Although canning is a relatively new invention, and people used freezing sporadically for thousands of years, all ancient cultures were skilled in drying foods to preserve them for lean times. In fact, for much of history, drying was virtually the only preservation method available. It was a relatively easy process; the elements of wind, sun, and fire did almost all the work, and the end result was food that was easily stored and very portable. Today, these dried foods are popular with campers and backpackers, because these foods are easy to carry and need only fresh water to make a nutritious meal. And trail mixes, seeds, dried fruits, and nuts are even more popular as snack items, and provide more nutrition than snacks like potato chips.
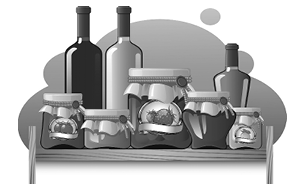
Drying foods today is just as easy as in the past, and requires no special equipment — though if you wish, you can purchase special dehydrators, drying racks, and other tools. Besides being economical, dried foods are more nutritious than many other types of preserved foods. Fewer vitamins are destroyed during drying than in methods such as canning or freezing. The protein in meat and the sugars in fruit become more concentrated — so your snack or your lunch is easier to carry but still satisfies that sweet tooth. Because dehydrated foods reduce in size, and have a stable shelf-life if kept in the right environment, drying is a great way to stock up your pantry.
It is likely that your first taste of dried foods were raisins — one of California’s biggest yearly crops. Other dried staples of our diets are rice, beans, pasta, prepared cereals, and whole grains. These foods have been prepared for you with the same techniques shown in this book for your own use. As you select your own produce and meat, and carefully dry it, you will have the satisfaction of knowing that your food is prepared exactly as you want it.
The drying process, which is also called dehydration, is merely removing the water from the food to the point that the food becomes storable. This prevents bacteria, yeasts, and molds from growing and causing spoilage. The drying process also interferes with the enzyme activity in food, which can cause color, texture, and flavor changes. Some dried foods are eaten dry, but others are rehydrated, or given moisture, before used.
Foods that do not dry well
Although most produce and meat can be preserved through drying, there are some foods that will give unsatisfactory results. It is recommended that you do not try drying these items:
• Any dairy products
• Cucumbers
• Lettuce, cabbage, and other greens
• Asparagus
• Melons
• Avocados
Some unusual foods to try
Looking for new flavors? Try drying some of these items:
• Rosehips
• Nasturtium or sweet violet flowers
• Edible seaweed (know your species first!)
• Edible mushrooms (know your species first!)
• Juniper berries
• Chive blossoms
Drying Methods
Foods can be dried several ways. The oldest method is sun drying. Other methods include a food dehydrator, room drying, or drying in an oven. Microwave drying is not recommended because of the uneven heating and the trapped moisture inside the microwave. For best results a combination of warm temperature, low humidity, and air circulation helps to dry foods properly. As air moves over the food, it absorbs moisture, but the warmer the air, the more moisture it can absorb. Each 27 degree F increase in heat will double the amount of moisture the air can carry. However, controlled heat and humidity are the keys to successful dehydrating. Too little heat and too much moisture will mean that organisms grow faster than the food is being preserved. This food is either spoiled immediately, or the microorganisms remain inactive until the food is rehydrated — and then make you sick. Too much heat and your food will be too tough or burnt.
When you dry foods, they are actually preserved by removing the moisture that can accelerate decay. If the food is not dried adequately, it will encourage the growth of mold, which is the primary reason that dried foods become spoiled when they are stored. Bacteria and other organisms can also grow in food that has sufficient moisture content. For that reason, it is better to over-dry your foods than to not dry them enough.
Sun-dried foods
The best candidates for sun-drying foods are fresh fruits and vegetables. The thin leaves of herbs contain volatile oils that will actually help burn the plants — and then dissipate, leaving little flavor. And though it is still possible to dry meats outdoors, it is healthier to use indoor methods to prepare meat to better control the heat and timing that is necessary.
Climate is a big factor in successful solar drying. If you live in a climate without much humidity and many long days of sunlight, you will have the best luck drying foods outdoors. Sun-drying requires about 3 to 5 days of temperatures above 90 degrees F and low humidity — a rarity in the Midwest U.S. If you live in a place that has high humidity or gets plenty of rain, your best choice may be to dry foods with a dehydrator or in the oven. If you live in a place that has bad air pollution or heavy traffic nearby, your food may be contaminated from airborne emissions.
Solar drying is done on a drying tray, which might also be used for home or oven drying. Drying trays are easy to make. Cover a wooden frame with cheesecloth or plastic screen. Metal screens should not be used unless you cover them with cheese cloth, because the metal may contaminate food that is placed on the metal. Old windows, doors, or discarded screens all make good frames for drying trays. Stretch the screens as tightly as possible and tack or staple the screens to the back of the frame. Then crisscross the back with sting to provide extra support across the middle of the screen.
The tray must be able to receive air circulation on all sides so that evaporation happens as quickly as possible. To solar dry your food, first prepare it for drying according to the chart at the end of this chapter. The prepared foods should always be arranged in a single layer on your drying trays without allowing the food pieces to touch each other. Make sure that strong-flavored or strong-smelling foods are dried by themselves so that their flavors do not overpower other foods. Drying trays should be set at least a foot or so above the ground in a spot that will be sunny all day and provide good air circulation (but away from wind gusts that could blow your food away). You can set the drying trays on blocks, bricks, or pieces of wood to keep them off the ground. Loosely drape cheesecloth or a light layer of fabric over the food to prevent insects from eating their share. Do not allow the fabric to touch the food, because it may stick.
Turn food at least daily. To intensify the heat from the sun, set another layer of bricks or wood above the frame, and place a piece of glass or hard plastic on the second layer of bricks. The space between the bricks and glass should provide several inches of space for air circulation. Placing the frame in a hot area, like a hot driveway or rooftop, can intensify the heat, as well. You want the drying temperature to be between 95 degrees and 130 degrees F. Check the temperature occasionally to make sure it is not burning your food or keeping it too cool for evaporation. If rain is in the forecast, or you might have heavy dew overnight, be sure to bring your trays inside. Finish drying in the oven or on your stove if necessary.
Oven-dried foods
If you choose to oven-dry your food, you do not need any special equipment, and your drying can continue day and night without much intervention from you — if you do not need the oven for something else. Oven-drying is also more satisfactory than sun-drying, because you do not have to worry about insects, wildlife, or pollution during the drying process.
To properly dry food in an oven, your appliance must be able to be set at the low temperature of 140 degrees F. Because an oven does not provide much air circulation, you will need to keep the door cracked open a few inches, and keep checking that the temperature remains stable throughout drying time. A fan in front of the stove or an overhead fan will also keep the air circulating as moisture-filled air seeps from the oven.
Your produce or meat should be prepared according to this section’s directions. Note that variations in food slices, maturity of produce, or size of the portions will all affect drying time. If you want to err on the side of caution, it is better to slightly over-dry your food rather than under-dry it, because remaining moisture will encourage mold and rot.
To oven dry, place your food on cookie trays or drying trays (as described above). Make sure the pieces do not touch each other. Dry strong-tasting or strong–smelling produce, such as onions or garlic, at a different time so the smell does not transfer to other foods. It is also wise not to dry produce and meat at the same time.
Place your oven racks at least 2 to 3 inches apart. Make sure that your trays or pans are a few inches shorter than the oven from front to back, to maximize circulation. Do not overcrowd the oven, because this will slow the drying process enormously, and the pieces at the edges will dry much more quickly than the ones in the center.
Drying times will vary greatly according to the type of food and size of the pieces; at least 12 hours are usually needed. Check the oven after four hours, and several times a day after that until the product is completely dry.
Using dehydrator appliances
A dehydrator is a small appliance that can be used to quickly dry batches of produce and meat. In fact, dehydrators work in half the time that sun-drying or oven-drying takes, so the method can be very energy efficient. If you plan to dry food regularly, the $100 to $300 price tag can be well worth it. The best places to find dehydrators are in health-food stores, garden and cooking catalogs, and department stores.
Dehydrators contain rows of non-reactive drying screens above a heating element and a fan that continually circulates air. Good-quality dehydrators will also have a thermostat so that you can monitor an even temperature. These appliances come in different sizes, so you should consider the amount of food you will dry each year. Each square foot of shelf space will hold about 1 or 2 pounds of fresh food. Some dehydrators run at louder volumes than others, so if you are running it frequently, you may want to choose a quiet model.
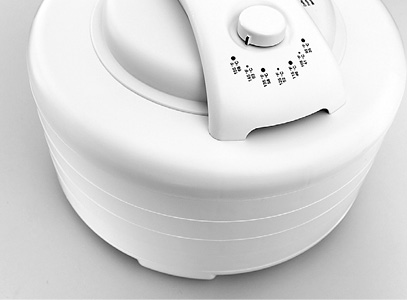
A dehydrator makes drying foods quick and easy
Like all other methods of drying, the amount of time needed to dry the food will vary. However, there is no harm in leaving the food in the dehydrator for longer than a day, because the goal is to get the food as dry as possible.
Air-drying
Herbs are commonly air-dried without the application of heat or sun, and many other foods you eat daily are also dried solely by the circulation of air. For example, many beans, rice, and grains can be dried by simply leaving them on racks or pans, and shaking them from time to time. The best candidates for air-drying are foods that are small and have less moisture content.
Some vegetables and legumes can be dried right on the vine or stem. If you grow peas, white beans, fava beans, lima beans, kidney beans, soybeans, or other legumes, you can let them field-dry in a spell of warm weather. The crop should be kept off the ground and free of mildew or insect pests. When they are thoroughly dry, but not damaged by frost, pick the pods. Make sure to collect them before they over-dry and the pods break open, or you will have lost the seeds to the ground or to hungry animals. If your dry season is interrupted by wet weather, harvest the pods before rot or mildew sets in, and dry them in an oven or dehydrator.
Once you pick your bean pods, you will notice that the pods are hard and brittle. To remove the shells, place them in a strong plastic bag or old pillowcase, and beat them with a mallet or crush them with your feet. Alternatively, you can put the pods in a pillowcase, tie the end shut, and toss it in the dryer on low heat for about 30 minutes. If any pods remain unopened, shell them by hand.
Corn and popcorn can be partially field-dried, until the kernels are past maturity and begin to harden. Check the corn often to be sure the leaves are not developing mildew — this might affect the taste of the corn. Once you notice the kernels firming up, pick the ears and shuck all the leaves and tassels from them. Put them in paper bags in a cool, dry place with good circulation, like a basement or garage, for about one month. Check occasionally for rot. When you can rub your finger over the ear with a little pressure and the kernels fall off, it is time to remove the kernels from the cob. If you have many ears to shell, you can buy an inexpensive gadget called a corn sheller at a farming-supply store or an internet gardening source. It is best to try popping an ear or two of popcorn to see if it is ready. If you do not get much popcorn but plenty of kernels, let it dry longer before shelling any other cobs.
Dried corn can be ground for flour, polenta, corn meal, or grits, depending on the variety. Check your blender or food processor to see if it can handle the hard, tough kernels. If not, you can purchase tools to grind up the corn to the desired consistency.
Garlic, peppers, and onions are other popular foods for air-drying. In old pioneer movies, you may remember seeing strings of these vegetables hanging in kitchens. As warm air dries the produce, a piece can be snipped off to use whenever needed. The best onions for air-drying are young, small ones — slightly larger than a bulb of garlic. Dig up the onions and garlic with the tops intact, because this is what you will use to string the vegetables. Rinse any dirt from the bulbs and clip off any diseased leaves. Small peppers, such as jalapenos, scotch bonnets, cayennes, anchos, and others should be harvested as they mature. Always wear gloves when handling hot peppers.
Use a length of string or twine and a thick needle to string the stems of the bulbs together. String the peppers by piercing the stem of the pepper. The string can be placed like a clothesline in a cool, dry place with good air circulation, such as a shed, garage, or basement. Alternatively, you can braid together the stems of garlic and onions and let them hang from a string in your drying area for approximately two weeks. Check occasionally for signs of rot. Once the produce starts to dry, these strings can be coiled around themselves to produce long, bountiful columns of produce. Garlic and onions are completely dried when they are tough and have no “give” when you squeeze them; dried peppers will be wrinkly, crispy, and tough (note: the volatile oils in peppers become concentrated during drying — do not squeeze a pepper without your gloves).
Food Dehydration Guide
Drying herbs
One of the easiest and cheapest ways to dry fresh herbs is simply to allow them to dry in the air. One benefit is that the slow drying process retains all the essential oils in the herbs, adding more flavor and health to the dried produce. As a last resort, you can use an oven to dry the herbs, but this process will also cook the plants slightly, and will reduce the herbs’ oil content and flavor.
Harvest before the herbs begin flowering. Alternatively, harvest throughout the season, making sure you cut off tops so that your plants will continue to grow in a bushy pattern, rather than a tall spike or one long vine. If you harvested herbs throughout the gardening season, your plants probably have not set flowers. However, herbs that are sensitive to cool weather will start to decline in early fall, so late summer is the best time to start cutting and drying herbs. Some herbs have a short growing season.
Whether you are harvesting seeds, roots, or leaves, you must take care with the finished item. Once your herbs are completely dry, they should be stored in labeled paper or plastic bags, or in glass jars. Keep them out of sunlight and extreme temperatures, and check them for signs of mold. It is best to toss out last year’s harvest once a new harvest is ready, but well-dried herbs will keep their flavor in a jar for several years.
Drying whole herbs
Cut healthy branches, full of undamaged leaves. The longer the branches, the easier it will be to dry them. If you wait until mid-morning to harvest, the morning dew will dry off the leaves, and you will avoid clipping plants that suffer wilting in hot afternoon sun. Cut off any dry or diseased leaves, and then rinse the foliage. Pat dry with towels or napkins; leaves that remain wet will be susceptible to mold or mildew.
Cut off the leaves growing on the bottom inch or two of the branch. Take 4 to 8 branches at a time, and tie them together at the bare end of the stems with twine, string, or rubber bands. Make sure the knot is tight; as the bundles dry, they will begin to shrink, and the stems could slip apart. Note: if you are drying herbs with high water content, such as basil, tarragon, or mint, use smaller bundles.
Hang the herbs upside down by the string in a warm, airy room. If you are drying the herbs in the summertime, anywhere outside that is not in direct sunlight is ideal, including a garage or a shed. However, many people love the mingled scent of many herbs drying together, so they hang the herbs with twine in a hallway, where they can catch a good whiff every time they walk by.
Within two weeks, most herbs are dry enough for permanent storage. They should be as crispy as old autumn leaves, and leave no feel of moisture when you crumple one between your fingers. You may want to strip the leaves from the stems and put them in labeled jars, or you may want to save the bundles until needed.
If you store whole leaves from the plants, and then crush the leaves as you use them in recipes, they will have the freshest, strongest flavor. Note that dried herb leaves are much more potent than fresh herbs. The rule of thumb is to use about one teaspoon of crushed dried herbs in place of a tablespoon of fresh leaves.
Drying herb seeds, flowers, and roots
Sometimes the leaves of an herb are not the part you want — you may be after the seeds of cilantro, called coriander, or the roots of angelica or ginger. The process is similar to drying herbal leaves and stems. Bundle roots together and tie them tightly, then place in a paper bag with holes punched in for air circulation. Label the bag with the name of the root you are drying. For seeds or flowers, bundle the stems upside down and place them in a paper bag.
Check on the bag every few weeks to see how the plants are drying. After the bundle is thoroughly dry, you can shake the seeds off the stems or pick the flowers. These can be stored either in paper or plastic bags, or in glass jars. Be sure to label the containers, because many herb seeds look alike.
Drying meat
For most of history, humans preserved their meat by drying or smoking it over a fire. Early dried meats were mostly wild game, domesticated birds, and fish. Later in history, people began to dry and smoke domesticated large animals, creating beef jerky, ham, bacon, and pemmican. Today, most of us who have tried beef jerky (or jerky made from any other sort of meat) are familiar with the spicy taste and leathery texture. The spiciness of jerky dates back to earlier generations, who liberally sprinkled their meat with pepper to chase away insects as the meat dried in the sun.
Like any other food, meat and seafood can certainly be dried in the sun, but you must be cautious about contamination from insects or the growth of harmful microorganisms. Raw animal products may be contaminated with dangerous microorganisms such as Campylobacter, Clostridium perfringens, E. coli, Listeria, Salmonella, Shigella, and others. Marinating or salting the meat will help kill some of these organisms, while tenderizing the meat. Meat can also be dried in an oven or dehydrator.
You also want your meat, especially fish, to be as fresh as possible. Depending on the type of animal or fish, the meat must be cut into specific uniform pieces. The right shape and thickness of the piece is key to even, successful drying; the outer surface of the meat should not dry so soon that moisture in the inside cannot escape through the “crust.” Meat will complete drying outdoors in 3 to 7 days during ideal conditions; during this time, it will lose 60 to 70 percent of its weight. Plan ahead when buying or preparing your meat so that you have the desired yield.
Fish
Fish is generally salted before drying; some fish are traditionally heavily salted and then soaked to release the salt and rehydrate the meat before eating. Different types of fish will require different preparation, but the drying process remains the same.
• If you are drying larger fish, from trout to large deep-water fish, skin the fish and bone it, then slice along the grain in ½ to 1-inch thick fillets. Try to keep each slice about the same size and thickness.
• If you are drying small fish, such as sardines or perch, remove the head, tail, entrails, and bones, but leave the skin intact. Split the fish in half length-wise. Rinse the fish in cold water.
In a large bowl or pan, add 1 cup of salt to 1 gallon of cold water. Soak the fish or fillets in this solution for 30 minutes. Drain the fish and rinse the flesh again. Next, cover the fish with coarse pickling or sea salt. Press the salt into the flesh of the fish to help firm up the flesh of the fish. If you wish, you can add marinades, dry rubs, herbs, or flavorings to the fish.
If you will be drying your fish outside, place the fish on wooden drying racks in a sunny place. Do not use metal racks, because they can corrode and harm the taste and appearance of the fish. Cover the meat with light cheesecloth to discourage bugs, and move the racks indoors at night to prevent wildlife from stealing your fish. Each day, turn the meat and check it for dryness. Press on the flesh of the fish to squeeze out excess salt water, as this hastens drying.
If you will be drying your fish in an oven, turn the oven to 170 degrees Fahrenheit, and prop it open 1 to 2 inches. Spray the tray or pan with a bit of non-stick spray, and then place the fish on the trays without any pieces touching. Make such the oven racks are several inches apart and there is ample circulation room. Dry for 2 hours. Take the trays out and squeeze any water from the fish and drain it off the pans. Flip over the fish and dry for another 4 to 6 hours. Check again for dryness and if it is not ready, squeeze it, flip it again, and return it to the oven. When the fish is done, the flesh will yield to your touch, but it will not spring back.
This same process can be followed by using a food dehydrator, but depending on the size, you may have to cut your fish into smaller pieces.
Store the dried fish in a plastic bag in the refrigerator or pantry, away from light and extremes of temperature. Make sure you squeeze as much air as possible out of the bag. If you pack your fish in small portions, such as enough for one meal, you will lose less of the product if the contents go bad. The fish should keep for 1 month in the pantry when completely dried, 3 to 6 months if refrigerated, or up to a year if stored in a freezer. Check the package occasionally for signs of rot, foul smell, or mold; discard the entire package if it is spoiled.
Meat
Dried meat is generally called jerky, and can consist of practically any meat, such as beef, lamb, pork, goat, deer, caribou, moose, elk, bear, or small game. Poultry, wild or domestic, does not produce a texture and flavor as good as other meats, but it can be dried, as well. Jerky was a food staple of explorers, trappers, hunters, American Indian tribes, and settlers in early years of the U.S. In earlier times, meat was soaked in salty water and then dried in small pieces over a fire. The wood smoke helped keep insects away and flavored the meat. Jerky is still popular with everyone from city dwellers to mountain climbers. Meat can be dried into jerky in three ways: By drying in a dehydrator, in the sun, or in on oven. Again, oven drying is the easiest method.
If you kill and dress your own meat, make sure the carcass is completely cooled before cutting meat for drying. Take particular care with wild game; the wound can affect the safety of the meat. For example, if the wound pierced the entrails, the contents may contaminate all the meat and make it unsafe for jerky. This meat should be thoroughly cooked instead. Decrease the risk of causing illness with home-dried jerky by constantly using a meat thermometer to check that the meat’s temperature is a constant 160 degrees Fahrenheit during drying.
When selecting your meat, you do not necessarily need an expensive cut; in fact, cheaper cuts of meat can be a very cost-effective method for adding protein to your diet. Lean meat is best, because the fat content will oxidize and could cause an unpleasant taste; trim off as much fat as you can. About 4 pounds of fresh meat will produce 1 pound of jerky. Begin by partially freezing the meat to make slicing easier. Slice meat no thicker than ¼ inch. You can slice with the grain if you like chewy jerky, or slice across the grain if you prefer a tougher, brittle jerky. Your pieces should be shaped like ribbons or tongues, 2 to 3 inches wide and as long as you have room for in your oven or drying racks.
If desired, you can also sprinkle the meat with a prepared tenderizer. Marinating the meat will make it more tender and flavorful. Marinade recipes can include all kinds of ingredients such as sauces, vinegar, and herbs; many recipes are included in the index for you to try. Once you begin making jerky, you will probably want to experiment with different flavorings and marinades.
If you will be drying your meat outside, place the slices on wooden drying racks in a sunny place. Do not use metal racks, because they can corrode and harm the taste and appearance of the meat. Cover the meat with light cheesecloth to discourage bugs, and move the racks indoors at night to prevent wildlife from stealing your food. Each day, turn the meat and check it for dryness. The meat should be completely dry all the way through and flexible, but as brittle as a dry twig. Your marinade might change the color of the meat, but it should have a pleasant odor and no signs of rot or insect damage.
If you will be drying your meat in an oven, heat your oven to 160 degrees Fahrenheit. Make sure the oven racks are several inches apart and there is ample circulation room. Spray nonstick spray directly on the oven racks and spread the meat evenly on the racks in the oven. Try not to have the meat pieces touch each other. Place a cookie sheet under the drying racks, to catch any drippings. Leave the door propped open 1 to 2 inches to permit moisture to escape.
After about 2 hours, check on the meat and turn it over. Meat will dry into jerky in 4 to 10 hours, depending on the size of the pieces, the cut of meat, and the amount of meat you are drying at once. Meat will dry more quickly if the pieces are spread far apart. Your meat is ready when you can bend it slightly; once the jerky cools, it will become more brittle, so make sure you do not dry it too much. It should look dehydrated and dark in color. Jerky is usually eaten dry, but you can rehydrate it with water and use it in casseroles, stews, and other recipes.
If you will make jerky in a dehydrator, spray the drying racks with non-stick spray and then arrange the meat pieces in a single layer without any piece touching another. Rotate trays periodically to ensure an even consistency. A dehydrator will dry the meat in approximately 3 to 5 hours.
Jerky can be stored in a labeled bag or screw-top jar. Squeeze as much air as possible out of the container. If you pack the meat in small portions, enough for one meal, you will lose less food if the contents go bad. Keep jerky in an airtight container in a cool, dark place, or store it in the refrigerator or freezer. Well-dried jerky will last about a month in a pantry, 3 to 6 months if refrigerated, or up to a year if frozen. Check the package occasionally for signs of rot, foul smell, or mold, and discard the entire package if it is spoiled.
Drying fruits and vegetables
Dried fruits are especially delicious because of the concentrated sugar content, the intense fruit flavor, and chewy texture. Dried legumes and grains are the staple of many diets. Dried vegetables are convenience foods, and make it easy to store a large amount of produce. Depending on the amount of juice in the produce, the dried product can be up to 75 percent less weight and volume than the fresh item.
Fruits and vegetables can be dried by the sun, oven, or dehydrator. Always use the freshest produce you can find. There are many ways to prepare produce, because of the vast variety of fruits and vegetables that can be dried. The moisture content and chemical makeup will affect how each kind of produce should be prepared. For instance, before you dry some kinds of fruit, they should be dipped in ascorbic acid or shaken with lemon juice to prevent browning from exposure to air. Make sure fruits and vegetables are prepared according to the chart shown below.
Some vegetables should be partially cooked (blanched in hot water) before being dehydrated, to stop the enzymatic ripening process that will reduce the flavor and texture of the food. Blanch vegetables with a ratio of 1 gallon of water for each pound of vegetables. After the vegetables are boiled for the specified time, they will be chilled for an equal time in ice water. Place the prepared vegetables in the boiling water for the recipe’s stated time. When finished, remove the vegetables and immediately pour them into the bowl of cold water. After an equal time cooling in the water, pat the slices dry and begin the drying process.
If you will be drying your produce outside, place the fruits or vegetables on wooden drying racks in a sunny place. Do not use metal screens, because they can corrode and harm the taste and appearance of the food. Cover the vegetables with light cheesecloth to ward away bugs and birds; move the racks indoors at night to prevent wildlife from stealing your food. Each day, turn the pieces and check for dryness. Produce generally dries completely in 4 to 7 days; very tough or large items, such as popcorn ears, will take 2 weeks or longer.
If you will be drying your produce in an oven, turn the oven to 160 degrees Fahrenheit and prop it open 1 to 2 inches. Place produce on the trays without any pieces touching. Make such the oven racks are several inches apart and there is ample circulation room. Dry for 4 hours. Take the trays out and flip the pieces. Dry for another 2 to 4 hours and check again for dryness. Depending on the moisture content and size, produce can take 4 to 12 hours to dry in the oven.
If using a dehydrator, spread the pieces evenly on the racks without touching each other. Try to place produce of a similar size in the dehydrator together, so it will finish at approximately the same time (check your owners’ manual for instructions). Rotate trays periodically to ensure an even consistency. Depending on the produce, a dehydrator can dry the food in approximately 2 to 8 hours.
Fruits and vegetables should be stored in labeled plastic bags or air-proof containers. Squeeze as much air as possible out of the container. If you pack the food in small portions, such as enough for one meal, you will lose less food if the contents go bad. These foods will keep for up to 1 year; check occasionally for spoilage or mold. If you want to rehydrate the food before using it, soak it in hot water for 30 minutes and then drain before using.
Vegetable drying guide
Once vegetables are completely dry, they should have a leathery to brittle consistency. Follow proper storage techniques to maximize the storage time; remember that dried food will store for longer periods at temperatures less than 55 degrees Fahrenheit.
|
Vegetable |
Preparation |
Storage Months |
|
Beans, green or yellow |
Cut off ends and slice into 1 inch pieces. Steam 3 minutes. |
4 |
|
Broccoli |
Cut off stem and cut head into small florets. Steam 3 minutes. |
1 |
|
Carrots and parsnips |
Slice ¼ to 1/8 inch thick. |
6 |
|
Corn |
Steam whole ears for 3 minutes, then cut the kernels from the cob. |
4 |
|
Eggplant |
Cut into ¼ inch thick slices or small chunks. Steam for 3 minutes. |
2 |
|
Onions |
Cut off ends and cut into 1/8 inch slices. |
2 |
|
Peas and shell beans |
Shell and steam for 3 minutes. |
8 |
|
Peppers |
Slice ¼ to ½ inch thick. |
6 |
|
Potatoes |
Peel potatoes if desired. Cut into ¼ inch slices. Steam for 3 minutes. |
4 |
|
Summer Squash and Zucchini |
Cut off ends and slice ¼ inch thick. |
1 |
|
Tomatoes |
Cut off stem end and slice ½ inch thick. |
3 |
|
Winter Squash |
Cut flesh from rind and cut into small chunks or slices. Steam 3 minutes. |
8 |
Fruit drying guide
Pretreat any fruit that will start to turn brown after slicing, such as apples, bananas, or pears. This will prevent them from turning an unappetizing color while they dry. To make a pretreatment solution, mix a proportion of 1 cup of water to 1 teaspoon of ascorbic acid (found in the canning section of local stores) or 2 teaspoons lemon juice. After preparing the fruit for drying, dip them in this solution and then arrange them on drying trays or pans.
Most fruits are completely dry when they are leathery and no longer moist; berries should be slightly harder, and bananas should be slightly crisp or brittle when done.
|
Fruit |
Preparation |
Storage Months |
|
Apples |
Wash ripe, firm fruit. Peel off skin and core. Cut into ¼ inch slices or thin sections. |
6 |
|
Apricots |
Wash ripe, firm fruit. Cut in half and cut out the pit. |
8 |
|
Bananas |
Peel firm, ripe fruit. Cut out any bruised sections. Slice 1/8 inch thick. |
6 |
|
Berries |
Wash ripe, firm fruit and drain well. |
6 |
|
Cherries |
Wash ripe, firm fruit. Remove stems and pits. |
12 |
|
Coconut |
Break open shell. Cut out flesh and slice into 1/8 inch sections. |
|
|
Dates and figs |
Wash ripe, firm fruit and drain well. Remove skin if desired. Slice ¼ inch thick. |
6 |
|
Grapes |
Wash seedless grapes and drain well. Remove stems. |
6 |
|
Nectarines and peaches |
Wash ripe, firm fruit. Remove stems. Cut in half and remove pit. Slice into 1/8 inch pieces or sections. |
6 |
|
Papayas and mangoes |
Wash ripe, firm fruit. Remove stems and peel fruit. Cut in half and remove pit. Slice into 1/8 inch pieces or sections. |
6 |
|
Pears |
Wash ripe, firm fruit. Peel off skin. Cut in half and remove core. Cut into 1/8 to ¼ inch slices. |
6 |
|
Plums |
Wash ripe, firm fruit. Remove stems. Cut in half and remove pit. |
8 |
|
Rhubarb |
Wash tender stalks. Cut off tough ends and slice into 1 inch sections. |
4 |
Drying nuts and seeds
The word ‘nut’ is a general term for the large, oily seeds or fruit from certain plants and trees. On the other hand, seeds come from fruit, and can be removed from the fruit. Nuts are both the seed and the fruit, and cannot be separated. So all nuts are seeds, but not all seeds are nuts.
Some people have (serious) allergic reactions to peanuts, tree nuts, ground nuts, seeds, or wheat. If you are able to eat them, they are a great addition to your diet. Note that if someone close to you has a serious nut allergy, you could endanger his or her health even by processing these foods in your kitchen. Be cautious, and ask questions of your allergic friends.
Nuts and seeds are powerhouse foods, providing concentrated protein and vitamins in small packages. Their nutrients include heart-healthy Omega 6 and Omega 3 fats, monounsaturated fats, and the antioxidant vitamin E. Almost all nuts and seeds contain high amounts of fat, but the fat is unsaturated and can actually aid weight loss and reduce the saturated fat and calories in your overall diet, if eaten in moderation. Eating portion-controlled amounts of the good kind of fat can placate your cravings and keep you from gorging on something far less healthy.
Some commonly dried nuts include:
• Almonds
• Walnuts
• Brazil nuts
• Cashews
• Chestnuts
• Peanuts
• Pine nut
• Pistachios
Commonly-dried seeds include:
• Sesame seeds
• Sunflower seeds
• Pumpkin and squash seeds
• Poppy seeds
• Flax seeds
• Wheat kernels
Drying nuts and seeds will preserve them for about 4 months. They can be dried raw, toasted, or baked after drying to bring out more flavors. Many seeds and nuts should be soaked before drying. Nuts and seeds that are not soaked and are raw have enzyme inhibitors, which prevent human bodies from absorbing healthy enzymes. In addition, raw nuts and seeds that are not soaked contain phytic acid, which is indigestible, and bonds with minerals in the digestive tract, instead of allowing the minerals to be absorbed by bodies. It is sufficient to submerge nuts and seeds in warm water for 30 minutes before draining thoroughly.
Most nuts must be shelled before drying, but pistachios and peanuts can also be dried in the shell, if you prefer. When shelling walnuts, be careful not to punch through the hard shell and crush the nut inside. Special picks can be purchased to pull all the nutmeats out of the shell. When shelling chestnuts and Brazil nuts, remove all the papery brown skin on the nut; it will leave a bitter taste if it remains. Pine nuts are particularly hard to remove from the cones, but the taste is certainly worth it.
Pumpkin seeds should be carefully washed, while rubbing the seeds with your hands, to remove all the fibers and pumpkin flesh that clings to the seeds. Make sure the seeds are not slippery — this means that all the pumpkin meat has been removed. Wrap the flower of the sunflower in cheesecloth as it starts to ripen during the harvest. You will notice that during this ripening process, birds and squirrels will be checking the sunflowers daily to see when they will ripen —make sure you get to the seeds before they do. Sunflower seeds may be dried in the sun right on the stalk, in the oven, or in a dehydrator at 100 degrees Fahrenheit.
All seeds and nuts can be dried without adding any further seasoning, but many people enjoy salted nuts and seeds. This is achieved by soaking them in salt water for 3 to 6 hours, and then draining well before drying them. To salt the nuts, try the following proportions, and then adjust for your personal taste:
1 cup raw nuts or seeds
2 cups water
2 teaspoons salt
When your seeds or nuts are prepared, spread them on a baking sheet in a single layer and put in a 200 degree Fahrenheit oven for 4 hours. Alternatively, you can dry them in a dehydrator at 100 degrees Fahrenheit for 2 to 4 hours.
Peanuts, pistachios, and sunflower seeds are dry when the shells are hard and easy to crack. Inside, the meat should be tender, but not wrinkled up. Shelled nuts are dry when the surface is slightly leathery, but upon breaking one open the inside is tender not moist. Wheat kernels and other seeds will be hard and dry.
Store these seeds and nuts in labeled plastic bags or air-tight containers. If you prefer to toast seeds or nuts before use, spray a little non-stick spray on a frying pan, and warm to medium heat. Pour in the food and allow it to toast, stirring or shaking constantly. The seeds, especially small ones, can burn easily. If you will be storing them after toasting, allow them to cool on paper towels before packaging them.
If you would like to roast nuts before storing, turn the oven to 400 degrees Fahrenheit. Spray non-stick cooking spray on a baking pan. Spread the nuts in a single layer on the sheet. You may want to add seasonings such as salt, pepper, chili powder, garlic salt, or brown sugar before roasting. Cook for several minutes and then stir the nuts, making sure they are browning on all sides. When the seeds are golden brown, remove them from the oven. Allow them to cool on paper towels before packaging them.