Visitors make a beeline for kitchens because it’s the least awkward place to be in a stranger’s house. We all have kitchens, and we all sort of know what to do in them. Couches, living rooms, and entryways, by contrast, are all places where there’s nothing to do but gawk and stare at each other’s kneecaps and wall décor. I’m sure this kitchen-flypaper effect has something to do also with the fact that food and the people who cook it are usually found there.

Practicality Meets Personality
My kitchen is the least decorated room of the house. Spend a week actually using your kitchen and then tell me that certain elements of style or flair we tend to see in décor magazines and design books are not a total pain in the ass in the throes of cooking, cleaning, and eating. Be smart and decorate with your tools; make what’s practical also an indicator that you have personality and a keen design sense.
We’ll explore ways to populate your fridge and pantry shelves in Chapter 8, but for now, let’s get the structure ready: shelves, containers, seating arrangements, and routine maintenance.
Develop a Relationship with Your Dishes
An affinity for certain everyday items might inspire you to use them more often. Breakfast at my house usually involves our Arizona state plate, the Charles and Di 1981 wedding plate I found years ago for $3 at a San Francisco stoop sale, or my 65¢ leaf-carved yellow teacup. These dishes are some of my most prized possessions (and collectively cost less than breakfast at the airport).
If sentimentality toward the things you use every day seems far-fetched, just ask yourself a few simple questions: Do you like your dishes? Do you still have that set from Target that your mom bought you as you were packing up for dorm life? They were probably on sale. Mine were hunter green and nondescript (translate: boring).
You shouldn’t feel bad about placing boring, cheap dishes in the care of Goodwill or the Salvation Army, since you might buy a few of your new dishes there when you drop off the old ones. When you find a dish you like, practice the one-in-one-out rule (unless you’re in straight acquisition mode) and select a dish to donate from your cabinet that garners only so-so feelings.
Diversity is the Spice of Life
Mix-and-match dishes and silverware are functional ways for you to show off and, more important, enjoy aspects of your personality in your home. By selecting beautiful and useful pieces that go well together or that just make you happy, you’re setting yourself up for home life success.
You can always go out and spend money on a fancy new set of matching dishes or silverware. But for some people that’s not an option or not desirable. Instead, take to the thrift store! I can find at least one interesting drinking glass and/or teacup in any city’s thrift store. The trick is to enter the store with blinders. Ignore all the weird, crappy stuff that stands out.
As you begin your dish mission, focus. Look at the items individually, not in the context of the other dull things. Sometimes it helps to write a list and keep it in your wallet, since the thrift store can be entirely overwhelming with all its tacky stuff (or sometimes with too much good stuff).
Decorate with Dishes
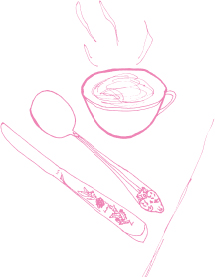
Once you’ve equipped your shelves with things you actually like, show ’em off! I keep big/useful/cute kitchen utensils in a vintage coffee tin on the counter because it saves space in the drawer, looks great, and places my tools within reach. Score!
Get creative with your utensil container. Look for a wide metal container like mine, a wide-bottomed glass jar, or a ceramic jar—anything that can be cleaned well (or lined) and will remain upright when a handful of utensils are inserted.
Display your teacups, people, those gorgeous, hand-selected personality pieces. Grab a few screw hooks (or S-hooks if you’re hanging cups from some sort of rack) at the hardware store for about 20¢ apiece and turn the underside of a crowded cupboard into a fine (and accessible) place to stash tea settings.
Decorate with Food
What do you use in the kitchen every day? (Do you know yet? Don’t fret if you’re new to the idea.)
Our countertop staples/decorations include salt, pepper, and olive oil. We use them all the time and showcase them proudly.
Put a Lid On It
Mason or other glass jars from food long ago ingested are a perfect way to store new foods and condiments, since they’re airtight, see-through, and much better-looking than some bland (and potentially expensive) plastic storage container.
 Grains. Get them out of bulk plastic bags in your precious cupboard or pantry space and into quart-sized jars. A whole flat of these jars will run you around $14, and they’re crazy useful. Or reuse jars from pickles, pasta sauce, or other large-volume liquids. We went pickle crazy last summer and ended up with ten matching pickle jars, which turned into fine grain bins.
Spices and other dried foods. These things keep best in the airtight environment that jars afford nicely.
Sea salt. The one food item that should be on every countertop, easy to grab in pinches here and there. Ours is occupying a quarter-pint mason jar. Don’t keep too much out or you won’t use it fast enough and it’ll acquire unwanted debris.
Dish Soap Diluting
Save money with this unique décor idea. Tools needed: empty olive oil bottle (the fancier ones usually come in exotic, slender bottles perfect for your dish suds) and an oil pourer (the spout you’d use to pour olive oil; spend the $5 or $6 on a sturdy metal one, as opposed to the $1.99 version, and you’ll be glad you did). Slender vintage bottles will also do; just be sure the pourer fits snugly and properly inside the bottle’s rim.
Squirt your dish soap of choice into the clean bottle, filling it halfway. Fill the bottle up almost the rest of the way with room-temperature water, leaving an inch or two unfilled at the top of the jar. Use your hand to cover the rim completely and then invert the bottle five or six times. You want the soap to mix with the water as much as possible. This allows the dish soap to thin just enough to be expelled without clogging your decanter. Remember, you’re not shaking the bottle, just practicing patience in watching the viscous dish soap mingle with water. Pop on the pourer and you’re in business.
With this tip, you’ll use less soap and get just-as-clean dishes. It also allows a fine opportunity to splurge on a brand of olive or other fancy-pants oil you wouldn’t normally buy; dual-purpose purchasing is totally worth the extra cost in the long run.
The Spice Rack Dilemma
Whatever you do, don’t rush out to a box store to buy that gigantic metal ($30 and up) spice rack that will sit large and in charge on your counter. The magnetic fridge-side ones are a little better, but generally those containers are way too large for real-life kitchen spice use. You’ll end up filling the bin and then watching spices go stale before you use a quarter of them. Boo to that method.
Instead, keep your bulk-bought spices (as discussed in Chapter 8’s “Bulk Binge” section) from composting in their non-biodegradable plastic bag by putting them in little glass spice jars, which can be organized by size and frequency of use. Place these jars in small pull-out trays and stack two or three trays no higher than eye level in your cabinet by using a space-saver rack, found in any store’s home organization section or at the home organization mecca, the Container Store.
This method also allows you to include and incorporate the occasionally purchased plastic or glass spice containers that weren’t found in the bulk area.
Repurposing Your Pickle Jars like a Pro
1. Start with a good wash in warm soapy water.
2. If your jar still reeks of pickles after a good washing, sprinkle some baking soda into the jar and use a damp sponge to gently scrub around the inside of the jar. Fill with water and let the baking soda solution sit overnight if necessary.
3. Remove labels by peeling off as much as you can or by (carefully) using a single-edged razor blade.
4. Use a few drops of Citra Solv on a damp washcloth to remove remaining label goo.
Get Your Cookbooks Out of the Living Room
Where are your cookbooks? Are they handy? I didn’t think so.
Keep kitchen-specific books in or near the kitchen; you’ll be likely to actually use them. I’ll talk more about cookbooks in Chapter 8, but do your homework now by checking out a few classics from the library to see which instruction styles suit you best. I suggest looking through these:
How to Cook Everything by Mark Bittman
The Joy of Cooking by Irma Rombauer
On Food and Cooking: The Science and Lore of the Kitchen by Harold McGee
Hip Trick
You can write on any glass jar or container with a Sharpie marker—and easily remove the writing with a dab of rubbing alcohol!
Clothespins
I don’t mind telling you with certainty that clothespins will change your life. Clothespins are the most essential item in my homekeeping. During a long stay when I helped my mom recover from surgery, she drove me to three stores in icky winter weather to find clothespins, since I was to be her homekeeping housemate.
Five Things to do with Clothespins in the Kitchen

1. Say good-bye to chip clips, those ugly plastic things that break under pressure. It seems there are never enough of these clips to cover all the things that need cinching, and they come in obnoxious colors to boot.
2. Hang single-page recipes above your workspace. Or clip a group of pages in a cookbook to keep it open to the page in use.
3. Affix your gloves to a place near the sink. Mine are clipped to the watering pail stashed above our sink.
4. Pin your apron(s) to one of the less-used drawer handles for handy access.
5. Hang still-drying Ziplocs on various objects in your kitchen (if you run out of room on the drying rack).
Make Arrangements: Sitting Down with Your Food
Where you sit and where guests sit is hopefully one and the same place. I advocate for a small kitchen table centrally located in the kitchen if possible. Most home builders and designers understand the fundamental principle of eating in or near where the food is made. Maybe you’re blessed with a grown-up dining room just off the kitchen. I’m not, but that hasn’t stopped me from hosting a fourteen-person seated dinner. More to come in Chapter 10 on how I moved my futon into the hallway to accommodate a makeshift extended table for fourteen.
For now, let’s focus on you having a seat.
The Kitchen Table
It’s time to ritualize the process of sitting down with your food (and not at your computer desk). Here’s where the kitchen table comes in handy.
Of the staple furniture pieces, the kitchen table is perhaps one of the toughest pieces to come by on the cheap. I inherited my 1950s-style leather-topped four-seater from friends who upped their family size. Refer to the “Shopping and Scavenging Like a Pro” section in Chapter 2 for ideas on how to find “the one” without going broke.
Most important, hold out for the right one, and don’t be hasty. A card or fold-up table decked out with a nice tablecloth is an excellent interim piece (and a staple in the kind of entertaining done in Chapter 10) until you meet your table soul mate. Whatever you use as a table, just be sure your legs will fit underneath it without disturbing the setup.
If a table and chair or two do not fit in your kitchen, then place your setup as near your kitchen as possible. Proximity breeds regularity. (And besides, who wants to schlep a fine meal’s accoutrements through your bedroom, bathroom, and/or laundry room?)
If you’re carving out a dining area from a larger room, try to keep this area as uncluttered as possible in terms of décor. The table is a prominent enough feature, so regardless of its individual style, focus attention there rather than incorporating stuff on the walls or loading up shelving. Anchoring your table to a free wall (so it juts out lengthwise) will help set the tone for turning this area into an eating and sitting area versus a cluttered corner where you stuck a table and some chairs.
While it may be chic, a rug underneath the kitchen or dining room table is counterproductive to cleaning efforts. Stuff spills under the table all the time; the last thing you need is to rack up dry cleaning bills from the act of using your table properly. If you must have a rug, try to stick with an easily spot-treated or machine-washable one.
Chairs
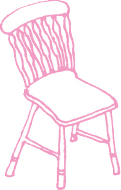
You can never have too many. We pick them up off the side of the road whenever we find a sturdy one. A layer of paint or wood glue usually does wonders for an unfortunately painted or wobbly chair. When scavenging for additional seating, pay close attention to the underlying design. Your chair collection doesn’t have to match, but an ultramodern find will stand out in the wrong kind of way if the rest of your décor is vintage, so try to snag ones that will go together or play off one another.
Don’t bother with chairs that need extensive work to make them usable, like ones with broken legs or missing seats, unless you’re into those types of fixer-upper projects.
Most important consideration in chair choice: comfort. You’ll never sit at your table if the chairs aren’t sturdy and reasonably comfortable. Try dressing up hard wooden chairs with simple, washable seat cushions. No need to buy anything fancy; a thin pillow is essentially a seat cushion.
Keep it Clean
A space for eating doesn’t do you much good if it’s covered with dishes from last Tuesday, knickknacks, stacks of paper, utility bills, three months’ worth of newspapers, business cards for people you’ll never call…you get the point. The first part of starting a ritual begins with how you practice establishing rules.
Our table backs up with newspapers still, but that stack of out-of-date New York Times sections inhabits the third, usually unoccupied, seat.
Skirting the Issue
Real-deal linens add color, style, and old-school flair to your home. If you have a less-than-enchanting kitchen table for the time being, a tablecloth instantly transforms and inspires. Cloth napkins are my first choice for a quick and easy way to add character to your pad. Yes, I know, you have to wash these things, but you also have to wash your underwear, and I don’t hear you complaining about that.
Tablecloths
When I was on a trip home a few years ago, my mom passed along two family heirlooms: lace tablecloths. Unfurling Great-Grandma Rose’s long lace tablecloth in my apartment, I discovered the family tree of food stains, dating back to when I was little and further back to before my dad ever sat at the table.
Finding everyday tablecloths can be a challenge. When purchased new at a big-box store, they’re either vinyl or end up looking like a stiff, bland banquet tablecloth. The small, square, pretty tablecloths are real diamonds in the rough, and they’re almost exclusively vintage (and can include other people’s happy life stains).
Take to thrift and antiques stores, and read on for tips on finding cool linens on the cheap. As you’re hunting around for cute vintage tablecloths, expect to pay at least $10, but don’t buy anything over $25 (unless you have to have it). You’re eating off this thing; someone might spill wine or olive oil on it.
I do love my old tablecloths and will continue to buy them with minor stains or small holes. Most of the time these flaws are not easily noticeable, and other times a simple shift of a place mat, visit from the needle-and-thread fairy, or strategically placed vase will draw attention elsewhere.
Place Mats
Consider these a protection zone for your linens. They can be cool-looking, not just woven or gingham patterns that remind you of eating cereal and gazing into space throughout your childhood. Our charming vinyl numbers relieve me of my inner midwestern tendencies (which make stain prevention my focus rather than allowing me to relax and enjoy suppertime and company). I no longer fret in secret about how that slosh of oily vinaigrette is going to be a royal pain in the ass, if not impossible, to remove from our white frilly tablecloth.
I make it a habit to look at the linen section of any thrift store I enter because treasures do exist. Linen sections will trick you. I scored our quirky elk and coral reef place mats at a Salvation Army hanging among godawful things. Once removed from the context of overused twin bedsheets and matching ugly shams doubled over on hangers, these place mats’ charm grew exponentially.
Now, thanks to that $3.99 purchase, I am no longer that crazy grandma figure who sets out in a frenzy to cover the whole house in plastic.
Napkins
I’ve learned to avoid the siren song of pastel or, God forbid, white napkins because whoever deemed them appropriate for regular table use must have been on a diet consisting solely of cereal and lunch meat. Cooking done in our household involves butter or olive oil, both of which are light-colored napkins’ fatal enemies.
Look for dark-hued, pretty patterns. The cool thing about patterns (as opposed to solid colors) is how they camouflage grease stains and spots. You get stylish table settings without spending hours in the laundry room (or hunkered over the bathtub) spot-treating and hand-washing a friggin’ napkin.
I chanced upon a set of eight navy blue, rose-patterned napkins at Goodwill. This impromptu linen excursion continued to pay off when I dug deeper into the nondescript cardboard box piled high with excess linens (those that had yet to, and might never, make it to hangers) when I spotted a set of six brown West Elm napkins with a single-leaf design. Though the brown set isn’t my everyday style, it can never hurt to have extra napkins on hand to mix and match for dinner parties or for times when your laundry schedule is a little behind.
What’s more, two bundles of napkins, fourteen in total, cost me a grand total of $4.31.
Finding Chic Linens On the Cheap
Thrift stores such as the Salvation Army, Goodwill, or Savers are your best bet for cheap and possibly vintage linens. However, be prepared for disastrous piles of ugly stuff. There are diamonds in the rough; they’re just usually at the bottom of that box in the corner.
Antiques stores frequently have an array of grandma-inspired tablecloths. Napkins are a little iffy since it seems like all that gets planted in these places are the white linen, tea napkin sets, and clearly, I vote no on light-colored linens for sanity purposes.
Etsy. I know you know about this website, but I’ll bet you haven’t thought to buy vintage napkins here. You’ll also find contemporary hand-stitched and embroidered linens, and (big plus) the vendors actually mail them to you.
Many cities have a citywide garage sale or big charity garage sale of some sort where you pay by the pound for what is mostly antique and vintage stuff. Bring a cart and be prepared to fight for that perfect flowery tablecloth, though. All manners and etiquette are usually checked at the door with your coat when hitting up these seasoned-shopper conventions.
Fabric stores (gasp). See the DIY napkin or tablecloth project in Chapter 6. C’mon, it’s just a square piece of fabric—how hard can this be?
Taking Stock:
Pantry Closets or Cupboards
Okay, let’s get you prepared for Chapter 8. Walk over to your pantry closet or cupboard (or both) and look inside. Just like in yoga breathing exercises, take note of the status quo without attempting to change anything at first. Are your food items stacked precariously? Are things composting on the bottom, things you’ve moved in and out of numerous apartments or houses? Are you instantly able to locate and discern all types of foods: pastas, cereals, canned foods, dry goods, cookies? If this takes more than a minute of your time, read on.
Sort and Dispose
Add some method to your madness by doing a big ol’ pantry inventory at least once a year. Any season is great for this, especially spring (think spring cleaning), when a new season of stocking up starts (more on that in Chapter 9). Don’t be intimidated by this; you’ll feel much better after it’s done. It’s an easy four-step process:
- Pull everything out. Wipe out your cabinet shelves when the coast is clear in there; excess crumbs are an invitation for pests to visit and snack from your pantry, gross.
- Investigate labels and expiration dates. If you don’t see one but you remember moving the item at least twice, that’s an automatic throw-away. Five-year-old pasta, hmm? An alternative to just pitching stuff that’s marginally fresh is to set it out on the counter and use it up in the next week. There’s a bit of my Depression-era granny in me, since usually I’d rather eat stale chips than throw them out. To this step, I say to each their own.
- Now is also a good time to take note of and/or rid your pantry of food items that contain things you don’t particularly want to eat, such as heavily processed foods with more than 2-inch-long lists of ingredients, or foods that contain ingredients a ten-year-old couldn’t pronounce. If you feel guilty about throwing these things away, then figure out how to give them away.
- When putting your food items back in the cabinet, group like objects. Stack soups, beans, and other cans so you can read the labels. Put things you don’t use often in the back. Utilize an inexpensive space-saver rack to stack things and double your pantry space. Small kitchens provide plenty of opportunities for creative stashing; my favorite pantry method involves external shelving.
Considering Ditching the Microwave?
They take up valuable countertop real estate; they change the molecular structure of food in order to heat it up from the water stored within foods (which is the opposite of conventional heating methods that go from the outside in); they decrease the availability of certain nutrients in foods.
Swap it out for a good convection or toaster oven (and then you can get rid of the clunky toaster, too). We use ours to heat up leftovers, melt butter for baking, and, of course, make toast.
Reuse on the Run
We all know by now that popping a plastic container of leftovers into the microwave isn’t a good idea because the heat increases the transfer of plastic particles into the food you’re about to eat.
We made the switch from plastic to glass storage containers via a birthday gift from my future mother-in-law. (I’m glazing over the fact that I’ve somehow become someone excited about storage containers as a result.)
I adore my Pyrex-brand, multi-sized set because the bowls double as classy serving dishes for salsa or other treats during parties, you can write on them with a Sharpie (now that you’re hip to the rubbing-alcohol trick), and they are safe for storing acidic, fatty, and salty foods without leaching plasticizers into your food.
A Life Less Plastic
Using less plastic in the kitchen is something we decided is best for us (and the family we are hoping to have in the future). We still buy plastic wrap, but we always get the brands (such as Glad Cling Wrap, which is made of polyethylene) that do not contain the chemicals in plastics (phthalates or DEHA) that leach into foods whether you’re heating them or not. The Washington Toxics Coalition advises against storing food in plastic containers when possible because it’s hard to know what’s in the variety of tubs and containers out there.
Plastic things you buy marked with a 1 inside the little recycle arrows are designed to be single-use. You might think you’re being thrifty by reusing that deli-bought water bottle or plastic tray, but they can harbor bacteria if not cleaned (and dried) thoroughly, and using it more than a few times can degrade the plastic, causing it to leach into whatever you’re eating or drinking. No thanks. Switch to a metal water bottle to refill on the run.
I like the catchy mantra from the authors of Slow Death by Rubber Duck to help you remember which plastics are safe to buy and eat from: “4, 5, 1 and 2; all the rest are bad for you.”
Chrome Wire Shelving Racks
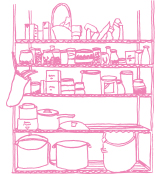
The movable and customizable pantry! I adore these industrial wire racks (not, of course, for their inherent charm; they’re pretty sterile and nondescript when empty). They’re super-sturdy (most hold up to six hundred pounds) and provide an excellent opportunity to decorate with practical items.
Load up shelving like this with jars of dry goods, cookbooks, kitchen linens, and large pots or appliances, and free up valuable real estate on your countertop or in cupboards and drawers. These racks are also great for use with S-hooks, to hang large utensils, tea or coffee cups, and utilize all available space.
Where to put this metal skeleton? Well, rarely do you have an available wall in the kitchen (and if you do, your kitchen table should be there), so position your shelving as a means of creating depth. If you have a studio apartment, add it perpendicularly to a wall to create the illusion of separation between the kitchen area and the rest of your room. Or place it strategically (i.e., as close as possible to the kitchen) if you’re working in a shoebox kitchen.
Though you don’t have to spend a ton of money on a shelf like this, if there’s one thing you do spend money on in setting up your kitchen space, let it be this.
Always check Craigslist first. Restaurants close and people move, so these racks are always available used. The racks are not at all difficult to disassemble, but if it’s going to be an ordeal to get a used rack home in pieces, then scope out the following options for a delivered, in-box version.
Kitchen supply stores
Office supply stores
Hardware stores
We actually found our rack left out by the side of the road for the trash pickup. Keep your eyes peeled; anything is possible.
If you’re ordering or buying a new one, you’ll likely be buying a starter unit that comes with four to six shelves, four column posts, and four wheels or stationary feet. The shelves come in a few different, standard sizes, so you can always buy extra shelves or other components later (next paycheck).
Deck the Walls
All that’s left in your kickin’ kitchen décor preparations are the walls. I’ve saved this area for last for a few reasons:
Structural pieces like kitchen tables or wire racks must be in place before you know where you have free wall space.
You are building a theme into your collection of dishes, tools, containers, and kitchen supplies (yes, even “useful” is a theme), so you’ll want to pick wall hangings that feel right with your stuff.
My favorite wall hanging in any kitchen is a chalkboard, multifunctional and good for love notes, grocery lists, visitor guest-booking, or vocabulary words of the day. If you’re not lucky enough to have a chalkboard wall (or if the space is too small to reasonably paint a chunk of the wall black and leave chalk next to it), hang a small, framed one. It works like a charm.
Quick Chic:
Five Kitchen Décor Dos and Don’ts
DO
- Buy vintage, mix-and-match cabinet and drawer pulls to distract kitchen visitors from your less-than-desirable cabinetry. Lucky scavengers might find them cheap at flea markets and antiques stores. I hunted ours down online for about $6 apiece.
- Double the function of cute bowls by storing fruit, vegetables, nuts, or salt and pepper on your countertop. It’s a win-win: show off pretty dishware and make your food accessible.
- Buy a mountable magnetic strip to hang your knives on a small area of wall space, preferably near the countertop, and kick that space-eating wood block to the curb.
- Take the opportunity to hang a lacy curtain or cute fabric where you have open shelving or missing doors; it also cuts down on cooking splashes and dust settling on your dishes.
- Stack once-in-a-while appliances and pretty cookware atop cabinets or on the fridge to leave room for your everyday items.
DON’T
- Buy knobs or drawer pulls that don’t fit the style of your kitchen (even if they’re really cheap). A brushed metal set will look silly on your 1940s-or 1980s-style kitchen cabinetry.
- Hang things where you will knock them over all the time or where you can’t reach them.
- Store knives in your countertop utensil jar. High utensil traffic will dull the blades faster.
- Place your open-shelving curtain or cloth in a major use area because extracting items from that shelf will be annoying. If this must be the case, then be sure to use a mini-curtain rod and a fabric that slides easily.
- Stack things so obscurely that you can’t find them or where it’s an ordeal to get them down (e.g., you need to haul out the ladder to get your Cuisinart).
Dish Duty 101:
The Never-Ending Chorey
There’s no way around it. The happy home life leaves a trail of dishes in its wake. If you’re not down with dish doing, there’s an appliance for you: the dishwasher. You decide. Either that’s where you spend what’s left of your paycheck, or start looking at doing dishes my way.
My dishes are a cathartic gateway to unlocking whatever task is at hand. The more dishes I do, the more productivity credits I garner. This may seem dramatic, but it applies to any task on your list, especially those unrelated to the kitchen. Think about it: a form of procrastination that leaves you with a clean cabinet of dishes is a real win-win situation. Your dishes will like this idea, your dinner-at-home success rate will rise, and you’ll ease into the idea of productivity one clean fork at a time.
Down-and-Dirty Dish-Doing Accoutrements
Gloves. A pair of pretty and functional dish gloves can do wonders for inspiring you to take on those daunting dishes. Make sure they’re accessible, though, and not crammed in a drawer underneath your prized array of rubber bands, takeout menus, and packets of spare Christmas lightbulbs. I like the Casabella brand because they’re (a) hot pink, (b) thick latex with a flocked lining, meaning they last a long time and help you work with high-temperature water (like when you attempt canning and preserving in Chapter 9) and (c) water-stop designed (folded over at top) because no one enjoys getting dish slosh inside their gloves, eeewww.
Shimmy while you shammy. Doing dishes is an excellent time to catch up on podcasts, radio news shows, or other audio media. The kitchen sink is not unlike the shower, so go ahead, belt out the lyrics to your favorite Patty Griffin album. I think dishes like being serenaded.
Stuck on flour sack. Invest in dish towels you actually like. Unlike with tablecloths and napkins, it’s rare that I find a used dish towel, vintage or thrift, that I like. I’m partial to the luxury of flour sack, but when it comes to vintage, either it’s gone threadbare and fallen apart in Grandma’s kitchen or she’s still using it. Buy a pack of these towels new, four for $10 at the most. They’re absorbent and soft on the hands, and they usually come in plain white or solid colors that you might (at some point down the line) embroider to personalize (or gift).
No Dishwasher?
My favorite method for dishwasherless living is dish-tub washing. The dish-tub method is my pretend pioneer lady throwback—not to mention the most efficient hand-wash method—except I don’t have to pitch used water off the porch when finished. I can also hear the radio better from the kitchen when the water isn’t running.
Step 1: Fill a dish-tub-like object (e.g., a stock pot or a large mixing bowl) with hot water and a few squirts of undiluted dish soap. Use this tub/water combo to immerse dishes (if they’ll fit) or just to refresh the sponge before you soap up each dish. After each dish is sufficiently sudsed, set them on the counter somewhere next to the sink in preparation for the rinse bath. Try to keep your suds bath relatively clean by scraping food remnants into the trash before plopping plates in the water, or dumping out presoak water from cups or bowls before you dunk them in the suds.
Step 2: Once all your dishes have been sudsed, pitch out the soapy water and rinse the container or dish tub, filling it with hot or warm water for the rinse cycle. When you’re dipping dishes in the rinse tub, be sure to create a little friction—that is, give the dish a good slosh during the dunk—so that soapsuds don’t cling to the dish as you pull it out of the water. Alternatively, if using a smaller improvised tub, use it to rinse silverware only and run the rest under the hot tap to rinse.
If we were really fancy, we’d have two rinses, one warm and one cold, but I get lazy and tired of standing at the sink. One rinse will do for me.
When I’m feeling particularly uninspired by the relentless daily mound of dishes, I adopt a classic Garrison Keillor–inspired approach: it could be worse. I think about all the people in other countries who have access to only use a fraction of the water we use here in the United States, and feel immediately grateful that I didn’t have to carry home my day’s water supply on my head or boil every drop of my water before using it.
Resources
Books
Slow Death by Rubber Duck by Rick Smith and Bruce Lourie.
Clean and Green by Annie Berthold-Bond. A thorough guide to eco-friendly home set-ups.
Web
etsy.com
Amazing homemade items for the house.
fishseddy.com
Dinnerware, flatware, glassware and more!
theimprovisedlife.com
Loads of homemaking and household management info.