
As this chapter quickly exploded well beyond my allotted word count, I soon realized that a short overview of gardening is impossible. There are entire books out there devoted exclusively to soil, compost, container gardening, spotted bugs, removing dirt from your fingernails, etc.
Gardening is one of those areas where you can easily suffer from TMI (too much information). It’s actually better to jump right in with a few basics under your belt and save reading the countless books, magazines, and online tips for when you encounter specific issues. The problem with too much book smarts in the beginning is the absence of reality, that is, what’s really going to happen when you try it yourself. No one can tell you that; no one’s variables are exactly like yours.
Here’s what Michael Pollan has to say about all this (from an interview in Organic Gardening magazine): “We read books to learn how to garden; then the reality turns out to be more complicated. It doesn’t come out the way it’s supposed to in the book, and there are always surprises.” As you’re probably well aware, he also wrote a whole book—The Botany of Desire—on how humans have attempted to control our ecosystems with varying levels of success.
I’m not a master gardener; I have successfully planted, tended, and consumed my own vegetables and herbs. There have been plenty of surprises, sure, but that’s the most intriguing part of it all. The garden is a study in slowness, patience, the everyday. If any of these things eludes you, don’t fret; just start small.
As with everything in this book, there are many levels of involvement (and means/capacities). Just because you don’t have actual outdoor space doesn’t mean you should pitch the idea of gardening out the window. Instead, stick with the window and establish a sunny ledge as your home’s food production region. Or consider gardening on your rooftop. What you learn from tending a few pots will lend itself to future plans of extending into the ground or just growing more and working smarter next year.
So what does all this mean to you, beginning gardener? It means freedom. Freedom to mess up, freedom to discover and incorporate slowness into your life. One single basil plant will shift you, no matter how slightly, toward freedom from the industrial food chain and large companies dictating what you put in your mouth.
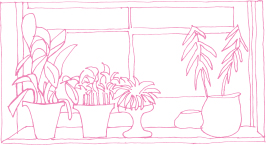
Before we head to the great outdoors, let’s check out (or reinstate) green space inside your home. After all, not everyone gets to stake a claim to their own patch of exterior nature.
Frantic Foliage
I have a notoriously bad relationship with houseplants. The great indoors and I came to terms a few years ago when I managed to grow a new devil’s ivy plant from a cutting of a larger plant. After living in a plastic cup for about eight months, this tenacious variety sprouted roots, at which point I relocated it into soil. After this migration my plant carried on a static existence for the next year, not growing, but staying alive (which I count as success). One house move and a west-facing window later, my plant took off, climbing the walls and shooting limbs in every direction. The indoor plant gospel rang from my kitchen window: places where plants look good are not always places where the sun shines.
Up to this point, I never gave interior conditions much thought. My plant planning consisted of weekend mornings spent strolling through aisles of pretty plants of all shapes and sizes at my local nursery. I selected things I liked and hoped for the best. I soon discovered that good intentions mean nothing when it comes to plants and their multiple, variable needs. Buying the wrong kinds of indoor plants is a long, fraught process of tearing up your money and throwing it in the compost pile.
Have Your Houseplant and Keep It Alive, Too
There are a few considerations to keep in mind when choosing houseplants:
- Light. How does light fade in and out of the proposed plant space? Where you think a houseplant should go and where a houseplant will get enough light to survive may not match up. Some of you are lucky enough to have too much light for certain plants (but for the record, most plants don’t see this as a problem).
- Temperature, humidity, or other desired conditions. Some plants need a greenhouse-y atmosphere, not your radiator-gone-wild, 500-degrees-in-the-winter apartment. Don’t buy these varieties. Ask the people at the plant nursery before you buy anything. Or better yet, get a copy of Taylor’s Guide to Houseplants if you’re doing most of your leafy tinkering indoors.
I’m used to barely maintaining plant life in my cave-like, low-light apartment situation, a challenge to houseplant survival. But I have hopes of moving somewhere one day where my windows won’t face north.
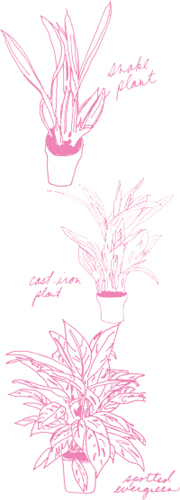
Six houseplants that won’t die in your cave (i.e., low-light best bets):
- Cast-iron plant (Aspidistra elatior).
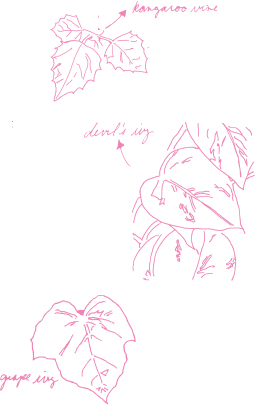
This member of the lily family tops my chart with a description in Taylor’s of abilities to withstand “poor soil, low light and minimal care.” This one also stole my heart by earning its nickname by surviving in dim, coal-fumed Victorian-era households. If they could keep this plant alive, then so can you. - Kangaroo vine (Cissus antarctica).
Any plant with Antarctica in its scientific name must be able to survive in my house. This is a hanging plant, thus a great option for sprucing up small spaces. - Grape ivy (Cissus rhombifolia).
A relative of the kangaroo vine, perhaps the most arty of the low-lighters with its faceted leaves. - Spotted evergreen (Aglaonema costatum).
Looks sort of like a leopard print philodendron with big leaves. - Devil’s ivy (Epipremnum aureum).
You could not kill this plant if you tried. - Snake plant (Sansevieria trifasciata).
This one has the double benefit of fitting in tight spaces (since it’s tall and skinny) and filtering indoor air.
None of these are flashy, showy plants. In fact, they are the exact same plants you’ll find at any fluorescent-lit office building or in shopping malls that don’t have skylights.
Did you Know…
Houseplants improve indoor air quality by removing VOCs (discussed in Chapter 3) like formaldehyde and benzene and by absorbing carbon dioxide. The chemicals find their way to the plant’s roots, where microbes do the work of breaking them down into energy or food.
Quick Chic:
Five Indoor/Outdoor Décor Dos and Don’ts
DO:
- Spruce up a plain ol’ chain-link fence with old windowpanes or vintage wooden picture frames (ones you don’t mind getting weather-worn).
- Run a clothesline between any two sturdy things you can tie the line to directly or with screws (e.g., a fencepost, deck post, etc.). If you’re strapped for outdoor space, buy an indoor line kit that winds back into the casing between uses.
- Use simple hardware to hang a hammock somewhere in your yard or common area. This way it’s easy to take down if you share the space with others. Pick up two 3-foot pieces of midweight chain and two screw links (like a carabiner that has a screw bolt), and you’re in hammock-hanging business.
- Utilize whatever space you have for growing plants, be it windowsills, a fire escape, a stoop, a roof, or even a small yard. Remember that hanging space might be one of your best assets. I’ve suspended my strawberry jar from the neighbor’s deck, where it’ll get enough sun to fruit all summer long.
- Line a walkway with cinder blocks painted bright colors and plant succulents (or other inedible native plants) in the holes as a low-cost way to spruce up your front or back yard.
DON’T:
- Place food plants directly underneath your decorative windowpane-lined fence or wall; little paint chips will drift down into the soil, and consuming hundred-year-old lead paint is not good for you.
- Keep your clothespins on the line all the time because weather exposure will cause them to mildew and rust. Instead, stash them on a coat hanger in your closet and bring it outside with you when you hang your clothes or linens.
- Hang your hammock somewhere you don’t want to sit, like the corner of the yard that meets the corner where the neighbor’s dog routinely poops. At the time it seemed like a perfectly good idea to string up my hammock underneath our upstairs neighbors’ deck; then I realized that deck debris would fall on my face if anyone happened to be walking overhead.
- Assume all windows are the same. I’ve killed more than my share of cute succulents by hoping my north-facing window would be sufficient for sun-guzzling foliage. Figure out your window’s orientation and make decisions about plants from there.
- Use painted cinder blocks or wood planks to make garden boxes for food plants. Painted things might leach toxins you don’t want to consume into the soil.
Hip Trick
Dress up a sorta boring, low-light plant champ with a cool pot. Be sure your chic pot has drainage holes in it, though, if you don’t want to be figuring out how to drill holes in ceramic on your day off.
Introduction to Container Gardening
If you need inspiration to try growing something edible, consider the scary, invasive scope of the industrial food system; the nutritional benefits of consuming food that has not traveled for days on a semitruck; or doing your part to snatch up floating molecules of carbon dioxide via plant foliage.
Years of tinkering and observing what’s going on in my pots has helped me put things in perspective, mainly allowing me to realize that I’m apparently not the center of the universe. It’s funny what a few plants with their own ideas of fun can do for your outlook. I’ve managed to grow and eat my own vegetables and herbs for a few seasons now. I like it, and after you put aside fears of failure, you might like it too.
As you move through understanding the whys of the garden (and I don’t think anyone ever gets all of them), you’ll gain confidence and start to see things you’ve never noticed before, like the way lettuce slowly unfolds or how sprouts emerge from their seeds in a forward-bend-like position.
Don’t read too much before you start, or you might not ever start. There are so many factors involved, most of them living (read: unpredictable) and at the microbial level. Leave complexity to your soil; basic gardening should be a learn-as-you-go thing, no expertise required to start. First rule of plant tending: relax!
Potting a Plant
This skill applies to both indoor plant tending and container gardening; the method is exactly the same. It’s really all about drainage.
The essentials:
 Something with holes in the bottom
Rocks or broken pieces of terra-cotta or dishware
Organic potting mix
Vermiculite or coir (optional)
Fertilizer (for indoor plants) or compost (for outdoor plants)
Topsoil or mulch (for outdoor plants)
Bricks (optional)
- Buy pots with drainage holes. Or if you’re poking/drilling your own drainage holes in something like a food-grade 5-gallon bucket, don’t be stingy. Look under existing pots (depending on the size you’re working with) and use their drainage hole sizes and positionings as a guide.
- Line the bottom of the pot with 1 to 2 inches of rocks or pot shards to allow extra room for drainage. Some books say you can use Styrofoam packing peanuts, but nowadays it’s hard to tell which ones are true Styrofoam and which ones are planet-friendly, biodegradable doppelgangers. You don’t want a pot bottom full of decomposing faux Styrofoam. Stick to broken stuff, or better yet, get a huge bag of landscaping/pond rocks for $5. (Don’t buy decorative rocks; you’re wasting your money.)
- Though potting mix is designed specifically for containers, you can always add extra fluff to keep the soil from compacting. Vermiculite or coir (coconut husk fiber) are both good fluffing additives, but avoid peat moss since it’s a nonrenewable resource. Never pack down soil in your pot.
- When the pot is about half full of soil, I drop in a scoop of organic fertilizer to get the soil microbes and bacteria going, and for outdoor plants, I add a handful of compost. Follow directions on your fertilizer bag for proper proportions.
- If the plant’s root ball is tightly compacted, gently loosen the roots with your fingers, as if you’re untangling a knot from long hair.
- Fill pot with potting mix to 2 inches from the top of the pot, and add topsoil to top off the pot. Don’t worry—when you water for the first time, the soil will settle, leaving an inch or so of space between the top of the pot and the soil. Topsoil (or mulch) protects and insulates your soil life, a good idea for plants that are exposed to full-sun (otherwise your plants will dry out faster and develop a brittle top layer).
- Set larger pots (like 5-gallon buckets) on two or three bricks to assist drainage. You never want your pots to sit in a pool of water; the roots will rot.
- Water thoroughly, until you see water coming out of the drainage holes.
I like how Taylor’s Guide to Houseplants explains how to properly extract cuttings and propagate plants.
Watering Basics
How to water your plants:
Indoor plants. Water sparingly. Let them dry out completely. Root rot (from overwatering) is the most common killer of indoor plants. Your plants will tell you when they’re thirsty; they’ll droop slightly. My low-light plants usually go weeks between waterings.
Outdoor plants. Water when dry, which usually means once daily. Hot, sunny summer days (combined with container scenarios) will suck the moisture right out of your plants. The best way to make sure your plants are getting enough water is to touch the soil. Poke your fingers down a few inches and feel around; if it’s bone dry, then your plants are thirsty.
As you get fancier (I have yet to do this), you can buy or make a soaker hose for a slow-drip deep-watering setup. I like to use dark-colored glass bottles (like wine bottles or similarly sized ones) as inverted drip waterers in my container plants during especially hot times. The plants will take water as needed (like you do at the office water cooler), thanks to simple physics.
Word to the Wise
Avoid watering outdoor plants during the day, even if your plants are wilted and thirsty. Direct sunlight heats up the soil, and the heated water could burn the roots of the plants. Instead, water in the morning or evening hours, and stick to spraying the soil, not the leaves.
Short Course on Fertilizer
Any bag of fertilizer you pick up will have three numbers written on it. Those numbers stand for the nitrogen, phosphorus, and potassium (N-P-K) ratios. Some fertilizers cater to certain types of plants or specific soil needs: a 4-6-4 ratio will be better for flowering parts of plants (vegetables included), and a 7-2-1 will help acidify overly alkaline soil with a nitrogen blast. I selected a fertilizer this year with mycorrhizal fungi to balance and assist microbial and bacterial growth.
For beginning purposes, start with a basic, all-purpose fertilizer (something similar to an 8-2-4 ratio) at first and expand your knowledge as you go along, amending soils with both fertilizer and companion plants (beans are an excellent source of nitrogen for your soil). Avoid synthetic fertilizers—ones with really high numbers in the ratio—and instead stick with organic and natural choices, which are nonpolluting to the watershed and don’t salinate the soil (make it too salty), which would kill beneficial microbes who are working to make your soil richer.
Alternate fertilizer feedings with applications of worm castings (which you can buy by the bag at any organic garden shop). Worm poop is balanced—equal in N-P-K ratios—and a perfect addition to any kind of soil.
Hip Trick
Fill your watering can immediately after you empty it and let the water sit at room temperature until you use it again (twenty-four hours). Tap water can contain any number of chemicals, like chlorine, as remnants from the sanitization process, and these chemicals aren’t great for plants, especially container plants. Leaving the water overnight allows smaller, volatile chemicals to dissipate into the air.
My Bucket Garden
This year I planted my garden using six 5-gallon buckets from my local hardware store. You can also find these food-grade plastic buckets in restaurants, pickle and mayonnaise tubs in particular; ask around wherever you go. Do not use buckets that were once filled with plaster, paint, or any other nonfood item.
I drilled a bunch of holes in the bottoms of my buckets (which was oddly soothing, but more on that in Chapter 7), dropped some pond rocks in to assist drainage, filled them with a local potting soil mix, and voilà! Serious container gardening ensued. My six buckets are now planted with edibles:
Raspberries
Bell peppers
Carrots
Chioggia beets
Dutch wax beans
Double-yield cucumbers
Tomatoes
Instead of bricks to elevate each bucket, I lined my buckets up along two parallel two-by-fours to create a little pedestal and air tunnel underneath them.
Four Times the Charm
I’ve repotted my lone alpine strawberry plant several times. First I went from a 3-inch pot to a hanging basket; then I put it in a strawberry jar (a kind of pot that has holes in the sides to create more fruiting area). Then I learned that the alpine variety doesn’t reproduce via runners like all the other strawberry plant varieties; I needed to put separate plants in each of the holes for a higher yield. So I severed two new shoots and their roots and planted them in the holes in the jar. (Hell, if a strawberry plant has to die for me to learn how to take a root cutting, then so be it. I’ll buy another for $4 and be all the wiser for it.)
Then I couldn’t resist buying an Ozark Beauty at the farmers’ market. This one is an ever-bearing variety that spreads via runners. Bingo! All I needed to do was add it to one of the holes in my jar. Not so easy as envisioned, but my not-so-ideal planting situation has worked out just fine.
The moral of this tidbit: planting rules and guidelines are not set in stone; there’s not just one way to do things. All plants involved are thriving (even the rogue cuttings).

Guerrilla Gardening
In addition to my container garden, spread out between my neighbor’s back deck and our front stoop area, I also took over the little 3-foot-square concrete, dirt, and debris patch just outside our stoop. I moved my globe amaranth starts, a few native plant containers, and my most invasive stoop garden plant, mint, for a trial run in the wide world of Hancock Street. I’m considering moving my stoop beets container to this patch too, since it’s a much better sun spot and since neighborhood kids and passersby haven’t disturbed my plot since it debuted.
I built a three-sided frame around it using four 12-inch screws and a 2-foot section of fine mesh chicken wire cut into three strips. Reclaiming this space from debris and trash accumulation and seeing it generally unscathed for months renews my faith in humanity. I peek outside occasionally, watching for the occasional smile or nod of appreciation as people walk by.
Word to the Wise
Community garden plots are a fine idea in theory, but unless gardening is your only hobby, you live next door to the garden, or you can work out watering shifts with other plot holders, you might instead consider a guerrilla patch on the sidewalk outside your house. You don’t need the daily demands of the garden to raise your stress level.
What to Grow?
Your very first task in plotting a garden of any sort should be to visit a local plant nursery to track down your local planting chart according to hardiness zone. This sublimely useful diagram shows what vegetables thrive in your ecological zone, what to start indoors or seed directly in the garden, and time frames for each.
First, find your hardiness zone by plugging in your zip code on the National Gardening Association’s website: garden.org/zipzone. These charts are not always easy to track down, but they do exist. It’s easier once you know what you’re looking for.
Here’s my New York City/Zone 6 chart as an example:
Once you find your region’s chart, identify which foods you actually eat. Don’t grow stuff you don’t know what to do with or you’ll be faced with two learning curves at once, one in the garden and a second in the kitchen. Go easy on yourself, and don’t bite off more than you can chew.
Permaculture 101
Permaculture is a way of setting up your living and growing space so that it mimics natural systems. Don’t worry, you needn’t move into a yurt and bathe in the nearby stream; the key word is mimics. All this really means is, use common sense, utilize all the resources at hand (wind, gravity, light, old yogurt containers, whatever), and strive for efficiency (i.e., minimize how much you’re going to have to work or pay).
As with all the ideas in this chapter, permaculture is an entire movement and has an oeuvre to match. Looking up Bill Mollison and David Holmgren is a good way to start delving into the principles in more depth.
You might have heard about permaculture’s bedfellow, biodynamic farming, which focuses on no-waste, efficient farming by utilizing animals and techniques like pasture rotation so natural processes do most of the work. This is Joel Salatin’s farm model, described in Michael Pollan’s The Omnivore’s Dilemma (required reading).
When it comes to urban permaculture, scale is everything. You probably aren’t working with an orchard in your apartment scenario; don’t worry, smaller is way better. Start by figuring out what you have.
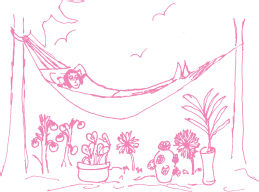
Homework: Lie Around
I learned in my permaculture design studies that the best way to become acquainted with your surroundings is to lie around (hammock preferred) and observe them as the day progresses. See how the sun angles and ambles its way across the sky; see where you have direct sunlight.
Notice the slope of the ground. Are there any agents at work in your ecosystem—birds, bugs, bees? Do you have access to water? How far away is the compost pile? If you’re planning a raised garden bed, will it be a pain in the ass to unload soil into your plot?
Black thumbs of the world, don’t worry. By setting yourself up using nature as your guide (instead of viewing it as the thing to overcome), you’re making failure nearly impossible.
Toxic or Uninspired Soil
Testing your soil is a good idea, especially in urban areas with old buildings (or in new construction areas, since you might not know what was there before you and your house). Lead and mercury are common heavy metals found in urban soil, and petroleum leaches into and lingers in soils. Call your local university extension office (where you might get a heavy metal test kit for free) or visit your local nursery or hardware store for a soil test kit.
Word to the Wise
Buy plant starts for plants that are not direct-seeded (i.e., planted directly in the ground or an outside container) if you live in a cave-like dwelling or you’ll become a slave to grow-light-innovation-on-the-fly and seedling-salvaging efforts.
Yes, it’s more expensive (since a seed packet is about $2.50 and a single plant start is anywhere between $3-6), but urban, small-plot gardeners will rarely use all the seeds in a packet, and you run the risk of not storing them properly for future years’ use. If you’re growing in containers, you probably don’t have enough room for more than three tomato plants, anyway.
Even if your garden soil isn’t toxic, it may be too acidic or alkaline, excessively packed, or too sandy or clayey, or maybe it’s just incapable of hosting plant life. You have two choices (neither of which is scrapping the idea of planting a garden):
Amend it with organic fertilizer and compost (and patience). Certain plants also take up toxins from soils (but must be disposed of carefully).
Build up right away and let a couple years of raised beds do the work of amending the soil for you.
Raised Garden Beds
Raised beds are an ideal solution to imperfect, uninspired, or excessively compacted soil. By building up, you get to start growing things immediately, and after a few years of nurturing, the soil below will benefit from a trickle-down effect, thus making it a richer and deeper source of nutrients for your plants. You can plop the structure for a raised bed down wherever you please. The only drawback is that you’ll need to get your hands on a bunch of good-quality garden soil to fill it. Ask a friend with a pickup truck to take you to the local plant nursery, and offer to feed him or her something homemade and yummy in return. (Sending your friend home with a loaf of homemade bread might boost your chances of having him or her answer the phone next time your number appears on your friend’s caller ID.)
Build Your Own Raised Bed
Gardens are great for building relationships between yourself and your surroundings (including neighbors). When I lived in Austin, Texas, I built my 4-foot-by-4-foot raised bed atop a gangly patch of crabgrass that also happened to butt right up to my residential neighborhood curb. As I dug and pulled up as much of the crabgrass as I could (crabgrass is a real bitch), my garden project garnered a bunch of strange looks. The curbside location was not selected as a means of showing-off my vegetables; I hadn’t enough sun anywhere else.
You’ll need:
Two 2-inch-by-8-inch-by 8-feet planks (have your hardware store saw them both in half, so you end up with four planks that are 4 feet long each). This is a great time to graduate from those punk rock cinder-block-and-board bookcases (noted in Chapter 2), since you can repurpose your planks as garden bed walls, like I did.
Four (or eight, if you want to doubly reinforce) corner brackets, with screws
Cardboard (to control grass or other invasive weeds below your plot)
Half a cubic yard of soil (100 gallons) to fill the bed
Mel Bartholomew’s Square Foot Gardening has an excellent photo tutorial on how to build a raised bed (and creative garden problem solving in general). I’ve never added the grid or bottom panel as he suggests, and I’ve still enjoyed full harvests.
Battling the Bugs
The kinds of bugs your plants attract is the best way to know what’s going on. I went to my local nursery in my first year of garden tending with questions for a staff member about a mysterious spinach invader. She told me that the bugs in my case meant the plant was in distress, and with due cause; I was two months past the spinach growing season. I should’ve already pulled them up and composted. No wonder!
GOOD BUGS
Ladybugs
Earthworms
Roly poly bugs
Bees and wasps
Spiders

BOTHERSOME BUGS
I won’t get into the details of all the pesky little buggers you might encounter, but here’s a list of common pests to prompt your Google Images search:
Mealybugs
Scales
Aphids
Spider mites
White flies
Caterpillars
After you identify your pest, treat the plant or soil accordingly. Home remedies are the best (and cheapest) way to solve your pest problems. I like the variety of recipes featured on Austin’s own The Natural Gardener website, naturalgardeneraustin.com, which can be used for issues you’ll encounter in any region, not just Central Texas.
Compost: Eew or Ooh
So what is compost, anyway, and why shouldn’t you be afraid to touch it? Let me start by saying that you touch germier things every single day, like subway rails, door handles, ATMs, the phone receiver in your office, and elevator buttons. You’re still alive, right?
When you turn to toxic chemicals, like commercial disinfectants or bleach, you kill everything involved, including the good bacteria and other microbes that assist our bodies. Read up on the “hygiene hypothesis” and maybe reconsider antibacterializing everything you encounter. Whether or not you accept this hypothesis—the idea that since our immune systems don’t have much going on these days (that is, they aren’t called upon to fight off common bacterial infections as often), our ultraclean environments are actually enhancing allergic reactions to common things like mold, animal dander, pollen, dust and dust mites, and certain foods—at least get the toxic stuff out of your home. Check in with Chapter 5 for homemade, nontoxic cleaning alternatives.
Okay, swinging back from my mini-rant/tan-gent: compost. Using your own food and yard waste is the very best you can do by your plants. Not only is it efficient, but it’s also better than pitching food scraps and decomposing refrigerator matter into your indoor trash can, which makes it develop that hideous smell and also clutters up landfills unnecessarily.
The cool thing about nature’s way of managing decomposition is that it involves a ton of bacteria, fungi, and insects doing the thing they do best: eat. The food chain that is decomposition (which in turn makes for fantastic soils) is a giant cleaning and balancing process. When your bugs and microbes have done their jobs, you scoop out a crumbly, earthy-smelling handful of stuff that you could actually eat (again). (I recommend feeding it to your plants, though.)
Quick Fix
Make a simple soapy water mix by diluting a few drops of dish soap or Dr. Bronner’s liquid soap (unscented is perfectly fine, but peppermint and lavender oils are known insect repellents) into a spray bottle filled with water and apply directly to foliage; this manages most of the pests listed here.
Indoor/Outdoor Composting Setups
Our countertop compost collector is a simple glass cookie jar stashed out of direct view in the corner near the sink. You can hide your compost jar under the kitchen sink or in an easily accessible cupboard if the jar creeps you out. When it gets full, we dump it into our 11-cubic-foot compost bin outside. The outdoor bin has a lid, air vents, and a handy bottom hatch for scooping out the best kind of black gold anyone can make.
Yeah, you can be crafty and make your own bin, but the $90–$120 investment in a backyard bin is well worth it. It’s easy. You can’t mess it up. It won’t smell (if you add the right kinds and proportions of browns and greens). The animals that aren’t supposed to be in there can’t get in. And you don’t really have to turn it. (Turning your compost pile every couple of weeks helps microbes and larger bugs thrive by incorporating the greens with the browns and distributing heat and moisture evenly.)
Do as you wish; there are a zillion ways to assemble a DIY compost pile setup, and plenty of books to help you identify solutions to your specific composting situations. Check out these books to answer all your compost questions:
Teaming with Microbes: The Organic Gardener’s Guide to the Soil Food Web
The Rodale Book of Composting: Easy Methods for Every Gardener
Greens Versus Browns
There are two basic kinds of materials you want to populate your compost pile: “greens” for nitrogen and “browns” for carbon.
Greens should constitute 40 percent of your pile:
- Kitchen scraps (no oils, meat, or bones because they’re harder for the microbes
to break down and they’ll attract pests) - Cottonseed meal
- Garden wastes
- Pet (or human) hair
- Fresh grass clippings (pick up a neighbor’s yard bag before the city does)
Browns make up the other 60 percent of your healthy compost pile:
- Coffee grounds
- Eggshells
- Stale flours, spices, and dry beans
- Shredded paper (not colored or shiny)
- Sawdust (also helps control smell and lower the temperature in a pile that’s gotten too hot)
- Dry leaves, brown grass clippings
- Alfalfa hay or wheat straw
Composting Indoors
You still have compost options in your tiny, yardless apartment. Most farmers’ markets and community gardens have a food scraps drop-off area, although there is a degree of impracticality involved: if you cook a lot, like we do, you’re going to have way too many food scraps to conveniently carry on public transit (or your bike), and you’ll need to do it at least once a week. (We empty our small countertop container two to three times a week.) Another issue I’ve run across is that in winter months, you might need to haul your scraps farther away, to some central location operated by either the city or an organic gardening association, since community gardens and markets aren’t usually operating then.
Maybe you have a chest freezer? By all means, keep your scraps in there until you haul them off to the compost drop-off. Public compost pickup is becoming available in many cities, which is heartening because it cuts down on the bulk in already crowded landfills. If you don’t live in Seattle, San Francisco, or Ann Arbor, where the city picks up your food scraps, then send a message to city council members and tell them you’re interested in adding a public composting initiative. Two small towns in Massachusetts just introduced public compost pickup to the East Coast.
Your best bet for ridding your house of food wastes in small spaces is to investigate vermi-composting—composting with worms. This may be a little out there for you, but think about the benefits:
It’s a year-round solution.
There’s no smell.
You can be flexible with temperatures, though room temp is best.
Castings (aka worm poop) are jackpot assets in the garden.
It requires only a utility closet or a small bin under your sink (which will fit nicely because you’re going to get rid of all the chemical cleaning supplies after you read the next chapter.
There’s not a lot of work involved (on your part, at least).
You can trade some of your compost “harvest” for friends’ home-grown foods. I just swapped some of my watermelon rind pickles for a three-pound bag of worm castings.
Grab a copy of Worms Eat My Garbage: How to Set Up and Maintain a Worm Composting System or The Urban Homestead for DIY worm bin setups plus troubleshooting scenarios. Before you rush out for worms, go visit a friend who has a setup like this and see if it’s going to work for you (i.e., to see if you get too grossed out).
Three Tips for Successful Composting
1. Your compost pile actually needs some sunlight to thrive. Sunlight heats things up in there and activates decomposition.
2. Give the microbes a hand by keeping kitchen scraps smaller (and thus making them more easily digested). Crumble eggshells and dice tough fruit rinds or large vegetable scraps to keep your pile decomposing at a steady and even pace.
3. Place your compost bin where you can access it easily. The farthest corner of the yard is not automatically the best location for it, especially if you have a big yard.
Five Fun Things to do with Homegrown Foods
- Mojitos with your stoop-grown mint. Mint is the easiest thing to grow. Watch out, though; it has a mind of its own and spreads like crazy. Don’t keep it near other plant pots or it’ll invade.
- Pesto with your window basil.
- Super-small batches of preserves with strawberries or raspberries you grew on your fire escape.
- Salads all summer long with your own lettuce mix.
- Trading some of your produce for things you didn’t grow but another friend did.
Resources
Remember that your best resource is your local organic plant nursery. Your regional university extension office and local botanic garden are also great places to start for local planting guides, suggestions about plant varieties, and tips.
Books
Great sources for information about methods:
Taylor’s Guide to Houseplants by Gordon P. Dewolf.
An excellent primer on house and container plants.
Square Foot Gardening by Mel Bartholomew.
Creative use of minimal space, plus great photo tutorials for building your own raised beds.
The Urban Homestead by Kelly Coyne and Erik Knutzen.
Detailed how-tos on DIY projects.
Kitchen Harvest: A Cook’s Guide to Growing Organic Fruit, Vegetables and Herbs in Containers by Susan Berry.
A not-too-involved primer focusing on edibles in containers, helpful for those of us who are spatially challenged.
You Grow Girl by Gayla Trail.
Great pictures of tricky things and an all-around, nonstressful guide to all things garden.
If you need inspiration:
Animal, Vegetable, Miracle: A Year of Food Life by Barbara Kingsolver (and family).
The Omnivore’s Dilemma by Michael Pollan.
Web
On the Web, try the following sites to build community and ask questions:
veggieharvest.com
hyperlocavore.ning.com
forums.gardenweb.com
naturalgardeneraustin.com
Home remedies for pest control.
seedsavers.org
Get heirloom seeds in the mail.