MATERIALS: old cardboard box, ceiling medallions, spray paint
When you’re on a budget, it’s hard to fill your home with art. Art is expensive! And I think that what artists do is really valuable, so it doesn’t ruffle my feathers when original works cost big bucks. But if you can give up watching football or picking your toenails for one afternoon, and put that time and effort into creating something aside from a pile of toenails, you can make Freakin’ Fabulous art.
I adore the idea of an entire wall of mismatched but coordinated art. Choose: (1) a color scheme, (2) common shapes, and (3) a common theme. Here, I selected a blue-green color scheme, round and oval shapes, and an outdoorsy theme. Most any theme will work—dogs, buildings, flowers, whatever you’re into.
Then mix it up. Start with a few medallions that you can find in various shapes and sizes in home improvement stores. They cost from $4 to $50. Add some decoupage plates. These were less than $1 each! Decoupage is also a great way to use an old set of dishes. You’re not limited to pressed flowers here. Anything can supply your design element, from photos to magazine images to paper to fabric. Next try an update on a childhood classic: silhouettes. Use images of objects or family members by taking silhouette snapshots, scanning and enlarging them on the computer, then printing and tracing. In a grouping they all sort of come together and they look happy. I love it! Whee!
painted ceiling medallions method
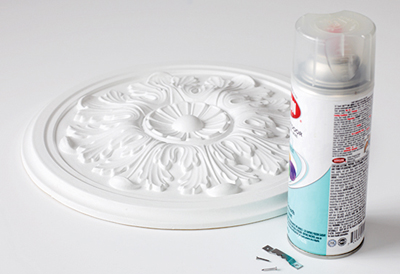
MATERIALS: old cardboard box, ceiling medallions, spray paint
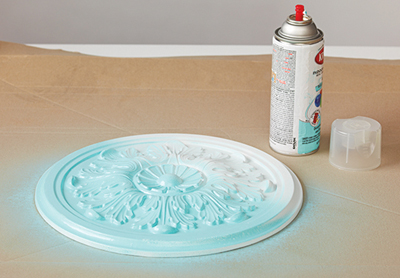
![]() Working outside or in a well-ventilated area, set the ceiling medallions on a surface protected by an old cardboard box and spray them with spray paint.
Working outside or in a well-ventilated area, set the ceiling medallions on a surface protected by an old cardboard box and spray them with spray paint.
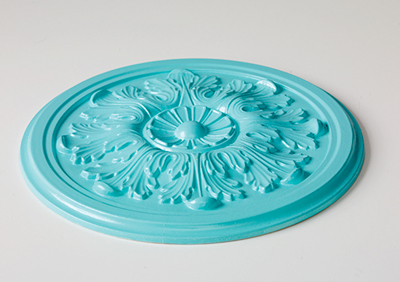
![]() Allow to dry, then hang on your wall.
Allow to dry, then hang on your wall.
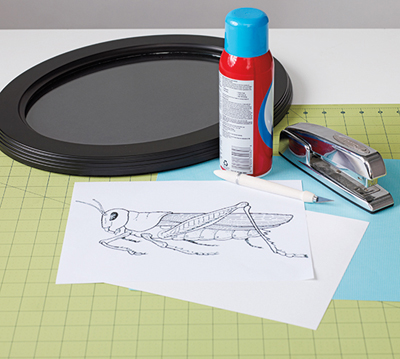
MATERIALS: picture images, computer paper, stapler, craft knife or scissors, spray adhesive, construction or wrapping paper, painter’s tape, frames, paint
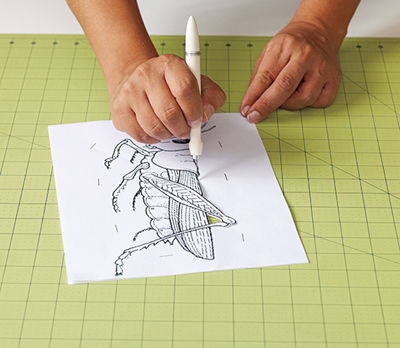
![]() Begin by placing an image on a plain piece of paper—staple around (not within) the image to hold it in place. Cut out your chosen image with a craft knife or scissors.
Begin by placing an image on a plain piece of paper—staple around (not within) the image to hold it in place. Cut out your chosen image with a craft knife or scissors.
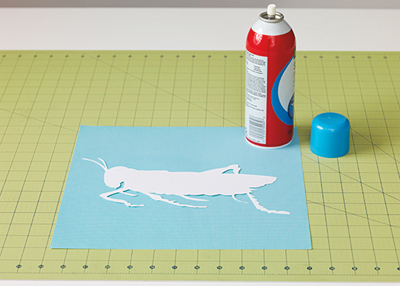
![]() Spray the back of the image with spray adhesive and affix to colored construction or wrapping paper. Repeat as desired.
Spray the back of the image with spray adhesive and affix to colored construction or wrapping paper. Repeat as desired.
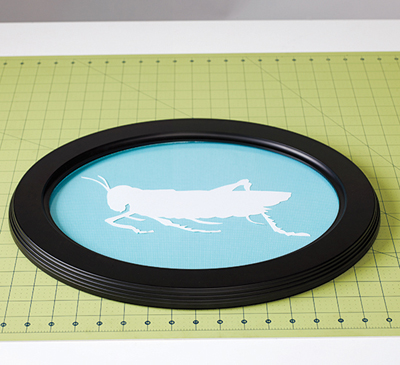
![]() Once dry, trim paper to fit frame and assemble. Using painter’s tape to protect glass, paint the frame with acrylic or latex paint to match your décor, if desired. Display.
Once dry, trim paper to fit frame and assemble. Using painter’s tape to protect glass, paint the frame with acrylic or latex paint to match your décor, if desired. Display.
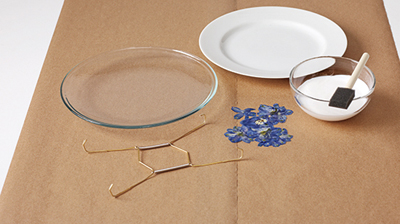
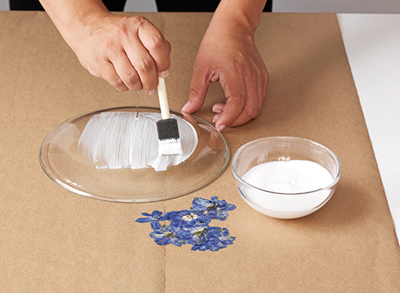
MATERIALS: Mod Podge, clear glass plate, foam brush, pressed flowers and ferns, white plate, plate hanger
![]() Working on a protected surface, apply Mod Podge to the back of the clear plate with a foam brush to avoid a brushstroke texture.
Working on a protected surface, apply Mod Podge to the back of the clear plate with a foam brush to avoid a brushstroke texture.
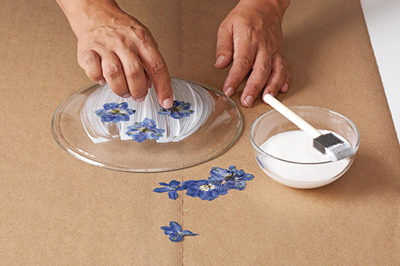
![]() Place pressed flowers and ferns onto the wet Mod Podge.
Place pressed flowers and ferns onto the wet Mod Podge.
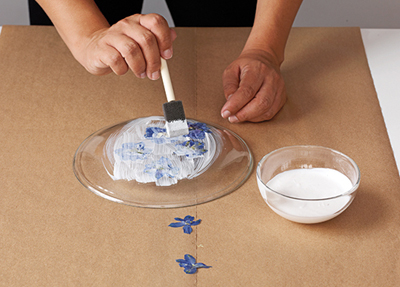
![]() Once all the flowers have been placed, carefully add another layer of Mod Podge over the flowers and ferns.
Once all the flowers have been placed, carefully add another layer of Mod Podge over the flowers and ferns.
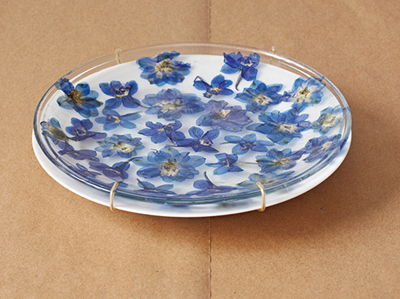
![]() Allow to dry for at least 24 hours—then place a second, opaque white plate behind it. Hang the plates together on the wall with a plate hanger. Gaze at the gorgeousness you’ve created.
Allow to dry for at least 24 hours—then place a second, opaque white plate behind it. Hang the plates together on the wall with a plate hanger. Gaze at the gorgeousness you’ve created.

HOW TO PRESS FLOWERS AND FERNS
Choose flowers and trim away most of the stems and leaves, and remove interior petals from large flowers like roses, then gently flatten with fingers. Place flowers in a folded piece of paper or tissue. Using a large, heavy book like a dictionary, sandwich the flowers between the pages and close the book. Choose a book you are okay with staining—the flowers may leak. Stack additional books on top to add weight. Allow to dry for at least one week.