![]()
When you grow fruits and vegetables, you are growing plants that are usually greatly changed from their wild ancestors through selective breeding by humans who wanted more and tastier fruits. They are less hardy and less tenacious but bear larger and more delicious fruit. As a result, they need the gardener to tend them as they’ve lost much of their wild-survival adaptability. You give them what they need to thrive, ensure their future generation, and in return get delicious, nutritious fruits and vegetables.
This means you have to understand the basic needs of your garden produce. There are basic requirements for the plants you’re trying to grow that have to be provided for to ensure the maximum harvest.
The literal foundation of your garden is the soil. You’ve surely begun to grasp by now how I obsess about never taking more from your soil than you put into it, and the reason for that is simple. In a backyard farm, the health of your soil quite directly affects the health of your family. If your soil is lacking in nutrients, your diet could be negatively affected. Plus, rich soil will grow healthier, more productive plants.
Healthy soil is alive with millions of microorganisms in a single square foot of garden space. It’s loose in texture, easy for plants to send their roots through. The organic matter that’s contained within ensures that the soil doesn’t get compacted so hard that no air can reach the roots of your plants. Healthy soil is like a well-tuned piano—it doesn’t become tuned by accident and it doesn’t hold a perfect pitch forever.
It may seem strange, but all soils except peat-based soils started out as rocks. The differences in particle size are partially what are responsible for the different types of soils and the way they behave. Clay soils have tiny rock particles, hold water for a long time, and don’t allow a lot of air into the soil. Sandy soils have large rock particles, with lots of air able to get into the ground, but the water drains away very quickly and so do the nutrients in the soil.
There are three main types of soils that are found in the garden: the two extremes of clay and sand, and the ideal soil, what many gardeners call loam. Loamy soil is neither sand nor clay, but rather a mix of each with plenty of organic matter mixed in. Unfortunately, most backyards don’t magically have this type of soil already present.
There are other types of soil you might have in your area, although they are less common.
Peat soils form in wet, acidic areas and the soil is usually dark, almost black. The soil doesn’t hold its shape and retains moisture for a long time, but, like clay, when it dries it can become very dry.
Saline soils tend to have a high pH, can be infertile, and are usually found in arid climates.
DEFINITION
The pH of the soil is the acidity or alkalinity of the soil. The pH of your soil affects how available the nutrients are to be used by your plants. The ideal range of pH for most vegetables is between 6 and 7.
You can tell a lot about your soil composition by giving it the squeeze test. When your soil is slightly damp, like a wrung-out sponge, pick up a handful and give it a firm squeeze in your hand. Heavy clay soil will retain a lot of water and will stick together like a sausage in a solid, slimy roll. Highly sandy soil tends to dry out quickly and the clump will break together easily into very small pieces when you open your hand. The more you can avoid either extreme, the better.
The tiny mineral rock particles aren’t the only ingredients in the soil. It’s also organic matter, microorganisms, air, and water. The exact makeup of your soil determines the pH and the fertility of your soil. In every case, the best way to improve the quality of the soil and make it better for your home garden is to add soil amendments such as compost, peat moss, leaf mold, and other organic matter.
Bottom line: the better your soil, the better your garden. I used to think that this meant mixing up some of that pricy, chemical fertilizer and pouring it over my plants on a regular basis when watering. I’ve since learned that overuse of synthetic fertilizers can actually damage my plants, wash into the water supply, and cause deficiencies in micronutrients that aren’t supplied. The answer is to build up your soil with organic methods like composting and nonharmful fertilizer.
Composting to Build Healthy Soil
Adding compost is one of most efficient ways to feed your soil and improve the soil quality. And it’s not something you do once; feeding your soil is an ongoing process that is part of your regular maintenance in the backyard garden.
I prefer compost over chemical fertilizers because of the huge number of benefits from composting:
![]() Economically, the cheapest soil-builders are the ones from your own garden, livestock, and kitchen. Why throw it out if you can compost it and add it to your garden for no money at all?
Economically, the cheapest soil-builders are the ones from your own garden, livestock, and kitchen. Why throw it out if you can compost it and add it to your garden for no money at all?
![]() From an ecological perspective, avoiding the petroleum-based fertilizers is an obvious benefit.
From an ecological perspective, avoiding the petroleum-based fertilizers is an obvious benefit.
![]() Building your soil with compost gives longer-lasting benefits because chemical fertilizers, while quick and easy to apply, are usually water-soluble and wash away very quickly.
Building your soil with compost gives longer-lasting benefits because chemical fertilizers, while quick and easy to apply, are usually water-soluble and wash away very quickly.
![]() Soil that is rich in organic material will hold heat better, helping gardeners extend the growing season.
Soil that is rich in organic material will hold heat better, helping gardeners extend the growing season.
Making compost is not rocket science. It’s earth science. In its simplest form you throw a bunch of biodegradable stuff together in a pile, and a few months later you have fabulous dirt to add to your garden. Remember when I said it’s okay to be a get-it-doneist instead of feeling like you have to be a purist? This is one of those areas, because if trying to do compost “perfectly” means you don’t do anything, then stick with a heap-it-in-a-pile method. Having said that, there are a few things you can do to increase the effectiveness of your compost pile.
The Right Ratio
The key is to make a compost pile that cooks or matures—that is, breaks down from your raw materials into humus more quickly. Finished compost is almost always a 30:1 ratio of carbon to nitrogen. The microbes that work to break down the materials in your compost pile live and work best in a ratio of 25:1 to 35:1, so providing a mix of high-nitrogen (called green) materials and high-carbon (called brown) materials is the best way to build up your compost bin quickly.
DEFINITION
Humus is the final product of the breakdown of organic matter. It is dark, woodsy smelling, and full of nutrients that benefit both soil and plants.
Now don’t get overwhelmed by all that. The key to remember is that when you put a high-nitrogen item like, say, chicken manure (10:1) into your compost bin, you would want to also mix in a low-nitrogen ingredient such as chopped leaves (50 to 80:1). As I said, this isn’t an exact science but rather a principle to keep in mind when working in the backyard. If you have mucked the goat pen and the chicken pen into the compost bin that week, you might decide to throw in some dry straw, shredded paper, sawdust, or even cardboard.
The following table lists some common green and brown matter you can find readily in most households and backyard farms.
We like to keep two main compost heaps going—one that is just finishing and one that is in the process of being used. We pile everything we can into one, as quickly as possible usually. I empty my paper shredder and we give the animal houses a thorough cleaning to get the new pile started. From there it’s just a matter of adding to the pile during our regular household chores. When you start thinking about the compost bin in the backyard, you find quite a lot of what usually ends up in the landfill can be repurposed to your backyard farm!
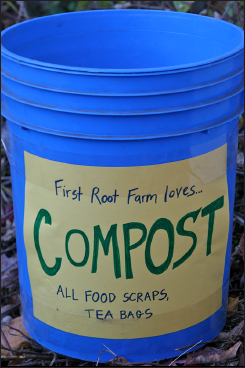
Keep a bucket dedicated to composting around the house and add your scraps to it throughout the day. In the evening when you close up the chicken coop, empty the bucket into the compost bin.
(Photo courtesy of Tim Sackton)
Mowing the lawn? Toss the clippings into the compost pile and mix them in. Weeding? Toss it in! Our coffee grounds and kitchen scraps and shredded cardboard paper tubes all go in a bucket on the counter and then out to the compost bin each day. Whenever I add anything that might mat up, like a bunch of grass clippings or leaves, I am careful to turn the pile over and stir it up a little bit. You want air to be able to get inside the compost bin so the whole thing heats up and breaks down. By the time the bin is full, you’ve got a good mix of raw materials added in.
Now let that compost bin sit and age and let the microscopic workers do their thing and start filling the second compost bin. By the time that bin is full, your first one will have cooked down into dark, rich, fertile compost ready for you to add to your garden. If you find that you are filling your bins faster than the compost is becoming ready (this might happen if you have lots of manure or household waste you’re adding, as our large family does) then simply add another bin.
ON A DIFFERENT SCALE
Have you heard about how the Native Americans would bury a fish where they planted their corn, peas, and squash? That was something we’ve now fancied up with the term “trench-composting.” You can do the same thing in your own garden by digging a deep hole, filling it up with vegetable scraps from the kitchen, and then covering it up with dirt. Plant heavy feeders like squash or melon vines on top, and voilà! You’ve composted with no hassle or overthinking.
A couple of quick words about some special composting ingredients:
![]() Wood chips and other hard materials like corn cobs or avocado pits won’t break down in the compost bin well unless you shred them up in a wood chipper, so most gardeners avoid these altogether.
Wood chips and other hard materials like corn cobs or avocado pits won’t break down in the compost bin well unless you shred them up in a wood chipper, so most gardeners avoid these altogether.
![]() Coffee grounds will raise the acidity of the soil in large quantities, so some people prefer to age their coffee grounds in a separate compost pile reserved for acidic-soil plants like blueberries, camellias, and hydrangeas.
Coffee grounds will raise the acidity of the soil in large quantities, so some people prefer to age their coffee grounds in a separate compost pile reserved for acidic-soil plants like blueberries, camellias, and hydrangeas.
![]() Wood ashes are taboo with some gardeners because they raise the pH levels in high amounts, but I like to add them for the micronutrients (namely potash) and because we have a wood-burning stove so it seems wasteful not to compost something that could be composted. Wood ash shouldn’t be a problem unless your soil already has a high pH level or if you add a lot of them into the mix.
Wood ashes are taboo with some gardeners because they raise the pH levels in high amounts, but I like to add them for the micronutrients (namely potash) and because we have a wood-burning stove so it seems wasteful not to compost something that could be composted. Wood ash shouldn’t be a problem unless your soil already has a high pH level or if you add a lot of them into the mix.
If your compost bin begins to stink, you’ve probably added too many large leaves or a big mound of grass clippings that have matted together into a soggy, slimy mess. To solve this problem, add in some bulky material like straw and stir up the entire pile. Your compost bin should be kept moist, but not soggy, and you want to make sure that it gets plenty of air into the middle of the pile.
This homemade compost bin is constructed from leftover lumber and old chicken wire. It allows plenty of air flow in the compost pile.
Moisture, air, and a proper mix of carbon and nitrogen will give the compost microbes a perfect environment to work in and your compost bin will heat up, killing any weed seeds and plant diseases that may have been lurking on the ingredients you added.
Consider the Source
It is important to consider where your compost materials come from. I know gardeners whose vegetable plots have been ruined because of the residual herbicides in the manure of cows that were not fed organically and sustainably. If you are sourcing your manure from animals that are being wormed, given growth hormones on a regular basis, or are eating hay that has been sprayed with chemical herbicides, all of that can find its way into your family’s vegetables.
Additionally, grass clippings from lawns that have been treated with herbicides and pesticides, or sawdust from treated lumber, can act in the same way—transmitting unwanted chemicals to your vegetable garden. It’s another example of how the agricultural industrial complex has taken something that was designed to work in perfect balance (matter feeds soil feeds plants becomes matter feeds soil) and so disrupted the original cycle that it’s now toxic in places. That’s why I tend to err on the side of caution and only use compost materials from our own backyard farm, or my in-laws’ ranch.
The more organic matter you can prevent leaving your backyard farm to the landfill, and remaining to feed your land, the better off your soil—and your produce—will be.
Organic Fertilizers and Soil Supplements
It seems that all farmers have a fertilizer blend or soil amendment they just swear by, and I think that’s because soil varies so much in composition and makeup. Our area in Oklahoma tends to benefit from small applications of lime, but other areas have different deficiencies to contend with.
OVER THE GARDEN FENCE
I highly recommend taking soil samples to your local county extension office for testing. You’ll learn if there are any specific deficiencies that you need to address. Deficiencies in your soil become deficiencies in your crop, which in turn become deficiencies in your family’s diet!
Even with healthy soil as a base, I like to add some plant food to our heavy feeders like asparagus, tomatoes, and potatoes. I found a great recipe for organic fertilizer in the book Gardening When It Counts: Growing Food in Hard Times by Steve Solomon. The mix is inexpensive when made in bulk and can be applied right onto the soil around the plants.

Commercially purchased soil amendments often come in large plastic sacks.
(Photo courtesy of Brannan Sirratt)
Of course, there are lots of things that can be added to your garden as soil amendments. These organic fertilizers are from mineral, plant, or animal origins and usually contain many micronutrients and trace elements in addition to whatever main nutrients are in them.
Bonemeal. This supplement is made from finely or coarsely ground bones, usually slaughterhouse remnants, and is an excellent source of phosphorus and calcium. It usually encourages strong root growth, which is why you’ll hear gardeners say to mix a spoonful into the bottom of a planting hole for bulbs. It also helps prevent blossom end rot in tomatoes.
Bloodmeal. Like bonemeal, this fertilizer has an animal origin and is powdered blood. Over 10 percent nitrogen, it is a strong fertilizer that is useful to feed nitrogen-loving plants and leafy greens. Be aware that spread bare in the garden, bloodmeal might attract dogs or cats to the garden.
Gypsum. A common ingredient in plaster and construction drywalls, this fertilizer contains calcium sulfate and helps supply calcium without changing the pH of the soil. You can use it to lighten clay soils, often in tandem with dolomitic limestone, but it isn’t one of the most effective or popular fertilizers as not every area needs gypsum.
Feed meal. Usually soybean meal or cottonseed meal, these fertilizers are high in nitrogen (6 to 7 percent) and potassium or phosphorus. They can be used as a side dressing on vegetable beds to feed fast-growing annuals. Of interest to those looking for organic backyard farms, cotton crops are often heavily sprayed with pesticides and most soybeans are genetically modified.
Alfalfa meal. Alfalfa is a great source of not only nitrogen, but many other nutrients as well, such as potassium. It’s often used as a general fertilizer for feeding both annuals and perennials, but many self-sufficient farmers are beginning to grow alfalfa as a cover crop to improve soil fertility without having to apply it in concentrated form.
Seaweed meal or kelp. Valued for the diversity of minerals and nutrients it provides, gardeners can usually find it in liquid, pellet, or powdered form. Applied to soil in the spring and summer, seaweed applications seem to increase a plant’s stress tolerance. It is considered by some to be the most complete source of micronutrients available.
Rock phosphate. This is a nice source of phosphate for vegans who want to avoid bonemeal. However, it is stronger—especially hard-rock phosphate—and it shouldn’t be used on alkaline soil because it will raise soil pH. Soft-rock phosphate is not as strong and breaks down more slowly so that it lasts for a long time in the garden.
Limestone. Both ground limestone and dolomitic limestone raise a soil’s pH level and supply calcium. Dolomitic limestone also supplies magnesium and is easy to spread directly onto the soil.
When trying to figure out which fertilizers and soil amendments to use in your garden, a great place to start is your local extension office. They will know what the soils are like in your region and which supplements are the most beneficial. You can take it a step further and test the soil right in your own yard, taking samples from the exact spots you are considering placing your garden to see what, if any, fertilizers and amendments are needed.
Knowing your hardiness zone (the number assigned to a region according to the coldest expected temperatures) will help you determine which plants will grow best in your area. These numbers are especially important for growing fruit trees and perennial herbs that will need to survive a winter in your area. The U.S. Department of Agriculture (USDA) hardiness zone map is a general guideline of the United States that helps gardeners get a basic idea of the weather conditions in their area. The smaller the number on the hardiness chart, the colder the winter temperatures.
For example, my growing zone in southeast Oklahoma is 7b, which means we can expect temperatures with a low of 5°F to 10°F over the winter. This means that an apple tree that is hardy to zone 5 would probably survive a winter in my area, while an orange that is hardy to zone 9 would get too cold and die. But this is only half the picture.
The other zone map that is handy for gardeners to consider is the heat zone map by the American Horticultural Society. This map tracks the average number of days that are above 85°F. So my rural Oklahoma corner of the world is a heat zone 8, with between 90 and 120 days in the heat zone (above 85°F) each year.
These two numbers taken together start to give you an idea of the types of plants that are ideally suited to your general area. There are several ways to manipulate your specific backyard, however, to try to include plants that might be outside your zone. The best way to do this is to pay attention to the microclimates in your backyard garden and learn how the layout of your land will affect the temperature of a small, specific area of your yard. Have you ever noticed that after a snowstorm, some parts of your yard are completely free from snow very quickly, while other areas still have unmelted snow a week later? Those are microclimates at work, and you can use them to your advantage as a gardener to grow as wide a variety of plants as possible.
DEFINITION
A microclimate is the unique climate of a very restricted or small area. Walls, windbreaks, mulch, hilltops, low-lying areas, and other exposure changes can all create microclimates in your yard.
Are you trying to grow an apple variety that needs more chilly hours than you are zoned for? You could choose a lower-lying spot to plant your apple tree, as the bottom of a slope can be a frost pocket where the cool air gathers. Does your area have higher temperatures than your lettuce and broccoli prefer? Try planting your lettuce in an area west of the cucumber trellis so it is provided diffuse shade for part of the day, creating your own microclimate.
In general, southern exposures get more sun and tend to be warmer, while northern exposures get less sun and tend to be cooler. Areas that are elevated tend to be warmer, while the low depressions can allow cold air to collect. The exception would be at the top of a hill where cold wind exposure makes it easier for plants to freeze. Providing a windbreak can raise the temperature for an area by creating an insulating buffer. I’ll cover ways to get more out of the garden, regardless of your gardening zones, in Chapter 7.
Another of the vital components to a healthy garden is sunlight. Each vegetable and fruit plant has a natural cycle based on the number of hours of sunlight it receives. Most vegetables need a full six to eight hours of sunlight to produce well. However, the following vegetable plants and herbs will tolerate fewer hours of direct sunlight, thriving even if they only receive four to six hours:
Broccoli
Cabbage
Calendula
Chard
Cilantro
Dill
Greens
Lettuce
Mint
Of course, the more sun a plant receives, the more water it is likely to need. And water is another area where conservation on the backyard farm can really make a big impact. Everything that I’ve talked about so far can impact how you water your garden. Of course, my focus is on making it easy, while not wasting water unnecessarily.
It is best to water deeply and thoroughly, so the water soaks completely into the soil and encourages the plant’s roots to grow deep into the ground. Loose, friable soil makes it easy for plants to grow strong, deep root systems like this. Creating healthy soil with plenty of compost and organic material worked into the garden soil will also help conserve water because those organic particles act as little sponges, holding the water in the soil where the plants can access it when it’s needed.
I stressed out about watering the garden when I first started until my father-in-law, with all his country wisdom, set me straight. “It’s easy,” he said. “Just water the garden when it needs to be watered.” He taught me how to tell when it was time to water by scratching into the dirt in the garden a little bit and if the soil was not moist just below the surface, it was time to water again.
Now most vegetables can tolerate a little bit of watering irregularity but they all taste better and grow better without that added stress. Keeping plants evenly moist will help them grow more successfully and can, as in the case of tomatoes, make the produce healthier. I like to achieve this the lazy way by using a soaker hose and a thick layer of mulch. In the spring after I’ve planted the bulk of my long-term seedlings I lay a soaker hose through the garden bed. When the soil has warmed up, I add a thick layer of mulch as well (adding mulch too soon can insulate cold soil and keep the ground cooler, longer) to prevent evaporation from wind and sun exposure.
By using these two techniques in tandem I can use the smallest amount of water possible, applied directly to the plants that need it, and make that water last as long as possible. Granted, last summer with triple-digit heat for three months in a row, we were still watering every day, but we used thick layers of mulch to help prevent drought stress and keep many of our vegetables going throughout the entire summer. Don’t forget that watering in the hottest part of the day will waste more water than watering in the evening or early morning. We often set our timer to water between 3 A.M. and 4 A.M. so the plants will be fully watered before the sun rises.
You’ve noticed that so much of my focus so far has been about the land. The soil is the foundation of your entire farm. It is important to create a system of balance where we provide for the land and the land provides for us. There are two more ways of keeping the land healthy I want to touch on that will help improve the long-term viability of your small-scale farm.
Mulching your garden is almost like composting right in the garden bed—if you use plant-based mulches, of course, which I usually do. There are so many benefits to mulching your garden that it’s almost insane to not place a good mulch cover on at the end of spring. Here are some reasons to mulch a garden:
![]() Mulch helps prevent water loss. Much of the water lost in the garden is lost through evaporation from wind and sun. A thick layer of mulch helps prevent that by providing an insulating layer.
Mulch helps prevent water loss. Much of the water lost in the garden is lost through evaporation from wind and sun. A thick layer of mulch helps prevent that by providing an insulating layer.
![]() A generous layer of mulch is excellent weed prevention because it limits the amount of sunlight that reaches the weed seeds. Weeds that do sprout are easier to pull out.
A generous layer of mulch is excellent weed prevention because it limits the amount of sunlight that reaches the weed seeds. Weeds that do sprout are easier to pull out.
![]() Plant-based mulches can feed the soil over time as they break down. While the mulch doesn’t get mixed into the soil like compost does, there is a small benefit for your plants.
Plant-based mulches can feed the soil over time as they break down. While the mulch doesn’t get mixed into the soil like compost does, there is a small benefit for your plants.
![]() Mulch helps moderate soil temperature so that your plants are cooler in the heat of summer, and given some protection from frost in the late fall.
Mulch helps moderate soil temperature so that your plants are cooler in the heat of summer, and given some protection from frost in the late fall.
![]() A mulched garden usually looks more attractive than an unmulched garden, especially with plant-based mulches.
A mulched garden usually looks more attractive than an unmulched garden, especially with plant-based mulches.
Now, before we discuss a few of the many items you can use as a mulch, there are a few things that you should not do with mulch. Laying a thick layer of mulch over a cold ground in the early spring can actually prevent the soil from warming up, so wait until the ground warms up a little bit before laying down your mulch. The exception to that would be black plastic mulch, which can help heat up the ground.
Applying mulch directly onto the stem of the plant, or trunk of the tree, can encourage the buildup of moisture and invite diseases. To avoid this, just pile up the mulch under the leaves of the plant so it isn’t touching the stem of the plant.
There are so many materials, even if you only limit yourself to plant-based and biodegradable materials, which can be used as mulches. And each has pros and cons.
Straw or hay. This is what I like to use because I have access to a free source. Hay can bring in weed seeds, but I’ve found that laying down at least 4 inches of mulch (and planting our vegetables closer together) can help prevent most of the seeds from germinating. Hay allows air and water to easily reach the soil and is easy to rake out of the way when needed. We use hay that isn’t suitable for feeding and is either peeled off the outside of the round bale, or has been discarded at the bottom of the feeder after being picked over by the goats.
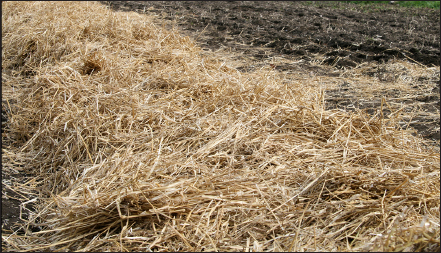
Straw makes an excellent organic mulch option. Make sure the source of your hay or straw hasn’t been treated with pesticides.
(Photo courtesy of Tim Sackton)
Wood chips or bark chips. Wood chips, or bark, is a very attractive mulch and lasts a long time in the garden. If you like to till your garden each year, you might not want bark chips because they will often last longer than a single year. Some types of bark, like pine, can slightly change the pH of the soil. I’ve also read warnings that a deep layer of bark mulch can encourage rodents, but with our barn cat and our dogs, that hasn’t been a problem I’ve ever experienced.
Grass cuttings. Grass cuttings are readily available to most households (just put a bag on your lawn mower and collect them!). However, grass clippings can’t be applied thick enough to suppress weeds without forming a wet, slimy mass, and they can also introduce weed seeds into the garden. On the plus side, grass cuttings biodegrade quickly and provide nitrogen to the garden when they do.
Chopped-up leaves. Another easy-to-find mulch, leaves work well to suppress weeds. Again, some types of leaves, like oak, can lower the pH in the garden soil. If you don’t chop the leaves up they can form a mat, similar to grass clippings, so run them over with the lawn mower before applying to the garden.

Leaves from the fall can become an excellent garden mulch. It is recommended to chop them up before laying down in the garden.
(Photo courtesy of Brannan Sirratt)
Pine needles. For some people, pine needles are free for the taking, and look attractive in an informal way. Pine needles, like oak, are a little acidic. I like to add them around my camellia bush and use them as mulch around other acidic-loving plants, like blueberries and hydrangeas. They do a good job of preventing weeds while allowing air and water to reach the soil.
Cocoa shell hulls or buckwheat hulls. I have never used this mulch, or seen it used in this area, because it is costly to purchase. It seems wasteful to buy what is otherwise available so inexpensively from other sources. Cocoa shell hulls are very attractive, though, and long-lasting because they don’t break down as fast as mulches like hay or chopped leaves. Buckwheat hulls are considered very attractive and preserve moisture well, but if allowed to dry completely, the mulch can blow away in high-wind areas.
Black plastic. This material is often used by commercial growers because it heats the soil quickly, blocks weeds, and lasts a long time. But for organic farmers, black plastic can cause a dilemma. If you are trying to minimize your impact on the environment, do you really want to use a mulch that will end up in a landfill instead of feeding the soil underneath it? Besides that, the one time we tried plastic we had to stake it down when the strong Oklahoma wind blew it around, and then weeds grew through the holes, defeating the purpose.
Using cover crops, sometimes called green mulches, is another way to keep your land in good health. This concept of letting the land lay fallow, or not producing a crop that is harvested but rather planting it with a cover crop, is something that is mentioned as far back as the early books of the Bible! In between planting vegetables, you can rotate in a leguminous cover crop like clover, cowpea, lentils, or hairy vetch.
There are a few things to keep in mind when planting cover crops:
![]() Time the planting of your cover crops with the season. Winter crops like oats and winter peas (often planted in a pair) or hairy vetch can be started in the late fall and allowed to work through the winter.
Time the planting of your cover crops with the season. Winter crops like oats and winter peas (often planted in a pair) or hairy vetch can be started in the late fall and allowed to work through the winter.
![]() When it’s time to replant with something else, you’ll need to mow or cut down the cover crop. Sometimes that’s just pulling out the cover crop and throwing it in the compost bin, or running a cutting hoe underneath the ground an inch to separate the plant from the root. (For us that means turning the chickens loose to work through that specific bed, where they do a perfect job ripping up the ground, tilling things over, and preparing the bed for replanting.)
When it’s time to replant with something else, you’ll need to mow or cut down the cover crop. Sometimes that’s just pulling out the cover crop and throwing it in the compost bin, or running a cutting hoe underneath the ground an inch to separate the plant from the root. (For us that means turning the chickens loose to work through that specific bed, where they do a perfect job ripping up the ground, tilling things over, and preparing the bed for replanting.)
![]() Many cover crops will become pests in the garden if you let them set and scatter seed before you remove them. This tendency is lessened when you use chickens to till them up because chickens will eat many of the seeds.
Many cover crops will become pests in the garden if you let them set and scatter seed before you remove them. This tendency is lessened when you use chickens to till them up because chickens will eat many of the seeds.
The main thing about cover crops is to choose something well-suited to your specific area (check with your county extension office for personalized tips) to keep your soil from being bare in between plantings. Bare soil becomes hard-packed, suffers nutrient loss, loses top soil, and doesn’t provide anything of value to the backyard farm. Using a cover crop in between plantings helps keep your garden areas producing at the highest levels.
