[I]N CASE OF HEAVY RAIN I PROPOSED TO MAKE MYSELF A LITTLE TENT, OR TENTLET, WITH MY WATERPROOF COAT, THREE STONES, AND A BENT BRANCH.
—Travels with a Donkey, Robert Louis Stevenson
Silence. A ragged edge of pine trees, black against a starry sky. Beyond, the white slash of a snowy slope on the distant mountainside. A cocooned figure stirs, stretches. A head emerges from the warm depths, looks around in wonderment, then slumps back to sleep. Hours pass. The stars move. An animal cry, lonely and wild, slices through the quiet. A faint line of red light appears in the east as the sky lightens and a faint breeze ripples the grasses. The figure moves again and sits up, still huddled in the sleeping bag, then pulls on a shirt. A hand reaches out, and the faint crack of a match being struck rings around the clearing. A light flares, then a soft roar breaks the stillness and a pan is placed on the stove’s blue flame. The figure draws back into its shelter, waiting for the first hot drink and watching the dawn as the stars slowly fade and the strengthening sun turns the black shadows into rocks and, farther away, cliffs, every detail sharp and bright in the growing light. The trees turn green again as warm shafts of golden sunlight illuminate the silent figure. Another day in the wilderness has begun.
Nights and dawns like that—and ones when the wind rattles the tent and the rain pounds down—distinguish backpacking from day walking and touring from hut to hut, hostel to hostel, or hotel to hotel. On all my walks I seek those moments when I feel part of the world around me, when I merge with the trees and hills. Such times come most often and last longest when I spend several days and nights living in the wilderness.
We need shelter from cold, wind, rain, insects, and sometimes sun. It’s a necessary evil. I use a shelter only when I have to, which admittedly is much of the time. But if I can sleep outside reasonably comfortably with no barrier between me and the world except a sleeping bag, I do.
The kind of shelter you need depends on the terrain, the time of year, and how spartan you’re prepared to be. Some people like to sleep in a tent every night; others use one only in the worst conditions. Polar explorer Robert Peary never used a tent or a sleeping bag but slept outside in his furs, curled up beside his sled. Most mortals require a little more shelter than that. In ascending order of protection, shelters include bivouac bags, tarps, tents, and huts and lean-tos, with snow shelters as a snow country option.
Sleeping out under the stars, known as bivouacking, is the ideal way to spend a night in the wilderness. The last things you see before you fall asleep are the stars and the dark edges of trees and hills. At dawn you wake to the rising sun and watch color and movement return to the world. These most magical times of day are lost to those inside a tent.
Of course, since the weather can be unkind and is often changeable, instead of sunlight you may wake up to cold raindrops on your face. The simplest way to cope with weather changes is to use a waterproof bivouac bag, also called a bivy bag or a sleeping bag cover. This is a waterproof “envelope” you can slip your sleeping bag into when the weather turns wet or windy. More sophisticated (and usually heavier) designs have short poles or stiffened sections at the head to keep the bag fabric off your face. (Bags with poles at each end are really minitents, so I’ll explore them later, in the Tents section.)

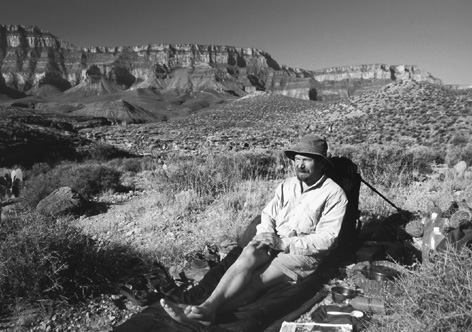
In dry places like the Grand Canyon, a shelter may not be needed.
A chilly morning in the Sonora Desert, Arizona Trail, Tortilla Mountains, Arizona.
Bivy bags made from nonbreathable fabric are now rare. Sleep in one of these and you’ll get damp pretty quickly. Waterproof-breathable fabrics are much better, though some condensation is still possible in humid conditions. Gore-Tex is the standard fabric, though there are proprietary ones like Bibler’s ToddTex and Integral Designs’ Tegraltex as well as coated fabrics like Triplepoint (used by Exped). The extremely breathable eVENT fabric, which seems ideal for bivy bags (see pages 153–54) is starting to appear. Exped makes a 25-ounce eVENT bag. Highly breathable but not fully waterproof fabrics like Nextec’s EPIC are also used. These are less prone to condensation than waterproof fabrics and will keep off dew and light rain but not heavy rain. Most bivy bags have non-breathable, coated undersides. The idea is that your sleeping pad goes inside the bag and on top of the base, so there’s no point in making the bottom breathable. Some bags have straps inside to hold your pad in place. I prefer bags made wholly from waterproof-breathable fabric, however, since I like to put my pad under the bivy bag so the bag can move with me. I don’t want a nonbreathable layer above me, which can happen if I turn over with the bag while asleep or if I deliberately turn it over to put the leak-prone zipper under me, which is the best way to stay dry when it rains. Placing the pad under the bivy bag also protects the bag against abrasion and sharp stones and thorns. A bivy bag needs to be roomy enough to allow your sleeping bag to expand fully. If it compresses the sleeping bag, you’re likely to feel cold and uncomfortable. If the bag is too big, however, pockets of cold air can form where it doesn’t touch the sleeping bag, which is likely to lead to more condensation. All bags have hoods of some sort, closed with a zipper or drawcord and often backed by no-see-um netting—essential in bug season. The bigger bivy bags can hold some of your gear such as clothing. Weight depends on the fabric and the design but generally runs from 8 to 32 ounces.
Straight-across zippers or entrances closed by drawcords are adequate for occasional use and bags that will mostly be used as sleeping bag covers in shelters. More complex entrances with vertical, diagonal, or curved zippers that make getting in and out easier and allow you to sit up with the bag partly undone are worth considering only if you intend to bivouac regularly, since these features add weight and cost. Many models have bug netting behind the zippers so you don’t have to close the bag fully against biting insects. Hooped bivies keep the fabric off your face, but I find them claustrophobic because there’s so little room. I spent a night in one once, and that was enough. I prefer simple bags, which I close fully only in heavy rain, so my face is out in the air most of the time. If you need more space, a good nonclaustrophobic option is to combine a small tarp with a bivy bag. This isn’t as stable as a bivy bag with integral poles, but the setup can allow you room to cook under cover and doesn’t shut you into a tiny, dark space. Some people use a bivy bag under a full-sized tarp to protect their sleeping bags against any rain that might blow in.
Bivouac bags are light and convenient for places where pitching a tent might be difficult, such as in the lee of a boulder or under a spreading tree. However, while a good bivy bag will keep out rain and wind, you have to cook outside whatever the weather or the biting insects. Unless the night is calm, dry, and insect-free, I prefer to sleep in a tent or under a tarp and cook, eat, read, write, and contemplate the world in comfort. This doesn’t mean I never carry or use a bivy bag; there are situations, even when tent camping, when one comes in handy.
My first bivy bag was a 19-ounce Gore-Tex model with a horizontal zippered entrance covered by a flap. It once kept me and my down sleeping bag dry during several hours of heavy rain. That was many, many years ago, and that bag long ago started to leak. Because I don’t carry a bivy bag much anymore—I just sleep out in my sleeping bag and move into a shelter if the weather changes—I replaced it with a lighter-weight waterproof-breathable coated Pertex nylon bag, the Rab Survival Zone, which weighs just 8.5 ounces (though the current catalog weight is 12 ounces). The fabric is very thin and probably not that durable, but since I mostly carry it in winter as an emergency item and have slept in it on maybe a dozen occasions in eight years, it’ll last me a long while. I’ve also tried bags made from Tegraltex, ToddTex, and Sympatex. They all work much the same.
Even on calm, dry nights, condensation can be a problem with bivy bags. I once tested a bivy bag high on a bare mountainside on a clear and starry summer night. There was just a slight breeze, which I avoided by sleeping in a small hollow. By dawn, a thick, damp mist covered the ground. The outside of my bivy bag was wet, and there was a lot of condensation inside and on the outside of my sleeping bag. Turning the bivy bag inside out and draping it over a boulder along with the sleeping bag soon cleared the moisture as the mist faded and the sun rose. On colder nights I’ve awakened to find a layer of ice inside the bivy bag. Even if it doesn’t seem damp, it’s advisable to air your sleeping bag as soon as possible after a night in a bivy bag to get rid of any moisture it may have absorbed. Condensation is a reason for using bivy bags only on short trips or in mostly fine weather. It’s hard to keep your sleeping bag dry if the weather is damp for several days.
In winter I usually carry a bivy bag as a backup shelter and sometimes use it inside my tent or a snow shelter for extra warmth and to protect against dripping condensation. A bivy bag adds several degrees to the range of a sleeping bag.
Outdoor Research, Bibler, Exped, and Integral Designs all offer a range of bags in waterproof-breathable fabrics. I especially like the look of the Bibler Winter Bivy, made of EPIC and weighing just 9 ounces. Although not fully waterproof, this would be fine for use in tents and snow shelters and outside for dew and drizzle. Oware also makes an EPIC bivy bag, which has a silnylon base and weighs 10.5 ounces without bug netting and 12 ounces with it. Oware makes Gore-Tex bivy bags too, and there are many design options so you can customize your bag.
The most interesting bivy bag I’ve come across is the Hilleberg Bivanorak. This 18-ounce bag is made from waterproof-breathable coated ripstop nylon and has sleeves and a hood so you can keep your arms and head protected when you sit up in it. There’s a drawcord at the foot too, so you can open it up, stick your legs out, and wear it as a rain jacket. The Bivanorak is very roomy and will fit over a medium-size pack. The material does flap a little and breathability isn’t that good when walking. I wouldn’t want to walk far in it, but as an emergency item it’s excellent. I have used it at rest stops in stormy weather and enjoyed the extra protection. As a bivy bag it’s very roomy, easily big enough for a full-length mat and a bulky sleeping bag. However the fabric is quite thin and it’s awkward to sit up with a mat inside, which negates one of the advantages of the design, so I prefer to keep the mat outside. I haven’t used it in prolonged or heavy rain but the drawcord closures at the cuffs and foot and the hood opening mean it can’t be 100 percent waterproof, though I wouldn’t expect much leakage. The hood and sleeves can be tucked under the bag but the foot will always be exposed to the weather.
Carrying an emergency shelter on day hikes and side trips away from camp is a good idea, especially in winter or when you’re going above timberline. An expensive waterproof-breathable bivy bag is unnecessary for this purpose, however, as well as a little heavy. Nonbreathable plastic and foil bags, sometimes called survival bags, are fine for emergency use. They’re inexpensive and take up little room in the pack. The comfort isn’t great—I once slept out in a plastic bivy bag and got extremely damp—but if you ever need one, you’ll be grateful. For emergency shelter in summer I usually carry an MPI Space Brand Emergency Bag, made from polyester foil with an aluminum reflective surface. It weighs 2.5 ounces and measures 3 by 7 feet when unfolded. This is a very thin bag that will keep off the wind and rain but won’t provide much warmth by itself. The MPI Extreme Pro-Tech Bag has a sealed corrugated pattern of the same fabric that traps air and is meant to be much warmer. There are elastic fibers in the construction that allow the bag to hug the body, cutting out dead air space. It weighs 12 ounces. An alternative is a plastic survival bag like one from Coghlan’s that weighs 9 ounces. I’ve often carried one of these on day hikes.
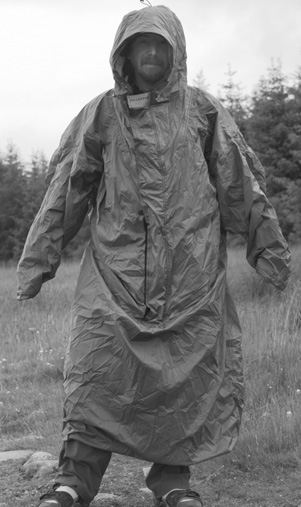
The Hilleberg Bivanorak, a bivy bag that becomes a rain jacket.
Tarps almost disappeared as backcountry shelters during the last third of the twentieth century as hikers turned to the seductive attractions of curving flexible poles and smooth, taut nylon tents. In the previous edition I wrote that “constructing your own shelter from sheets of plastic or nylon and cord is something hardly any backpacker does these days.” Since then there’s been a big and somewhat astonishing resurgence in the popularity of tarps because of both the ultralight revolution and the use of trekking poles, which make good tarp supports, although most backpackers still use tents.
First, though, a definition. A tarp is a sheet of fabric that can be suspended from poles or trees to make a shelter. Once you add doors it becomes a tent, or at least a fly sheet. Such designs will be considered below under Tents. Here I’m talking about basic tarps only.
I first used a tarp as a cooking shelter in areas where the presence of bears made eating and cooking in or near my tent unwise and where the likelihood of rain meant that eating and cooking outside could be unpleasant. On long walks in both the Canadian Rockies and the Yukon, I carried an 8-by-9-foot silicone-coated ripstop nylon tarp, with grommets for attaching guylines along each side, to use as a kitchen shelter. On the many occasions when I made camp in cold, wet, windy weather, the protection it provided while I cooked and ate was welcome and certainly justified its 16 ounces of weight. I usually pitched it as a lean-to, slung between two trees on a length of cord. Occasionally I made more complex structures, using my staff plus fallen branches as makeshift poles. At sites with a picnic table, I found I could string the tarp above the table and create a sheltered sitting and eating area.
However, I’d never used a tarp in place of a tent on a long walk until I hiked the Arizona Trail in 2000, when the almost certain prospect of dry weather made a tent unnecessary. Since then I’ve used a tarp frequently, including on a 500-mile hike in the High Sierra, and it’s become my favorite shelter. I now reserve tents for dependably wet, windy, or buggy places.
Another use for a tarp is as an awning for your tent, which provides a large undercover cooking, storage, and drying area that also lets you leave your tent door open in rain with no danger of leakage. I drape the tarp over the tent door, peg out the sides, then use a trekking pole or poles to support the front.
The advantages of tarps are low cost, low weight, space, views, adaptability, good ventilation, and an element of creativity in how you pitch them. Cooking under a tarp is easy because there’s no sewn-in groundsheet and you can raise a corner or side for safety. With each side raised high, you have a 360-degree view yet are still protected from precipitation. With a tent you’re either inside it or outside.
The disadvantages are that tarps can be difficult to erect in storms, need careful pitching to keep out wind-driven rain, and—worst of all in my view—don’t keep out bugs. Condensation can occur, but it’s never the problem it can be in a tent: a breeze usually prevents it. If there’s no wind, then you can pitch the tarp to allow plenty of ventilation.
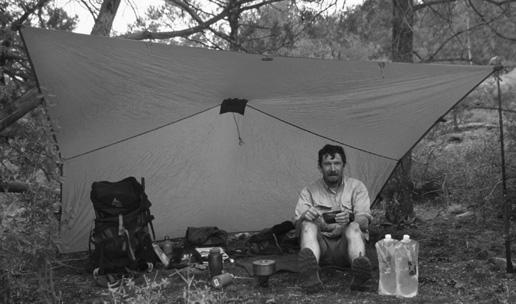
Tarp pitched as a lean-to.
Lightweight tarps, weighing 5 to 32 ounces, used to be hard to find but are now widely available. Companies like GoLite, Hilleberg, Bozeman Mountain Works, Integral Designs, MSR, Equinox, Campmor, Crazy Creek, and Oware offer a wide selection, as do some of the small specialist companies that have sprung up as part of the ultralight hiking movement, such as Lynne Whelden Gear, Dancing Light Gear, and Moon-bow Gear. Most tarps are made from silicone-coated nylon (see Tents below for fabric details), some from standard polyurethane-coated nylon. Sheets of plastic from building and hardware stores can be used as tarps, but they’re not very strong and can tear. Plastic is inexpensive, and some people leave torn sheets of it in the wilderness. I know; I’ve packed a few of them out. Disposable equipment isn’t environmentally friendly whether you pack it out or not, so overall I think it’s best not to use plastic for shelters.
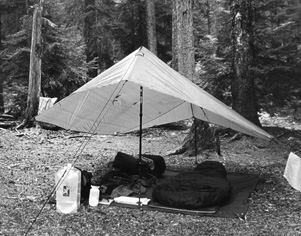
Tarp pitched high off the ground for good headroom and ventilation. GoLite Cave.
Most tarps are flat sheets, though some have graceful shapes with curved sides—the MSR Moss HeptaWing (25 ounces) has seven sides; the Dana Design Hat tarp (24 ounces) has six and can also be zipped up to make a two-person bivy bag. The shaped tarps may be more wind-resistant, but they’re also heavier and more costly. Sizes vary enormously. For solo use, 5 feet by 8 feet is probably the smallest feasible size. I tried the 7-ounce 5-by-8-foot Integral Designs Siltarp and found it just big enough to protect me if I pitched it carefully. I prefer more space, however, and the tarp I use most measures 7 feet by 11 feet, big enough for two and roomy for me and my gear. It’s a silicone-nylon GoLite Cave 1, a Ray Jardine design. It weighs 14 ounces; stakes add another 4 to 6 ounces. The Cave has a small awning at each end, known as a “beak,” that gives greater protection against rain than open ends. The beaks can be pitched down to the ground to seal off the ends in severe storms. There are plenty of stake points and guylines, including some on the sides that can be tied to poles to create more interior space and prevent sagging. The larger Cave 2—8 feet, 9 inches by 11 feet, 7 inches and 18 ounces—sleeps two or three. There are two GoLite tarps with a beak at one end only: the Lair 1 (8 feet by 8 feet, 8 inches, 12 ounces) and Lair 2 (8 feet by 11 feet, 4 inches, 16 ounces).
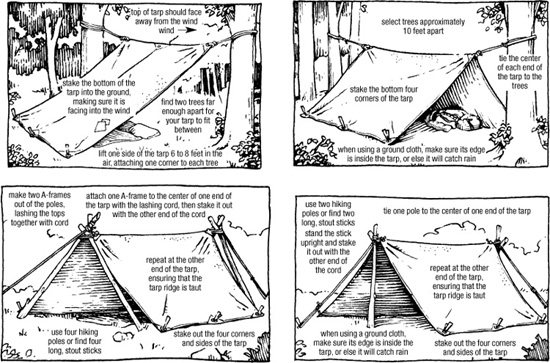
Clockwise from top left: A lean-to tarp; an open-ended ridge using trees; an open-ended ridge using two sticks or poles; and an open-ended ridge using four sticks or poles.
I don’t use a tarp in bug season because I haven’t yet found any netting that I’m happy with. I want to be able to sit up and move around under a tarp, not feel trapped in a mesh enclosure. Once a tarp gives less space and freedom than a tent, I’d rather have a tent. If bugs are out only when you’re sleeping, you could just drape a piece of no-see-um material over your head or the hood of your sleeping bag. That doesn’t solve the problem of bugs in the evening and morning, however. GoLite has a new bug tent that could be the answer. It comes in two sizes, the solo Lair 1 Nest with a front height of 33 inches (21 ounces) and the two-person Lair 2 Nest with a front height of 45 inches (25 ounces), and will fit inside the Lair and Cave tarps. The Nests have zipped doors and polyurethane-coated nylon floors and look far better than the original Nest, which didn’t have a zipped door; you had to crawl in under a flap, an awkward maneuver that brought in insects too.
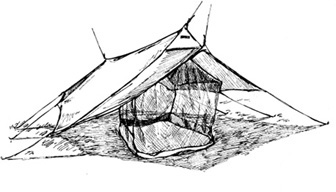
Tarp with bug-netting inner. GoLite Cave and Nest.
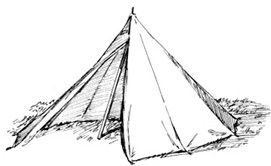
Tarp pitched as a pyramid with a single pole.
Some tarps have mesh panels at the ends and mesh strips around the perimeter. These probably help, but my experience is that when biting insects swarm, you need a totally closed, insect-proof shelter to keep them out. When the bugs are bad, I like a down-to-the-ground fly sheet with a zippered door and a vestibule where I can burn a mosquito coil or insect-repellent candle and an inner tent with mesh doors.
Tarps can be pitched in so many ways that the best advice is to experiment and practice—you don’t want to be trying to figure out how to erect a stormproof shelter in the rain at the end of a long day’s hike. Try different shapes and profiles. If you have a trekking pole or poles, these can be used as supports. You can easily lower the profile of the tarp if the weather becomes stormy by shortening the poles and then restaking the tarp from inside. You can also fit poles inside a tarp and pull the fabric over the handles without danger of damaging the tarp, as can happen with a stick. Having supports inside adds to wind resistance and stability. If you don’t have poles, you’ll need to find a stout stick or two or else tie the tarp to trees, which means camping only below timberline. You could carry tent poles, but this adds weight. You need enough stakes to hold the tarp down plus some cord for guylines unless your tarp comes with guylines attached. Most tarps have grommets or loops for attaching guylines. If yours doesn’t or you want extra stake points, you can wrap a smooth stone in the fabric and tie a loop of cord around the neck between the stone and the rest of the tarp. I’ve always found this method satisfactory, but there’s a device called the Grip Clip, from Shelter Systems, that does the same job with perhaps less likelihood of tearing the fabric. Grip Clips come in various sizes; the smallest 0.08-ounce Micro and the 0.2-ounce Light Fabric clips are recommended for lightweight tarps. For silicone nylon, Shelter Systems recommends fitting pieces of a balloon as gaskets because the fabric is so slippery. To use Grip Clips, you push the two open-centered halves together with the tarp fabric between them. The pieces snap together and cannot come undone. Guylines can be attached to the clips, and they come with 11 inches of cord attached.

Tarp pitched as a low-profile ridge with a storm approaching. GoLite Cave.

Tarp pitched as a pyramid with a trekking pole. A second pole is being used to hold the front of the tarp open.
The most common tarp shapes are the lean-to, the ridge, and the pyramid. For the first, tie the corners at each end of a long side of the tarp to trees or poles, several feet above the ground. If you use poles, they’ll need guying out to keep them from falling over. The other side of the tarp can be staked to the ground or, for better ventilation if there’s no wind, loops of cord can be attached to the stake points and the tarp can be pitched with an air gap between the lower edge and the ground. Lean-tos are roomy and reasonably condensation-free, but they protect you on only one side, and they can flap in the wind.
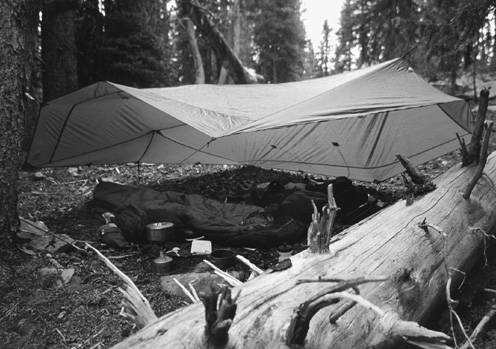
Tarps can be pitched in unusual shapes using trees, both standing and fallen, as supports. GoLite Cave.
Ridges give more protection. An open-ended ridge can be pitched by attaching lines to the centers of the short sides of the tarp and tying them to trees or trekking poles. Again, you’ll need guylines to stake the poles out. If it’s windy, one end of the ridge can be staked down close to the ground, which is most easily done with a tarp with a shaped end like the GoLite beak. This produces a sloping ridge that is more wind and rain resistant than one with both ends at the same height.
For a pyramid, stake out one side, then pull the center of the tarp over the handle of an upright trekking pole and tie it off with a bit of cord before staking out the other two corners with the tarp slack between them to leave space for a door. The center of this loose side can be pulled taut with a guyline or, more effectively, by tying it to a pole. Pyramids are quite wind resistant but are best suited to large tarps. Small tarps may not give you enough room to lie down.
These three basic shapes can be varied according to terrain and available supports. I’ve tied tarps to fallen trees to make unusual shapes and fitted them into awkward spots with one corner at ground level and the one diagonally opposite high in the air. Experiment. That’s one of the joys of tarp camping.
With any shape, a low profile with the edges of the tarp at ground level is the most storm resistant but also the most prone to condensation.
A groundsheet, or ground cloth, is useful when sleeping under the stars or under a tarp, especially if the ground is wet. I also carry a groundsheet if I’m planning on using a snow shelter or wilderness huts or lean-tos, because their floors may be wet and muddy. Unlike many people, I don’t use one under my tent. I find tent groundsheets durable—I have some that have had more than a year’s use and are still waterproof—and I don’t want to carry the extra weight.
Cheap plastic sheets are lightweight but don’t last long, and they can’t be staked out, which is necessary when it’s windy. Nylon groundsheets are much better, especially those that come with grommets or stake points. Tent-footprint ground-sheets, designed to be used under tents, work well and weigh 8 ounces or more, depending on size. Many tent makers offer them. Silicone nylon makes for a very light, strong groundsheet, though it can be a little slippery. I have one that measures 54 inches by 84 inches and weighs 8 ounces. Dancing Light Gear makes a sheet 72 inches long that tapers from 36 to 22 inches and weighs 4.5 ounces. GoLite’s Ultra-Lite measures 42 inches by 90 inches and weighs 5 ounces. The lightest ground cloths come from Gossamer Gear. The Spinnsheet, made from spinnaker ripstop nylon, comes in two sizes: the 27-by-84-inch size weighs 1.7 ounces; the 54-by-84-inch size weighs 3.4 ounces.
Of course, tarps can be used as groundsheets—and vice versa. I once used a groundsheet as a tarp during a thunderstorm in Yellowstone National Park. I didn’t want to cook in my tent because of bears, nor did I want to sit outside in the cold storm. So I slung my groundsheet, carried for when I slept under the stars, between two trees as a lean-to and used my pack as a seat while I cooked, ate, and watched the lightning flashes illuminate the forest and the rain bounce off the sodden earth.
An alternative to coated nylon is polyethylene, which comes in two forms, DuPont’s Tyvek and Space Brand aluminized fabric, and is much more durable than ordinary plastic. Tyvek is used in the construction industry and can be bought in rolls and cut to size (it’s also used for waterproof maps). Tyvek is very light and has become popular with ultralight hikers. Six Moon Designs sells Tyvek in lengths of 3 feet or more (84 inches wide, 1.6 ounces per square yard; 59 inches wide, 1.75 ounces per square yard for aluminized Tyvek). Lynne Whelden Gear sells ready-cut Tyvek groundsheets measuring 42 inches by 90 inches and weighing 5.5 ounces with a foot pocket in the end for your sleeping bag to protect it from rain blowing in at the end of a tarp. I haven’t used Tyvek, but it’s recommended by many experienced long-distance hikers. I have used MPI Outdoors’ Space Brand All Weather Blanket. Current versions are made from a four-ply laminate of clear polyethylene film, aluminum coating, reinforcing fabric, and colored polyethylene film. The blanket measures 60 inches by 84 inches and weighs 10 ounces. One side is silver, the other is blue, red, or olive. With the silver side out, these blankets make good sunshades in the desert. One drawback is that if you fold them for carrying, they tend to crack and then leak at the creases. I now roll mine, and this does seem to prolong the life. I don’t use it much anymore anyway, preferring lighter-weight silicone nylon.
A good tent provides complete protection from the weather and insects and also space to sit, cook, eat, read, make notes, sort gear, play cards, and watch the world outside. A tarp provides more space ounce-for-ounce, of course, but it doesn’t give the same protection against windy weather or, especially, biting insects.
Choosing a tent can be confusing. They come in a wide variety of shapes and sizes, and few stores have the space to display many. There are limited opportunities to see tents pitched and to crawl in and out of them to assess how well they suit your needs. However, a good store should be prepared to erect a tent you’re considering buying so you can have a look at it.
A tent’s primary purpose is to keep out rain and snow. Luckily that’s easy to do. Ideally, a tent should also let out moisture vapor. This is not so easy. Bodies give off a fair amount of vapor, and there may be more from wet clothes, cooking, steaming drinks, wet hair, drips, and spills. Moisture from damp ground and vegetation in the vestibule and around the edges of the fly sheet can also condense on cold, impermeable tent walls. If you brush against those walls, you’ll get damp too. In my experience the standard two-skin (or double-skin or double-wall) tent design with a breathable, nonwaterproof tent (nowadays sometimes called a canopy) and a nonbreathable, waterproof fly sheet or rainfly is the best solution to condensation, but it’s nowhere near perfect. In theory, moisture passes through the inner fabric and is then carried away by the air circulating between the two layers. Any condensation that forms on the fly sheet can run down to the ground, with stray drips repelled by the inner wall. To prevent condensation from reaching the inner tent, the gap between the tent and the fly sheet must be large enough that wind cannot push the two together. And you need to be careful not to press the inner walls against the fly sheet.
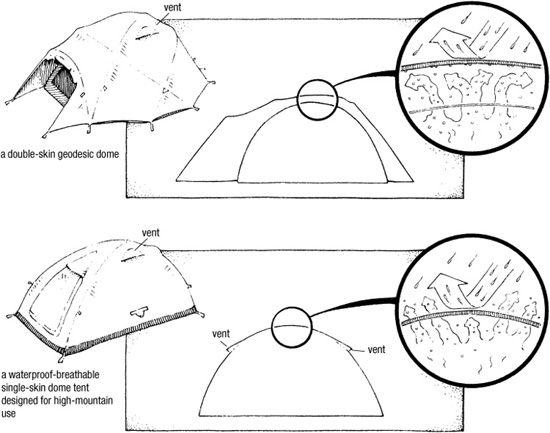
Double-skin and waterproof-breathable single-skin tents.
To some extent the double-layer system works. However, moist air is carried away only if there is a breeze and if it can escape. Since warm air rises and warm air holds more moisture than cold air, a vent high up on the fly sheet can create a chimney effect, drawing cool, dry air in under the bottom edge and expelling warm, damp air through the vent. Vents are more common than they used to be, but many tents still don’t have them.
Two-way fly sheet door zippers are also useful for ventilation. I leave at least the top few inches open unless rain starts coming in through the gap.
Condensation is worst in calm, humid conditions. Then nothing—not even leaving all the doors open—will prevent the fly sheet from becoming very wet. One misty night I was awakened by drips falling from the tarp I was under, which was pitched as a lean-to. In a much more enclosed tent, condensation is unavoidable. I have even left tents empty in calm, humid conditions and found the fly sheets wet with condensation in the morning.
Where bugs are a problem, I’ve sometimes felt my tent turning into a sauna while I cooked inside the vestibule with all the doors shut tight, producing clouds of steam that promptly condensed on the fly sheet. But being warm and damp is preferable to being eaten alive!
Condensation is a more serious problem in freezing temperatures, when the inner tent can become so cold that moisture condenses on it and then drips back on the sleeper below. If temperatures drop even more, the problem may be solved, because the moisture will freeze on the tent. But when you wake in the morning and start to move around creating heat, the ice will melt, and it can seem as though it’s snowing inside the tent. Ventilation is a partial answer to this.
If you camp regularly in damp, humid climates—on the Olympic Peninsula or in the Maine woods, say—it’s worth looking for a tent with plenty of ventilation options, such as hoods over door zippers and covered vents. Tents that have sloping inner doors or large mesh panels without covers are poor designs for humid areas. Condensation can drip through the open door or the mesh panels and onto the groundsheet or your sleeping bag. The best design for keeping condensation out of the tent has solid inner walls, a vertical door, vents at the high point of the fly sheet, and outer doors with two-way zippers. Any mesh panels should have covers.
Polyester and nylon are excellent fabrics for backpacking tents, being strong, light, quick drying, and durable. Canvas, the traditional tent material, is not strong enough to make lightweight tents. Polyester stretches less than nylon when wet and resists ultraviolet light better. (Whatever the fabric, it’s still best not to leave tents up for long in bright sunlight.) However, nylon has a much higher tear strength weight-for-weight.
Inner tents are usually made from nonwater-proof-breathable nylon that absorbs little moisture, dries quickly, and allows moisture vapor through. Most have a light fluorocarbon finish to repel drips of condensation from the fly sheet. Tents designed for warm weather often have large mesh panels for ventilation to keep out insects and provide views of the stars when the fly sheet isn’t in use. However, mesh can let in cold breezes and drips of condensation. Some tents have mesh panels with covers for cool and damp conditions. In my experience, while mesh panels do make a tent cooler, they don’t decrease condensation.
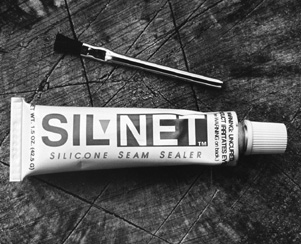
Seam sealant for silnylon.
Fly sheets may be coated with polyurethane or impregnated with silicone. Silicone nylon, often abbreviated to silnylon, is the lightest fabric yet has a much higher tear strength than polyurethane-coated fabrics. It also has the best resistance to ultraviolet light. Silicone encapsulates the fibers completely rather than just lying on the surface, so it can’t wear or peel off, making it very durable and permanently water repellent. Even after years of use, rain still beads up on silnylon, so it dries very quickly. Polyurethane is applied to only one side of a fabric; it’s put on the inside of the fly sheet to protect the coating from wear. Once the original durable water-repellent treatment (DWR) wears off, the outside can absorb moisture, making it heavy and slow to dry. Some fly sheets are coated inside and out with silicone, while others have silicone on the outside but polyurethane on the inside so the seams can be taped.
Weights for tough inner and outer nylons are about 1 to 2 ounces per square yard (usually stated in the form 1.5-ounce nylon); the lighter ones need slightly more care than the heavier materials. Deniers (see page 117) range from 30 to 75. To prevent leaks, fly sheet seams may need sealing with a seam sealant like SeamGrip unless they come with taped seams. Neither tapes nor standard sealant will stick to silnylon. You’ll need McNett’s special silicone sealant, SilNet. That said, I’ve been using silnylon tents and tarps for well over a decade, including months at a time in wet climates, and I’ve never sealed any seams or had any leaks.
An intriguing alternative to the breathable tent–waterproof fly sheet norm comes from Stephenson’s Warmlite, whose tents have two layers made of coated fabric that are permanently linked. The inner layer also has an aluminized coating on the inside to block radiant heat. There are low and high vents to create a chimney effect. This design minimizes condensation, according to the makers, because the inner tent is warmer than in standard designs. I haven’t tried a Warmlite tent, but it makes theoretical sense and has gotten positive reviews. Friends who have one speak highly of it. For more on Warmlite tents, see page 209.
Some tents now come with plastic windows in the doors or the roof so you can look out without opening the tent—at least in theory. In my experience these mist up with condensation very quickly or else are covered with rain and are actually only useful at those times when opening the door isn’t a problem. These windows used to be found only in budget tents, since they were brittle and cracked easily. Now they are made from flexible and tough materials and are more widespread.
Tents made from waterproof-breathable fabrics are easy to pitch and quite light for their size because they have a single skin. Wind can’t get in under the edge of the fly sheet because there isn’t one, so they can be warmer than two-layer tents. The chief makers of these tents are Bibler and Integral Designs, each using its own proprietary fabrics, ToddTex and Tegraltex, respectively. Gore-Tex tents seem to have mostly disappeared.
Waterproof-breathable tents work well in dry conditions, but they aren’t breathable enough to cope with much moisture vapor in humid conditions, and then condensation is likely; moreover, the condensation can’t escape by running into the ground because there is a sewn-in groundsheet (see sidebar, opposite).
My first true backpacking tent was a single-skin (or single-wall) nonbreathable coated nylon ridge tent. It was lightweight, easy to pitch, waterproof, and low in bulk when packed. However, in wet or humid conditions, to call the condensation copious was an understatement. It ran down the walls and slowly flooded the groundsheet. I replaced that tent with a double-layer model as soon as I could and wasn’t surprised when single-skin tents disappeared shortly afterward. The lightweight revolution has seen them reappear, on the basis that cutting out the inner tent and sewing the groundsheet to the fly sheet saves weight. These modern nonbreathable tents often have vents and door configurations said to reduce condensation. These might help a little, but the inside of a fly sheet in a double-layer tent can be soaked with condensation in humid weather even with vents and doors open and an air gap right around the perimeter, so there’s no way a single-skin tent, without that lower air gap, will have less condensation. I’d be very wary of nonbreathable single-skin tents with sewn-in groundsheets unless I camped only in places with low humidity. And then I would probably just carry a tarp anyway. A brief trial with the single-skin silnylon GoLite Den 2 (3 pounds, 9 ounces) showed that a good design with vents at each end does help, but when there’s no wind much condensation still forms. GoLite says the Den is for “areas with low humidity and/or with ample breezes.” I’d say this applies to all tents of this type, and I’d drop the or.
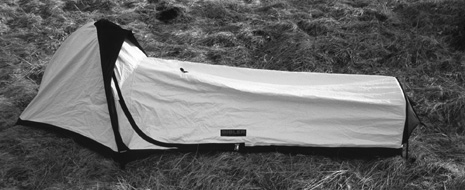
Low-profile, single-skin bivy tent of waterproof-breathable fabric. Bibler Tripod.
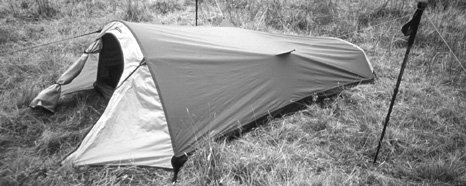
Low-profile single-skin tunnel tent of waterproof-breathable fabric with vestibule and trekking poles used to pull out the sides for more space inside.
Single-skin waterproof-nonbreathable tunnel tent. GoLite Den 2.
There are also single-skin tents without ground sheets, basically just fly sheets. These are still prone to condensation, but it can run into the ground rather than onto the groundsheet, so they’re more practical for conditions where a tent is most needed. Most pyramid tents are floorless single-skin models, as are many of the new ridge designs. The key when using these tents is to avoid touching the walls when they’re damp.
Tent floors are usually made from 2- to 4-ounce polyurethane-coated nylon. Long ago nylon floors didn’t stay waterproof very long and ripped easily, so people usually used a groundsheet under them, a habit that has remained even though the nylons used today are tough enough to make a ground-sheet unnecessary. The tent I used on my Canadian Rockies walk back in 1988 was still waterproof after eighty nights with no protection under it.
The best floors are the “bathtub” type with no ground-level seams. Short sidewalls keep out rain splashes that come under the fly sheet. Tiny punctures are the most likely damage to occur to floors. To prevent further leaks, cover them with spots of sticky nylon tape. Better yet, check the ground for sharp twigs and stones before pitching the tent to minimize the chances of puncturing the floor.
If you do use a groundsheet with your tent, make sure it doesn’t extend beyond the edge of the fly sheet, or rain can collect between it and the tent floor. This can happen even when it’s tucked well under the tent, though it’s much less likely if you fold up the edges of the groundsheet. On the few occasions when I’ve used a groundsheet with a tent, I’ve put it inside the tent.
Most tent poles are made from flexible aluminum, though those on less expensive models may be made from fiberglass. Pyramid tents often come with rigid aluminum poles. I’ve never used a tent with fiberglass poles, but the general view is that they’re not as strong as aluminum. Aluminum comes in different types; DAC Featherlite and Easton 7075 are regarded as the highest quality. The diameter of the tubing also affects the strength. Most backpacking tents have 8.5- to 9.5-millimeter poles. Tents designed for severe high-mountain weather may have thicker poles, such as 11.5 millimeters.
Carbon fiber is stronger, lighter, and more expensive than aluminum. A new pole material is Easton’s Ultralite A/C, carbon fiber bonded to an aluminum core. The poles are 30 percent lighter than standard Easton poles and are used by Sierra Designs. If you want to save a few ounces, you can—for a price—buy carbon-fiber poles for your tent from Fibraplex. These are half the weight of Easton 7075 poles. The pole on my favorite solo tent weighs 5.5 ounces. Since the shock cord linking the sections would weigh the same, I’d save maybe 2 ounces if I changed to carbon fiber. Of course, with a large geodesic dome tent with four or five long poles, the weight saving would be more significant, as would the increased cost.
Some flexible poles come prebent. If they are not prebent, they often develop a curve with use. This is not a problem as long as you don’t try to straighten them, because then they may break. Pole sections are normally linked by shock cord, which makes it easy to put them together and almost impossible to lose sections (though I managed it once after a shock cord snapped).
Poles may run through nylon or mesh sleeves or attach to the tent with clips or shock cord; some have flexible hubs at pole intersections. Pole ends fit into grommets, plastic pole cups, or webbing. Clips theoretically allow better airflow between the inner layer and the fly sheet than sleeves, but I don’t think they make much difference. What’s more important is that poles are marked so you know where each one should go. Many poles come already marked. If not, it’s worth sticking different-colored tape on each one.
Poles are strong when the tent is pitched but vulnerable when lying on the ground—especially long, thin, flexible poles. Take care not to step on them. And don’t use them as handholds when entering and leaving the tent. A companion once broke a flexible pole by putting all his weight on it as he left the tent during a winter gale in a remote mountain area. I had to scramble out of my sleeping bag, throw on some clothes, and repair it before the storm caused any more damage. I fixed it by slipping a short alloy sleeve over the break and binding it in place with duct tape. Such sleeves are supplied with most flexible-pole tents. I always carry one, though that’s the only time I’ve used it.
After I’d been using trekking poles for a few years it occurred to me that carrying tent poles as well was a little superfluous, especially since trekking poles are stronger than most tent poles. However, you can’t pitch a flexible-pole tent with trekking poles. Now, though, tents designed to be used with trekking poles are appearing, which makes good sense. I use mine with tarps and the GoLite Hex 3 pyramid tent.
Every tent must be staked to hold it down in wind. Fifteen to twenty stake points are plenty; more increase the weight you’re carrying and the time it takes to pitch the tent. Many tents need only eight to twelve stakes. Most stakes are made of steel or aluminum (I’ve found plastic too fragile for wilderness use), and they come in a variety of shapes. Thin ones work best in hard ground, wide-angled or curved ones in soft ground. For sand or soft snow, you need really wide snow pegs. I have a set of 12-inch hardened aluminum stakes for snow camping. They weigh 1.8 ounces each and are drilled with holes to save weight and to attach guylines so they can be buried horizontally for maximum holding power. Hilleberg, MSR, and SMC make snow stakes. Hilleberg’s come with a line and a hook for attaching them to guylines or stake points. Much lighter are fabric “stakes” with short lengths of cord attached that you fill with sand or snow and then bury, such as Bibler’s 1-ounce Soft Stakes and Exped’s 0.6-ounce Snow and Sand Anchors. I suspect it would be easy to make your own version of these.

A selection of tent stakes. From left: plastic I-beam for soft ground, C-curve for soft ground, short pin with loop end for hard ground, Y shape for soft ground, long pin with hook end for hard ground, thick pin for hard ground, snow stake for sand and snow.
Outside of snow country, I use 7-inch hardened aluminum pins (0.33 ounce each), which hold in most soils. For softer ground, I carry two or three 6-inch hardened aluminum V-angle stakes (0.5 ounce each). Y-shaped stakes are considered the strongest alloy ones, though I don’t like them because they are harsh on the hands. If you want very strong stakes that weigh very little, you can get titanium stakes, both pins and angles—at a price—from Stanley Alpine, Snow Peak, Vargo Outdoors, Bozeman Mountain Works (which paints them bright orange), and Simon Metals. Titanium pins are very thin and apparently can be driven into hard, rocky soil without bending or breaking. However, reports suggest that the thinness means they pull out of anything less hard too easily. Although I occasionally bend stakes, I’ve never felt the need for stronger ones. If you regularly camp on rocky ground or hardened tent platforms, titanium stakes might be worth using. In hard ground stakes can be tapped in with a small rock or pushed gently with the sole of your boot. Don’t hit them too hard though, or they might bend or break. If stakes are hard to pull out by hand, use another stake by hooking it into the end of the stuck stake and using it as a lever.
Stakes are easy to misplace, so I carry a couple of extras. However, on many occasions I’ve finished a hike with more stakes than I started with, finding ones others had lost. I keep stakes in the small nylon stuff sack supplied with most tents and carry them in a pack pocket so they’re easy to find when I pitch the tent.
Depending on the design, tents need anything from two to a dozen or more guylines to keep them taut and stable in a wind, though more than ten is too many for one- and two-person tents. Most tents come supplied with a full set of guys, but some have only the main ones plus attachment points for others. It pays to attach these extra guylines before they’re needed or at least carry some cord with you. I’d rather have plenty of guylines and leave them tied back when it’s calm than not have enough.
To avoid confusion and to help when sorting out tangles, different-colored guylines are useful, especially when several are attached to the tent at the same point. If the guylines are tied back in loops when you pack your tent, they’re less likely to tangle. I always try to do this, though when packing in a hurry during a storm, I often forget and end up cursing myself the next night as my numb fingers undo knots. Metal locking or plastic friction adjusters come with most guylines, but you can also buy them separately. It’s useful to know how to tie the tautline hitch (see illustration) in case you need extra guylines and have no extra mechanical sliders. This knot will slide up and down the guyline when the line is slack but lock when it’s tightened. Nylon stretches when wet, so guylines should be staked out tightly. If it’s wet and windy, I generally retighten them before going to sleep.
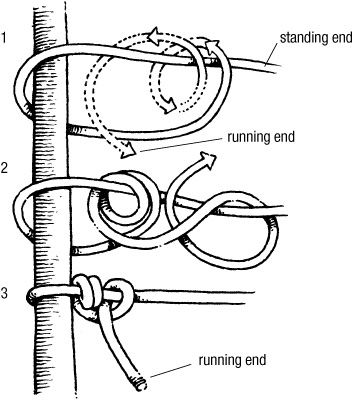
Tautline hitch. Wrap the rope around an object to create a loop. Feed the running end of the rope over the standing end and through the loop at least twice (1). Bring the running end out of the loop and over the standing end. Secure the running end as shown (2). Tighten the wraps so they lie flat and close together (3).
The weight of a tent depends on its size and the materials it’s made from. Tents come in a wide range of sizes—from tiny bivy tents barely big enough for one person to monsters that will accommodate half a dozen Himalayan mountaineers and all their gear. At a minimum, you need enough space to lie down and stretch out without pushing against the walls or either end. This is all the space the smallest tents have. There’s no room to sit out a storm in comfort (for which you need enough headroom to sit up), nor space to lay out gear inside, nor a vestibule big enough for safe cooking. They are light, though. Most of these tiny tents are designed for one occupant. The amount of space two people need depends on how cramped they’re prepared to be and how friendly they are. Many tents described in catalogs as sleeping two assume very close friendships!
Most tent makers give the floor areas of their tents, as do some retailers, and they all give length and width so you can compare sizes. As a rough guide, I’d look for at least 30 square feet of floor area in a three-season tent for two (excluding the vestibule), and 35 square feet or more in a winter tent. For solo use, 18 to 20 square feet is enough. The width for two should be at least 54 inches at the widest point; for one, 36 inches will suffice. Length should be at least 7 to 8 feet. Backpackers over 6 feet tall need to consider the length of a tent carefully; in many tents, they’ll find their feet pushing against the end.
In mostly dry areas where storms are unlikely and you just want a bedroom to keep out bugs or the occasional shower, the smallest, lightest tents may be fine. In wet areas or in winter, you need more room because you’re likely to spend more time in your tent and in winter you’ll have bulkier sleeping bags and clothing.
Being able to sit up in a tent makes a huge difference to how spacious it feels. I don’t like tents, however lightweight, that don’t let me sit up, because they make me feel uncomfortably confined. The key factor here is the distance between the floor and the top of your head when you’re sitting cross-legged. If you measure that, you can determine from catalogs which tents will be roomy and which will give you a crick in the neck. I always look for a tent with at least 35 inches maximum inner height.
The size of vestibule you need depends on whether you intend to cook and store gear in it. For cooking, a vestibule must be high enough and wide enough to prevent the fabric from catching fire or melting. Tents for two sometimes have double vestibules, and although they’re heavier, they make tent living much easier. For areas where you usually live outside and use the tent only for sleeping, vestibules don’t need to be large. Indeed, it doesn’t matter if there isn’t one at all.
I like vestibules with large zippered door flaps that can be rolled out of the way. It’s not quite the same as bivouacking, but having a wide-ranging view is far better than being encased in a nylon cocoon. I close the doors only if forced by the weather or bugs.
Many tents weigh more than they need to, as designers add excess features and “improvements.” It’s easy to be impressed by fancy designs. I know; I’ve done it. I started out using solo tents in the 4- to 4.5-pound range (weights include stakes and stuff sacks—the actual weight when carried), but a decade later my tents weighed 5 to 6 pounds. Wanting to cut that weight, I decided on 4.5 pounds as the maximum I would carry in the future. With the latest materials, that has come down to 4 pounds. Except when I’m testing heavier tents for review, I’ve stuck to that rule. Keeping the weight down when you share a tent is easier. I’ve used a 5.5-pound tent for snow camping with two and not felt cramped, and there are plenty in the 5- to 8-pound range that provide ample room.
Tent makers usually list two weights for tents. The minimum weight covers just the tent, fly sheet, and poles. The packed weight includes stakes, stuff sacks, spare parts, and instructions. The weight you’ll carry is likely to be closer to the packed weight than the minimum.
The stability of your tent becomes a matter of great concern once you’ve struggled alone in the dark, cramming gear into a pack under a thrashing sheet of nylon after the wind has snapped one of your tent poles—which happened to me many years ago. It was pouring rain and I had to make a long night descent to the trailhead. Had it been a more remote location in winter, I could have been in serious trouble.
In the distant past, three tents collapsed on me—two because of wind and one because of a heavy, wet snowfall. On two other occasions I’ve camped with others whose tents have been blown down. I’ve also slept peacefully in a well-designed, properly pitched tent during a gale that blew down less stable tents nearby and shook others so hard that the occupants got little sleep. If you spend the night expecting your thrashing tent to collapse any minute, you’ll be too exhausted to enjoy the next day.
The importance of tent stability depends on where and when you use your tent. For three-season, below-timberline forest camping, it’s not a major concern. For high-level, exposed sites and winter mountain camping, it’s very important.
Tent design and materials both contribute to stability. The most stable designs don’t have large areas of unsupported material that can catch the wind. Many makers describe their tents as three-or four-season models. However many three-season tents are as stable as four-season ones. What they lack is often snow-shedding ability, extra space, and large vestibules. High winds can occur above timberline and in exposed areas at any time of year anyway.
Stability is relative. Hurricanes that strip roofs off buildings and blow down trees can certainly shred even the strongest four-season mountain tent. In strong winds, your experience and ability to select a sheltered site are as important as the tent you have. If pitching the tent in a storm seems impossible, it’s better to go on, even after dark, in search of a more sheltered spot. You’ll rarely have to camp in storm-force winds, but if you do, seek out whatever windbreaks you can—piles of stones or banks of vegetation—and consider sleeping out in a bivy bag, if you are carrying one, or even wrapped up in your tent. It may be uncomfortable, but it beats having your tent destroyed in the middle of the night.
Careful pitching is important, too. A taut tent with no loose folds of material will resist wind much better than a saggy mass of nylon. The best mountain tents will still thrash around in a storm if badly pitched. When pitched properly, a stable tent should feel fairly rigid when you push against the poles.
Traditionally the fly sheet was an extra layer thrown over the tent to protect it from rain. Originally both layers were needed to keep rain out, since neither was fully waterproof. When nonbreathable coated nylon was introduced for fly sheets, it made sense for inner tents to be breathable rather than water resistant. This can present a problem when you pitch the tent in the rain. Unless you pitch it very fast, which depends on both your skill and the design, it can get very wet. To counter this, some tent makers—mostly in wet Northern European countries—began building tents that pitched fly sheet first. Since the poles are often on the outside, these are sometimes known as exoskeleton tents. Many of them also pitch as a unit; that is, the fly sheet and inner tent go up together. If the fly sheet is damp inside with condensation, you can then detach the inner tent when packing up so it doesn’t get wet from being packed with the fly. With many inner-first-pitching tents you can now pitch the fly sheet separately if you want, often with a separate groundsheet. You can’t usually then add the inner tent, though.
For very wet areas where having to pitch in the rain is likely, I prefer exoskeleton tents. For drier areas either design will do, while for very dry areas inner-first pitching is probably best, since you may not need the fly at all much of the time. But in those areas, why do you need a tent at all?
Dark tents can be gloomy inside in dull weather. Pale tents let in much more light. Warm colors—red, orange, yellow—give a warm light, which can be psychologically appealing in cold weather. Gray, blue, and green feel cooler; maybe too cool in dull weather but pleasant when it’s hot. In most environments bright, hot colors stand out and can be an eyesore. At high latitudes where it barely gets dark during the summer, dark tents can be soothing and more conducive to sleep. Overall I prefer inconspicuous greens, browns, and grays for fly sheets (and tarps) but a warm color such as yellow for inner tents. That’s except for snow camping, when I like bright yellow or orange tents. Any colors other than shades of white and pale gray look black at a distance against snow anyway, so the problem of visual pollution doesn’t apply in the same way.
Since the advent of curved poles in the early 1970s, designers have created a bewildering array of tent shapes, some of them bizarre. Overall, though, these developments have led to a superb range of tents that are lighter, roomier, tougher, and more durable than ever before. Some tents are hard to classify, but most fit into the categories of ridge, pyramid, dome, tunnel, and single-hoop.
Before flexible poles appeared, most tent designs were variations on the standard ridge tent, a solid structure that has had a bit of a renaissance as hikers have discovered that trekking poles make good upright tent poles. The simplest, but the least stable and most awkward to use, are those with upright poles at each end. A-poles make a far more stable tent, known as an A-frame, and leave entrances clear. It’s not easy to use trekking poles as A-poles, though. Ridge tents don’t have good space-to-weight ratios, and the angled walls mean a lack of headroom compared with curved pole designs. However if you use trekking poles, then ridge tents that can be erected with them are worth considering. These are usually single-skin tents, often with a bug netting inner tent as an option. The only one of these tents I’ve tried, albeit briefly, is the silnylon GoLite Trig 2. This has a sewn-in floor, a large vestibule, and retractable flaps. Mesh panels along the base of the sides and the internal mesh door keep out insects and provide ventilation. It weighs 2 pounds, 15 ounces without stakes, which add another 3 to 6 ounces depending on the type. Its area is 33 square feet plus 13 square feet in the vestibule. There’s a smaller version, the Trig 1, that weighs 2 pounds, 3 ounces, and has an area of 24 square feet plus 5 feet in the vestibule. The Trig is easy to pitch with two trekking poles, is fairly roomy, and quite stable. I like the look of it but I need to try it in really wet weather to see what the condensation is like. The polyester MSR Trekker Tarp (4 pounds) with optional mesh 40-square-foot Trekker Tarp Inner (2 pounds) sleeps two and can be used as a two-door tent or a three-sided tarp. Lighter is the side-opening MSR Missing Link at 3 pounds. This has a sewn-in groundsheet and a total area of 51 square feet. Much lighter again at 1 pound, 3 ounces is the 34.7-square-foot silnylon Black Diamond Beta Light. An optional floor weighs 1 pound, 5 ounces, and a mesh inner tent, the Beta Bug, weighs 1 pound, 14 ounces. Other ridge tents that can be pitched using trekking poles are sold by Dana Design, Oware, and Lynne Whelden Gear. There are also slightly modified tapered ridge tents that have a small hoop at the rear and a single pole at the front, available from Six Moon Designs and Henry Shires’ Tarptents—the latter come with optional Tyvek groundsheets or sewn-in groundsheets. Transverse ridge tents, where the ridge runs across rather than along the tent, are sold by Dancing Light Gear and Dana Design. The 40-square-foot silnylon Dancing Light Tacoma-for-2 Shelter looks interesting. It weighs 2 pounds, 6 ounces and has Velcro closures rather than zippers on the doors, a sewn-in groundsheet, and doors on each side. Dana Design’s Javelina tapers sharply to one end, has an area of 31 square feet, and weighs 3 pounds, 5 ounces.
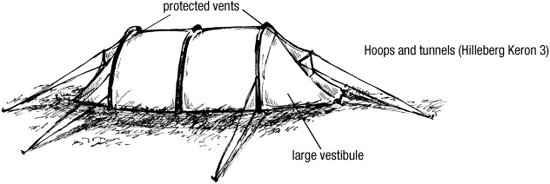
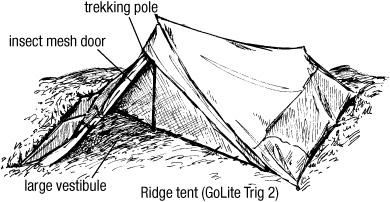
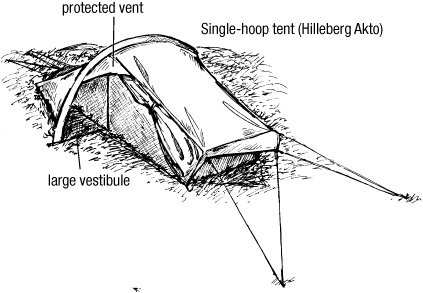
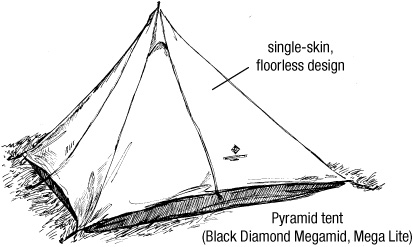
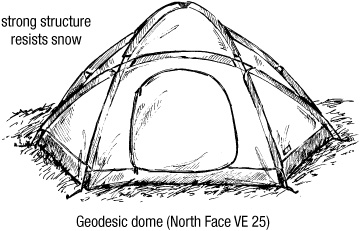
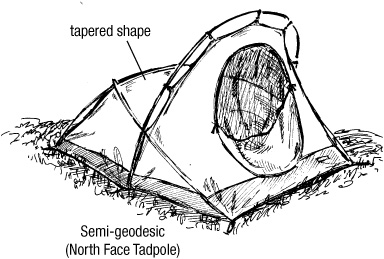
Basic tent designs.
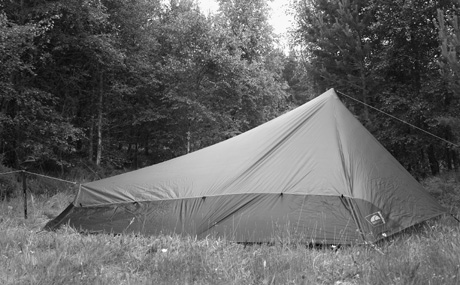
A single-skin ridge tent pitched using trekking poles. GoLite Trig 2.
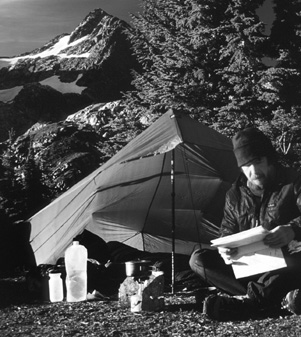
Tarp pitched as a tapered ridge to keep off the wind at a cool, breezy timberline camp. GoLite Cave.
There are few tents left with A-poles, though this is a stable, easy-to-pitch design that is less expensive than domes. Eureka’s Timberline tents are the classic A-frames and have been around since the 1970s. These have A-poles at each end and a curved ridgepole. They’re freestanding, and the lightest two-person model weighs 5 pounds, 13 ounces.
Long before the current lightweight revolution, Chouinard made a floorless tent called the Pyramid. Chouinard became Black Diamond, and the Pyramid became the Megamid and, in lighter form, the Mega Lite. These have an area of 81 square feet and can sleep four. The coated nylon Megamid weighs 3 pounds, 13 ounces; the silnylon Mega Lite weighs 2 pounds, 8 ounces. There’s an optional floor weighing 1 pound, 13 ounces. The tents come with adjustable shock-corded aluminum central poles, but the Mega Lite also has a pole converter that enables you to use two trekking poles instead.
The Pyramid/Megamid became popular with ski tourers, since the snow inside could be dug out for more space, something you can’t do with a floored tent, and it’s very light with lots of headroom. Other makers followed, and there are now several pyramid and tepee tents. I’ve used the 75-square-foot six-sided silnylon GoLite Hex 3, which has a canopy weighing 1 pound, 12 ounces, an 11-ounce pole, and 5-ounce stakes and stuff sacks for a total weight of 2 pounds, 12 ounces for a shelter that will sleep three and is very roomy for two. A floored mesh inner tent called the Hex 3 Nest weighs 2 pounds, 6 ounces. The Hex 3 proved a stable design when pitched for two nights in storms at 11,000 feet. The wind ensured that little condensation built up inside, though in calmer conditions there has been quite a bit. I’ve also used the Hex 3 on a two-week spring ski tour where the space was welcome. Cooking inside is no problem, and I really like being able to stand up to get dressed. Other makers of pyramid tents include Mountain Hardwear, Dana Design, Oware, and Kifaru, whose Tipis can incorporate a wood-burning stove (2 pounds, 5 ounces). The Ultralight 4 Man Kifaru Tipi weighs 4 pounds, 11 ounces.
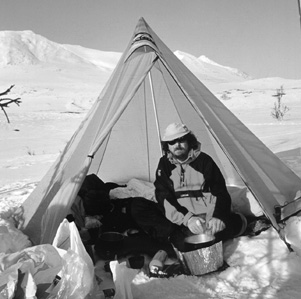
Single-skin pyramid tent. GoLite Hex 2.
Not quite a pyramid but similar enough to mention here are the Wanderlust Nomad silnylon tents. These are designed to be pitched with trekking poles as either A-poles or central uprights and have a groundsheet and huge mesh panels overhung by coated nylon. They look quite innovative, being neither single skin nor double skin. The 28-square-foot Nomad Lite weighs 1 pound, 11 ounces, and the 45-square-foot Nomad 2-4-2 weighs 1 pound, 15 ounces.
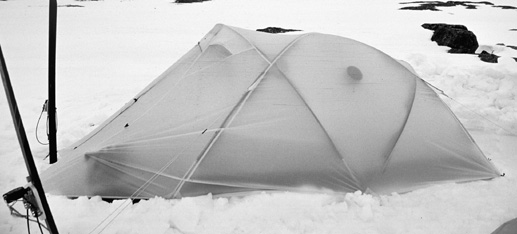
Geodesic dome with fly sheet.
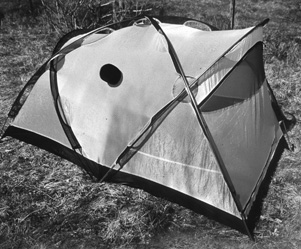
Geodesic dome.
Domes have two or more flexible poles crossing each other at one or more points. Many are free-standing—they don’t need staking down. This is often pushed as a huge bonus. It does indeed make pitching domes quicker and easier—if there’s no wind. But I’ve heard stories of domes taking off like giant balloons, never to be seen again. I would always stake down a tent. I have to say that although I’ve owned a few over the years and tested many more, I’m not particularly fond of domes. I prefer simpler designs that give more space for the weight and are generally easier to pitch. I seem to be in the minority here, however, since dome tents are by far the most popular design. Backpacker’s 2004 Gear Guide lists twenty-three companies offering over 160 models.
The two most common dome shapes are the geodesic and the crossover pole, though there are many variations. Geodesic domes are complex structures in which four or more long poles cross each other at several points to form very stable tents that are popular with mountaineers because they can withstand high winds and heavy snow loads. Crossover pole domes are simpler: two or three poles cross at the apex to make a spacious tent that is lighter than a similar-sized geodesic, though nowhere near as stable—in strong winds the poles can invert, and the whole tent can wobble like a gelatin mold. Weights run from 4 pounds for solo two-pole domes (sometimes called wedge tents) to 12 pounds for multi-pole tents that will sleep three or four.
A typical example of a simple wedge tent is North Face’s Roadrunner 2, at 5 pounds, 13 ounces. This has a tapered shape with two poles that cross toward one end rather than in the center. Pitch the narrow end into the wind, and the Roadrunner is quite stable for a crossover pole tent. The floor area is 33 square feet, and there are vestibules on both sides that add 9 square feet each. The fly sheet is made from ripstop polyester. There are two vents near the apex of the tent and two-way protected fly sheet door zippers, and the top half of the inner tent is made of mesh so ventilation is excellent, though condensation can drip through. The North Face also made one of the original geodesic domes, the VE24. This has become the silnylon VE25, with an added pole to create a larger vestibule at one end. It weighs nearly 11 pounds, but it has a floor area of 48 square feet and will stand up to almost anything.
Geodesics are very stable but not very light. Almost the same wind resistance can be obtained by adding a third pole across the front of a two-pole wedge and tapering the back of the tent to the ground to create a semigeodesic or geo-hybrid shape. On the Continental Divide Trail I used a 6-pound tent of this design (a long-gone model called the Wintergear Voyager) and found it roomy, durable, and stable in storms. For the first month of the hike I shared the tent with a companion. After that I used the tent solo, relishing the space but not the weight. One of the most popular semigeodesics for many years has been North Face’s Tadpole. The latest version weighs 4 pounds, 15 ounces, and has a 27-square-foot floor and 8-square-foot vestibule. The fly sheet is coated nylon, and there are mesh panels in the sides of the inner tent. I’ve used the Tadpole and found it a stable tent for two, though not very roomy because of the low rear and small area.
Rather than crossing, in tunnel tents the poles form parallel hoops. Tunnels have a better space-to-weight ratio than any other design. They’re also very easy to pitch, though they’re not freestanding. This category includes the tiniest tents, weighing about 2 pounds. For years I never tried one of these because they are so low and narrow that I felt claustrophobic just looking at them. This is hardly objective, however, so I did eventually brace myself and try a 2-pound, 5-ounce Bibler Tripod, which appeared to have slightly more headroom than most. The Tripod is made from waterproof-breathable Toddtex and has a tiny hoop at the foot and two poles at the head, one forming the main hoop, the other running at right angles to it and holding up the fabric at the end of the tent. This does give slightly more room than in tents with just two small hoops. (It also makes it debatable whether this is a hoop tent—it fits best here in my opinion, despite the third pole. Tent classifications are often fuzzy anyway.) With the doors closed the Tripod is very dark, but it didn’t prove quite as claustrophobic as I feared. Condensation was minimal—just a small amount on the groundsheet. I could prop myself up on my elbow and read inside, but there’s no room for any gear other than some clothes. It’s awkward getting dressed and undressed inside, too. In the conditions where I want a fully enclosed tent, I’d like more space—much more space. If I don’t need an enclosed shelter, I’d prefer a tarp. These minitents are light, but in my opinion they have more disadvantages than advantages.
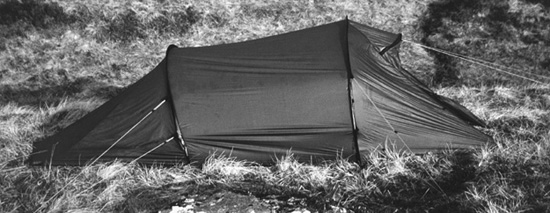
Double-layer tunnel tent with poles on the outside—the exoskeleton design. Hilleberg Nallo 2.
Timberline camp with tarp pitched as a tapered ridge and two tapered tunnel tents.
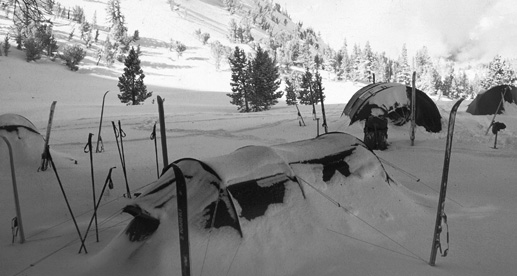
Morning after a night of snow. Tunnel and geodesic dome tents.
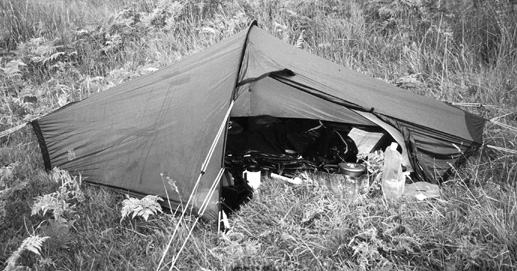
Single-hoop solo tent, the Hilleberg Akto—my favorite solo tent.
The simplest models that can be called real tents weigh from 3 pounds upward for double-skin (or double-wall) models and 2.25 pounds for single-skin ones. The latter can be as light as minitents, but being made from nonbreathable fabrics they’re much more prone to condensation, as I found when I tried the GoLite Den 2, a 3-pound, 9-ounce, two-pole model. The key to stability with tunnel tents is the distance between the poles. Large areas of material between the poles can flap and shake badly, so those with the poles close together are the most wind resistant. I used the 4.75-pound, two-pole silnylon Hilleberg Nallo 2 on a 1,300-mile Scandinavian mountains walk and found it very stable as long as I pitched the rear into the wind. Crosswinds shake tunnels, though, and one night the tent was thrashing about so much I got up about midnight and dashed out into the lashing rain to turn the tent 90 degrees into the wind. The difference was astonishing. Like all Hilleberg tents, the Nallo 2 pitches as a unit or fly first. It’s roomy enough for two and very spacious for one. I now use it on midwinter trips when more space is welcome on long dark nights and on trips where weight isn’t too significant.
The lightest tunnel tents, indeed the lightest tents for the size of any design, are made by Stephenson’s Warmlite. These are made of silnylon, and the weights are astounding—the smallest model, the single-skin 2X, weighs 2.3 pounds, yet it’s 60 inches wide at the front, 48 inches wide at the rear, 134 inches long, and 40 inches high at the apex, with an area of 42 square feet. There are inside stabilizer straps for use in high winds—Warmlite tents are said to be extremely storm resistant. The lightest double-skin model, the 2R, weighs 2.7 pounds. Both layers are made from silnylon, and they are permanently linked and pitched together.
There are several tunnel tents suitable for solo use, including the popular Sierra Designs Clip Flashlight at 3 pounds, 13 ounces. Larger tunnel tents often have three poles, sometimes of different sizes, with the largest placed in the middle to give more headroom. These are excellent for two or more people. I’ve had great success using large three- and four-person Hilleberg Keron three-pole tunnels (8 pounds, 9 ounces and 9 pounds, 11 ounces) for group snow camping.
Tunnel tents are the most popular tents after domes. Backpacker’s 2004 Gear Guide lists twenty-one makers and sixty-three models.
The problem with solo tents is that weight and size are related. Length has to remain constant, of course—one person needs the same space to stretch out as two—which means that width and height have to be reduced to cut the weight. In a slimmed-down version of a ridge, dome, or tunnel tent usually you can barely sit up. The solution is the single-hoop tent, a style that really works only for solo tents. As the name suggests, this design features one long, curved pole that may run across the tent or along its length. Single-hoop tents can be remarkably stable for their weight if the guying system is good.
My favorite tent is a single-hoop model, the Hilleberg Akto, that weighs 3 pounds, 7 ounces. I’ve been using this little tent since the early 1990s, and it’s stood up well to many nights of wild weather. Made from silnylon, it has a huge vestibule that stretches the length of one side, a protected vent above the door, and two lower vents at each end. A problem with single-hoop tents is that the fabric can be close to your face when you lie down, especially if you’re tall. Hilleberg has solved this with tiny corner poles permanently attached to the fly sheet that lift the ends of the tent a little.
One of the pleasures of backpacking is sleeping in a different place every night. This can also be one of the horrors if you’re stumbling around in the rain looking for a campsite long after dark. In popular areas there are plenty of well-used sites. Take the time to look at such places and work out why they’ve been used so much, and you’ll soon learn what to look for when selecting a site.
There are both practical and aesthetic criteria for a good campsite. A site with a good view is wonderful, as long as it’s also comfortable. For a good night’s rest you want as flat a site as possible. Often, however, you must make do with a slight slope; most people then sleep with their heads uphill (if I don’t, I develop a headache and can’t sleep). Sometimes the slope can be so gentle that it’s unnoticeable—until you lie down and try to sleep. I like to check sites by lying down before I pitch the tent. That way I also find any sharp stones or pinecones my eyes have missed. Beware of camping in hollows in wet areas, however, since rain may collect there.
If it’s very windy, a sheltered spot makes for a more secure and less noisy camp, though I often head uphill and seek out a breeze if bugs are a problem. Cold air sinks, so valley bottoms are often the coldest spots. Where possible I like a site that will catch the early morning sun, making for a warm and cheerful start to the day, so I look for sites on east-facing slopes and on the west side of valleys.
Water nearby is useful, though in dry areas like deserts I often carry enough for the last few hours of a day and the next morning and have a dry camp. It’s best not to camp right next to water; you could damage the bank and you may deter wildlife that needs access to the water. In many national parks and wilderness areas, the regulations forbid camping within a few hundred feet of water or trails. Camping well away from water and trails is best.
In popular areas there are usually many regularly used campsites, so finding one isn’t difficult (finding one that you don’t have to share can be harder). When I’m in country where such sites are rare or nonexistent, each morning I generally work out where I’m likely to be that evening and use the map to select a possible area for a site. Usually I find a reasonable spot soon after I arrive. If an obvious one doesn’t present itself within minutes, I take off my pack and explore the area. If this doesn’t produce a spot I’m happy with, I shoulder the pack and move on. At times, especially when daylight hours are short, this can mean continuing into the night.
When a possible spot turns out to be unusable and I have to keep walking, sometimes tired and hungry, I remind myself that a site always turns up; it may just require a little imagination to make the most of what seems unsuitable terrain. Perfect pitches are wonderful, yet many of those I remember best are the ones, like that in the northern Rockies (see sidebar, opposite), that were snatched almost out of thin air.
The most important aspect of selecting a site is to minimize your impact and leave the wilderness fresh and untouched, both for itself and for the next hikers.
All sites, whether previously used or not, should be left unmarked, which means no trenching around tents, no cutting of turf, and no preparation of the tent site. Previously unused sites should always—always—be left with no sign that anyone has been there. Camp on bare ground, forest duff, or dry vegetation such as grass that will be least damaged by your stay—which shouldn’t be longer than one night. Avoid damp ground and soft, easily crushed vegetation. If you’ll be staying more than one night on any site with vegetation, move your tent or tents each day to allow the plants to recover. Paths from tents to water, tent to tent, and tents to kitchen site are easily created if you’re not careful. You can reduce the number of trips by carrying a water container big enough to hold all the water you’ll need for overnight. Siting the kitchen so there is bare ground or rocks between it and the tents also cuts down the impact. Wear light footwear, not heavy boots, or go barefoot.

Tarp pitched in snow on a windy forested ridge.
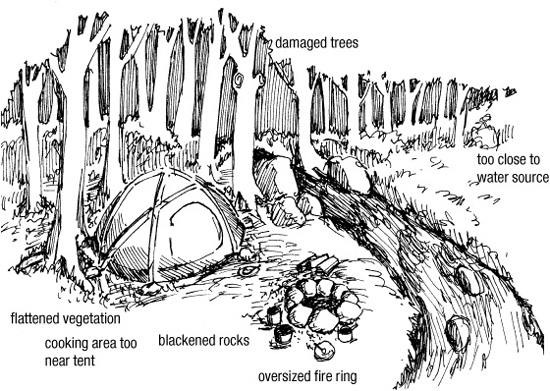
A quality campsite (top) is sited away from water sources and critical vegetation, and shows that minimum-impact methods have been used. Not-so-good campsites (above) are those near overhanging dead tree limbs, in the middle of a field during a thunderstorm, in a canyon, next to water, on soft vegetation, and near avalanche threats.
Light fires only if you can do so without leaving any sign of them when you depart (see Chapter 7). If you use rocks to hold down tent stakes—rarely necessary, though often done, especially above timberline—return them to the streams or boulder fields where you got them; I’ve spent many hours dismantling rings of stones on regularly used sites. When you leave a wild site, make sure to obliterate all evidence that you’ve been there, fluffing up any flattened vegetation as a last chore.
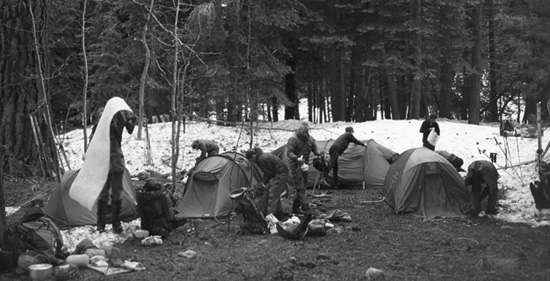
Pitching camp on a forest site in spring.
Of course you’ll often camp on sites that have been used before. If possible, I pass by a site that looks as if it’s used only occasionally, perhaps stopping to further disguise the signs of its use. A well-used site, however, should be reused, because doing so limits the impact to one place in a given area. You should still try not to add to the damage, of course. Use bare patches for tents and an existing fire ring for a fire—if there are several, dismantling all but one is a good idea. Tidying up the site may encourage others to use it rather than make new ones. As with every site, leave nothing, and don’t alter the natural surroundings.
In some areas, particularly in the eastern United States, land managers have provided wooden tent platforms at many sites. Use them, since they are there to reduce impact. I first came across these in the White Mountains, New Hampshire. To stake tents down you need either very sharp, strong stakes that can be hammered into the planks or, preferably, long lengths of cord that can be attached to stake points, then run off the platforms and staked down or tied to trees. Freestanding tents would be ideal for tent platforms, but I had the Akto, which requires eight stakes. On the advice of a friend, I carried 50 feet of nylon parachute cord, and I used it all.
Wilderness camping is generally safe as long as you have the right gear and the necessary skills. However, there are some external dangers that you need to consider.
In forests, dead trees and branches can fall on your tent; it’s always wise to look up when selecting a site and not camp under dead limbs. If there are dead trees nearby, I like to be sure they’re leaning away from the tent. Trees don’t fall only in storms, either—the only time I’ve seen a tree come down was on a calm day. I heard a loud crack and looked up to see a large pine topple over and crash to the ground.
Lightning is a hazard at certain times of the year. Camping out in the middle of a large open area or above timberline isn’t advisable during summer thunderstorms; you don’t want to be the highest object around. On one two-week trip in the Colorado Rockies there were thunderstorms every evening, often lasting well into the night, and on several occasions I reluctantly passed up scenic timberline campsites and descended into the security of the forest. When a deafening crack of thunder right overhead woke me up and the flashes of lightning lit up the tent, I was glad to be deep in the trees.
Big storms can cause a different and potentially serious problem in desert areas: flash floods. Heavy rainfall in mountains far away can cause walls of water to roar down desert canyons, sweeping away everything in their path. If there are signs of distant storms, I’d be very careful about camping in narrow canyons or at the bottom of drainages that are regularly swept by floods. In many desert areas, summer brings storms that sometimes make camping in any canyon bottom hazardous. I’ve never seen a flash flood, though I’ve seen the destruction these floods can cause. There is a dramatic and sobering description of a flash flood in George Steck’s Grand Canyon Loop Hikes II that is well worth reading if you’re going backpacking in desert canyons. Steck narrowly escaped when his camp was overwhelmed by floodwater. He lost his tarp, groundsheet, pad, sleeping bag, boots, spare clothing, eating utensils, and walking stick, though he found many items downstream the next day. This book, with its companion, Grand Canyon Loop Hikes I (now combined in one volume, Hiking Grand Canyon Loops), is entertaining and informative and recommended reading for anyone venturing off the main trails in the Grand Canyon.
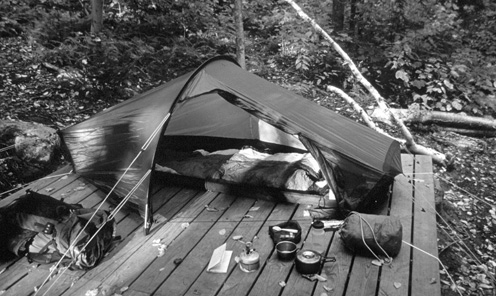
Camping on a tent platform in the White Mountains, New Hampshire. The Hilleberg Akto is not ideal for this! A freestanding tent would be better.
In mountain areas with permanent snowfields and glaciers, avalanches are a hazard. This isn’t usually much of a problem except in winter and spring, but some canyons may be swept by avalanches even in summer. Signs to watch for are treeless corridors below snowfields, bent and flattened vegetation, and large areas of willows and alder—the latter often called “slide alder” because it occurs so often in avalanche zones. These shrubs are flexible enough to survive repeated avalanches.
Compared with finding a site, setting up camp is easy. I don’t have a definite routine—it all depends on the time and the conditions. In cold or wet weather, when I’m tired or if darkness is imminent, I pitch my shelter as soon as I stop and chuck in the gear I’ll need overnight. I then fill my water bottles, crawl into the shelter, change into warm or dry clothes if necessary, set up the stove, and sort out my gear in comfort while the water boils for a hot drink. (This assumes I’m not in an area where bears could be a problem, of course.) By the time the water has boiled, I’m comfortable in my sleeping bag. The whole operation from unpacking the shelter to taking the first sip can be done in less than ten minutes, though I usually like to do it in a more leisurely fifteen or twenty. The key is knowing your shelter so well that you can pitch it even when you’re too tired to think. For greatest weather resistance and strength, pitch your shelter very taut and tighten guylines until you can play a tune on them. This also minimizes flapping and noise. Stakes should be at a 45-degree angle—sloping away from the tent—and pushed right into the ground. If you can’t get them all the way in, make sure that the stake loop is at ground level and not around the top of the stake, where it might lever the stake out of the ground if the wind gets up.
When there’s plenty of daylight and it’s warm and sunny, I may just sit and relax for half an hour before I do anything.
In some places and at certain times, though, setting up camp is not so easy. In rocky terrain where stakes won’t go in, you may have to attach loops to the staking points and tie them and the guylines to rocks to hold the tent down. I’ve done this only a few times, but then it’s been essential—it’s one reason I always carry a length of cord. In soft snow, tent stakes are nearly useless, but ice axes, crampons, skis, and ski poles can all be used to support the tent, through extra guylines tied to the stake points if necessary.
In snow, I first use skis or snowshoes to stamp out a hard platform; a snow shovel is also useful for this, especially for the final leveling of the site. If you use stakes, loop the guylines around them, then bury them lengthwise and pack the snow down on top. Once the temperature falls below zero, they’ll freeze in place. Come morning, you’ll probably need an ice ax to dig them out. You could use sticks instead of stakes. An alternative, which I’ve never tried, is to fill stuff sacks with snow, attach guylines to them, and bury them. Don’t set small items down on the snow when making camp; they could easily get buried. If snow falls during the night, bang the roof of the tent occasionally to make any buildup slide off so the tent doesn’t get buried. Make sure there’s ventilation high up—open the top of the fly sheet door zipper if there isn’t a vent—in case snow seals the gap around the edge of the fly sheet. Brush off snow before getting into the tent, and leave any snow-encrusted garments in the vestibule.
Whatever the surface, pitching a tent is easy—except in wind. You just follow the instructions that come with it. With a new tent, do a practice run first to see how it goes up and to check that all the pieces are there. There are so many ways of putting up tents that detailed advice is impossible. If it’s windy, I generally stake out the end of the inner or outer tent (whichever pitches first) that will face into the wind, then thread or clip the poles into position before raising the tent off the ground. In a strong wind, you may have to lie on the tent while you do this. The more the tent thrashes in the wind, the more vulnerable it is to damage, so speed is important. Once the basic shape is established, the rest of the staking can be done in a more relaxed manner. If the site allows, pitch rectangular or tapered tents with the tail or end into the wind; keeping the door away from the wind is a good idea for cooking, too.
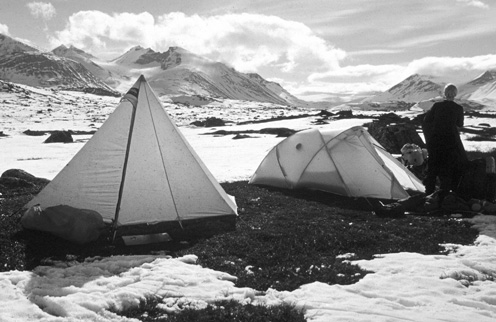
It’s always better to camp on clear ground than on snow. A spring camp with pyramid and geodesic dome tents.
Rain is not as much of a problem as wind, though you’ll want to get a tent that pitches inner first up fast. If your tent is at the top of your pack you can get it out quickly without letting too much rain into the rest of your gear. You can stand packs up under a tree while you pitch the tent. Once the tent is up you can bring the pack into the vestibule and then unpack items you need for overnight straight into the dry inner tent. You can sort them out once you’re inside too. Remember to fill water containers before taking off your waterproof clothing and getting into the tent. It’s a pain to have to put it back on to get water. Once the tent is up you need to keep the inside as dry as possible, so leave all damp gear in the vestibule or outside. You can strip off your wet jacket while squatting in the vestibule and then sit at the front of the tent with your legs in the vestibule while you remove wet pants, socks, and boots. Once you’re in the tent, put on warm clothing or slide into the sleeping bag so you don’t get cold. If your sleeping bag has gotten a little damp, getting into it will help dry it out.
For various reasons—late starts, unforeseen difficulties, a planned site’s being full or unsuitable or having a bear around, even by choice—you may occasionally have to make camp in the dark. For this you need a good flashlight or, preferably, a headlamp, especially on dark nights or in dense forest. To avoid losing things, try not to put any gear on the ground where it could be overlooked or kicked aside. Keep everything in the pack that isn’t needed in the tent. If you’re setting up a kitchen away from the tent and when going to the toilet, make sure you know the way back to your tent. I’ve sometimes spent rather longer than I would have liked finding the tent again. From a distance in the dark, a tent can easily look like a boulder or a tree stump. Take your flashlight with you and make sure you remember the direction back.
When striking camp, I usually pack the tent last so that it can air out and any condensation can dry. In rain, I pack everything under cover. In very heavy rain you can collapse the inner tent, leaving the fly sheet staked out, withdraw the poles, and then stuff the inner tent into its bag under the fly so it stays dry. Push the poles out of their sleeves; if you pull them, they’re likely to come apart. In very cold conditions, pole sections may freeze together—don’t try to force them apart or they may break. Instead, rub the joints with your hands until the ice melts. In bitter cold, I wear liner gloves for this so the metal doesn’t stick to my skin. If poles are frozen together, chances are that any condensation will have frozen to the fly sheet. If the fly sheet is coated with ice on the inside and frost on the outside, shake off as much of it as you can before you pack it. If the day is sunny and you have time, you could wait for it to thaw and evaporate. Wet tents can be strapped on top of the pack or stuffed into a mesh pocket.
Once you’ve packed everything, check the site for anything you’ve overlooked, such as bits of trash, clothes hung over a branch to air, or small items like tent stakes or cutlery.
Tents look after themselves when you’re out walking. On sunny mornings, I try to dry off any condensation, spreading the tent over bushes or on dry ground or hanging it over a length of cord or branch. If the stakes are particularly dirty, I wipe them clean. Most tents come with two stuff sacks for poles and stakes but only one for the fly sheet and inner tent. I always use an extra stuff sack for the fly, because two small units are easier to pack and it keeps a dry inner tent separate from a wet fly sheet. The easiest way to pack tents is, appropriately enough, to stuff them into their stuff sacks rather than fold them—if you habitually fold the tent the same way, the waterproofing may crack along crease lines. I always put my tent near the top of the pack so it’s accessible for quick pitching the next night. I slide the poles down one of the corners of the pack between the side and the back. Some people strap poles to the outside of the pack, but I’m afraid they might be damaged there or even fall off and be lost. Stakes tend to work their way down to the bottom when kept in the main pack, so I put mine in a pocket.

Camping on snow with pyramid and geodesic dome tents. Be sure stakes are buried firmly, with snow packed down on top.
Airing and drying a geodesic dome tent.
After a trip, I hang the tent up to dry before storing it in its stuff sacks. Nylon won’t rot, but a tent stored wet will mildew, which leaves stains and an unpleasant, musty smell and may damage the waterproofing. Single-skin waterproof-breathable tents need plenty of drying time; they often appear dry while still damp, since moisture can remain in the slightly absorbent inner material. If you want to wash your tent, use mild soap and warm water, never detergent, which can damage the proofing. Poles will corrode if not dried before storage. Salt corrodes poles very fast, so if you’ve been camping near the sea, wipe them down before you dry and store them.
Many wilderness areas have unlocked shelters for walkers to use. These usually provide shelter from the elements but no more, so you’ll still need a sleeping bag, pad, stove, and warm clothing. On some long-distance routes, such as the Appalachian Trail, walkers can use shelters almost every night. I generally prefer the freedom and solitude of a tent or tarp, but in bad weather such shelters can be a blessing. I always like to know where they are in case I need them. It’s best not to rely on them, though; they may be full.
In deep snow you can build a shelter rather than pitch a tent. Snow is a good insulator and cuts out all wind; inside a snow shelter it’s calm and quiet even when a blizzard rages outside. To build a proper one takes a few hours. Ice axes, cooking pans, and toilet trowels can all be used as digging tools, but a proper snow shovel speeds things up considerably.
Whatever tool you use, digging snow is hot work, so it’s best to strip off your warm clothing so it doesn’t get soaked with sweat. There are various forms of snow shelters—caves, domes, trenches, and igloos. Which you build depends on the terrain. Caves can be dug into steep snow-banks. Start by digging a vertical slot a bit more than shoulder width that goes in at least 6 feet. Then dig out the area around the slot to form sleeping platforms with a lower area in the center that leads to the entrance to act as a sink for cold air. A curved, smooth roof will minimize drips. How big you make the cave depends on how many it must shelter, how much time you have, and how much snow there is. The entrance should slope downward out of the cave and be kept small to prevent snow and wind from blowing in. Make sure you include an air inlet to prevent carbon monoxide buildup when you’re cooking. It’s a good idea to mark the cave too. A ski pole poked through the roof does this and acts as a vent. Wiggle the pole every so often to keep the hole open.
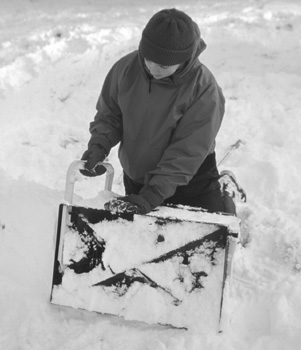
Using the IceBox to build an igloo.
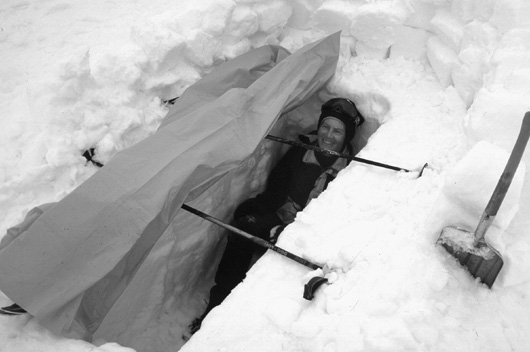
A snow trench is the quickest type of snow shelter to build.
Where there are no steep banks, you can build a snow dome. Simply pile up a huge mound of snow, leave it a short while to harden, then dig out the center, leaving walls about a foot thick. Snow domes superficially resemble igloos, but igloos are much stronger and more complex and require more skill and time to build. There is a tool that makes building igloos easy—the IceBox, a curved form into which you pack snow, and a long handle you use to determine the radius of the igloo and to ensure the snow blocks are positioned correctly. Using the form, you build a circle of snow blocks, each fitting next to the other, until the igloo is complete. The lightest IceBox weighs a touch over 5 pounds and can easily be strapped to a pack. With an IceBox, you can build an igloo in a couple of hours. If you’re going to set up a base camp in the snow, it could be worth carrying one.
In a storm the quickest shelter to build is a snow trench. Mountaineers high in the Himalaya have survived for several days and nights in body-size “snow coffins.” A simple trench can be roofed with tilted snow blocks or with a fly sheet or tarp spread over skis or ski poles and the edges held down with snow. The aim is to get out of the storm as fast as possible. If heavy snow is falling, make sure the roof of your snow trench isn’t completely buried and that there is ventilation.
Keeping warm at night is essential for enjoyable backpacking. Nothing destroys the pleasure of a trip like shivering through the night in an inadequate sleeping bag. Some people just pile on extra clothes at night, but I’ve never met anyone who does this by choice (a forced bivouac when you aren’t carrying a sleeping bag is another matter), and it sounds both uncomfortable and inefficient.
A sleeping bag traps warm air, which keeps you from feeling cold. To prevent dampness from condensation, a bag must allow the moisture vapor given off by your body to escape, so both fill and shell should be breathable. If you intend to sleep under the stars, a bag with a quick-drying or even a waterproof-breathable shell is best. Even if it’s dry, dew or frost may dampen your bag. (For more information on insulation and how to keep warm, see pages 120–30.)
Choosing a sleeping bag is much easier than choosing a tent. There are far fewer designs, though there are many models. The biggest decision is the kind of insulation or fill, followed by how warm a bag you need. The ideal material would be lightweight but very warm, low in packed bulk, durable, non-absorbent, quick drying, warm when wet, and comfortable. Unfortunately, this ideal doesn’t yet exist, so compromises have to be made in terms of which properties are most important—determined in part by when and where you’ll camp and what shelter you’ll use. The basic choice is between synthetic fibers and waterfowl down.
Since the mid-1970s when DuPont launched Fiber-fill II, many synthetic fills have appeared; they all attempt to mimic down by being light and fluffy in order to trap warm air but low in bulk when compressed. There are two basic types of fiber. As you’d expect, short-staple fibers consist of short sections of fill while continuous filaments are endless strands of fiber. KoSa’s Polarguard is the best-known continuous-filament fill. There are well-regarded proprietary versions too, like Wiggy’s Lamilite. Polarguard comes in four types, of which 3D and Delta are the lightest and most efficient. Polarguard HV, 3D, and Delta are made from hollow polyester with a triangular cross section, which cuts down on weight and increases the insulation, since warm air can be trapped inside the fibers. Original Polarguard and Lamilite are solid polyester. Continuous filament is generally reckoned to be the most durable fiber. I’ve certainly found Polarguard tough in insulated jackets (see page 150). It’s comfortable, too.
There are many versions of short-staple fibers, with new ones appearing frequently. The ones regarded as the best for sleeping bags are DuPont’s Thermolite Extreme and Thermolite Micro and Albany International’s Primaloft. Older fibers like Quallofil and Hollofil, both from DuPont, are less compressible and less durable and appear mainly in low-cost bags. Proprietary short-staple fills are mostly found in budget bags too. I’ve found Primaloft the most comfortable of the short-staple fibers. This microfiber is very soft and drapes around the body well. There are three types of Primaloft. Primaloft One is surprisingly water resistant, far more so than other synthetic fills, while Primaloft Two and Sport are similar to other synthetics in water resistance.
Synthetic fills cost less than down, are easy to care for, and resist moisture. But they are not “warm when wet,” as some manufacturers claim—nothing is. What matters is how fast something dries, and synthetic fills dry fairly quickly, since they are virtually nonabsorbent. Because the fill doesn’t collapse when saturated, it retains much of its warm-air-trapping thickness, too. A wet synthetic-filled bag will start to feel warm in a comparatively short time compared with a wet down-filled bag, as long as it’s protected from rain and wind. You can’t sleep outside in a downpour in a synthetic-filled bag and stay warm, however.
The disadvantages of synthetic fills compared with down are shorter life, less comfort over a wide temperature range, more packed bulk, and greater weight for the same warmth. The latest synthetics are lighter, more compressible, and more durable than earlier ones, but they still don’t compare with down. In the long run, down costs less too. One company that makes both down and synthetic bags estimates that with average use, a down bag will last at least twelve years (I have bags much older than this, as do many other people), but a synthetic bag will last only four years. Because down is expensive, awkward to handle, and needs to be kept dry, if a synthetic that performs as well ever does appear it will probably replace down. That day isn’t here yet, though.
Down is the lightest, warmest, most comfortable and most durable sleeping bag fill. No synthetic yet comes near down for packability, low weight, and warmth. Down is the fluffy underplumage of ducks and geese and consists of thin filaments that trap air and thus provide insulation. Down recovers well from compression and goes on doing so for a long time, hence the good durability. Unlike feathers, in down there are no quills to poke through the fabric. A single piece of down is called a cluster and consists of a solid point, called a quill point, surrounded by a tangle of fine filaments. Large clusters with long tendrils fill more space and trap more air for less weight than small clusters. Large birds have large clusters, so down from geese is generally warmer than down from ducks. The more volume a given amount of down can fill, the higher its quality, because the thickness, known as loft, determines the warmth. Measuring the volume filled by an ounce of down determines the fill power. Down of 500 to 550 fill power (500 to 550 cubic inches of down per ounce) is the least expensive but provides less warmth for the weight than down with higher fill power. The warmest, lightest, and most expensive bags are filled with down of 750 to 900 fill power. Before being tested, down is stored for five days in a large screened box and regularly mixed and blown with a warm dryer. This “conditioning” stabilizes samples for consistent results. An ounce of the down is then placed in a measuring cylinder and a 68.4-gram weight is placed on the down. (One bag maker points out that the weight is more than twice the weight of the down and that this testing procedure ignores the fact that some bag manufacturers use extremely lightweight shells—such as DP Airnet and Pertex Quantum—and also that others unduly compress their super-high-fill down with overly beefy shells.) This process means the down is in just about perfect condition when measured. Even so, the results have a margin of error of plus or minus 5 percent. Western Mountaineering, from whose catalog I culled this information, calls the resulting fill power rating “optimistic” rather than “practical” and says that its fill power figures are the lowest its down would produce. In practice the figures can be taken as comparative rather than absolute. Down with higher fill power will be warmer for the weight than down with lower fill power, but it almost certainly won’t loft as much in the wilds as under laboratory conditions.
People worry about down’s lack of insulation when soaked. Down can absorb a great deal of moisture, and it takes a long time to dry. Drying a sodden down bag outside in wet weather is practically impossible; it takes dry heat. But keeping down dry need not be difficult or a chore, and it’s harder to get down wet than many people think. I use down bags most of the time, including in wet places, and I haven’t yet had one get more than a little damp. Packing a down bag in a waterproof stuff sack and sleeping in a tent or under a tarp when it rains are the best ways to keep it dry. It’s also wise to air down bags occasionally to remove any moisture picked up from humid air or from your body.
If you want the warmth and comfort of down and the water resistance of synthetics, Marmot makes bags with down inside and Primaloft outside. The 30°F (−1°C) Fusion bag weighs 2 pounds, 4 ounces, and the 15°F (−9°C) weighs 3 pounds, 3 ounces. I’ve tried the 30°F; the rating is certainly accurate, and the bag is comfortable. The one problem I can see is that the down is likely to long outlast the synthetic fill. Using a light synthetic bag as a cover for a light down bag is probably a better idea.
There’s currently no legal standard, but sleeping bags labeled as “down” should be at least 75 percent down, the rest being small feathers, which it’s impossible to totally separate from the down. Many bag makers use a higher percentage of down. The figures are often expressed in the form 85/15 or 85:15 for 85 percent down, 15 percent feathers. “Down-and-feather” fills should be at least 50 percent down, but “feather-and-down” fill is less than 50 percent down. Feather-and-down and all-feather fills have just about vanished, since they offer no advantages over synthetics, which are easier to care for. The more quills you feel in down fill, the higher the percentage of feathers.
Down is a by-product of the food industry, and most down comes from places where waterfowl are eaten in large quantities, such as China and Eastern Europe.
Owing to the cost of the fill, virtually all down bags are high quality, since it isn’t worthwhile to cut costs.
Sleeping bag shells need to be lightweight, hard-wearing, breathable, resistant to wind and water, nonabsorbent, quick drying, and, for down fills, downproof (so the fill doesn’t leak out). Some modern synthetic fabrics have all these properties and feel comfortable next to the skin, making them suitable for the lining as well as the outer shell. Cotton and cotton-polyester shells have just about disappeared, since they’re heavier, more absorbent, slower drying, and harder to keep clean. After several months of continuous use, a polyester-cotton inner lining feels sticky and unpleasant—I speak from experience—but because a synthetic liner won’t absorb sweat or dirt, it stays fairly fresh as long as it’s aired occasionally.
The lightest fabrics allow the fill to loft fully and mold themselves around the body, maximizing the warmth of a bag. Many nylon and polyester fabrics are used, often ripstop versions, and there really isn’t much to choose between them. A typical high-quality nylon taffeta is 30 Max from Western Mountaineering, which weighs 1.4 ounces per square yard and has a denier of 30 (9,000 meters of fiber will weigh 30 grams). Some shells are made from microfibers (which weigh less than 1 gram per 9,000 meters of fiber). Although the denier is less than 1, this doesn’t mean microfibers are lighter than other fabrics; it means that more fibers are packed into a thread, making a fabric that is very windproof and water resistant because air spaces are too small for wind and rain to enter easily. The thread count of a fabric—the number of threads per inch—matters too. Good fabrics have a thread count of 300 or more.
My favorite shell fabric is 20-denier Pertex Quantum nylon, which weighs just 0.9 ounce per square yard yet is hardwearing, downproof, breathable, and very soft and comfortable. It’s not waterproof, but moisture quickly spreads out over its surface and dries. Quantum is used by a growing number of makers including Marmot, GoLite, Western Mountaineering, The North Face, Exped, and Rab.
Nonwaterproof shells are highly breathable, allowing body moisture through very quickly, which keeps the fill dry and ensures good loft. They are moisture resistant and dry quickly, but they won’t keep rain out for long. Waterproof-breathable shell fabrics are waterproof, but bags made from them usually aren’t, since water can enter through the seams unless they are sealed, which is rare. However, new construction methods make waterproofing seams possible, and fully waterproof bags are likely to become more common. The Swiss company Exped makes down bags with high-frequency-welded seams, while Mountain Hardwear makes down bags with baffles that are glued to the shell fabric. In both cases there are no stitch-holes through which water can enter, so these bags are waterproof.
There are several breathable waterproof or water-resistant shell fabrics, including Pertex Endurance, Gore Dryloft, and eVENT, plus proprietary ones like Mountain Hardwear’s Conduit and Sierra Designs’ DryDown. eVENT is new and so far is used only by Feathered Friends. Given how well it works in rain gear (see pages 153–54) it might well make the best waterproof-breathable sleeping bag shell. I’ve tried Endurance and Dryloft, and both are pretty good, keeping condensation drips from wetting the insulation of the bag. However, these shells add a little weight (they weigh from 1.7 ounces per square yard upward) and a lot of cost and don’t breathe as well as non-waterproof fabrics, as you’ll quickly find out when you try to pack one into a stuff sack—starting at the foot is essential, so air can be forced out the top opening. When damp, bags with these shells take longer to dry, too—it’s best to turn them inside out. In really damp conditions, I’d rather use a bivy bag over my sleeping bag. Any moisture is likely to occur between the sleeping bag and the bivy bag, leaving the insulation in the sleeping bag dry, and it’s easier to dry a bivy bag. Mostly, though, I find a nonwaterproof shell fine, since when it’s raining I always sleep under a tarp or in a tent. An interesting compromise would be a shell of EPIC by Nextec (see pages 145–46). This silicone-treated fabric is breathable and very water resistant but not fully waterproof. I haven’t tried a sleeping bag with it, but I imagine it would work very well. EPIC is used by Feathered Friends and Nunatak.
The color of your sleeping bag may seem to have no practical relevance, unless you want to sleep out unobserved. However, dark colors absorb heat and dry more quickly than light ones, and any moisture in the fill will dissipate faster. This heat absorption is noticeable to the touch. A black bag feels much warmer than a pale one when both are aired in the sun. Since light colors also show dirt more—one with a white lining looked unpleasantly grubby after a five-week trip—I prefer bags with dark linings.
The most efficient sleeping bag is the one that traps warm air closest to your body. A bag with lots of room is a bag with lots of dead air space to heat. Most bags reduce this dead space by tapering from shoulder to foot. Most also have hoods to prevent heat from being lost through the head and at the neck. The resulting shape is called a mummy bag. It’s the standard shape for high-performance, lightweight sleeping bags and is very efficient at heat retention. Some warm-weather bags dispense with the hood and have a tapered shape sometimes called semirectangular. Actual rectangular bags are fine for warm-weather camping, though heavier than tapered ones. Because they usually have a zipper that runs down one side and across the foot, they can also be used as quilts on a bed. I don’t think they’re really a serious choice for backpacking though. If you find a close-fitting mummy bag restrictive, a broader mummy is a much better choice than a rectangular bag.
A sleeping bag that is too wide or too long won’t keep you as warm as one that fits properly, and the weight will be more than you need to carry. But a bag that is too small will be uncomfortable and won’t keep you warm in spots where you press against the shell and flatten the fill.
For these reasons, bags come in different lengths and shoulder, hip, and foot girths. Many companies offer two sizes in each model, while GoLite’s SmartFit bags come in three lengths and three girths. Finding a reasonable fit isn’t difficult, although very tall and very broad people may find their choices limited, and short people may end up with a bag that’s a little too long and slim ones with a bag that’s too wide. It’s worth climbing into a bag in the store to see how it fits before you buy it, even if you do feel conspicuous. A slightly roomy bag is better than a slightly small one, for both comfort and warmth. Make sure you can toss and turn and lie comfortably in the bag. Check too that the bag will accommodate any clothing you intend to wear in it, such as an insulated jacket in a cold-weather bag.
There’s a theory that most sleeping bags are designed for men and may be too roomy at the shoulders and too tight at the hips for many women. An increasing number of bags are now made for women, some with narrower shoulders, wider hips, shorter lengths, and more fill at the foot and across the chest, where many women report feeling the cold. EMS, Feathered Friends, Lafuma, Marmot, Outbound, REI, Sierra Designs, and The North Face all make women’s bags. However, when GoLite designed its SmartFit bags it measured a number of people and found no significant difference between men and women within girth categories—there were just more women in the trim category and more men in the wide. Wide men and wide women resembled each other in all girth characteristics, as did trim and regular ones. The conclusion was that women tend to sleep colder because their bags are too wide for many of them throughout their length. Close-fitting bags are warmer than wide ones, so this makes sense. The best approach is to find a bag that fits well, ignoring whether it’s labeled male or female.
A problem with a close-fitting bag is that it can feel restrictive. Some people like to be able to turn over inside a bag rather than with it and bend their knees and elbows. A good solution to this problem is stretch elastic seams and baffles, as found in MontBell bags and Sierra Designs’ Flex Bags. These bags hug the body closely yet give when you move so they don’t feel restrictive. Because the stretch baffles pull the fabric inward, bags with them have a somewhat strange wrinkled look, but they work really well, cutting out cold air spots and reducing air movement in the bag. I’ve used bags that stretch made by the British company Mountain Equipment, and they are very warm for the weight and very comfortable.
An alternative and less effective method is to add a zippered panel to a bag so that the volume can be varied—roomy when it’s not too cold, close fitting when it is. Some bags, like Mountain Hard-wear’s Quantum Expander series, have these panels built in. In other cases, as with North Face’s Polarguard 3D-filled Expander Panel, they’re separate and can be zipped into a bag when required. Such panels add weight, though. North Face’s weighs 9.5 ounces, which seems rather a lot for something that reduces the warmth of a bag.
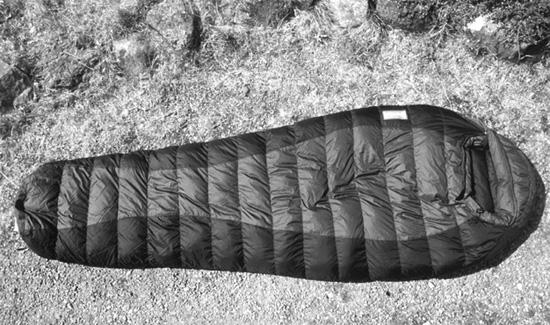
A mummy-shaped sleeping bag.
The method used to hold fill inside affects the warmth of a sleeping bag. Down fill has to be held in chambers, which give the familiar ringed or ribbed look, to keep it evenly distributed throughout the bag. To create these chambers, the inner and outer fabrics are attached in sections. The simplest and lightest way of doing this is with straight-through or sewn-through stitching (also known as quilting). This method is adequate only for bags designed for above-freezing temperatures because heat escapes through the stitch lines and cold air can blow in through them. Most of the lightest bags use sewn-through stitching.
To cut this heat loss, the inner and outer shells can be connected by short walls of fine netting, called baffles, to make rectangular boxes—hence the name box-wall construction. If the walls are angled (offsetting the top and bottom stitches), it is called slant-wall construction; if they’re angled away from each other it’s trapezoidal construction. In V-tube or overlapping-tube construction the baffles form triangular compartments. All cold-weather down bags use some type of walled construction. Chambers should have enough down in them so they bulge slightly, creating that familiar well-padded look. If the down can move much in the chambers, it may migrate to the corners or to one side, leaving a cold spot.
Synthetic-fill bags can’t use baffle construction because the fill is fixed in layers known as batts. Continuous fiber synthetics can be used in single sheets in a bag, so no stitching is required. For cold-weather bags two or more continuous fiber sheets may be layered on top of each other. Batts of short fibers need stabilizing, so stitching is necessary. Sewn-through construction, as in down bags, is all right for warm weather bags, but for most conditions double-layer or shingle construction is better. In the first, two or even three sewn-through layers are layered, with the seams offset to avoid cold spots—an efficient method, though it produces a rather heavy bag. In shingle construction, slanted layers of overlapping fiber are sewn to both the inner and outer shells. Some bags are made with a combination of methods—a shingle layer over a quilted one, for example. Whatever the construction method, synthetic insulation should be stitched firmly to the shell at the edges to stop it from tearing away and leaving a cold gap. Down bags also usually have baffles along the sides that prevent all the fill from ending up on the top or the bottom. Some bags dispense with these on the principle that it might sometimes be useful to shift the fill to the top or bottom of the bag to give more or less warmth. I distrust such a construction because the down could move even when I don’t want it to. Another construction method I don’t like, used in both down and synthetic bags, places side baffles at ground level so that more of the fill is in the upper section. Other makers simply put more fill in the upper half of the bag. The rationale is that the fill under you is crushed anyway, so there might as well be less of it.
The problem with bags that have more fill in the top is they don’t account for sleepers who don’t keep their bags the “right” way up. The designers seem to assume that all users sleep on their backs and don’t move during the night, although studies suggest that most people turn over many times during the night. I often wake to find the hood above me because I’ve turned the bag completely over during the night. Just turn on your side, and you can lift part of the base of a bag off the ground. If it has less insulation than the top, you may then feel a chilly line down your back. I prefer to have the fill equally distributed.
The outer shell on most bags is cut larger than the inner; this differential cut means that the inner shell has a smaller circumference than the outer shell to allow the fill to loft fully, to cut out cold spots caused by loose extra fabric on the inside, and to stop the fill from being compressed by knees or elbows pushing against the inner fabric. The idea makes sense, but I have to say I’ve used bags both with and without it and not noticed any difference. These days virtually all mummy bags come with differential cut whereas rectangular ones don’t so they can be opened out and used as quilts.
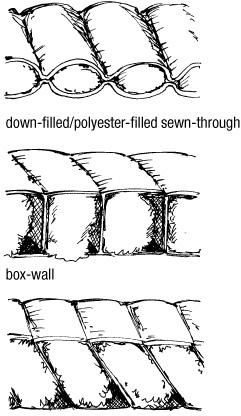
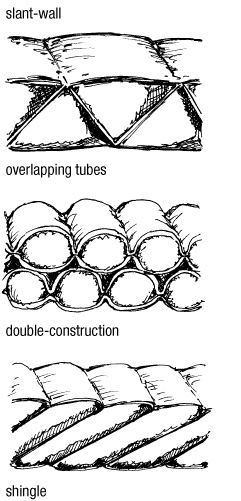
Sleeping bag construction.
If the fill under you is useless because it’s compressed, the logical thing is to do away with it altogether. Bags such as the down-filled 35°F (2°C) Big Agnes Horse Thief (1 pound, 8 ounces) do just that, having nothing more on the bottom than a sleeve for you to slide your sleeping pad into. Bags like this are usually meant for above-freezing temperatures because the design has inherent problems. Cold can creep in between the bag and the pad, as it has with all three bags of this type that I’ve tried. I also didn’t like not being able to sit up in the bags and pull them up around my chest. Sleeping on my side was awkward too. For low bulk and weight these bags can’t be beaten, but I find a full sleeping bag much more comfortable and psychologically reassuring. I like being totally enclosed in cold weather.
Blankets or quilts are even lighter than bags with no insulation in the base. Ray Jardine promotes these in his books, and for a while you could get his quilt designs from GoLite. Insulated quilts have no zippers and no hoods, just shaped foot-pieces. You spread them over you and tuck in the edges. They’re light, but to my mind—after, admittedly, only one very brief trial—they’re inefficient compared with a sleeping bag. Some people like them, however. A hiker I met on the Arizona Trail had made his own quilt by simply removing the zipper from a sleeping bag. Jake Schas was perfectly happy with his quilt and went on to use it on a Pacific Crest Trail through-hike. Nunatak, Integral Designs, and Lynne Whelden Gear make blankets. Nunatak’s 1-pound, 32°F (0°C) Ghost Blanket has 800-fill-power down and either a Pertex Microlight or an EPIC shell. Of course, a rectangular sleeping bag can be used as a blanket for two people. Integral Design’s 50°F (10°C) Primaloft-filled Prima Blanket is really one of these, since it has a zipper for conversion to a bag. There are instructions on how to make a quilt in Jardine’s Beyond Backpacking and on various ultralight Web sites.
Bottomless bags can be used as lightweight covers to boost the performance of a sleeping bag on trips that are colder than usual. Some companies offer zip-on covers for this purpose, and some bags even come with them. They have the same problem as having more fill in the top of the bag, however—they need to be kept above you to be any use. I should mention Stephenson, which introduced this type of bag back in the 1960s. Its Warmlite Triple bags come with either a 2-inch foam pad or a down-filled air mattress and two removable down tops of 820 to 890 fill power, a thin one rated to 25°F (−4°C) and a thick one to −10°F (−23°C). Combined, they are rated to an astonishing −60°F (−51°C). The tops attach to the bottom with double zippers, so there are no cold spots. I haven’t used one, but the bags look roomy, come in four sizes, and are designed so you turn over in them rather than with them. The lining is a soft vapor-barrier fabric. Weights for the total system run from 91 to 123 ounces depending on the size and the type of pad, but you need only the thin top (16 to 20 ounces) in temperatures above 25°F and only the thick one (26 to 33 ounces) between −10 and 25°F.
An alternative to getting rid of the bottom of a bag is to get rid of the upper half and wear an insulated jacket. This type of bag, sometimes called an elephant’s foot, was first developed by Alpine climbers for bivouacking on narrow ledges. One of the few half bags is the 14-ounce 20°F (−7°C) Akula from Nunatak, filled with 800-fill-power down and made with a variety of shells. Shock cord runs over the shoulders to keep the bag up around your rib cage. I’ve never used one of these bags, but I imagine you’d want a thick insulated jacket with a hood and a good seal between the two items.
Because of the massive amount of heat you lose through an unprotected head and at the neck, a hood is very useful in all but the warmest weather. A good hood should fit closely around your head and have a drawcord with self-locking toggles that permit easy adjustment from inside the bag. Most hoods fit reasonably well, though few are easy to adjust from inside. Some have two drawcords so they can be adjusted from both sides. This seems unnecessarily complicated to me, especially when I’m trying to get out of a bag and can’t find the toggles. Some toggles and drawcords dangle in your face, which is irritating. Bag makers seem to assume that sleepers will lie on their backs staring upward with their hoods neatly framing their faces. (Sierra Designs is an exception; its designers actually picture people in different positions.) Most people don’t sleep like this (I often sleep on my front), and chances are you’ll end up with your face pressed into the side of the hood much of the time. If it’s badly designed, this will strain the fabric and feel uncomfortable. Getting into a sleeping bag and trying the hood is the way to find out if you can live with it or if it will drive you crazy.
Bags for use in below-freezing temperatures should have large hoods in which you can bury everything but your nose. Bags for warmer conditions sometimes have smaller hoods, or even no hood at all, to save weight. In above-freezing temperatures, I often find the hood too warm and fold it under the bag.
A filled, drawcord-adjusted collar or neck baffle to prevent drafts is a feature of many bags, especially those designed for cold weather. It lets you close the bag around your shoulders while leaving the hood open. The most basic, lightest bags don’t have draft collars. You can drape a shirt or warm top around your shoulders if necessary. Baffles usually have a drawcord adjustment and snap fastenings on the zipper side. I find them restrictive, so I do them up only when it’s really cold. Some makers—GoLite, Marmot, Western Mountaineering—have a smaller filled tube in some of their bags that seals around the face rather than a large collar. This saves a bit of weight, since it requires less material than a draft collar.
To keep your feet warm, a sleeping bag should have a shaped or boxed foot section. If the two halves of the bag are simply sewn together at the foot, your feet will compress the fill when they push on it, reducing loft there. A boxed foot has an extra circular section, which could be made either in channels or as a single unit. Cold-weather bags may have an offset double layer of fill in the boxed foot. In down bags, some boxed feet have internal box walls.
Almost all bags, except for the lightest down ones, now have zippers, usually on the side, occasionally on the top. For years I distrusted zippers—they added weight, leaked heat, and had the potential for disaster if they broke. I’ve now developed a grudging acceptance of them, since the latest ones are pretty tough, though I still can see no real advantages. In theory, zippers allow you to regulate temperature and make getting in and out easier. Some bags can be zipped together to make a double bag.
Most bags have full-length side coil zippers. A few curve up toward the top of the bag at the hood to make using them easier. Some bags have short central zippers, a style that used to be standard. To prevent heat loss, zippers usually have filled baffles on the inside, though these may be absent in bags for above-freezing temperatures. Unfortunately, baffles snag zippers. A stiffened, antisnag strip will lessen the number of times the zipper catches, though these are far from perfect. When the zipper does jam, as it will, don’t try to yank it free—you could tear the fabric and damage the zipper. Gently ease the fabric sideways out of the zipper teeth. Two-way zippers let you open the bottom of the bag so you can stick your feet out to cool off if you overheat. You could even waddle around outside wearing your bag as a somewhat restrictive, but very warm, coat. Some sleeping bags are designed for this purpose and come with sleeves (the down-filled Nunatak Raku Alpine, weighing 32 ounces) or zipper openings for the arms (Feathered Friends down-filled Rock Wren at 27 ounces, Exped down-filled Wallcreeper at 33 ounces).
Rating sleeping bags for warmth is difficult. There’s no standard rating system, and even if there were, individuals aren’t standard and feel the cold differently. Most companies use temperature ratings. These give the lowest temperature at which the bag should keep you warm. Thus a bag may be described as a 40°F (5°C) bag or a 20°F (−7°C) bag. Another figure sometimes given is the bag’s loft. What’s important is the loft over the body, not the total thickness of the bag. Makers usually give the total loft, though some also give the loft for the top half of the bag. Halve the first to see how much loft you’ll have around you.
Although there’s no standard, bags with comparable weights of the same type of fill should keep sleepers comfortable over roughly the same temperature range. I’d be very suspicious of any maker that rates a bag as vastly warmer than competitors’ bags with a similar weight of the same quality of fill.
No rating system, however, can account for the different metabolic rates of different bodies. Warm sleepers, like me, can use lightweight bags below their rated temperatures; cold sleepers may shiver a summer night away in a bag made for polar conditions. I have a friend who sleeps buried in a four-season mummy bag while I’m comfortable in a summer bag with the hood open. Be realistic about how warm you sleep. It’s easy to be tempted by a too-light bag in order to save weight. (A friend pointed out that it’s just as easy to be tempted the other way and buy too heavy a bag to be sure of sleeping warm.)
Having tested dozens of sleeping bags over the years, I conclude that ratings for down bags are pretty accurate for a warm sleeper like me, while synthetic bag ratings are usually on the optimistic side. I recently tested fifteen bags for a magazine review—eight synthetic, six down, and one a combination down-synthetic. I was chilly in all the synthetic bags at temperatures higher than their ratings but warm at the rated temperature in five of the down bags, the only exception being a bag with no fill on the bottom. The combination bag was also warm at the rated lowest temperature. I measured the loft of each bag. None of the synthetic bags had as much loft as the lowest-lofting down bag; mostly they had half the loft of down bags with the same temperature ratings. Adding five or ten degrees to the rating of a down bag and more to a synthetic one would be wise for many people.
Other factors also influence how warm you’ll sleep. Food is fuel is heat, so however tired I am at the end of a long day, I always try to eat something before going to sleep on a cold night; if I don’t, I wake up in the early hours of the morning feeling chilly. (If it’s warm and I don’t eat, I wake up because I’m hungry!) Putting on some clothes is an obvious thing to do when you wake up in the night feeling chilly, but a carbohydrate snack can also help warm you up. If you don’t eat, fatigue can keep you shivering long after you expect to be warm. The weather is a factor, too—high humidity means a damp bag (though it may feel perfectly dry), less loft, and conductive heat loss. Thus you may feel colder when the temperature’s near freezing and the humidity is high than you do when it’s below freezing but dry. Wind reduces a bag’s efficiency, as does sleeping under an open sky with no barrier to prevent radiant heat loss. If you regularly sleep under the stars, you’ll need a warmer bag than if you always use a tent. Any barrier can make a difference. I’ve sometimes slept under a tree with the foot of my sleeping bag outside the tree’s cover and awakened to find the foot of the bag covered with frost.
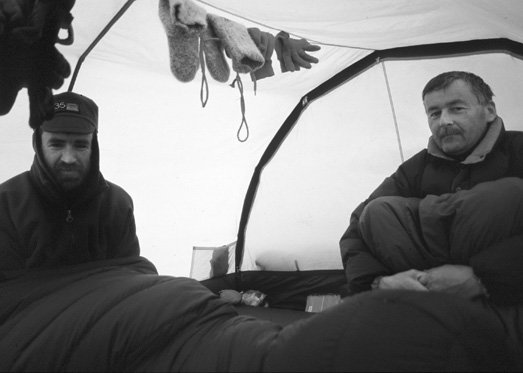
In cold weather, sit in your sleeping bag to keep warm.
High loft requires more fill, which means more weight. Down-filled bags are much lighter than synthetics across all temperature ranges, from about 1 pound for 40°F (5°C) bags to 2.5 to 3.5 pounds for 0°F (−18°C) models. The lightest synthetic-fill bags start at about 1 pound, 12 ounces for a 40°F bag and 3.5 pounds for a 0°F bag. Based on weight alone, I’d choose a down bag, especially since my experience suggests that synthetic bag ratings are on the optimistic side.
There are hundreds of sleeping bags—371 from thirty-four companies in Backpacker’s 2004 Gear Guide. However, it’s fairly easy to reduce the choice to a handful of models that fit your specific criteria. I look for the lightest, least bulky bag—which means one with down fill—that will keep me warm when I sleep unclothed in a tent in the average temperatures for the time and place of my trip. If temperatures are cooler than average, I wear clothes in the bag.
Several years ago the lightest 40°F (5°C) bags weighed about 25 ounces and had 10 ounces of down fill. New lighter shell fabrics and higher-lofting down mean they now weigh 16 ounces and have 8 ounces of down fill. I have two of these ultralight bags, both of them favorites. The first is a British-made 32°F (0°C) Rab Quantum 200, with 7 ounces of 850+ fill-power down, box-wall construction, a hood, and a Pertex Quantum shell. The weight is 16 ounces. There’s no zipper. I took it on a five-week hike in the High Sierra and needed to wear clothes in it only on the five nights when the temperature dropped below freezing. My only complaint is that the lining is white and shows dirt. My other ultralight bag is a 40°F Western Mountaineering HighLite, which also has a Quantum shell and weighs 16 ounces. It has 8 ounces of 850+ fill-power down contained in chambers that are square rather than long and thin and that have sewn-through horizontal seams and baffled vertical seams. There’s a half-length zipper and a hood, and the lining is black. Both bags are fine for summer trips when I’m expecting temperatures to be mostly above freezing, and they can be used together, since the Quantum 200 is cut slightly smaller than the HighLite. Similar bags weighing under a pound and a half are sold by Exped, PHD, GoLite, Marmot, Mountain Hardwear, Mountain-smith, Nunatak, Sierra Designs, and Bozeman Mountain Works.
These ultralight summer bags are fine for warm sleepers like me, but many people will find them inadequate in all but the very warmest temperatures (over 45°F [7°C]). Bags in the 15 to 25°F (−9 to −4°C) range are the standard for three-season use. The weights of these have come down as well, with many below 2 pounds, though some weigh as much as 3.5 pounds. The ones at the lighter end (with 16 to 20 ounces of fill) should be adequate for most people. Of the ones I’ve tried, I like the 1-pound, 11-ounce, 20°F (−7°C) GoLite Feather, which has 18 ounces of 800-fill-power down (700-fill-power in my early model) and a Pertex Quantum shell. There’s a quarter-length zipper on the top and an excellent-fitting hood. The Feather has kept me very warm at 28°F (−2°C), and it’s now my first choice for trips where temperatures are likely to be between 20 and 32°F (−7 to 0°C), which generally means spring and fall. Most makers have bags like this—it’s the closest thing you can find to a general-purpose bag.
My well-used winter bag sees little use these days because I rarely venture into areas where the temperature will be below 15°F (−9°C) on many nights, for which the Feather plus clothes is adequate. In colder temperatures the HighLite and Feather bags combined only weigh 2 pounds, 11 ounces and are warmer, smaller-packing, and more versatile than the winter bag. My bag (the model hasn’t been sold for many years) is typical of many winter bags: it weighs 3.5 pounds, with 26.5 ounces of 650-fill-power down. It’s rated to 0°F (−18°C) and is warm at 5°F (−15°C) but too hot at 35°F (2°C). Most makers offer similar bags, as well as bags designed for much colder temperatures. If I were replacing my old bag it would probably be with a Marmot Lithium. I borrowed one of these 0°F-rated bags for a spring ski trip and was extremely impressed. It contains 27 ounces of 900-fill-power down, has a Pertex Quantum shell, and weighs 2.5 pounds, less than many 20°F (−7°C) bags. There’s a half-zipper and a superbly comfortable hood. Marmot’s two other bags in this 900-fill-power series, the 15°F (−9°C), 29-ounce Helium and the 30°F (−1°C), 21-ounce Hydrogen look excellent too.
Combining bags is a good way to increase the warmth while keeping the versatility of two bags. Not all combinations are comfortable, however, and some can be hard to get in and out of, so it’s best to check that bags are compatible before trying them in camp. Obviously the outer bag will need to be roomier than the inner one. Some makers offer bags designed to fit inside others, such as Western Mountaineering’s 45°F (7°C), 14-ounce LineLite, which has no hood or boxed foot so it will fit easily inside other bags.
I use synthetic bags only when they’re sent to me for tests and reviews, but they’re the ones most people buy. I find down softer and more comfortable, as well as lighter and more packable. If I were buying a synthetic bag, I’d look for Polarguard or Primaloft, and I’d choose one rated 5 to 10° lower than the temperatures I expected to use it in. I did try a 54-ounce, 20°F (−7°C)-rated Polarguard 3D bag on a nine-day trip and found it warm and quite comfortable, though the coldest overnight temperature was only 36°F (2°C). A down bag half the weight would have been just as warm and much smaller-packing.
Sleeping bags are best carried inside the pack, where they are protected from rain, dirt, and damage. I pack my down bag at the bottom of the lower compartment, in an oversized waterproof stuff sack (see page 122). The oversized stuff sack lets the bag mold to the curve of the pack around my lower back and hips and fill the corners. A round stuff sack packed to bursting is very hard to fit in a pack without leaving lots of unfilled space. If I use a synthetic sleeping bag I pack it in an even bigger stuff sack and carry it packed as loosely as possible at the top of the pack, since compression reduces the loft of a synthetic bag. Because they are bulky when packed, many synthetic bags come with compression stuff sacks. These should never be used unless you like replacing your sleeping bag frequently.
In the field, all sleeping bags benefit from being aired whenever possible to let any moisture evaporate. This is especially important with down bags, which can absorb a surprising amount of moisture overnight. It’s also a good idea to remove down bags from their stuff sacks a while before you use them to let the fill expand, and to give them a shake before you climb in, which helps distribute the fill. Neither makes the slightest difference to synthetic bags.
Patch small cuts or holes in the fabric with rip-stop nylon tape or duct tape to prevent fill from escaping. You can sew a patch on when you return home—just remember to coat the stitch lines with seam seal to make them downproof. If tendrils of down start to work their way through the fabric, don’t pull them out, which may enlarge the hole. Instead, pull the down cluster back into the chamber from the other side.
At home, always make sure a bag is dry before storing it and never store a bag compressed; prolonged compression may damage the fill’s ability to recover so it won’t loft fully anymore, reducing the warmth. This affects synthetic bags the most; prolonged compression can destroy virtually all the loft. Bags should be stored so that the fill can loft—either flat, hung up, or packed loosely in a large bag. They need airflow round them, too, so don’t store them in a waterproof bag; cotton, polyester-cotton, or mesh is ideal. Many manufacturers provide breathable storage sacks with sleeping bags.
Whatever the outer fabric, the shell should have a durable water-repellent (DWR) treatment. As with clothing, this treatment will wear off in time; it can be restored by low-heat tumble-drying, which also helps break up any clumps the down may have formed. Running a warm hair dryer over the bag could help revive the DWR, too. Ironing should work, but I wouldn’t risk ironing a sleeping bag. When the DWR has gone completely, which does happen, you can apply a spray-on DWR treatment (see pages 176–78). Wash-in water-proofing also can be used, though drying the bag thoroughly—which is essential—is said to take a very long time.
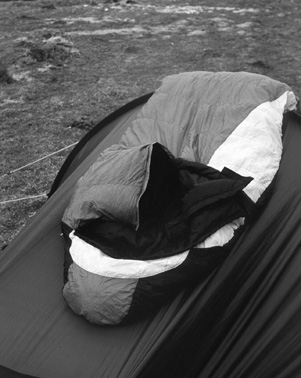
Airing a sleeping bag on top of a tent. GoLite Feather.

Airing sleeping bags on skis at a spring camp.
Eventually a well-used bag will need washing. With down bags this requires great care. Down loses some of its insulating properties every time it gets cleaned, so you should do it only when the fill is so dirty that it no longer keeps you as warm as it should. If only the shell is dirty, it can be sponged clean. Synthetic fills may be damaged by washing too, so again do so only when absolutely necessary.
When washing a bag take great care. Down absorbs vast amounts of water, and a wet bag is very heavy; if it’s lifted when wet, the baffles may tear under the weight of the wet down, so sliding it into a laundry basket is a good idea. Most instructions say bags should be hand washed in a large tub or else washed in a front-loading machine and dried on low heat in a large commercial tumble dryer to keep the down from forming clumps. You need a special down soap such as Nikwax Loft Down Wash, since detergents strip the natural oils from down and shorten its life. I always send down bags out to be washed by professionals. This relieves me of the task and increases the likelihood that my bag will survive. Many experts think that improper cleaning ruins more down bags than anything else, including prolonged use.
If you decide to have someone else wash your bag, ask for recommendations from the store where you bought it or from the manufacturer. Dry cleaning isn’t recommended for sleeping bags, since the solvents can remove the down’s natural oils. The fumes from dry-cleaning chemicals are poisonous, too, so any bag that is dry cleaned must be aired well before being used.
The shell of your down-filled bag eventually may become dirty enough that no cleaning company will touch it. This happened with the bag I used on the Continental Divide walk. It had a polyester-cotton inner shell, which was in appalling condition after 157 nights’ use. Cleaners I approached wouldn’t handle it, saying the inner shell was rotten and would disintegrate during cleaning. Since the expensive goose-down fill still lofted well and kept me warm, I was loath to throw the bag away, so I had it remade. This cost less than half the price of a new bag and included washing the down. The resulting bag not only was a better fit, since I could specify the length, but it weighed just 2 pounds rather than 2 pounds, 12 ounces because the new inner shell was nylon.
One way to improve the warmth of a sleeping bag is to wear clothes in it. This keeps the bag clean and extends its life too, because it needs washing less often. A liner accomplishes the same thing but adds weight. Clothes you can wear at other times; liners aren’t much use for anything else. I don’t really like liners because it’s easy to get tangled up in them. Liners come in cotton, wicking synthetics like CoolMax, silk, fleece, and coated nylon. I’d disregard cotton entirely because of its weight, absorbency, and slow drying time. Synthetic liners make more sense—Cocoon’s CoolMax Mummy Liner weighs 9 ounces. Silk is really light and low in bulk, and I have a 4.5-ounce Cocoon mummy-shaped silk liner that I sometimes use when weight isn’t important. It’s what I’d recommend if you really want a liner.
Coated nylon liners form a vapor barrier that keeps moisture in and stops evaporative heat loss. A vapor-barrier liner can add a surprising amount of warmth to a bag. Because drying a bag can be almost impossible in extreme cold, they’re useful in such conditions just to prevent your body moisture from condensing inside the bag and dampening it. Vapor barrier liners weigh 4 to 8 ounces. Although I’ve slept in vapor-barrier clothing (see pages 163–64), I’ve never used a vapor-barrier liner. Makes include Stephenson’s Warmlite, Feathered Friends, Western Mountaineering, Integral Designs, and Dancing Light Gear. Because they’re waterproof, vapor barrier liners can double as an emergency bivy bag. The converse, of course, is also true.
No sleeping bag provides much insulation or cushioning from the ground because the fill is compressed under your body weight. In summer weather, some hardy souls manage without a pad, putting clothing or their packs under them if it’s cold, but most people, including me, use a pad year-round.
There are two sorts of sleeping pads in general use: closed-cell foam pads and self-inflating open-cell foam pads, though modern versions of the old air mattress have made a bit of a comeback and there are some noninflating open-cell foam pads. Thickness means warmth, though how much depends on the type of pad. Self-inflating mats are not as warm for the same thickness as closed-cell foam pads. The R-value, which measures the resistance to heat flow, tells you how much insulation a pad provides, though not all makers provide this information. The higher the R-value, the greater the insulation. The 1-inch-thick Therm-a-Rest ProLite 3 self-inflating pad has an R-value of 2.3; the 0.75-inch-thick Ridge Rest closed-cell foam pad has an R-value of 2.6.
Closed-cell foam pads are lightweight, reasonably inexpensive, and hardwearing, but they’re bulky to carry. Although they’re efficient insulators, they don’t provide much cushioning, and you can feel stones through them. These pads are made from foam that is either pressure blown or chemically blown; the first is warmer, more durable, and resists compression better than the second, but the two types look identical, and manufacturers rarely tell you which is which. Various materials are used to make pads—Evazote (EVA), Ensolite, and polyurethane are common ones. The big advantage of closed-cell foam is that’s it’s waterproof, since the air pockets in the foam are sealed inside, so it doesn’t suck up water the way open-cell foam does. Closed-cell foam is pretty indestructible, too, though it can be torn apart by spiny vegetation (and duct taped back together if necessary). In time the foam compresses and doesn’t provide as much insulation or cushioning, though it’s still usable.
Closed-cell pads come in different lengths, widths, and thickness, and you can easily cut one down to the shape you want. I find three-quarter-length pads adequate, since I use clothes as a pillow and under my feet if necessary. This saves a little weight and bulk. Weights for short pads start at 3.7 ounces for the 18-by-29-inch NightLight pad from Gossamer Gear. The thickest, longest, widest pads can weigh 20 ounces or more.
Most foam pads have flat, smooth surfaces. But the most comfortable closed-cell foam pad I’ve used, Cascade Designs’ very popular 0.75-inch laminated EVA Ridge Rest, has a ridged pattern that adds softness and traps air for greater warmth. Although it has more bulk than flat-surfaced pads, the 48-inch model weighs only 9 ounces, the 72-inch one 14 ounces. Cascade Designs also makes the 48-inch EVA Z-Rest (R-value 2.2), which has an egg-crate pattern and folds up like an accordion. The 48-inch Z-Rest weighs 11 ounces, the 72-inch full-length one 15 ounces. The Z-Rest is more comfortable than most closed-cell foam pads but in my experience not quite as comfortable or durable as the Ridge Rest. Because of their bulk, closed-cell pads are normally carried on the outside of the pack, wherever there are convenient straps. In hiking through low, dense brush, however, a pad attached to the side or the bottom of a pack is likely to get ripped, as I discovered when bushwhacking down an unmaintained trail in a side canyon of the Grand Canyon. Before it was totally torn apart, I transferred it to the top of the pack, where it was above the bushes. In forests with low branches, of course, the top of the pack is not where you want to put a pad.
Cascade Designs is best known for introducing the first, and in my opinion still the best, self-inflating pad, the Therm-a-Rest, back in 1973, and it has since become the nearest thing there is to a standard pad. I’ve used one of these for over two decades. Therm-a-Rests have a tough waterproof coated nylon shell bonded to an open-cell polyurethane foam core that sucks in air and inflates when you open the valve at one corner. That’s the theory anyway. In reality it takes a few puffs of breath. Once the pad has reached the desired thickness, you close the valve to keep the air from escaping. Self-inflating pads combine the comfort of an air mattress with the insulation of a foam pad and are relatively luxurious to sleep on.
The Therm-a-Rest ProLite 3 self-inflating pad.
My first Therm-a-Rest, bought back in 1981, was a 48-inch model weighing 24 ounces. Back then the only choice was between two lengths. Now there’s a whole family of Therm-a-Rests, with seven models, many in a choice of lengths and with weights up to 8 pounds. I long ago replaced my first Therm-a-Rest with the 47-inch-long, 1-inch-thick UltraLite (R-value 2.6), which weighs 16.5 ounces. This has been replaced by the tapered ProLite 3 Short, which weighs just 13 ounces owing to new materials and construction methods but is still 47 inches long and 1 inch thick. My original 47-inch UltraLite lasted through both the Continental Divide Trail and walks the length of the Canadian Rockies, plus many other trips, a total of well over a year’s use in ten years, before finally splitting around the valve, where a repair was impossible (the valves used to be metal; now they’re plastic and much better attached). Having found nothing better, I replaced it with a new UltraLite, which is still going strong, though I now also have a ProLite 3. The ProLite 3 has die-cut foam with holes through it, hence the reduction in weight. The warmth is reduced slightly too, but I’ve still found the pad warm on freezing ground. It also has a base that grips well and doesn’t slide about on groundsheets. Like the UltraLite it’s a great three-season pad but for cold temperatures and snow camping I’d supplement it with a foam pad.
Although slightly heavier than many closed-cell foam pads, the ProLite 3 is much less bulky and can be folded and packed inside the pack, where it is protected from damage. I would never carry a self-inflating pad on the outside of a pack unless it was in an extremely tough stuff sack. To deflate a self-inflating pad you open the valve and slowly roll the pad up, either on a ground cloth or on your thighs, squeezing out the air as you go. Keep pressure on the rolled pad—I kneel on it—while you close the valve. The deflated pad can then be rolled or folded as you choose. Open-cell foam has a “memory.” Leave it compressed for a long time and it’ll stay compressed. At home, Therm-a-Rests should be stored uncompressed with the valve open. This also allows moisture from breath to escape. Breath doesn’t harm Therm-a-Rests. I always blow mine up rather than waiting for it to inflate.
Therm-a-Rests require care. I don’t throw mine down on the ground and sit on it without checking for sharp objects that might puncture it. In fact, I don’t put it on bare ground at all, I always use a ground cloth. In case the pad does spring a leak, you can get a repair kit containing patches and glue. The HotBond Repair Kit weighs an ounce, and I usually carry it. Sticky-backed nylon repair tape can be used too, or even duct tape as a last resort. Finding a pin-prick-sized leak can be difficult, however. The best method is to immerse the pad in a creek or pool and watch for bubbles. Because of the foam core, self-inflating mats still supply a little insulation if punctured. Look after your pad, and punctures should be rare. I’ve only had three in twenty-one years, during which I’ve slept on a Therm-a-Rest at least a thousand nights. DEET-based insect repellent (see page 337) can damage the coating, another reason for not using DEET or at least wiping it off yourself before handling or lying on a pad. Prolonged exposure to ultraviolet light can damage a pad too, as can solvents. Various other self-inflating mats are sold by Slumberjack, Outbound, Artiach, Exped, Big Agnes, and Pacific Outdoor Equipment. POE makes InsulMat mummy-shaped pads, which is a nice idea. I’ve tried the full-length, 1-inch-thick InsulMat Max-Lite 1.0 (R-value 3); it’s very comfortable and weighs a reasonable 25 ounces. Perhaps the most interesting alternative to a Therm-a-Rest is Bozeman Mountain Works’ tapered 1-inch-thick TorsoLite. It’s only 32 inches long, but it weighs just 10 ounces.
Traditional air mattresses are very comfortable but also cold, since there’s no fill to hold the air in place, so it moves around and conducts ground cold upward. Few traditional air mattresses are still around, though Big Agnes makes one, the REM (Rest Easy Mama) Air Core. The mummy-shaped version of this weighs 19 ounces and is 72 inches long and 2.5 inches thick. Despite the thickness, however, it’s rated only down to 35°F (2°C), and if it punctures it will be much less comfortable than a deflated self-inflating mat.
The most luxurious—and expensive—air mattresses are filled with down. Pump these up (don’t use your breath; it will dampen the down), and they form a supportive and warm bed. Stephen-son’s Warmlite introduced down mattresses way back in 1975 with their DAM (down-filled air mattress) models. The lightest 56-inch one weighs 18 ounces and is 3 to 4 inches thick. Its stuff sack doubles as a pump. Much more recently Exped has introduced its Down Air Mattress, which weighs 32 ounces (plus 6 ounces for the stuff sack, which incorporates a pump), is 70 inches long and 3.5 inches thick, and has an R-value of 9.54, equivalent to over four ProLite 3 Therm-a-Rests. Exped’s mattress is filled with 8.8 ounces of 700-fill-power down.
If you want more comfort than closed-cell foam but don’t like the idea of a pad that can puncture (my partner, Denise Thorn, won’t use a self-inflating pad for this reason), there are pads that provide this. They tend to be heavy and bulky, though, since they use open-cell foam with a waterproof cover, often in combination with closed-cell foam. Mountain Hardwear pads are such a combination. The cover zips off so the foam can be removed for cleaning and airing. The lightest model is the Superlight 60, at 24 ounces. It’s tapered, 60 inches long and an inch thick.
Despite all this choice, I regularly only use two mats, and for many years I used only one. Much to my surprise, after some eighteen years of using a Therm-a-Rest, I have reverted to a closed-cell pad for some trips. During my Therm-a-Rest years I did occasionally use closed-cell pads on short trips, but I never found them very comfortable. However, when I came to hike the Arizona Trail I wanted a pad I could chuck on the ground without bothering about cactus spines or sharp stones, so I took a Ridge Rest. I soon found myself quite happy sleeping on stony ground on this pad, and I’ve gone on using it—I really like not having to worry about puncturing it and being able to throw it down where I like. It’s often said that as you get older you feel the bumps and hardness of the ground more. I seem to be the opposite. When camping on snow, I usually carry both Ridge Rest and ProLite 3, though in spring I sometimes take just one. The combined weight is 22 ounces, still light for a winter pad.
For a pillow, I simply use a fleece or insulated top stuffed loosely into a large stuff sack (usually the one that holds the sleeping bag). I put this makeshift pillow under my sleeping bag hood so that if I turn over with the bag in the night it stays put. For those who prefer more organized comfort than soft clothing provides, you can get lightweight pillows. Integral Designs make a delightful-sounding Primasilk pillow with Primaloft fill and a silk shell that weighs 4 ounces.
Carrying chairs is unusual in the wilderness, though I did once see two hikers with lawn chairs strapped to their towering packs. Rather than carry these, you can adapt a pad with a chair kit. Cascade Designs makes kits for all their Therm-a-Rests, and they’ll undoubtedly work with other pads. I have a 12-ounce Lite Chair that fits shorter pads. It consists of a piece of nylon that slips over each end of the mat, with adjustable straps linking the ends. Tighten these straps and the mat folds up so you can sit in it, adjusting the tension until it feels comfortable. Many years ago my companion and I each took one of these devices on a fairly leisurely eleven-day hike in Yosemite National Park, where weight wasn’t paramount. It was very pleasant sitting outside in our chairs each evening. However, we both punctured our Therm-a-Rests, despite the tough nylon base of the chairs. I figured I’d have been as comfortable sitting against a tree, a boulder, or my pack, and I’ve never taken the chair backpacking again, though I do occasionally use it—with the Ridge Rest—when camping from the car.
Some pads come designed to be used as chairs, or maybe it’s the other way around. Crazy Creek was first with these and now offers sixteen models. I have an Original Chair. It weighs 22 ounces and consists of a 15.5-by-33-inch closed-cell foam pad encased in ripstop nylon with carbon fiber stays in the sides and adjustable straps. It’s very comfortable as a chair but a bit narrow and short for a sleeping pad. It’s good for car camping, but I’ve never taken it backpacking. Crazy Creek also makes the Thermolounger Shell (22 ounces) into which you can put your own 48-inch pad.

Relaxing in a hammock.
Hammocks might seem to belong to tropical expeditions rather than most backpacking, but they’re gathering a following, mainly owing to one design, the Hennessey Hammock, which was developed for hiking use. The original Hennessey has expanded into nine models, of which the Ultra-light Backpacker A-Sym is probably the best for hiking. (I haven’t used any of them.) This hammock comes with netting and a silnylon fly sheet and so will keep out bugs and rain. There’s a Velcro-closed slit in the bottom for entry, so you don’t have to swing yourself in from the side (and maybe rapidly exit the other side, as I’ve done when trying out hammocks). The weight is 31 ounces. If there are no trees to hang it from (it has extra-wide webbing so it won’t damage trees), it can be pitched as a tent using trekking poles. Oh—it can be used with a sleeping pad to make a chair, too! A-Sym is short for asymmetrical, and it’s designed to make it easy to lie diagonally across the centerline, which is supposed to be more comfortable. There appear to be many happy users, and if I were looking for a hammock, this is the one I would choose. There are plenty of others. Hammocks.com stocks more than three hundred—most too heavy for backpacking, of course—while Speerhammocks.com offers hammocks more suited to backpacking along with kits so you can make your own plus a book on hammock camping.