Improving Your Soil
Nutrient-rich, fertile soil is essential for growing the best and healthiest plants—plants that will supply you with quality fruits, vegetables, and flowers. Sometimes soil loses its fertility (or has minimum fertility based on the region in which you live), so measures must be taken in order to improve your soil and, subsequently, your garden.
Soil Quality Indicators
Soil quality is an assessment of how well soil performs all of its functions now and how those functions are being preserved for future use. The quality of soil cannot just be determined by measuring row or garden yield, water quality, or any other single outcome, nor can it be measured directly. Thus, it is important to look at specific indicators to better understand the properties of soil. Plants can provide us with clues about how well the soil is functioning—whether a plant is growing and producing quality fruits and vegetables, or failing to yield such things, is a good indicator of the quality of the soil it’s growing in.
In short, indicators are measurable properties of soil or plants that provide clues about how well the soil can function. Indicators can be physical, chemical, and biological properties, processes, or characteristics of soils. They can also be visual features of plants.
Useful indicators of soil quality:
- are easy to measure
- measure changes in soil functions
- encompass chemical, biological, and physical properties
- are accessible to many users
- are sensitive to variations in climate and management

Indicators can be assessed by qualitative or quantitative techniques, such as soil tests. After measurements are collected, they can be evaluated by looking for patterns and comparing results to measurements taken at a different time.
Examples of soil quality indicators:
- Soil Organic Matter—promotes soil fertility, structure, stability, and nutrient retention and helps combat soil erosion.
- Physical Indicators—these include soil structure, depth, infiltration and bulk density, and water hold capacity. Quality soil will retain and transport water and nutrients effectively; it will provide habitat for microbes; it will promote compaction and water movement; and, it will be porous and easy to work with.
- Chemical Indicators—these include pH, electrical conductivity, and extractable nutrients. Quality soil will be at its threshold for plant, microbial, biological, and chemical activity; it will also have plant nutrients that are readily available.
- Biological Indicators—these include microbial biomass, mineralizable nitrogen, and soil respiration. Quality soil is a good repository for nitrogen and other basic nutrients for prosperous plant growth; it has a high soil productivity and nitrogen supply; and there is a good amount of microbial activity.
Soil and Plant Nutrients
Nutrient Management
There are twenty nutrients that all plants require. Six of the most important nutrients, called macronutrients, are: calcium, magnesium, nitrogen, phosphorous, potassium, and sulfur. Of these, nitrogen, phosphorus, and potassium are essential to healthy plant growth and are required in relatively large amounts. Nitrogen is associated with lush vegetative growth, phosphorus is required for flowering and fruiting, and potassium is necessary for durability and disease resistance. Calcium, sulfur, and magnesium are also required in comparatively large quantities and aid in the overall health of plants.
The other nutrients, referred to as micronutrients, are required in very small amounts. These include such elements as copper, zinc, iron, and boron. While both macro- and micronutrients are required for good plant growth, over-application of these nutrients can be as detrimental to the plant as a deficiency of them. Over-application of plant nutrients may not only impair plant growth, but may also contaminate groundwater by penetrating through the soil or may pollute surface waters.
Soil Testing
Testing your soil for nutrients and pH is important in order to provide your plants with the proper balance of nutrients (while avoiding over-application). If you are establishing a new lawn or garden, a soil test is strongly recommended. The cost of soil testing is minor in comparison to the cost of plant materials and labor. Correcting a problem before planting is much simpler and cheaper than afterwards.
Once your garden is established, continue to take periodic soil samples. While many people routinely lime their soil, this can raise the pH of the soil too high. Likewise, since many fertilizers tend to lower the soil’s pH, it may drop below desirable levels after several years, depending on fertilization and other soil factors, so occasional testing is strongly encouraged.
Home tests for pH, nitrogen, phosphorus, and potassium are available from most garden centers. While these may give you a general idea of the nutrients in your soil, they are not as reliable as tests performed by the Cooperative Extension Service at land grant universities. University and other commercial testing services will provide more detail, and you can request special tests for micronutrients if you suspect a problem. In addition to the analysis of nutrients in your soil, these services often provide recommendations for the application of nutrients or how best to adjust the pH of your soil.
The test for soil pH is very simple. pH is a measure of how acidic or alkaline your soil is. A pH of 7 is considered neutral. Below 7 is acidic and above 7 is alkaline. Since pH greatly influences plant nutrients, adjusting the pH will often correct a nutrient problem. At a high pH, several of the micronutrients become less available for plant uptake. Iron deficiency is a common problem, even at a neutral pH, for such plants as rhododendrons and blueberries. At a very low soil pH, other micronutrients may be too available to the plant, resulting in toxicity.
Phosphorus and potassium are tested regularly by commercial testing labs. While there are soil tests for nitrogen, these may be less reliable. Nitrogen is present in the soil in several forms that can change rapidly. Therefore, a precise analysis of nitrogen is more difficult to obtain. Most university soil test labs do not routinely test for nitrogen. Home testing kits often contain a test for nitrogen that may give you a general, though not necessarily completely accurate, idea of the presence of nitrogen in your garden soil.
Organic matter is often part of a soil test. Organic matter has a large influence on soil structure and so is highly desirable for your garden soil. Good soil structure improves aeration, water movement, and retention. This encourages increased microbial activity and root growth, both of which influence the availability of nutrients for plant growth. Soils high in organic matter tend to have a greater supply of plant nutrients compared to many soils low in organic matter. Organic matter tends to bind up some soil pesticides, reducing their effectiveness, and so this should be taken into consideration if you are planning to apply pesticides in your garden.
Tests for micronutrients are usually not performed unless there is reason to suspect a problem. Certain plants have greater requirements for specific micronutrients and may show deficiency symptoms if those nutrients are not readily available.
STEPS FOR TAKING A SOIL TEST
- If you intend to send your sample to the land grant university in your state, contact the local Cooperative Extension Service for information and sample bags. If you intend to send your sample to a private testing lab, contact them for specific details about submitting a sample.
- Follow the directions carefully for submitting the sample. The following are general guidelines for taking a soil sample:
- Sample when the soil is moist but not wet.
- Obtain a clean pail or similar container.
- Clear away the surface litter or grass.
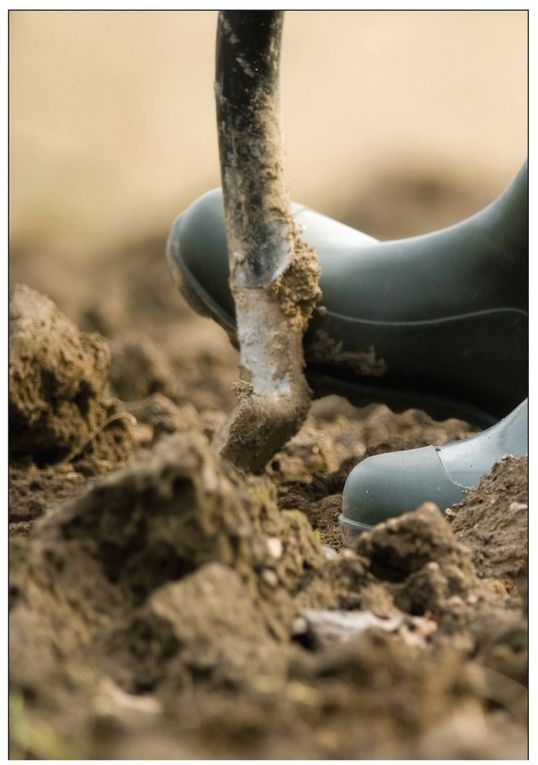
- With a spade or soil auger, dig a small amount of soil to a depth of 6 inches.
- Place the soil in the clean pail.
- Repeat steps 3 through 5 until the required number of samples has been collected.
- Mix the samples together thoroughly.
- From the mixture, take the sample that will be sent for analysis.
- Send immediately. Do not dry before sending.
- If you are using a home soil testing kit, follow the above steps for taking your sample. Follow the directions in the test kit carefully so you receive the most accurate reading possible.
Enriching Your Soil
Organic and Commercial Fertilizers and Returning Nutrients to Your Soil
Once you have the results of the soil test, you can add nutrients or soil amendments as needed to alter the pH. If you need to raise the soil’s pH, use lime. Lime is most effective when it is mixed into the soil; therefore, it is best to apply before planting (if you apply lime in the fall, it has a better chance of correcting any soil acidity problems for the next growing season). For large areas, rototilling is most effective. For small areas or around plants, working the lime into the soil with a spade or cultivator is preferable. When working around plants, be careful not to dig too deeply or roughly so that you damage plant roots. Depending on the form of lime and the soil conditions, the change in pH may be gradual. It may take several months before a significant change is noted. Soils high in organic matter and clay tend to take larger amounts of lime to change the pH than do sandy soils.
If you need to lower the pH significantly, especially for plants such as rhododendrons, you can use aluminum sulfate. In all cases, follow the soil test or manufacturer’s recommended rates of application. Again, mixing well into the soil is recommended.
There are numerous choices for providing nitrogen, phosphorus, and potassium, the nutrients your plants need to thrive. Nitrogen (N) is needed for healthy, green growth and regulation of other nutrients. Phosphorus (P) helps roots and seeds properly develop and resist disease. Potassium (K) is also important in root development and disease resistance. If your soil is of adequate fertility, applying compost may be the best method of introducing additional nutrients. While compost is relatively low in nutrients compared to commercial fertilizers, it is especially beneficial in improving the condition of the soil and is nontoxic. By keeping the soil loose, compost allows plant roots to grow well throughout the soil, helping them to extract nutrients from a larger area. A loose soil enriched with compost is also an excellent habitat for earthworms and other beneficial soil microorganisms that are essential for releasing nutrients for plant use. The nutrients from compost are also released slowly, so there is no concern about “burning” the plant with an over-application of synthetic fertilizer.


Manure is also an excellent source of plant nutrients and is an organic matter. Manure should be composted before applying, as fresh manure may be too strong and can injure plants. Be careful when composting manure. If left in the open, exposed to rain, nutrients may leach out of the manure and the runoff can contaminate nearby waterways. Make sure the manure is stored in a location away from wells and any waterways and that any runoff is confined or slowly released into a vegetated area. Improperly applied manure also can be a source of pollution. If you are not composting your own manure, you can purchase some at your local garden store. For best results, work composted manure into the soil around the plants or in your garden before planting.
If preparing a bed before planting, compost and manure may be worked into the soil to a depth of 8 to 12 inches. If adding to existing plants, work carefully around the plants so as not to harm the existing roots.
Green manures are another source of organic matter and plant nutrients. Green manures are crops that are grown and then tilled into the soil. As they break down, nitrogen and other plant nutrients become available. These manures may also provide additional benefits of reducing soil erosion. Green manures, such as rye and oats, are often planted in the fall after the crops have been harvested. In the spring, these are tilled under before planting.
With all organic sources of nitrogen, whether compost or manure, the nitrogen must be changed to an inorganic form before the plants can use it. Therefore, it is important to have well-drained, aerated soils that provide the favorable habitat for the soil microorganisms responsible for these conversions.
There are also numerous sources of commercial fertilizers that supply nitrogen, phosphorus, and potassium, though it is preferable to use organic fertilizers, such as compost and manures. However, if you choose to use a commercial fertilizer, it is important to know how to read the amount of nutrients contained in each bag. The first number on the fertilizer analysis is the percentage of nitrogen; the second number is phosphorus; and the third number is the potassium content. A fertilizer that has a 10-20-10 analysis contains twice as much of each of the nutrients as a 5-10-5. How much of each nutrient you need depends on your soil test results and the plants you are fertilizing.
As mentioned before, nitrogen stimulates vegetative growth while phosphorus stimulates flowering. Too much nitrogen can inhibit flowering and fruit production. For many flowers and vegetables, a fertilizer higher in phosphorus than nitrogen is preferred, such as a 5-10-5. For lawns, nitrogen is usually required in greater amounts, so a fertilizer with a greater amount of nitrogen is more beneficial.
Fertilizer Application
Commercial fertilizers are normally applied as a dry, granular material or mixed with water and poured onto the garden. If using granular materials, avoid spilling on sidewalks and driveways because these materials are water soluble and can cause pollution problems if rinsed into storm sewers. Granular fertilizers are a type of salt, and if applied too heavily, they have the capability of burning the plants. If using a liquid fertilizer, apply directly to or around the base of each plant and try to contain it within the garden only.
In order to decrease the potential for pollution and to gain the greatest benefits from fertilizer, whether it’s a commercial variety, compost, or other organic materials, apply it when the plants have the greatest need for the nutrients. Plants that are not actively growing do not have a high requirement for nutrients; thus, nutrients applied to dormant plants, or plants growing slowly due to cool temperatures, are more likely to be wasted. While light applications of nitrogen may be recommended for lawns in the fall, generally, nitrogen fertilizers should not be applied to most plants in the fall in regions of the country that experience cold winters. Since nitrogen encourages vegetative growth, if it is applied in the fall it may reduce the plant’s ability to harden properly for winter.
| Soil Test Reading | What to Do |
|---|---|
| High pH | Your soil is alkaline. To lower pH, add elemental sulfur, gypsum, or cottonseed meal. Sulfur can take several months to lower your soil’s pH, as it must first convert to sulfuric acid with the help of the soil’s bacteria. |
| Low pH | Your soil is too acidic. Add lime or wood ashes. |
| Low nitrogen | Add manure, horn or hoof meal, cottonseed meal, fish meal, or dried blood. |
| High nitrogen | Your soil may be over-fertilized. Water the soil frequently and don’t add any fertilizer. |
| Low phosphorus | Add cottonseed meal, bonemeal, fish meal, rock phosphate, dried blood, or wood ashes. |
| High phosphorous | Your soil may be over-fertilized. Avoid adding phosphorous-rich materials and grow lots of plants to use up the excess. |
| Low potassium | Add potash, wood ashes, manure, dried seaweed, fish meal, or cottonseed meal. |
| High potassium | Continue to fertilize with nitrogen and phosphorous-rich soil additions, but avoid potassium-rich fertilizers for at least two years. |
| Poor drainage or too much drainage | If your soil is a heavy, clay-like consistency, it won’t drain well. If it’s too sandy, it won’t absorb nutrients as it should. Mix in peat moss or compost to achieve a better texture. |
In some gardens, you can reduce fertilizer use by applying it around the individual plants rather than broadcasting it across the entire garden. Much of the phosphorus in fertilizer becomes unavailable to the plants once spread on the soil. For better plant uptake, apply the fertilizer in a band near the plant. Do not apply directly to the plant or in contact with the roots, as it may burn and damage the plant and its root system.
HOW TO PROPERLY APPLY FERTILIZER TO YOUR GARDEN
Apply fertilizer when the soil is moist, and then water lightly. This will help the fertilizer move into the root zone where its nutrients are available to the plants, rather than staying on top of the soil where it can be blown or washed away.
Watch the weather. Avoid applying fertilizer immediately before a heavy rain system is predicted to arrive. Too much rain (or sprinkler water) will take the nutrients away from the lawn’s root zone and could move the fertilizer into another water system, contaminating it.
Use the minimum amount of fertilizer necessary and apply it in small, frequent applications. An application of two pounds of fertilizer, five times per year, is better than five pounds of fertilizer twice a year.
If you are spreading the fertilizer by hand in your garden, wear gardening gloves and be sure not to damage the plant or roots around which you are fertilizing.
Rules of Thumb for Proper Fertilizer Use
It is easiest to apply fertilizer before or at the time of planting. Fertilizers can either be spread over a large area or confined to garden rows, depending on the condition of your soil and the types of plants you will be growing. After spreading, till the fertilizer into the soil about 3 to 4 inches deep. Only spread about one half of the fertilizer this way and then dispatch the rest 3 inches to the sides of each row and also a little below each seed or established plant. This method, minus the spreader, is used when applying fertilizer to specific rows or plants by hand.
Composting in Your Backyard
Composting is nature’s own way of recycling yard and household wastes by converting them into valuable fertilizer, soil organic matter, and a source of plant nutrients. The result of this controlled decomposition of organic matter—a dark, crumbly, earthy-smelling material—works wonders on all kinds of soil by providing vital nutrients, and contributing to good aeration and moisture-holding capacity, to help plants grow and look better.
Composting can be as simple or as involved as you would like, depending on how much yard waste you have, how fast you want results, and the effort you are willing to invest. Since all organic matter eventually decomposes, composting speeds up the process by providing an ideal environment for bacteria and other decomposing microorganisms. The composting season coincides with the growing season, when conditions are favorable for plant growth, so those same conditions work well for biological activity in the compost pile. However, since compost generates heat, the process may continue later into the fall or winter. The final product—called humus or compost—looks and feels like fertile garden soil.
Compost Preparation
While a multitude of organisms, fungi, and bacteria are involved in the overall process, there are four basic ingredients for composting: nitrogen, carbon, water, and air. A wide range of materials may be composted because anything that was once alive will naturally decompose. The starting materials for composting, commonly referred to as feed stocks, include leaves, grass clippings, straw, vegetable and fruit scraps, coffee grounds, livestock manure, sawdust, and shredded paper. However, some materials that always should be avoided include diseased plants, dead animals, noxious weeds, meat scraps that may attract animals, and dog or cat manure, which can carry disease. Since adding kitchen wastes to compost may attract flies and insects, make a hole in the center of your pile and bury the waste.

JUNIOR HOMESTEADER TIP
Compost Lasagna
Watch your produce scraps decompose! And see how some materials don’t.
Things You’ll Need:
1 2-liter clear plastic bottle
2 cups fruit and vegetable scraps
1 cup grass clippings and leaves
2 cups soil
Newspaper clippings or shredded paper
Styrofoam packing peanuts
Magic marker
Layer all your ingredients, just like you’d make a lasagna. Start with a couple inches of soil, then add the produce scraps, then more dirt, then the grass clippings and leaves, more dirt, the Styrofoam, more dirt, the shredded paper, and top it all off with a little more dirt.
Use the magic marker to mark the top of the top layer. Then place the bottle upright in a windowsill or another sunny spot. If there’s a lot of condensation in the bottle, open the top to let it air out.
Once a week for four weeks check on the bottle and notice how the level of the dirt has changed. Mark it with the marker.
At the end of four weeks, dump the bottle out in a garden spot that hasn’t been planted, or add it to your compost pile. Notice which items decomposed the most. Remove the items that didn’t decompose and discard them in the trash.
For best results, you will want an even ratio of green, or wet, material, which is high in nitrogen, and brown, or dry, material, which is high in carbon. Simply layer or mix landscape trimmings and grass clippings, for example, with dried leaves and twigs in a pile or enclosure. If there is not a good supply of nitrogen-rich material, a handful of general lawn fertilizer or barnyard manure will help even out the ratio.
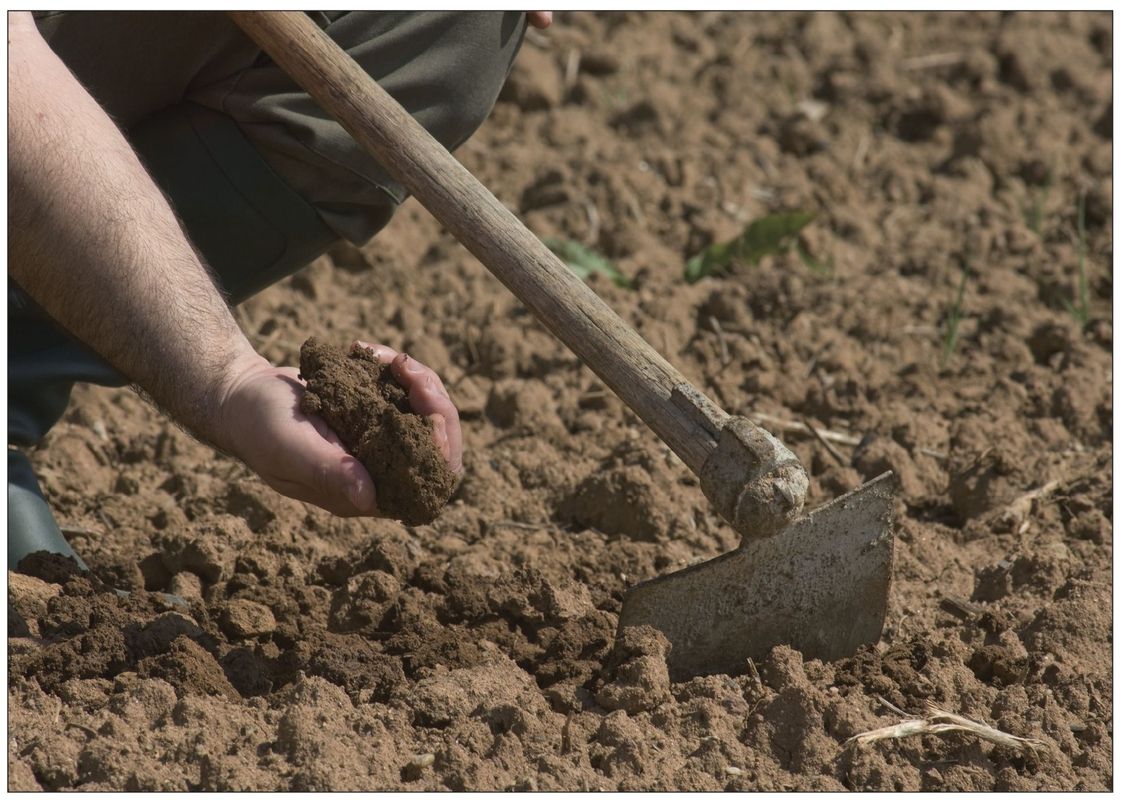
Though rain provides the moisture, you may need to water the pile in dry weather or cover it in extremely wet weather. The microorganisms in the compost pile function best when the materials are as damp as a wrung-out sponge—not saturated with water. A moisture content of 40 to 60 percent is preferable. To test for adequate moisture, reach into your compost pile, grab a handful of material, and squeeze it. If a few drops of water come out, it probably has enough moisture. If it doesn’t, add water by putting a hose into the pile so that you aren’t just wetting the top, or, better yet, water the pile as you turn it.
Air is the only part that cannot be added in excess. For proper aeration, you’ll need to punch holes in the pile so it has many air passages. The air in the pile is usually used up faster than the moisture, and extremes of sun or rain can adversely affect this balance, so the materials must be turned or mixed up often with a pitchfork, rake, or other garden tool to add air that will sustain high temperatures, control odor, and yield faster decomposition.
Over time, you’ll see that the microorganisms, which are small forms of plant and animal life, will break down the organic material. Bacteria are the first to break down plant tissue and are the most numerous and effective compost-makers in your compost pile. Fungi and protozoans soon join the bacteria and, somewhat later in the cycle, centipedes, millipedes, beetles, sow bugs, nematodes, worms, and numerous others complete the composting process. With the right ingredients and favorable weather conditions, you can have a finished compost pile in a few weeks.
How to Make Your Own Backyard Composting Heap
- 1. Choose a level, well-drained site, preferably near your garden.
- 2. Decide whether you will be using a bin after checking on any local or state regulations for composting in urban areas, as some communities require rodentproof bins. There are numerous styles of compost bins available, depending on your needs, ranging from a moveable bin formed by wire mesh to a more substantial wooden structure consisting of several compartments. You can easily make your own bin using chicken wire or scrap wood. While a bin will help contain the pile, it is not absolutely necessary, as you can build your pile directly on the ground. To help with aeration, you may want to place some woody material on the ground where you will build your pile.
- 3. Ensure that your pile will have a minimum dimension of 3 feet all around, but is no taller than 5 feet, as not enough air will reach the microorganisms at the center if it is too tall. If you don’t have this amount at one time, simply stockpile your materials until a sufficient quantity is available for proper mixing. When composting is completed, the total volume of the original materials is usually reduced by 30 to 50 percent.
- 4. Build your pile by using either alternating equal layers of high-carbon and high-nitrogen material or by mixing equal parts of both together and then heaping it into a pile. If you choose to alternate layers, make each layer 2 to 4 inches thick. Some composters find that mixing the two together is more effective than layering. Adding a few shovels of soil will also help get the pile off to a good start because soil adds commonly found, decomposing organisms to your compost.
- 5. Keep the pile moist but not wet. Soggy piles encourage the growth of organisms that can live without oxygen and cause unpleasant odors.
- 6. Punch holes in the sides of the pile for aeration. The pile will heat up and then begin to cool. The most efficient decomposing bacteria thrive in temperatures between 110 and 160 degrees Fahrenheit. You can track this with a compost thermometer, or you can simply reach into the pile to determine if it is uncomfortably hot to the touch. At these temperatures, the pile kills most weed seeds and plant diseases. However, studies have shown that compost produced at these temperatures has less ability to suppress diseases in the soil, since these temperatures may kill some of the beneficial bacteria necessary to suppress disease.
COMMON COMPOSTING MATERIALS
Cardboard
Coffee grounds
Corn cobs
Corn stalks
Food scraps
Grass clippings
Hedge trimmings
Livestock manure
Newspapers
Old potting soil
Plant stalks
Pine needles
Sawdust
Seaweed
Shredded paper
Straw
Tea bags
Telephone books
Tree leaves and twigs
Vegetable scraps
Weeds without seed heads
Wood chips
Woody brushAvoid using:
Bread and grains
Cooking oil
Dairy products
Dead animals
Diseased plant material
Dog or cat manure
Grease or oily foods
Meat or fish scraps
Noxious or invasive weeds
Weeds with seed heads - 8. Check your bin regularly during the composting season to assure optimum moisture and aeration are present in the material being composted.
- 9. Move materials from the center to the outside of the pile and vice versa. Turn every day or two and you should get compost in less than four weeks. Turning every other week will make compost in one to three months. Finished compost will smell sweet and be cool and crumbly to the touch.
Other Types of Composting
Cold or Slow Composting
Cold composting allows you to pile just organic material on the ground or in a bin. This method requires no maintenance, but it will take several months to a year or more for the pile to decompose, though the process is faster in warmer climates than in cooler areas. Cold composting works well if you are short on time needed to tend to the compost pile at least every other day, have little yard waste, and are not in a hurry to use the compost.
For this method, add yard waste as it accumulates. To speed up the process, shred or chop the materials by running over small piles of trimmings with your lawn mower, because the more surface area the microorganisms have to feed on, the faster the materials will break down.
Cold composting has been shown to be better at suppressing soilborne diseases than hot composting and also leaves more non-decomposed bits of material, which can be screened out if desired. However, because of the low temperatures achieved during decomposition, weed seeds and disease-causing organisms may not be destroyed.
Vermicomposting
Vermicomposting uses worms to compost. This takes up very little space and can be done year-round in a basement or garage. It is an excellent way to dispose of kitchen wastes.
Here’s how to make your own vermicomposting pile:
- Obtain a plastic storage bin. One bin measuring 1 foot by 2 feet by 3½ feet will be enough to meet the needs of a family of six.
- Drill eight to ten holes about ¼ inch in diameter in the bottom of the bin for drainage.
- Line the bottom of the bin with a fine nylon mesh to keep the worms from escaping.
- Put a tray underneath to catch the drainage.

Any large bucket can be turned into a compost barrel. You can cut out a piece of the barrel for easy access to the compost, as shown here, or simply access the compost through the lid. Drilling holes in the sides and lid of the bucket will increase air circulation and speed up the process. Leave your bucket in the sun and shake it, roll it, or stir the contents regularly.
THE JUNIOR HOMESTEADER
Let the kids be in charge of feeding the worms in your compost. They’ll be fascinated by the squirmy critters!
- Rip shredded newspaper into pieces to use as bedding and pour water over the strips until they are thoroughly moist. Place these shredded bits on one side of your bin. Do not let them dry out.
- Add worms to your bin. It’s best to have about two pounds of worms (roughly 2,000 worms) per one pound of food waste. You may want to start with less food waste and increase the amount as your worm population grows. Redworms are recommended for best composting, but other species can be used. Redworms are the common, small worms found in most gardens and lawns. You can collect them from under a pile of mulch or order them from a garden catalog.
- Provide worms with food wastes such as vegetable peelings. Do not add fat or meat products. Limit their feed, as too much at once may cause the material to rot.
- Keep the bin in a dark location away from extreme temperatures.
- Wait about three months and you’ll see that the worms have changed the bedding and food wastes into compost. At this time, open your bin in a bright light and the worms will burrow into the bedding. Add fresh bedding and more food to the other side of the bin. The worms should migrate to the new food supply.
- Scoop out the finished compost and apply to your plants or save to use in the spring.
Common Problems
Composting is not an exact science. Experience will tell you what works best for you. If you notice that nothing is happening, you may need to add more nitrogen, water, or air; chip or grind the materials; or adjust the size of the pile.
If the pile is too hot, you probably have too much nitrogen and need to add additional carbon materials to reduce the heating.
A bad smell may indicate not enough air or too much moisture. Simply turn the pile or add dry materials to the wet pile to get rid of the odor.
Uses for Compost
Compost contains nutrients, but it is not a substitute for fertilizers. Compost holds nutrients in the soil until plants can use them, loosens and aerates clay soils, and retains water in sandy soils.
To use as a soil amendment, mix 2 to 5 inches of compost into vegetable and flower gardens each year before planting. In a potting mixture, add one part compost to two parts commercial potting soil, or make your own mixture by using equal parts of compost and sand or Perlite.
As a mulch, spread an inch or two of compost around annual flowers and vegetables, and up to 6 inches around trees and shrubs. Studies have shown that compost used as mulch, or mixed with the top 1-inch layer of soil, can help prevent some plant diseases, including some of those that cause damping of seedlings.

As a top dressing, mix finely sifted compost with sand and sprinkle evenly over lawns.