Conserving Water
Wise use of water for hydrating your garden and lawn not only helps protect the environment, but saves money and also provides optimum growing conditions for your plants. There are simple ways of reducing the amount of water used for irrigation, such as growing xeriphytic species (plants that are adapted to dry conditions), mulching, adding water-retaining organic matter to the soil, and installing windbreaks and fences to slow winds and reduce evapotranspiration.
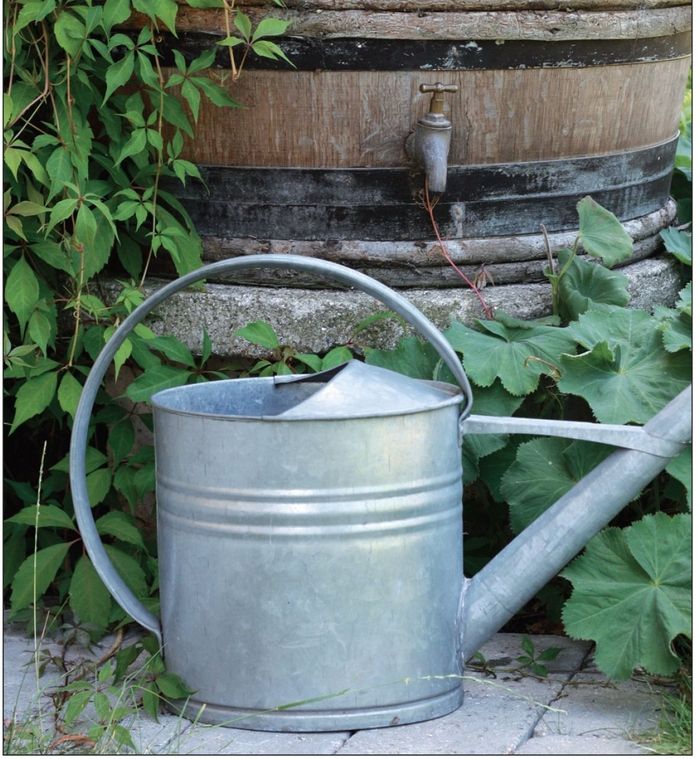
You can conserve water by watering your plants and lawn in the early morning, before the sun is too intense. This helps reduce the amount of water lost due to evaporation. Furthermore, installing rain gutters and collecting water from downspouts—in collection bins such as rain barrels—also helps reduce water use.
How Plants Use Water
Water is a critical component of photosynthesis, the process by which plants manufacture their own food from carbon dioxide and water in the presence of light. Water is one of the many factors that can limit plant growth. Other important factors include nutrients, temperature, and amount and duration of sunlight.
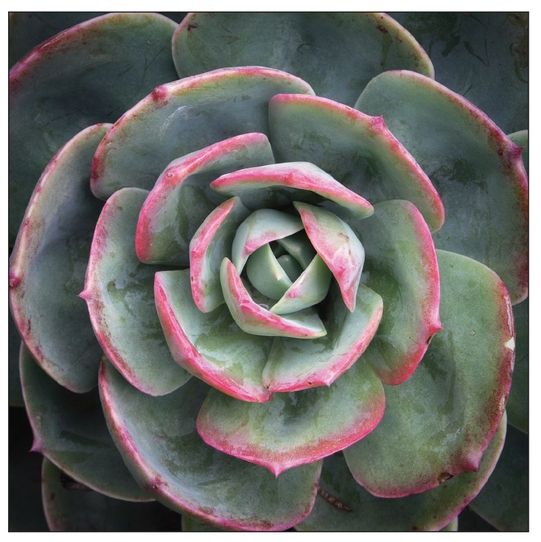
Succulent plants retain water and can therefore thrive in arid environments.
THE JUNIOR HOMESTEADER
See what happens when a plant (or part of a plant) doesn’t get any light!
- Cut three paper shapes about 2 inches by 2 inches. Circles and triangles work well, but you can experiment with other shapes, too. Clip them to the leaves of a plant, preferably one with large leaves. Either an indoor or an outdoor plant will do. Be very careful not to damage the plant.
- Leave one paper cutout on for one day, a second on for two days, and a third on for a week. How long does it take for the plant to react? How long does it take for the plant to return to normal?
Photosynthesis means to “put together using light.” Plants use sunlight to turn carbon dioxide and water into food. Plants need all of these to remain healthy. When the plant gets enough of these things, it produces a simple sugar, which it uses immediately or stores in a converted form of starch. We don’t know exactly how this happens. But we do know that chlorophyll, the green substance in plants, helps it to occur.
Plants take in carbon dioxide through their stomata—microscopic openings on the undersides of the leaves. The stomata are also the place where water is lost, in a process called transpiration. Transpiration, along with evaporation from the soil’s surface, accounts for most of the moisture lost from the soil and subsequently from the plants.
When there is a lack of water in the plant tissue, the stomata close to try to limit excessive water loss. If the tissues lose too much water, the plant will wilt. Plants adapted to dry conditions have developed numerous mechanisms for reducing water loss—they typically have narrow, hairy leaves and thick, fleshy stems and leaves. Pines, hemlocks, and junipers are also well adapted to survive extended periods of dry conditions—an environmental factor they encounter each winter when the frozen soil prevents the uptake of water. Cacti, which have thick stems and leaves reduced to spines, are the best example of plants well adapted to extremely dry environments.
Choosing Plants for Low Water Use
You are not limited to cacti, succulents, or narrow-leafed evergreens when selecting plants adapted to low water requirements. Many plants growing in humid environments are well adapted to low levels of soil moisture. Numerous plants found growing in coastal or mountainous regions have developed mechanisms for dealing with extremely sandy, excessively well-drained soils or rocky, cold soils in which moisture is limited for months at a time. Try alfalfa, aloe, artichokes, asparagus, blue hibiscus, chives, columbine, eucalyptus, garlic, germander, lamb’s ear, lavender, ornamental grasses, prairie turnip, rosemary, sage, sedum, shrub roses, thyme, yarrow, yucca, and verbena.
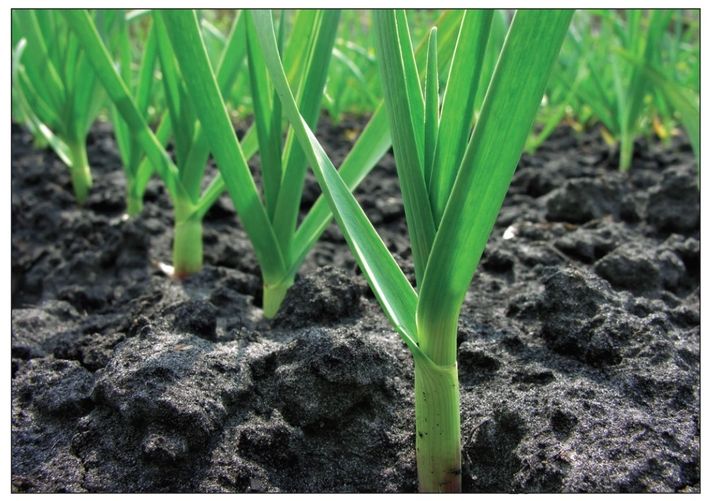
Garlic plants
Trickle Irrigation Systems
Trickle irrigation and drip irrigation systems help reduce water use and successfully meet the needs of most plants. With these systems, very small amounts of water are supplied to the bases of the plants. Since the water is applied directly to the soil—rather than onto the plant—evaporation from the leaf surfaces is reduced, thus allowing more water to effectively reach the roots. In these types of systems, the water is not wasted by being spread all over the garden; rather, it is applied directly to the appropriate source.
Installing Irrigation Systems
An irrigation system can be easy to install, and there are many different products available for home irrigation systems. The simplest system consists of a soaker hose that is laid out around the plants and connected to an outdoor spigot. No installation is required, and the hose can be moved as needed to water the entire garden.
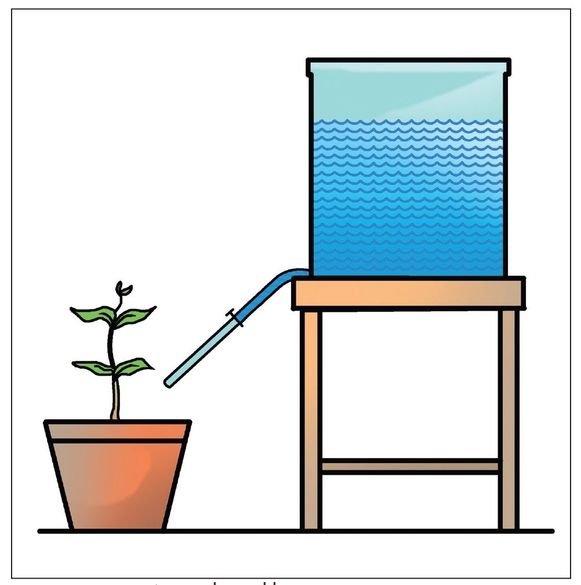
A simple trickle irrigation system.
THE JUNIOR HOMESTEADER
Did you ever wonder how water gets from a plant’s roots to its leaves? The name for this is “capillary action.”
Things You’ll Need:
4 same-size stalks of fresh celery with leaves
4 cups or glasses
Red and blue food coloring
A measuring cup
4 paper towels
A vegetable peeler
A ruler
Some old newspapers
What to Do:
- Lay the four pieces of celery in a row on a cutting board or counter so that the place where the stalks and the leaves meet matches up.
- Cut all four stalks of celery four inches (about 10 centimeters) below where the stalks and leaves meet.
- Put the four stalks in four separate cups of purple water (use 10 drops of red and 10 drops of blue food coloring for each half cup of water).
- Label four paper towels in the following way: “2 hours,” “4 hours,” “6 hours,” and “8 hours.” (You may need newspapers under the towels.)
- Every two hours from the time you put the celery into the cups, remove one of the stalks and put it onto the correct towel. (Notice how long it takes for the leaves to start to change.)
- Each time you remove a stalk from the water, carefully peel the rounded part with a vegetable peeler to see how far up the stalk the purple water has traveled.
- What do you observe? Notice how fast the water climbs the celery. Does this change as time goes by? In what way?
- Measure the distance the water has traveled and record this amount.
- Make a list of other objects around your house or in nature that enable liquids to climb by capillary action. Look for paper towels, sponges, old sweat socks, brown paper bags, and flowers. What other items can you find?
Capillary action happens when water molecules are more attracted to the surface they travel along than to each other. In paper towels, the molecules move along tiny fibers. In plants, they move through narrow tubes that are actually called capillaries. Plants couldn’t survive without capillaries because they use the water to make their food.
A slightly more sophisticated system is a slotted pipe system. Here are the steps needed in order to install this type of irrigation system in your garden:
- Sketch the layout of your garden so you know what materials you will need. If you intend to water a vegetable garden, you may want one pipe next to every row or one pipe between every two rows.
- Depending on the layout and type of garden, purchase the required lengths of pipe. You will need a length of solid pipe for the width of your garden, and perforated pipes that are the length of your lateral rows (and remember to buy one pipe for each row or two).
- Measure the distances between rows and cut the solid pipe to the proper lengths.
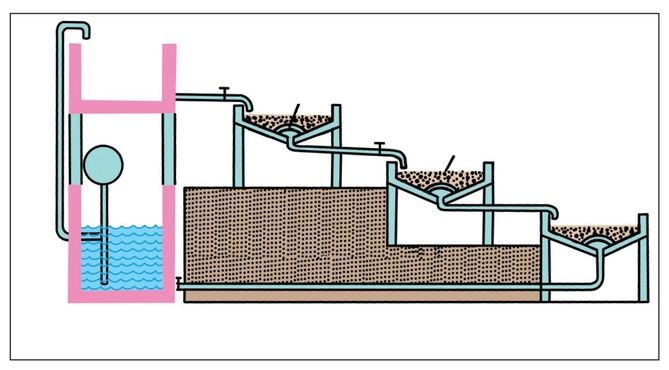
A slotted pipe irrigation system.
- Place T-connectors between the pieces of solid pipe.
- In the approximate center of the solid pipe, place a T-connector to which a hose connector will be fitted.
- Cut the perforated pipe to the length of the rows.
- Attach the perforated pipes to the T-connectors so that the perforations are facing downward. Cap the ends of the pipes.
- Connect a garden hose to the hose connector on the solid pipe. Adjust the pressure of the water flowing from the spigot until the water slowly emerges from each of the perforated pipes. And now you have a slotted pipe irrigation system for your garden.
Rain Barrels
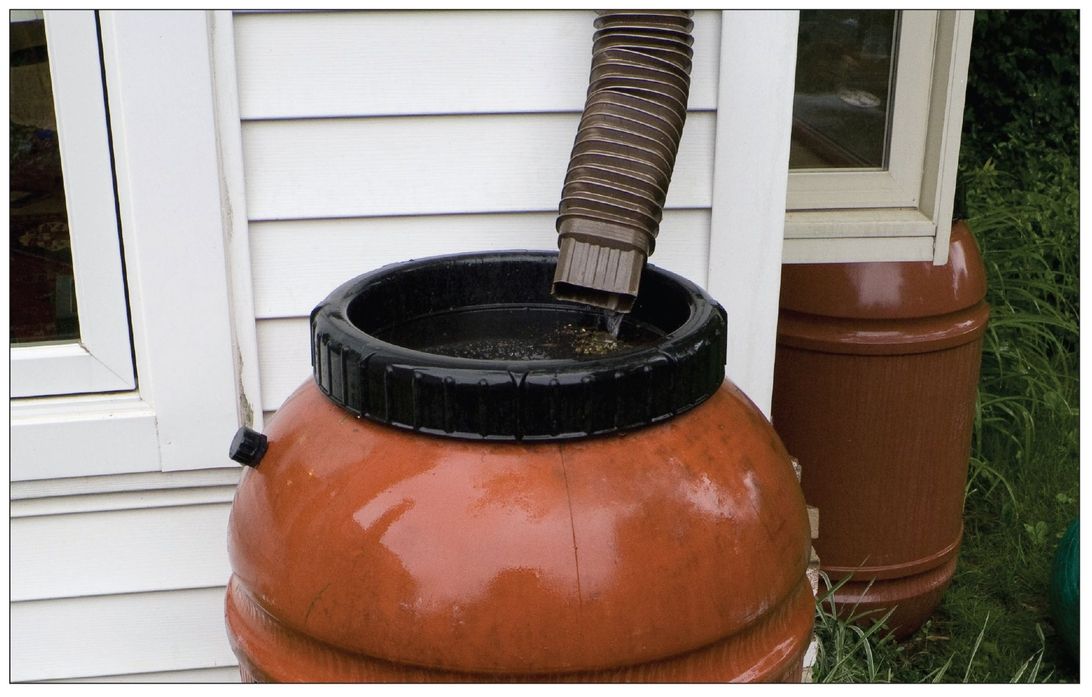
Another very efficient and easy way to conserve water—and save money—is to buy or make your own rain barrel. A rain barrel is a large bin that is placed beneath a downspout and collects rainwater runoff from a roof. The water collected in the rain barrel can then be routed through a garden hose and used to water your garden and lawn.
Rain barrels can be purchased from specialty home and garden stores, but a simple rain barrel is also quite easy to make. Below are simple instructions on how to make your own rain barrel.
How to Make a Simple Rain Barrel Instructions:
- Obtain a suitable plastic barrel, a large plastic trash can with a lid, or a wooden barrel (e.g., a wine barrel) that has not been stored dry for too many seasons, since it can start to leak. Good places to find plastic barrels include suppliers of dairy products, metal plating companies, and bulk food suppliers. Just be sure that nothing toxic or harmful to plants and animals (including you!) was stored in the barrel. A wine barrel can be obtained through a winery. Barrels that allow less light to penetrate through will minimize the risk of algae growth and the establishment of other microorganisms.
THINGS YOU’LL NEED
- A clean plastic barrel, tall trash can with lid, or a wooden barrel that does not leak—a 55-gallon plastic drum or barrel does a very good job at holding rainwater
- Two hose bibs (a valve with a fitting for a garden hose on one end and a flange with a short pipe sticking out of it at the other end)
- Garden hose
- Plywood and paint (if your barrel doesn’t already have a top)
- Window screen
- Wood screws
- A drill
- A hacksaw
- A screwdriver
- Once you have your barrel, find a location for it under or near one of your home’s downspouts. In order for the barrel to fit, you will probably need to shorten the downspout by a few feet. You can do this by removing the screws or rivets located at a joint of the downspout, or by simply cutting off the last few feet with a hacksaw or other cutter. If your barrel will not be able to fit underneath the downspout, you can purchase a flexible downspout at your local home improvement store. These flexible tubes will direct the water from the downspout into the barrel. An alternative, and aesthetically appealing, option is to use a rain chain—a large, metal chain that water can run down.
- Create a level, stable platform for your rain barrel to sit on by raking the dirt under the spout, adding gravel to smooth out lawn bumps, or using bricks or concrete blocks to make a low platform. Keep in mind that a barrel full of water is very heavy, so if you decide to build a platform, make sure it is sturdy enough to hold such heavy weight.
- If your barrel has a solid top, you’ll need to make a good-sized hole in it for the downspout to pour into. You can do this using a hole-cutting attachment on a power drill or by drilling a series of smaller holes close together and then cutting out the remaining material with a hacksaw blade or a scroll saw.
- Mosquitoes are drawn to standing water, so to reduce the risk of breeding these insects, and to also keep debris from entering the barrel, fasten a piece of window screen to the underside of the top so it covers the entire hole.
- Next, drill a hole so the hose bib you’ll attach to the side of the barrel fits snugly. Place the hose bib as close to the bottom of the barrel as possible, so you’ll be able to gain access to the maximum amount of water in the barrel. Attach the hose bib using screws driven into the barrel. You’ll probably need to apply some caulking, plumber’s putty, or silicon sealant around the joint between the barrel and the hose bib to prevent leaks, depending on the type of hardware you’re using and how snugly it fits in the hole you drilled.
- Attach a second hose bib to the side of the barrel near the top, to act as an overflow drain. Attach a short piece of garden hose to this hose bib and route it to a flowerbed, lawn, or another nearby area that won’t be damaged by some running water if your barrel gets too full. (Or, if you want to have a second rain barrel for excess water, you can attach it to another hose bib on a second barrel. If you are chaining multiple barrels together, one of them should have a hose attached to drain off the overflow.)
- Attach a garden hose to the lower hose bib and open the valve to allow collected rain water to flow to your plants. The lower bib can also be used to connect multiple rain barrels together for a larger water reservoir.
- Consider using a drip irrigation system in conjunction with the rain barrels. Rain barrels don’t achieve anything near the pressure of city water supplies, so you won’t be able to use microsprinkler attachments, and you will need to use button attachments that are intended to deliver four times the amount of citysupplied water as you need.
- Now wait for a heavy downpour and start enjoying your rain barrel!
Things to Consider
- Spray some water in the barrel from a garden hose once everything is in place and any sealants have had time to thoroughly dry. The first good downpour is not the time to find out there’s a leak in your barrel.
- If you don’t own the property on which you are thinking of installing a rain barrel, be sure to get permission before altering the downspouts.
- If your barrel doesn’t already have a solid top, cover it securely with a circle of painted plywood, an old trash-can lid screwed to the walls of the barrel, or a heavy tarp secured over the top of the barrel with bungee cords. This will protect children and small animals from falling into the barrel and drowning.
- As stated before, stagnant water is an excellent breeding ground for mosquitoes, so it would be a good idea to take additional steps to keep them out of your barrel by sealing all the openings into the barrel with caulk or putty. You might also consider adding enough non-toxic oil (such as vegetable cooking oil) to the barrel to form a film on top of the water that will prevent mosquito larvae from hatching.
Always double check to make sure the barrel you’re using (particularly if it is from a food distribution center or other recycled source) did not contain pesticides, industrial chemicals, weed killers, or other toxins or biological materials that could be harmful to you, your plants, or the environment. If you are concerned about this, it is best to purchase a new barrel or trash can so there is no doubt about its safety.