
If I could give you one tip about how to use this book, it would be this: Forget the rules and have fun; this is about your time, your family, your home. These projects range from ten-minute drawer fronts to an afternoon of building a simple end table. Creating the home you want is a process. You don’t need a fancy degree, and you certainly don’t have to hire a professional to do it for you. One of the most freeing things I ever did was grasp that my home was mine to make my own. This book is your guide to just that: freeing yourself so that you can make your home your own.
Taking the reins to paint, swap out a throw pillow, or build a coffee table isn’t a life-altering decision. But it can be life altering when you feel like your home works for you and reflects your style. At the end of the day, this book is about putting your feet up in the home you crave on the budget you have.
I didn’t grow up painting and drawing and sewing. I didn’t decorate my own room, and I certainly didn’t go diving through junk stores to dig up treasure. The idea of creating my own anything was pretty foreign to me, so when my husband suggested we paint my childhood furniture instead of buying new pieces for our upcoming bundle of joy, I all but laughed him out of the room. I literally remember thinking, “Why would we ruin this nice furniture?!”
I was six months pregnant, and painting that first nightstand on our back porch was absolutely terrifying to me. But I liked the way the brush felt in my hand, and I liked the fact that I was working on something—that I had a project. I liked that at the end of the day, my son’s nightstand was snow white instead of yellowed-cream. And it had cost me about two hours and twenty bucks.
What do you need? What does your home lack? Start with the projects you are most excited about and the ones you feel your home is begging for. Start small. Start somewhere. Just start.
Once you begin painting, scraping, and decorating toward a whole new home, you will become addicted. I’m telling you… once that first room is finished, and you look at it and smile each time you pass it by, you will be an addicted DIYer.
Here’s the thing, though: The adrenaline will wear off eventually, and even if it doesn’t, remember why you are painting/crafting/sewing/building. You are doing all these projects to create a simpler life, to make your home work for you.
Be sure that throughout the process you take time to rest, and time to simply live. I’m telling myself this, too; we are notorious for starting six major projects at once. The process is thrilling for the first two weeks, and somewhere around week three, there are mounds of dust, toys everywhere, and we can’t even find our kitchen sink.
As you catch the DIY bug, pace yourself. Try to finish projects you begin, try to stick to one room makeover at a time, and hey, take a break when you need it.
Unless you are going to begin your own decorating blog, or construction company, or interior design firm, this work on your home is going to happen in your leisure time and should be enjoyable. Some weekends you’ll feel like tackling the world, or at least building a new entertainment center, and some weekends you’ll be thankful you felt like dusting.
Go with it; work with your own motivation. You’ll find that you get triple the amount done if you work while motivated instead of making yourself paint a room every weekend off. Using this approach to fixing up your home really helps you avoid burnout. Oh, and it can also aid you in keeping your kitchen sink visible and free of stacks of dishes.
Just like painting my son’s nightstand was terrifying to me, it might be terrifying to you to start one of these projects you’d desperately like to try.
Do yourself a favor: Decide that some won’t work. It’ll be humid while you’re hot-gluing to your heart’s content, and the stuff just won’t set. You might paint with two colors I love in my home, but in your south-facing room, they might look yellow instead of white. Despite admiring a photo of our mirrored chest, you may paint your own and decide the piece is just too shiny for your taste.
Creating—it’s a process. It is not, however, a process of perfection. It took me three times to get the correct wash of color I wanted for the Dyed Fabric Napkins in Chapter 2. There will be projects that you complete and love, and others that just don’t work in your home or need a little tweaking. I’m betting that you’ll love all these projects, but never be afraid to tweak them so that they’re a reflection of you. If you don’t like a paint color, swap it. If the furniture is too shiny, put some dark wax on it. Repaint it, even. No creation is perfect, but no project is ever complete until you, and only you, are happy with it.
It wouldn’t hurt more blogs or Pinterest gurus to share their worst rooms and their “failures” with the world. It is quite easy for you to peruse Pinterest for ten minutes and leave feeling inadequate, frustrated, and kind of annoyed.
When you look at a decorating blog (even mine), remember that the room reveal was shot with beautiful lighting, staged accessories, and clutter-free moments. That’s why we like to share some pretty embarrassing photographs with you from time to time on our blog. We’re all about keeping it real.
Your project, space, or furniture may get dirty or chipped by day-to-day life, but so does everyone else’s. Remember that a snapshot of a project is just that—a fleeting moment.
Plus, all those mistakes and chips and dents make for a life lived with character, right?
These 75 projects are broken down into four categories: Before and After, Semi-Handmade, Upcycling, and Simple DIY. Turn to the Before and After section for furniture makeovers, painting techniques, and simple updates. The Semi-Handmade section boasts crafting projects that call for premade materials to begin with, so you save time and effort. Think wreaths assembled from purchased elements, stenciled pillow covers, and easy chalkboard placemats. In the Upcycling section, you’ll find new ways to use old objects or ways to reinvent items you already own. You’ll love the Suitcases Side Table, Vintage Art Collection (such an affordable way to add personality and style to your walls!), and the Book Letters. The Simple DIY section shares beginner-level building projects and projects that require a few more steps, but are not necessarily more difficult. You will love the Simple Map Wallpaper, Starched Fabric Feature Wall, Wood Slat End Table, and Antique Door Table.
You’ll also find a simple project key with icons that denote cost, difficulty, and time. Every one of these projects was completed for $50 or less, and many of them cost only a few dollars—some were even free! We listed an approximate cost, but remember that pricing in different locations varies, and sometimes we use the same can of paint for more than one project, lowering our cost. Different types of paint and fabric will cost more or less, so keep that in mind.
Every project has a project key where you’ll find three things: the cost, difficulty, and time needed for that project.
The cost of a project will indicate how much you’ll spend to recreate it exactly as pictured. The estimate only includes the cost of what is actually used. For example, for the Painted Laminate Countertops in Chapter 1, I calculated only the cost for the amount of paint used, not the entire container of paint. If a project calls for repurposing a piece of furniture, then the original cost of the furniture wasn’t included in the calculation. Many of the projects use the same tools, such as paintbrushes or sanding blocks, so those weren’t calculated as a new expense for every project. I tried to round up in my calculations to give you a true picture of cost, but of course, you could reduce the cost by choosing cheaper brands and reusing what you have already. Also keep in mind that product cost may vary from place to place.
The level of difficulty of each project is indicated by a ranking of 1-5 in the project key. For example, a project with a difficulty level of 1 is easier than a project with a difficulty level of 5.
1–2: This project is easy-peasy. It requires few tools and little effort.
3: This project is a bit more difficult, requiring more attention to detail or instruction, but it’s still simple to create.
4–5: These projects are more difficult. They will require some more intensive work, such as cutting or nailing or even using layers of paint to create a finish. However, if instructions are followed, no project should be too difficult!
I recorded exactly how much time each project took me. Most of these projects were done in an unplanned way, meaning I did not have materials lying out in a perfect assembly line (of course not!), so the timelines should be close to what you can realistically pull off yourself. Everyone works differently, though, and you may take breaks when I didn’t or have unexpected events to deal with. Just keep working, and the project will get finished!
This book is all about really affordable, easy projects. Most projects have similar supply lists, so you won’t need to buy a bunch of new supplies that you may only use once. All projects were created with simplicity in mind. You can also use the heck out of each can of paint—one quart of paint can be used on six or seven different projects.
While you will have a supply list for each project, we thought it would be helpful to list our favorites here in the Tool Kit, along with a short explanation as to why we love them.
I will also tell you when we believe certain products are best for certain projects. We choose our products very carefully, and we’ve always loved the way our projects turn out with certain brands. But feel free to substitute more inexpensive products to save money. And don’t run out and buy everything here—this is just a handy reference if you’d like to read more about why certain products work well.
You’ll find these three paints throughout the book, used on everything from furniture to lamps to glass to scrap boards. These paints contain very low (or no) VOCs. VOCs stand for volatile organic compounds. The EPA regulates how many VOCs are emitted to prevent too many chemicals and toxins from polluting our air. Low (or no) VOCs is the way to go! These paints flow off the brush nicely—there are virtually no brushstrokes in the finish—and they create timeworn looks so effortlessly.
I recommend using Annie Sloan Soft Wax or Miss Mustard Seed’s Furniture Wax as a topcoat and sealant. They both create a smooth, lustrous finish that is easily doctored when nicked or scratched. It’s no secret that Marian of Miss Mustard Seed is a dear friend of mine, but I recommend her products because I absolutely love them and believe in them. As a matter of fact, her milk paint has been used all throughout our home!
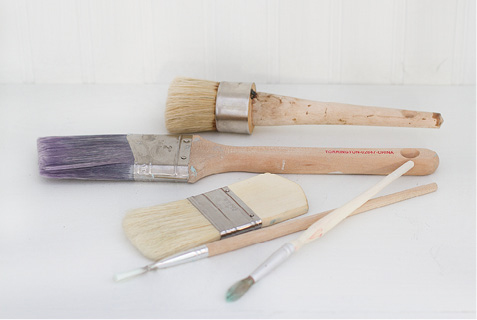
You can use all sorts of different brushes for painting and crafting. My favorites, though, are a Purdy 2½" sash nylon brush for smooth finishes or with Miss Mustard Seed’s Milk Paint, and an Annie Sloan small brush for rustic finishes, crafts, and artistry. I also love the Martha Stewart craft brushes, as well as those from IKEA.
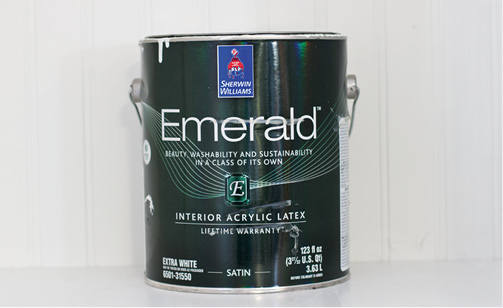
Latex paint still has my heart for some projects. I love Sherwin Williams paint, and am especially fond of their new Emerald line, as well as the ProClassic line for whites. Both of these are durable, dry to a hard finish, and require no topcoat. Use them for sprayed or rolled finishes on cabinets, painted floors, and bookcases. Tip: If you are painting furniture with latex paint and don’t have access to a paint sprayer, paint in the grooves first with a Purdy brush, and then use a sponge roller to paint the flat surfaces. Latex paint samples are also great for small projects, so that you don’t have to commit to a whole can of paint in a color you may never use again.
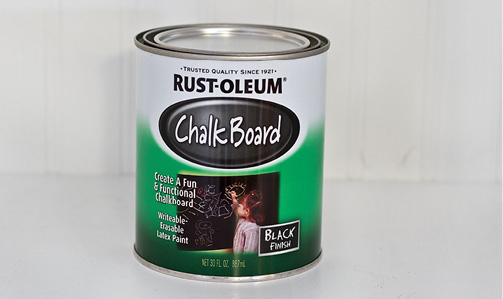
Almost every surface is better with chalkboard paint. It’s truly a magical medium, transforming the dullest surfaces into chalkboards. Both the spray can and the quart size are great. The spray is best for small items, and a brush or roller is best for large flat surfaces.

There are a few types of painter’s tape, but I’ve found that FrogTape is the best. You’ll never get any paint seeping under the tape, or have peeling when removing the tape. It works well on many surfaces, even fabric (see our Striped Curtains in Chapter 1).

I have a thing for washi tape and other pretty tapes. It adds just the right touch to simple tags, gifts, and paper displays, and now there are lots of decorative tapes that tackle home projects as well (see the Duct Tape End Table and Washi Tape Drawer Fronts in Chapter 1). You can order colored duct tape from Amazon, and the thicker washi tapes I like are made by MT Casa (www.mtcasa.com).
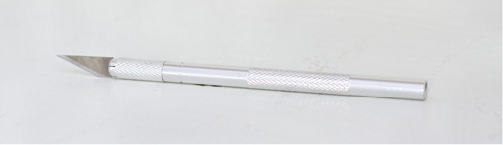
This little guy is one of the best crafting tools to have around. You’ll want it for several projects in the book (see Washi Tape Striped Steps, Duct Tape End Table, and Giftwrap-Backed Bookcase), and you may find that you’ll start using it all the time at home. Snazzy, super-sharp cutting tool? Check.
There are a million handy power tools out there, but here are some favorites.
Now that you are geared up with the project key and a list of our favorite tools (even some motivational speeches), roll up your sleeves and let’s get going!