TECHNIQUES
Adjustable Loop
Most granny squares are worked in rounds, beginning with a center ring. This method for making the center ring, sometimes referred to as magic ring or sliding loop, allows you to pull the ring tightly closed.
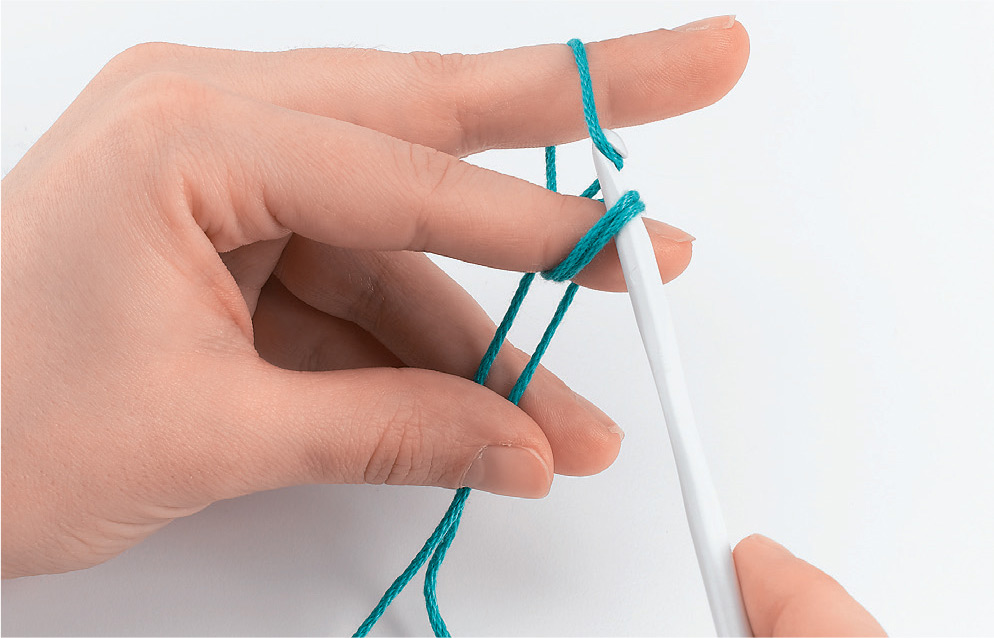
1. Wrap the yarn clockwise around your index finger twice, leaving a 6" (15.2) tail. Holding the tail between your thumb and a finger, slide the hook under the wraps and catch the working yarn.
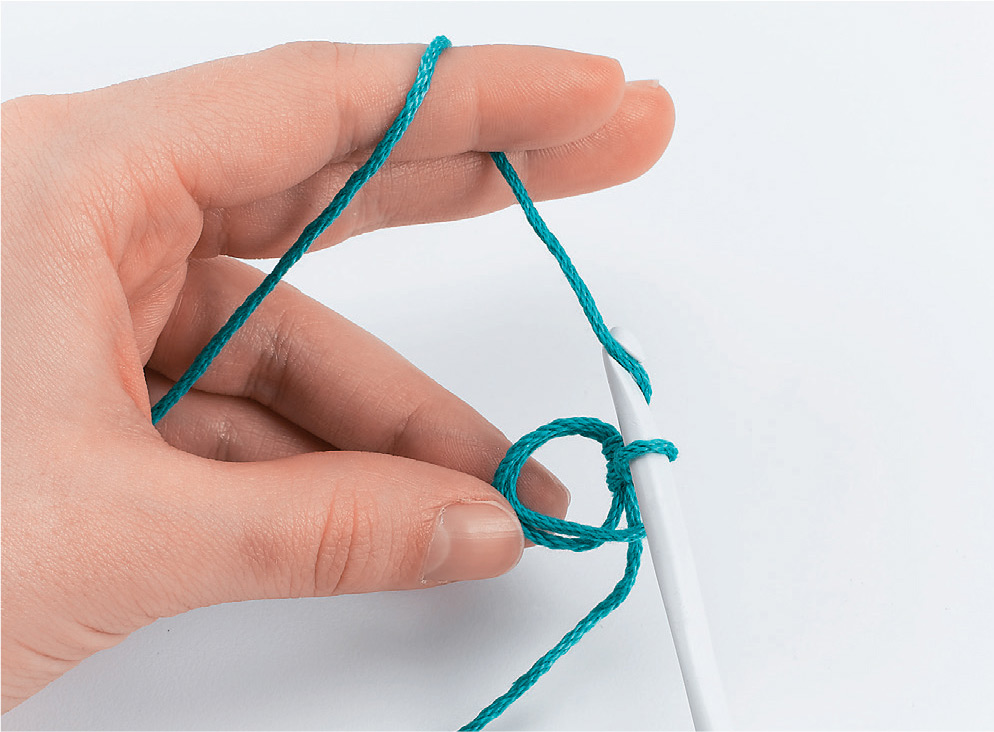
2. Pull the working yarn through the ring, and chain the designated number of stitches.
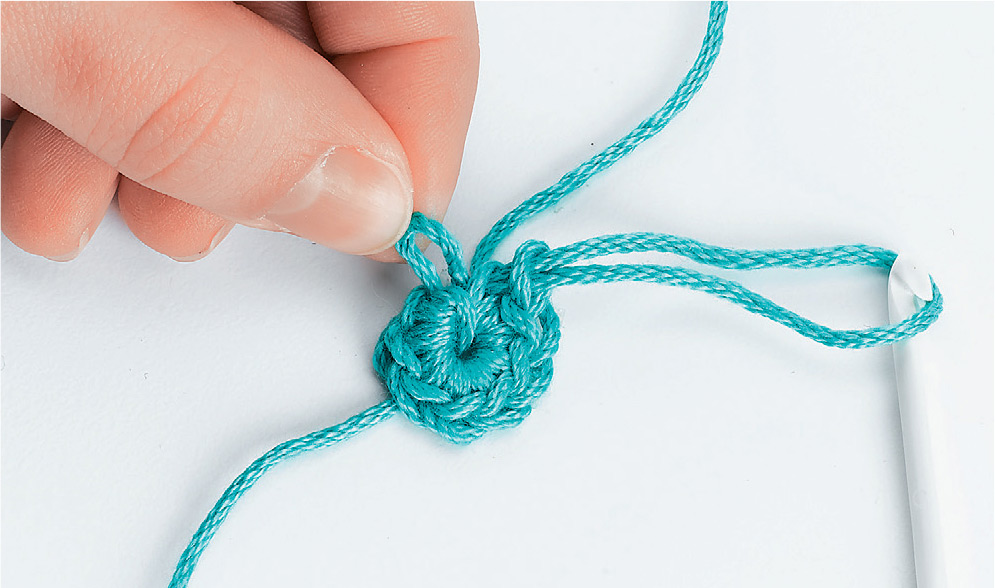
3. Work additional stitches into the two loops of the ring, keeping the tail free. Before joining the round, pull on the tail a little; one loop will tighten slightly. Pull on that loop, which will tighten the other loop.
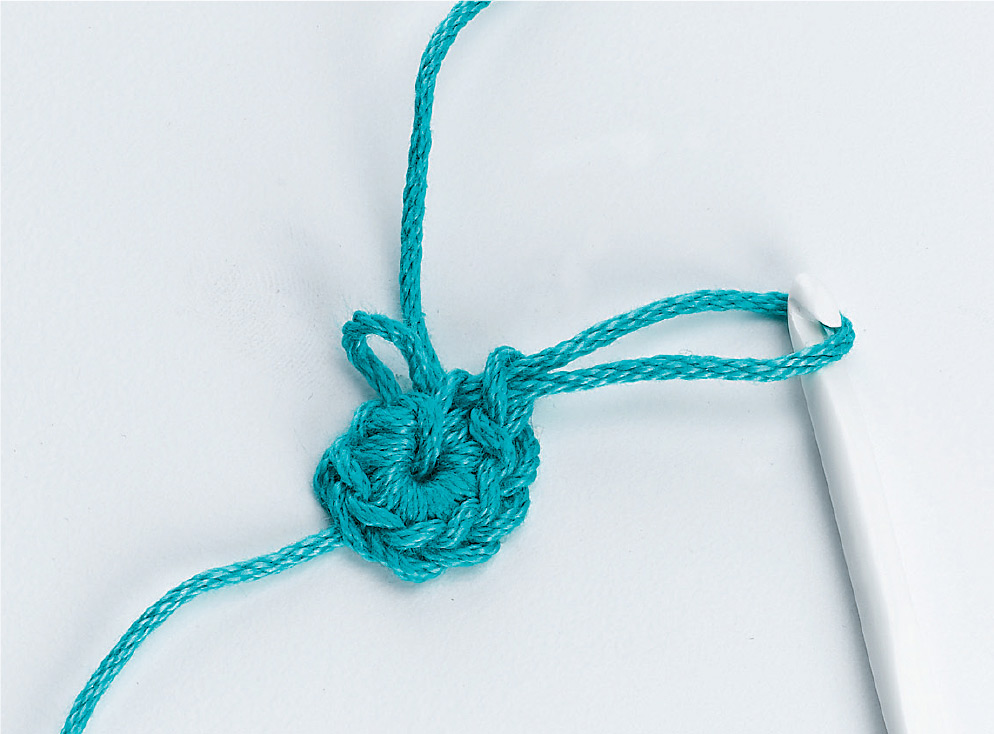
4. Then pull the tail, which will tighten the remaining loop.
Seams
Once you have crocheted all the granny squares for a project, you join them into one large piece using one of several methods. For some methods you sew seams with yarn and a tapestry needle. For other methods, you use a crochet hook. Some might consider this final step of a project to be a chore, but to me, the rhythm of hand sewing is soothing and relaxing.
WHIPSTITCH SEAM
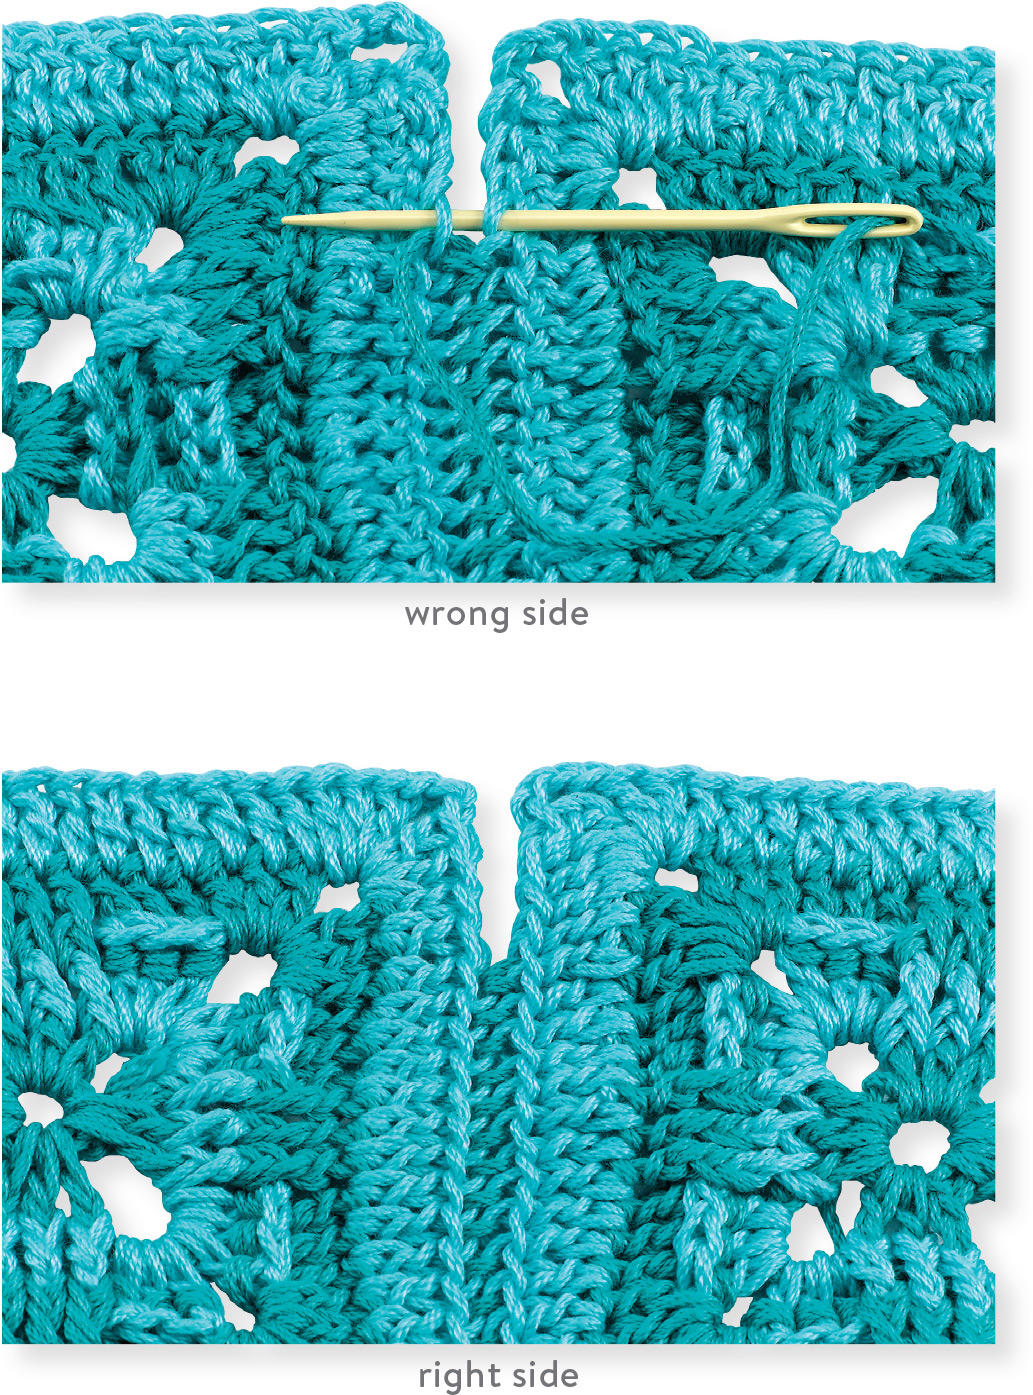
The whipstitch seam works best for sewing straight-edged seams. This method creates a little decorative ridge on the right side of the work. Place two squares side by side, wrong side up, aligning the stitches of the outer round. Insert the needle through the top loops of corresponding stitches, bring through and around, and repeat.
WEAVE SEAM
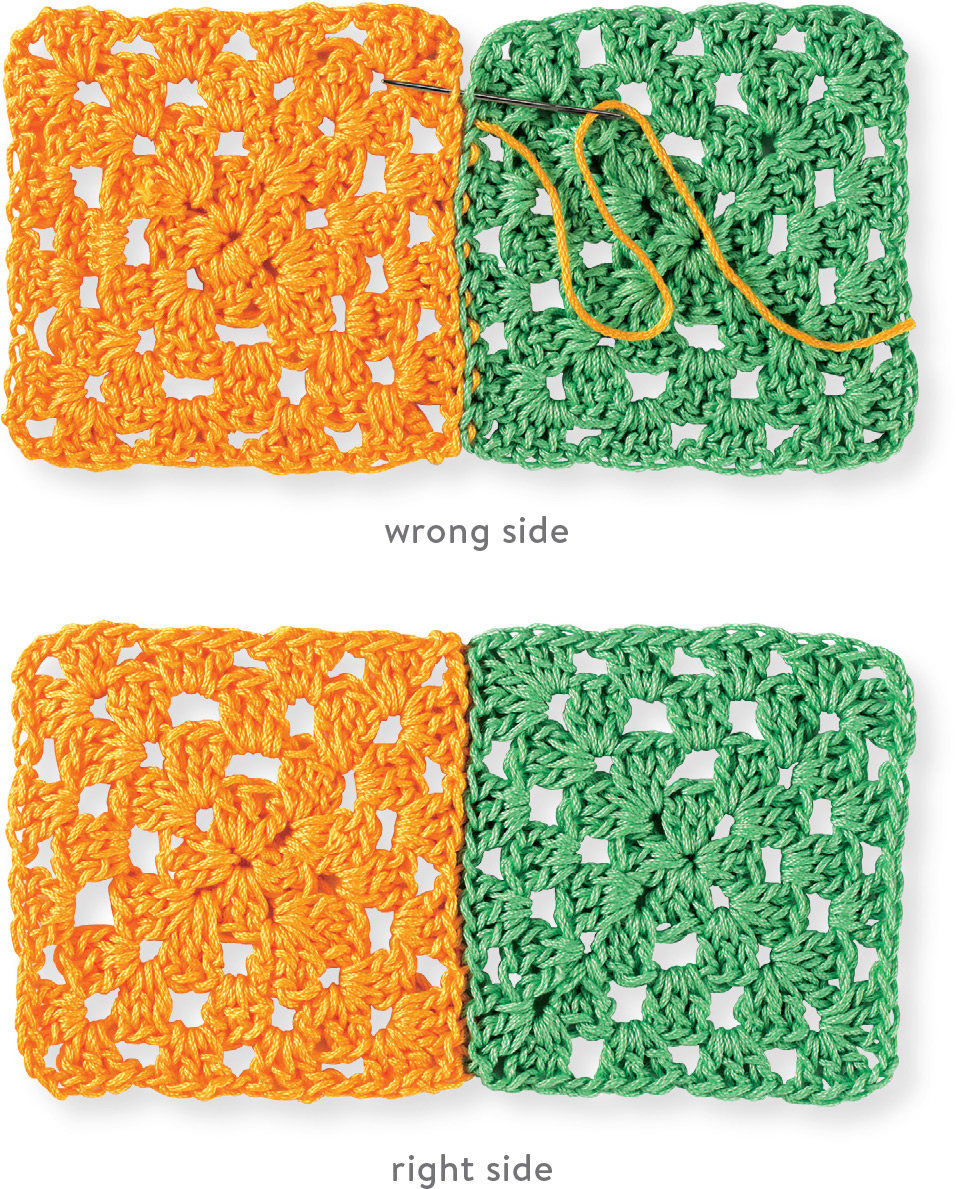
I use this join when I want a really flat seam. Hold pieces to be seamed side by side and, working from the wrong side, insert needle from front to back, through one loop only, draw through, progress to next stitch, bring needle from back to front (not over), and proceed in this manner until seam is completed. If you draw through top loop only, a decorative ridge will be left on the right side of the work. If you draw through bottom loops, the ridge will be on the back of the work.
SINGLE CROCHET SEAM
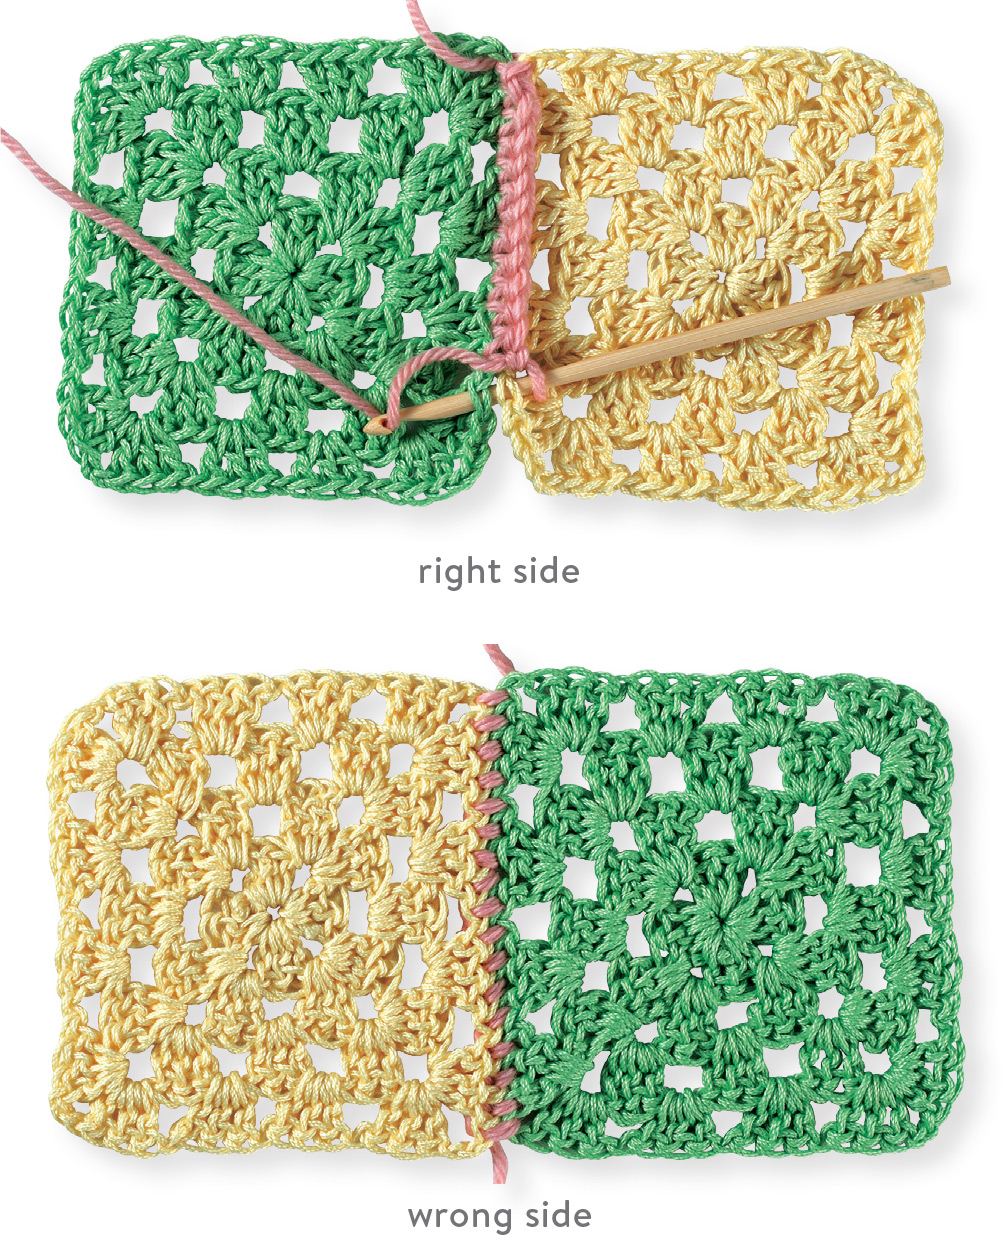
The single crochet seam creates a decorative ridge. Holding the pieces wrong sides together, work single crochet through the whole stitch on both motifs.
CHAIN JOIN
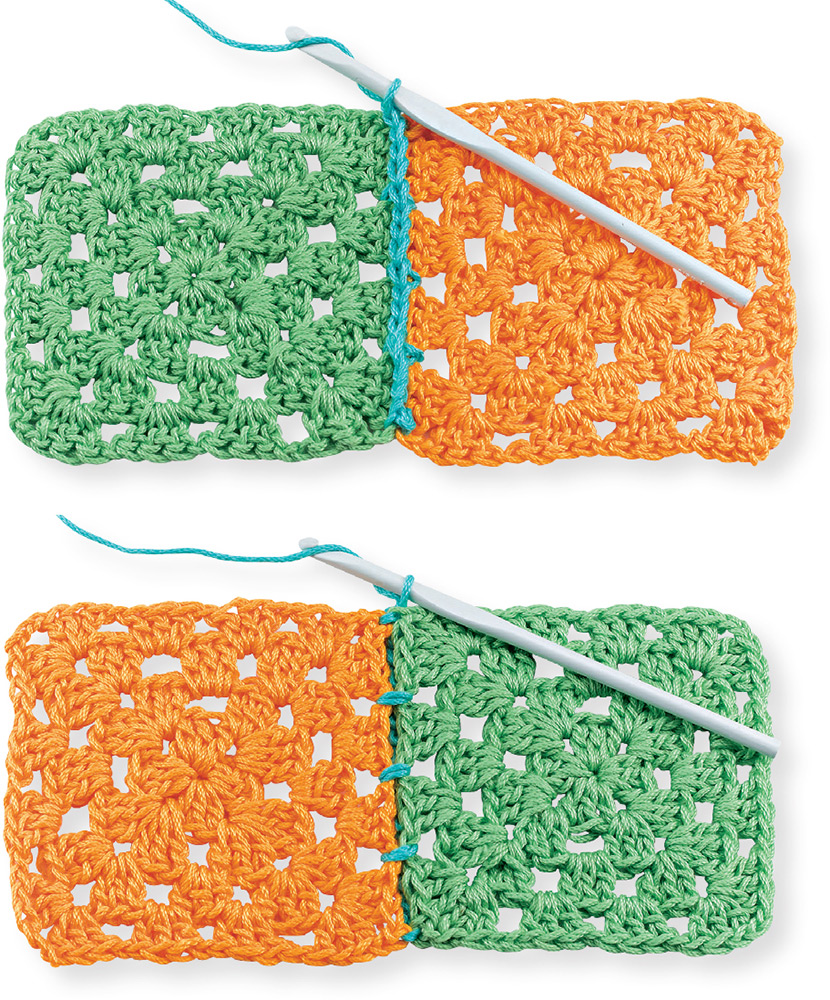
When the outer rounds of your squares have open spaces, you can join pieces with a stitch pattern that suits the spacing. This decorative join can be worked from either side. Place the pieces right sides together (or wrong sides together), aligning the stitches. Join yarn in one corner through both layers. *Chain 3, skip 3, single crochet through spaces of both layers, repeat from *.
Blocking
When your blanket is assembled and you have applied the edging or border, give it a professional finish by blocking it. Blocking restores balance to any squares that may be slightly misshapen. It sets the stitches and improves the drape of the blanket. I blocked all of the blankets in the same way.
1. Lay the blanket on a padded surface, such as clean carpet or a bed mattress. Use a tape measure, measuring stick, or carpenter’s square to make sure the dimensions are accurate and the corners are square.
2. Spritz the blanket with water using a spray bottle. Pat the squares into shape, working row by row.
3. Pin along the edges and at seam intersections, using rust-proof pins.
4. Allow the blanket to dry completely before removing the pins.