little feathered friends
This project is just right for a beginner to get started on knitting pets.
RATING

yarn
For each bird
Fingering-weight (4-ply) yarn
 ½ × 1¾oz (50g) ball for body (MC)
oddment for beak (A)
oddment for wings (C) (optional)
needles
4 × size 0 (2mm) double-pointed knitting needles
notions
For each bird
2 × ¼in- (6mm-) diameter toy safety eyes (or black yarn)
Oddments of brown yarn for legs
50:50 sugar (or PVA adhesive) and water solution
Scraps of fabric (optional)
gauge
17½ sts and 25 rows to 2in (5cm) of st st, using MC and size 0 (2mm) needles
Don't worry if the gauge is not exact – it doesn't matter if the birds are a little bigger or smaller than shown.
finished size
Approx. 5 in (13cm) long × 2in (5cm) tall (although you can vary the length of the tail)
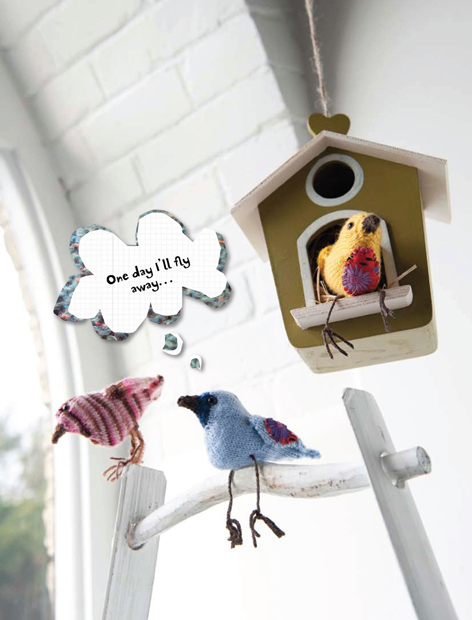
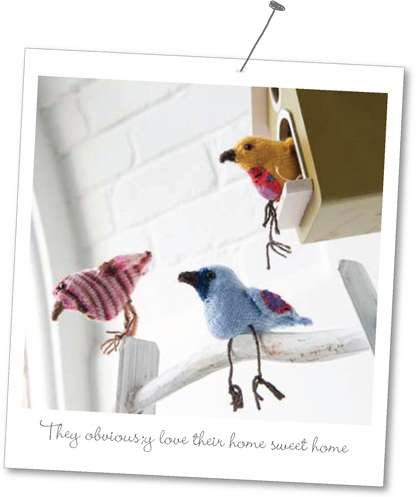
Rosey, Bluey and Sunny are sitting pretty in their Spring colours. Watch them flip and flap, but whatever you do don't tempt them with an open window – they might find their wings and fly away!
You can really let your imagination soar when choosing colours for your pretty little birds. Bluebirds, chaffinches or robins – the sky's the limit!
BIRD PATTERN
knitting notes
The main part of the bird is worked in one piece from the beak to the tail.
The birds are worked on double-pointed knitting needles working in the round. See the Techniques section for details.
Do not use even safety eyes on toys for an infant, as they can be a potential choking hazard. Instead, embroider the eyes in place with thread.
BEAK, HEAD, BODY, WINGS AND TAIL
Cast on 3 sts, using A and size 0 (2mm) needles.
Row 1 (RS) K1, kfb, k1. 4 sts.
Row 2 P.
Row 3 K1, kfb twice, k1. 6 sts.
Row 4 P.
Row 5 K1, kfb, k2, kfb, k1. 8 sts.
Row 6 P.
Cut yarn. Change to MC and cont as follows:
Row 7 K.
Shape head
Row 8 Pfkb, k to last st, pkfb. 10 sts.
Row 9 Kfb, k4, M1, k4, kfb. 13 sts.
Row 10 P.
Row 11 Kfb, k2, kfb 7 times, k2, kfb. 22 sts.
Row 12 P.
Shape throat
Cast on 3 sts at beg of next 2 rows, so ending with a WS row. 28 sts.
Row 15 Divide sts: k8 onto n1, k12 onto n2, k8 onto n3. With RS facing, keeping gauge fairly tight on rnd 1, work in the rnd as follows:
Rnd 16 K28.
Rnd 17 [M1, k1] 6 times, k16, [M1, k1] 6 times. 40 sts.
Rnd 18 K40.
Rnd 19 K40.
Shape breast
Rnd 20 [M1, k1] 4 times, k32, [M1, k1] 4 times. 48 sts.
Rnd 21 K48.
Rnd 22 K48.
Shape back of head
Rnd 23 K22, k2tog, skpo, k22. 46 sts.
Rnd 24 K21, k2tog, skpo, k21. 44 sts.
Rnd 25 K44.
Rnd 26 K44.
Rnd 27 K2tog, k40, skpo. 42 sts.
Rnd 28 K42.
Rnd 29 K42.
Divide for wings
Rnd 30 K12, sl next st onto a safety pin, k16, sl next st onto a safety pin, k12. 40 sts.
Rnd 31 K13, sl next st onto same safety pin as previous rnd, k12, sl next st onto same safety pin as previous rnd, k13. 38 sts.
Rnd 32 K14, sl next st onto same safety pin as before, k8, sl next st onto same safety pin as before, k14. 36 sts.
Rnd 33 K15, sl next st onto same safety pin as before, k4, sl next st onto same safety pin as before, k15. 34 sts.
Rnd 34 K34.
Rnd 35 K2tog, k30, skpo. 32 sts.
Rnd 36 K32.
Place marker.
Rnd 37 K, dec 1 st at beg and end of rnd. 30sts.
Rnd 38 K.
Rep last 2 rnds 3 times. 24 sts.
Shape tail
Rnd 45 K9, k2tog 3 times, k9. 21 sts.
Rnd 46 K21.
Rnd 47 K9, k3tog, k9. 19 sts.
Rnd 48 K19.
Rnd 49 Divide sts: k4 onto n1, k11 onto n2, k4 onto n3.
Rnd 50 K8, k3tog, k8. 17 sts.
Rnd 51 K17.
Rnd 52 K8, skpo, k7. 16 sts.
Work tail
K4 so that last 8 sts are on one needle. Sl rem 8 sts onto another needle. Kitchener stitch the two sets of sts tog. 8 sts.
Next row P.
Work 8 rows in st st (or more for a longer tail).
Bind off. Weave in end.
LEFT WING
*Rejoin yarn MC or C to 4 sts on one of the safety pins.
Row 1 (WS) P.
Work 2 rows in st st.
Row 4 (RS) Kfb, k2, kfb. 6 sts.
Row 5 P.
Row 6 Kfb, k to last st, kfb. 8 sts.
Row 7 P.
Rep last 2 rows once more. 10 sts.
Work 4 rows in st st. **
Row 14 (RS) K2tog, k to end. 9 sts.
Row 15 P.
Rep last 2 rows 6 times more. 3 sts.
Row 28 (RS) K3tog.
Fasten off. Weave in the end or use it to sew the wing against the tail.
RIGHT WING
Work as left wing from * to **. 10 sts.
Row 14 (RS) K to last 2 sts, k2tog. 9 sts.
Row 15 P.
Rep last 2 rows 6 times more. 3 sts.
Row 28 (RS) K3tog.
Fasten off. Weave in the end or use it to sew the wing against the tail.
MAKING UP
EYES
Following the manufacturer's instructions, snap the eyes in place on each side of the nose. Alternatively embroider the eyes with yarn.
BODY AND HEAD
Stuff the body, breast and head. Mattress stitch the beak and throat to close the seam.
LEGS [MAKE 2]
Cut a 9¾in (25 cm) length of brown yarn. Thread a 3in (8cm) length of brown yarn through a darning needle. Thread the short yarn through the longer one, splitting it 1½in (4cm) from one end. Pull the short length through, stopping when there is 1½in (4cm) of end and then take another st through the split yarn to secure.
Trim all three ends (claws) to the same length.
Use the same method to make a back claw, trimming one end close to the ‘knot’ at the join.
To stiffen the legs, make up a solution of equal quantities of sugar (or PVA adhesive, which will make the legs stiffer) and water. Paint or dip the solution onto the legs. Leave them to dry.
Sew the top end of each leg to the bottom of the bird, overstitching a few times to secure it. Bend the legs as required.
DIFFERENT OPTIONS
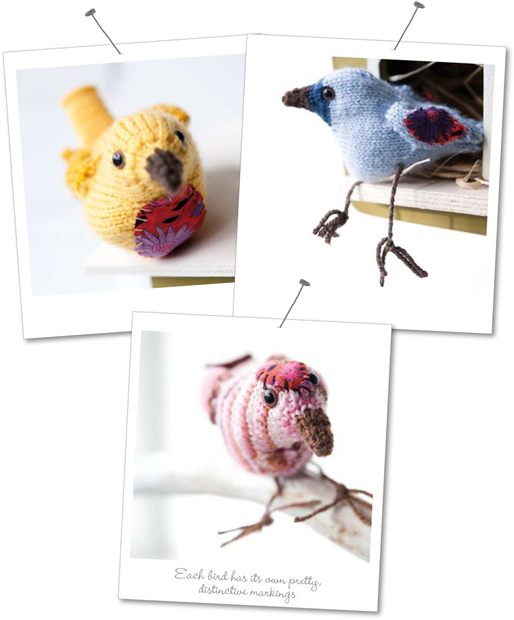
Cut an oval shape from fabric for the cap, wing or breast marking. Appliqué it in place, over-sewing with a matching thread.
Give your bird a different coloured face and/or work the tail as k1, p1 rib.