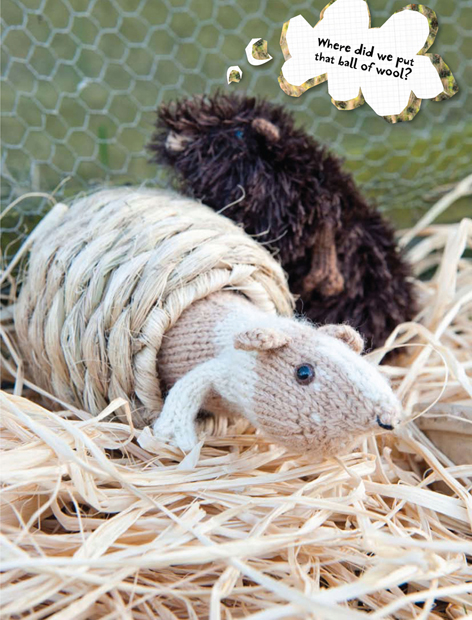
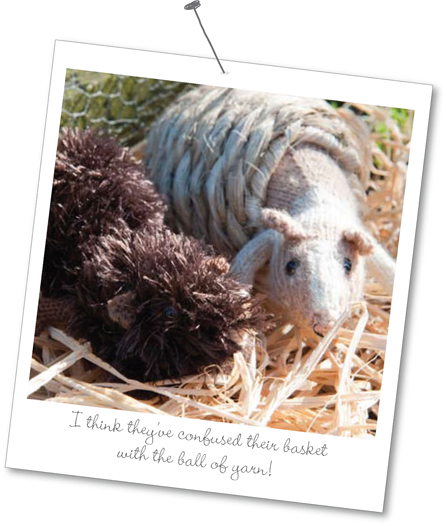
itty bitty guinea pigs
The guinea pigs are knitted mainly in the round, but their legs are knitted as i-cord to make them more spindly.
RATING

yarn
For each guinea pig
Lightweight (DK) yarn
 ½ × 1¾oz (50g) ball in body colour (MC)
Oddment in contrasting colour (C)
For the long-haired guinea pig
Oddment in brown for legs (A)
needles
4 × size 3 (3mm) double-pointed knitting needles
2 × size 0 (2mm) double-pointed knitting needles
gauge
13 sts and 16 rows to 2in (5cm) in st st, using MC and size 3 (3mm) needles
Don't worry if the gauge is not exact – it doesn't matter if the guinea pigs are a little bigger or smaller than shown
finished size
Approx. 5½in (14cm) long × 2in (5cm) tall (not including the legs)
Itty and Bitty! A third guinea pig would, of course, be called Boo but, alas, there are only two – and two is plenty of these little rascals! Cute but mischievous, they nibble everything and are very squeaky in a knitted squeak kind of way.
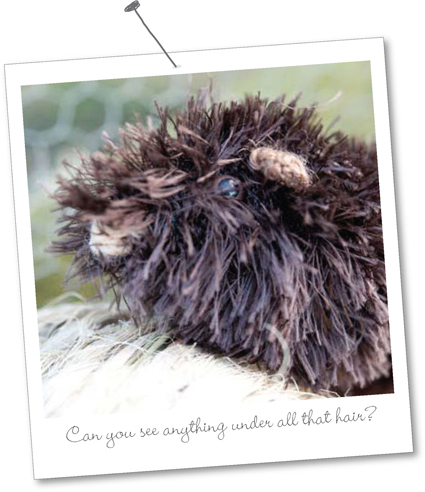
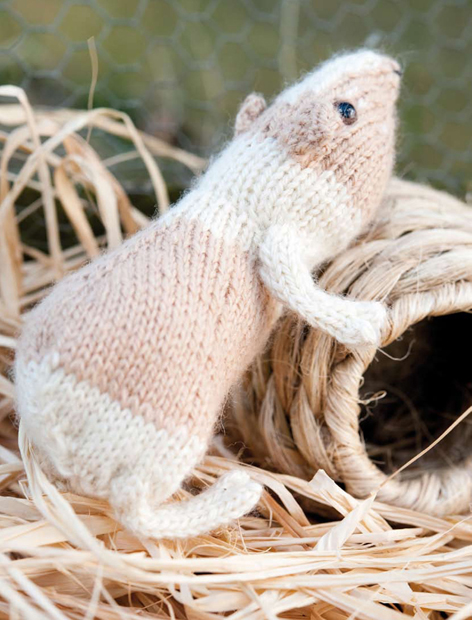
You can use a fancy yarn to give your guinea pigs a long beatnik hairdo or plain yarn for a short-haired look.
GUINEA PIG PATTERN
knitting notes
Both the long and the short-haired guinea pigs are worked in the same way, except for the colour changes on the short-haired one. For the long-haired guinea pig, work all the instructions for yarn MC and C as MC only.
The main part of the guinea pig is worked in one piece from the head through the body.
Even safety eyes can present a choking hazard for a very young child. So, instead of using toy eyes, embroider the eyes with thread.
knitting notes
The guinea pigs are worked on double-pointed knitting needles using the techniques i-cord and working in the round.
You can knit any yarn with needles one size smaller than the size recommended on the ball band to give a tight fabric that doesn't allow the stuffing to show through.
HEAD, LEGS AND BODY
Cast on 4 sts using MC and size 3 (3mm) needles.
Row 1 (WS) P.
For short-haired guinea-pig only: join C, working intarsia. For long-haired guinea pig, work all sts (MC and C) in MC here and throughout.
Cont as follows:
Row 2 (RS) MC kfb, C k2, MC kfb. 6 sts.
Row 3 MC p2, C p2, MC p2.
Row 4 MC kfb twice, C kfb twice, MC kfb twice. 12 sts.
Row 5 MC p4, C p4, MC p4.
Row 6 MC kfb twice, k2, C k4, MC k2, kfb twice. 16 sts.
Row 7 MC p6, C p4, MC p6.
Row 8 Divide sts: MC k5 onto n1, MC k1, C k4, MC k1 onto n2, MC k5 onto n3.
With RS facing, keeping gauge fairly tight on first rnd, work in the rnd as follows:
Rnd 9 (RS) MC kfb, k5, C k4, MC k5, kfb. 18 sts.
Rnd 10 MC kfb, k6, C k4, MC k6, kfb. 20 sts.
Rnd 11 MC k2, kfb twice, k4, C k4, MC k4, kfb twice times, k2. 24 sts.
Rnd 12 MC k10, C k4, MC M10.
Rnd 13 MC k3, kfb 3 times, k5, C k2, MC k5, kfb 3 times, k3. 30 sts.
Rnd 14 MC k14, C k2, MC M14.
For short-haired guinea-pig only: cut C. Cont with MC as follows:
Rnd 15 Kfb, k28, kfb. 32 sts.
Rnd 16 K32.
Rep last rnd twice more.
Shape head back
Rnd 19 K13, k2tog, k2, skpo, k13. 30 sts.
For short-haired guinea-pig only: join C and work with MC (as 2 strands),) as follows:
Rnd 20 K30.
For short haired guinea pig only: cut MC and cont with C as follows:
Rnd 21 K30.
Rnd 22 K2tog, skpo, k22, k2tog, skpo. 26 sts.
Rnd 23 K26.
Rep last rnd 6 times more.
Make eyes
Following the manufacturer's instructions, snap the eyes in place on each side of the nose. Alternatively, embroider eyes with yarn.
Divide for front legs
Rnd 30 Kfb 3 times, sl next 6 sts onto a safety pin, kfb 8 times, sl next 6 sts onto a safety pin, kfb 3 times. 28 sts. (Keep gauge tight to avoid gaps as you knit under the sts on safety pins.)
Rnd 31 K28.
Rep last rnd twice more.
For short-haired guinea pig only: join MC and work with C (as 2 strands) as follows:
Rnd 34 K28.
For short-haired guinea pig only: cut C and cont with MC as follows:
Shape back
Rnd 35 K14, M1, k14. 29 sts.
Rnd 36 K29.
Rnd 37 K14, M1, k1, M1, k14. 31 sts.
Rnd 38 K31.
Rnd 39 K15, M1, k1, M1, k15. 33 sts.
Rnd 40 K33.
Rnd 41 K16, M1, k1, M1, k16. 35 sts.
Rnd 42 K35.
Rnd 43 K17, M1, k1, M1, k17. 37 sts.
Rnd 44 K37.
Rnd 45 K18, M1, k1, M1, k18. 39 sts.
Rnd 46 K39.
Rnd 47 K19, M1, k1, M1, k19. 41 sts.
Rnd 48 K41.
Rnd 49 K20, M1, k1, M1, k20. 43 sts.
Rnd 50 K43.
Begin to stuff the head and body.
Place marker and work 5 rnds without shaping.
For short-haired guinea pig only: join C and work with MC (as 2 strands) as follows:
Rnd 56 k43.

For short-haired guinea pig only: cut MC and cont with C as follows:
Rnd 57 K43.
Rnd 58 K20, k3tog, k20. 41 sts.
Rnd 59 K41.
Rnd 60 K19, k3tog, k19. 39 sts.
Rnd 61 K39.
Rnd 62 K18, k3tog, k18. 37 sts.
Rnd 63 K37.
Divide for back legs
Rnd 64 (RS) K4, sl next 8 sts onto a safety pin, k5, k3tog, k5, sl next 8 sts onto a safety pin, k4. 18 sts.
(Keep gauge tight to avoid gaps as you purl above the sts on safety pins.)
Rnd 65 *K2tog, rep from * to end. 9 sts.
Cut yarn and thread end through rem sts. Stuff the rest of the body. Pull yarn up tight to close the opening and secure. Weave in end.
Shape front legs (make 2)
Sl 6 sts held on the safety pin for the front leg onto size 3 (3mm) needle.
With RS facing, rejoin C (A for long-haired guinea pig).
Rnd 66 (RS) K6. *Work as i-cord for 12 more rows or until the leg measures 1½in (4cm).
Rnd 67 K3, turn, bind off 3 sts p-wise. 3 sts.
Rejoin C (A) to rem 3 sts, k3, turn, bind off 3 sts p-wise.
Weave in ends.**
Shape back legs (make 2)
Sl 8 sts held on one safety pin for a back leg onto size 3 (3mm) needle.
Rnd 68 (RS) C (A) K8.
Work as i-cord as follows:
Rnd 69 K8.
Rnd 70 K2tog, k4, k2tog. 6 sts.
Work as front legs from * to **.
EARS (MAKE 2)
Cast on 5 sts using MC (or A for long-haried guinea pig) and size 0 (2mm) needles.
Row 1 (RS) Kfb, k3, kfb. 7 sts.
Row 2 P.
Row 3 K2, k3tog, k2. 5 sts.
Row 4 P.
Row 5 K1, k3tog, k1. 3 sts.
Cut yarn and thread end through sts. Pull up tight and secure.
MAKING UP
NOSE
Working mattress stitch, join the seam under the nose. Using black yarn, embroider a couple of straight sts at the tip of the nose for nostrils.
LEGS
Weave in the ends at the legs and feet. Sew a couple of stitches to join the front legs to the side of the body to give a slightly bent leg effect and to conceal any gap left under the legs.
Pinch and then stitch the back legs about 1in (2.5cm) up from the toes to make ankle joints. Work mattress stitch to close the opening where the back legs divide.
EARS
Sew the cast-on edge of an ear to one side of the head where the shaping decreases. Repeat for the other ear.