Shaping
The pets in this book have been created by shaping the knitting (increasing and decreasing stitches), as well as by knitting in the round and with the i-cord technique. This means you can see your pets developing their 3D shape as you knit and there is much less sewing up to do after you finish knitting. The different shaping techniques you will need are explained below.
DECREASING STITCHES
Decreasing stitches is where you lose stitches, in these patterns usually one at a time. This can be achieved in several ways.
SKPO (SLIP ONE, KNIT ONE, PASS THE SLIPPED STITCH OVER)
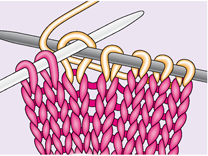
1 Knit along the row until you reach the area you want to decrease. Slip the stitch (unknitted) onto the right-hand needle. Knit the next stitch.
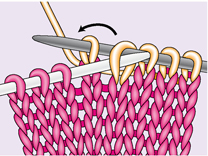
2 Lift the slipped stitch over the knitted stitch and off the needle. This decreases by one stitch.
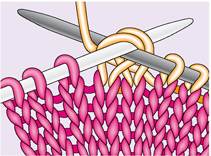
K2TOG (KNIT TWO STITCHES TOGETHER)
Knit along the row until you reach the area you want to decrease. Knit through the next two stitches as though they were one stitch. This decreases by one stitch.
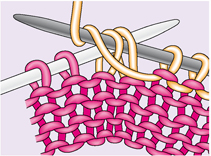
P2TOG (PURl TWO STITCHES TOGETHER)
Purl along the row until you reach the area you want to decrease. Purl through the next two stitches as though they were one stitch. This decreases by one stitch.
MULTIPLE DECREASES
You can also decrease by more than one stitch at a time. Some of the pattern instructions ask you to k3tog or p3tog, for example. Work these decreases as explained above; you will just need to insert your working needle through three stitches and knit or purl them together as though they were one stitch. K3tog and p3tog decrease by two stitches.
INCREASING STITCHES
Increasing stitches is where you make a stitch.
KFB (KNIT INTO THE FRONT AND BACK)
Knit along the row until you reach the area you want to increase. Knit into the front of the next stitch on the left-hand needle. Instead of removing it from the needle, knit into it again through the back loop. Then slip the original stitch off the left-hand needle.
PFKB (PURL INTO THE FRONT, KNIT INTO THE BACK)
Purl along the row until you reach the area you want to increase. Purl into the front of the next stitch on the left-hand needle. Instead of slipping it off the needle, take the working yarn to the back of the work and knit into the stitch through the back loop. Slip the original stitch off the left-hand needle.
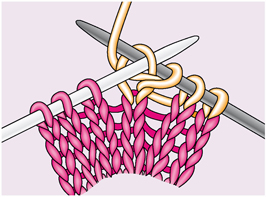
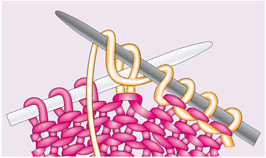
YON (YARN OVER/YARN OVER NEEDLE)
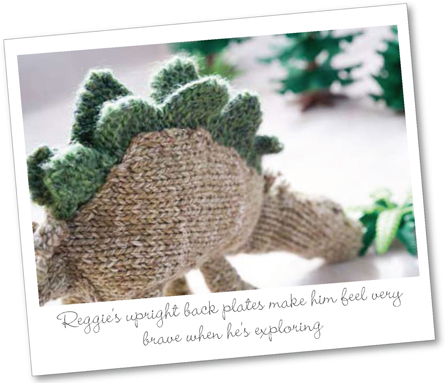
Wrapping the yarn over the needle makes an additional stitch and a hole in knitted lace and textured patterns. I have used this technique to create tiny holes in the Haughty Hens' feathers and to shape Reggie Veggie's triangular plates.
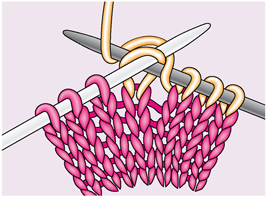
Bring the yarn over between the two needles. Knit the next stitch, taking the yarn over the right needle.