Paperclay can be applied directly to artwork for small accents or for larger shapes and textural areas. For larger areas, apply clay directly to the art surface, then trim it into the rough shape you want. After making your marks, you may want to trim again to clean up the edges.
When making a paperclay relief, you can either work in thin layers—letting them dry before adding on more clay for additional elements—or work with a single layer of paperclay. If you find the clay is not sticking well, just lightly wet the surface.
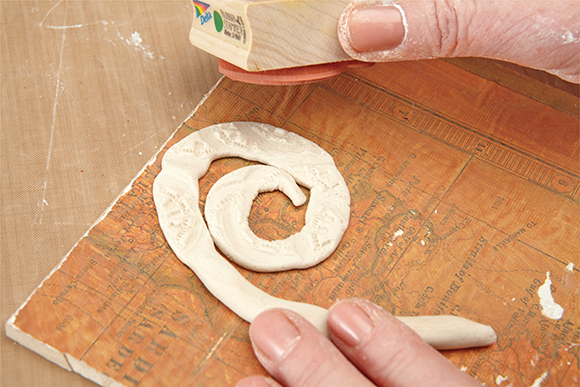
STEP ONE: Make a thin roll of clay and apply it to your art for an accent, then stamp or make marks in the clay (it will flatten out a bit as you do this). When dry, the clay is ready to paint.
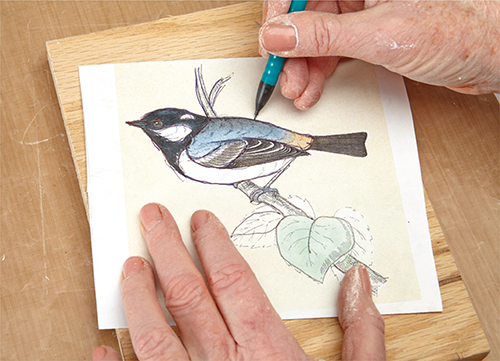
STEP TWO: For a paperclay relief, start by using tracing paper to transfer your drawing onto a wood panel.
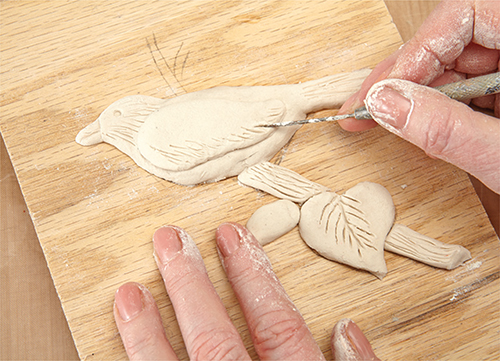
STEP THREE: Lay 1⁄8"– 3⁄8" (3mm–10mm) thick paperclay over the design, then shape it and mark it using mark-making and clay tools.
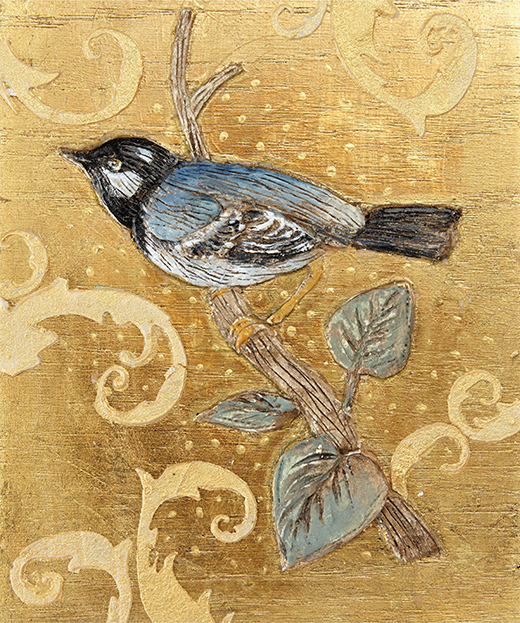
STEP FOUR: When the relief is dry, gesso the whole panel. Paint the bird. After the bird is painted, apply metal leaf by first applying adhesive size for metal leaf. When the size is tacky, lay the metal leaf on it and rub down lightly.
(Stencils were created on a polypropylene sheet with tinted coarse molding paste. When dry, the pieces were separated and glued down with soft gel.)