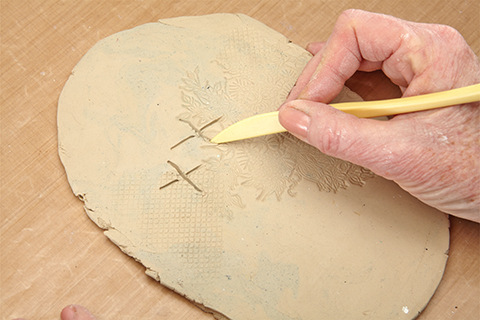
Make marks in the clay for your mold by carving or stamping. Just remember that the deepest marks you make in the clay surface will create the highest relief on your cast piece. When satisfied with your design, trim the clay into a square or rectangle with additional cuts for the walls of your dam (the edges that will hold in your casting medium).
Use your clay mold before the clay hardens so you will be able to peel the clay off after the plaster sets.
STEP ONE: Carve a design into the clay.
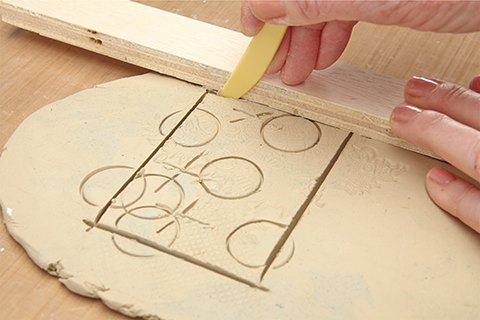
STEP TWO: Trim your designed clay into a rectangle or square.
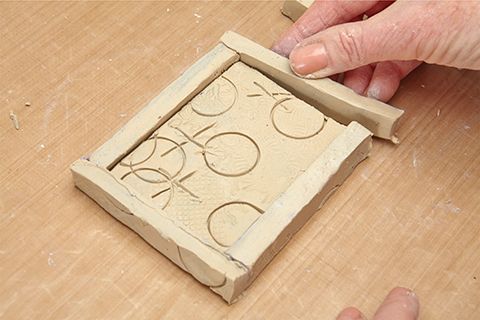
STEP THREE: Create the walls of your dam by cutting clay strips 1⁄2" (13mm) thick and 1⁄2" (13mm) taller than the center piece. To help the walls adhere to the main piece, wet and score where they meet.
Another way to make a mold would be to cut out the bottom of a small cardboard box and embed it in the marked clay slab. Then, pour the plaster and peel the cardboard off after the plaster has set up.