Remember making clay out of flour and salt in kindergarten? Isn’t it great that we are still playing with clay? We just had to share some of our favorite and funky DIY clay recipes with you. You can easily create all of these recipes in an afternoon and do your own comparison test. Most of these recipes can be made in just a few minutes. Several of them do need to be cooked, but this is the closest we will get to the stove in this lifetime.
You can add food coloring, acrylic paint or glitter to these clays to add color or sparkle, or simply paint and seal with a spray varnish after your clay projects have dried. Try antiquing with brown Briwax or drybrushing. It will take a few days for all of these clays to air-dry completely depending on the thickness of your projects. If you are not going to use all of the clay you make, be sure to wrap the unused portion in plastic and store it in a ziplock bag.
After making your homemade clay creations, let them dry on a nonstick pan or a sheet of freezer paper.
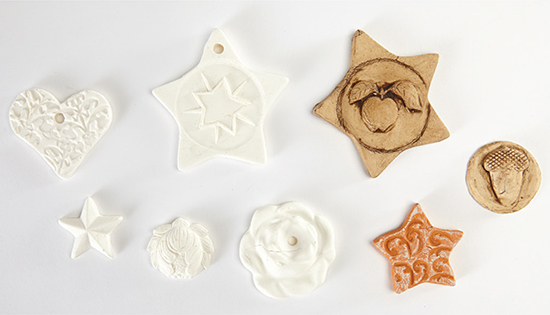
This is the brightest white clay of all these recipes. It holds details well and has a stiff enough body for modeling.
Mix the dry ingredients in a nonstick pan and then add water. Stir continuously over medium heat. When the mixture has started to resemble a soft dough, remove from the heat to cool for a few minutes. When it is cool enough to handle, knead the dough for about 5 minutes.

Cold porcelain clay has a translucent quality. It is wonderful for modeling finely detailed pieces. It shrinks a bit when it dries.
Mix white glue, water, cold cream and glycerin in a pan. Stir over medium heat until smooth. Add cornstarch and continue stirring. The mixture will become very stiff, and when it forms into a lump, it’s done. Knead the clay for 5 minutes while it is still warm.

This clay is great to model with and holds detail when used in molds or stamping. The color of your clay will depend on what flavor of Kool-Aid you use. The color will lighten as it dries.
Mix dry ingredients in a pan. Add water and oil and stir until smooth. Cook over medium heat for 3 to 5 minutes. Keep stirring until the dough forms a lump. Knead for about 2 minutes.

This is a surprisingly lovely clay with very nice texture. You can model, stamp and mold this clay and it will hold great detail.
Cut the crusts off the bread slices and tear the bread into small pieces in a bowl. Add the glue and mix with your hands (you may want to wear disposable gloves). Knead the mixture until it becomes smooth and pliable. Add more glue if the clay is too crumbly or more bread if it is too sticky.

With this easy and rustic clay, you can form crude shapes, but it is impossible to get fine detail when stamping or modeling it. It does not cut cleanly and will be a bit challenging but works beautifully with molds. This clay dries super-hard with a grainy surface.
Mix together the sawdust and flour, then add water a little at a time until the mixture is stiff but still pliable. Add a bit more flour if the mixture is too crumbly. Knead for several minutes until it is elastic.
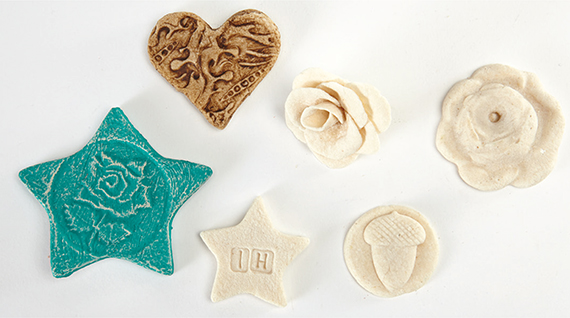
This clay is very easy to work with and has a wonderfully pliable consistency. It is excellent for detailed modeling, stamping and using in press molds. It has slightly grainy texture when dry.
Mix together the flour and salt. Put the water, baby oil and alum in a pot and bring it to a boil. Pour the boiling mixture into the dry ingredients and mix it all together. Knead for several minutes with more flour until it is no longer sticky.