
The folk-art inspired, whimsical family shown on page 48 is a great example of how deliciously fun and easy working with foil armatures can be. You can always add more foil as you work on your basic shape. If you have trouble attaching additional foil, give it a little help with some hot glue.
If you are using paper mache or ClayShay over the foil, mix it into a very thick, claylike consistency.
STEP ONE: Roll out several inches (17–21cm) of foil and start to crumple it up, shaping and compressing it into the rough shape that you want. Compress until you have a relatively smooth form with no huge dips or spikes.
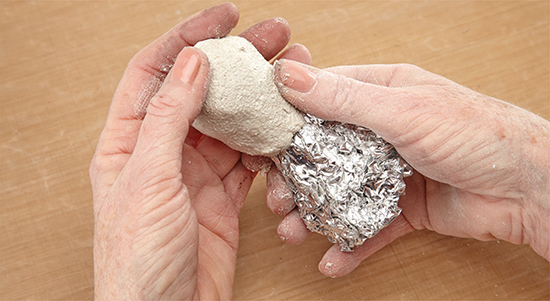
STEP TWO: Smooth clay (paper mache shown) onto your foil to form a little at a time, smoothing it together with wet fingers if needed.

STEP THREE: After the paper mache dries, add eyes and any marks or features. For larger, heavier embellishments, attach with resin clay or epoxy glue.

STEP FOUR: Allow your piece to dry thoroughly before painting. Paint a basecoat of acrylic paint and let it dry. Then add details and an acrylic wash if desired.