Designed by David Brill, UK
Dave Brill’s Origami Masu
David Brill’s origami masu is a marvelous design from many points of view. It is practically a replica of the wooden Japanese sake drinking cup (masu) . It was designed to be folded from paper with the proportions of a silver rectangle—a height to width ratio of one to the square root of two—and such paper (letter size is called “A4”) is commonly handy in most countries where “A4” format papers are standard. The folding method can be modified to make a masu with three, four, five, six, or even more sides! Brill’s is a particularly satisfying masu to fold, and it features several interesting techniques. It is the most challenging model in this book, yet the skills it teaches are well worthwhile. Take your time learning and practicing it and savor its clever design and folding challenges.
For your first experiments with this model I recommend using a larger sheet, so cut a rectangle with a long dimensional length that is easily divisible by five, since you will first need to fold the paper into equal fifths. The length of the short side must make the rectangle agree with the ratio of the silver rectangle. So, if your long dimension is 15 inches (38 cm), the short dimension must be 10 5/ 8 inches (27 cm). Otherwise, use an A4 (letter format) or larger A format sheet. A4 letter paper is common outside of the United States, and it is available even in the US at some office and paper supply shops. You can also follow a simple fold and cut method to convert paper rectangles into “Silver Rectangles.” The method is on page 94.
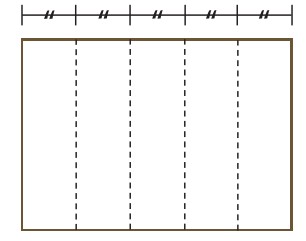
1. Begin inside up. Valley-fold into five equal columns. Refer to page 95 for a clever folding method to accomplish this.
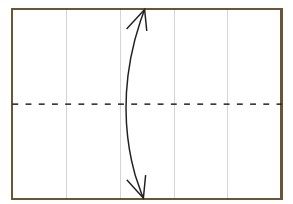
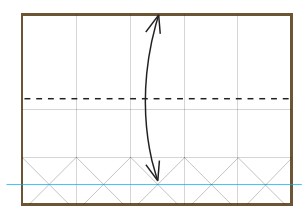
2. Fold in half, long edge to long edge. Unfold.
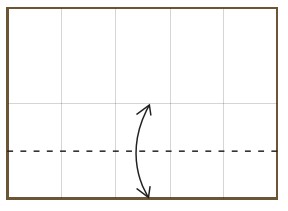
3. Fold the bottom long edge to the middle crease. Unfold.

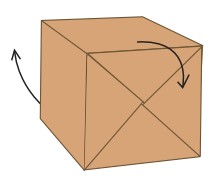
4. Install crossing 45 degree angle creases in the bottom row of rectangles. Use the top crease line as your origin. Video note: Use 45 degree creases at this stage of the video, not diagonals.
5. Fold the top long edge down to the level of the intersecting diagonal creases. Unfold.

6. Turn the paper over, left to right.
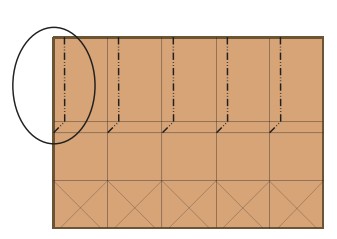
7. Mountain-fold each of the indicated crease sets. Detail to follow.

8. Mountain-fold a 45 degree crease between the parallel center creases, then add the vertical mountain crease up from the top end of the 45 degree crease. Unfold after each crease.

9. Mountain-fold 45 degree creases along the top edge. Note carefully the placement and use the previous creases as a guide.

10. Valley-fold and unfold two parallel creases through the intersections at the top and the bottom of the new 45 degree creases. Mountain-fold the final 45 degree crease into the far right rectangular outline.

11. Mountain-fold along the two horizontal center creases.
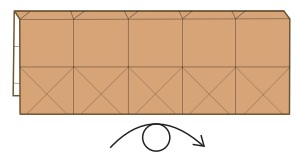
12. Turn the model over, left to right.
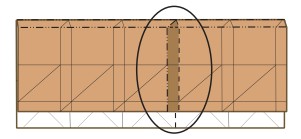
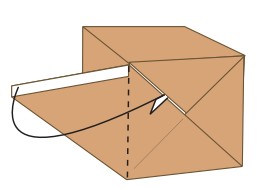
13. Using the indicated creases make a crimp, forming a right angle bend in the model. Detail to follow.

14. Push in at the valley fold lines. The shaded area will move inward.
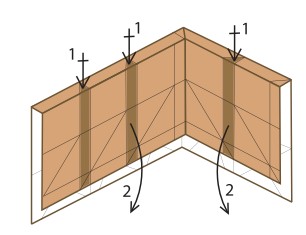
15. Your model should look like this. Unfold the crimp and repeat at each of the three remaining areas indicated by the top arrows (1). Unfold each crimp after completion. All of this pre-creasing will help step 18 move well. Flatten the paper (2). Look ahead to figure 16.
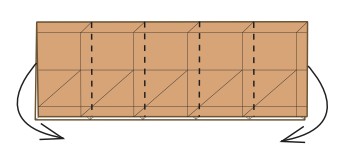
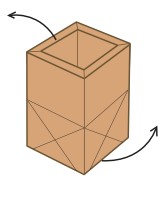
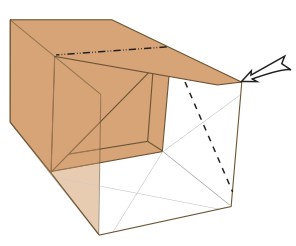
16. Valley-fold at the indicated creases, bringing the left and right ends together.
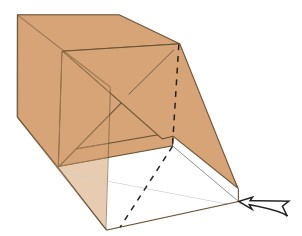
17. Tuck the fifth segment (right end) into the first segment (left end) forming a four-walled, square tube.
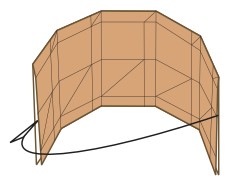
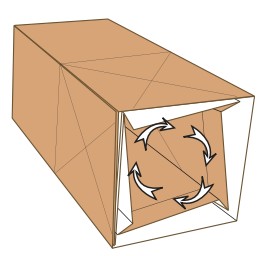
18. Using the crimps that were exercised in steps 14 and 15, push up the inner layers of the tube to 3-D the walls of the masu. Look at figure 19 for the result.
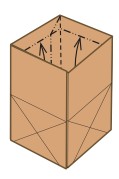
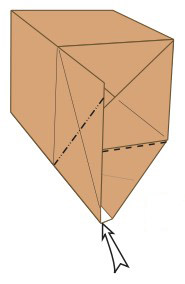
19. Turn the model on its side so that you have access to the bottom end.
20. Rotate and push in the inner layers to close and form the bottom of the inside of the masu. You must use the diagonal creases to initiate this, but you must also involve all of the other creases in the inner layers in order to form the twist. Make sure that each crease flexes without any kinks or short circuits. Details to follow.
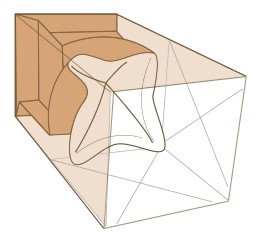
21. Twist in progress.
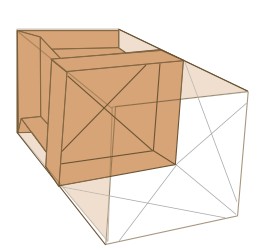
22. Completed twist.

23. Mountain-fold triangle flap 1 inside the model. Mountain-fold the indicated top flap to cover.
24. Mountain and valley-fold corner layers to cover.
25. Fold in the next corner to cover.
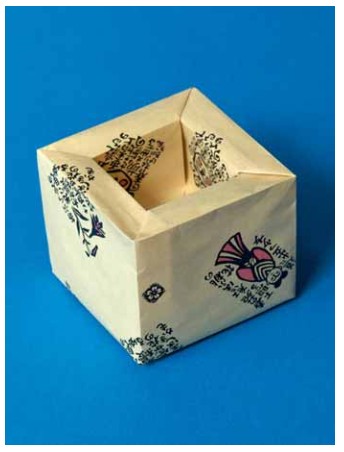
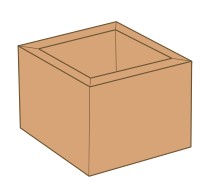
26. Fold in the final corner to cover.
27. Tuck in the indicated triangle flap to lock the bottom closed.
28. Turn the model right side up.
29. David Brill’s marvelous Origami Masu.