This book is a valuable resource that will absolutely improve your knowledge of Krav Maga and make you safer, but in the end it is only a book. To complete your knowledge, you need to take the information contained here and apply it with a partner, slowly at first and then with increasing speed and aggressiveness. As we noted earlier, techniques are the beginning of your understanding, not the end. Try the techniques as described in this book and use the principles to create variations that are comfortable for your body. Obviously, you will get the greatest benefit from training with a certified instructor. Our certified instructors have the knowledge to teach you the technique itself, and then show you how to apply it under varying degrees of stress. You can find a list of locations certified by Krav Maga Worldwide at www.kravmaga.com.
Along these lines, please remember that a book offers its own limitations. We cannot describe every “what if” situation for every type of attack. If we did, the book would be enormous, expensive, and confusing. In many of the techniques, we describe follow-up counterattacks or movements. These are, for the most part, recommendations rather than requirements. If you feel that a knee is more effective for you than an elbow, throw the knee. Or, better yet, pick up a stick and use that! Our message here is simple: If you take every word in here as gospel, you will gain knowledge, but it will be rigid. That isn’t our point. Focus on the principles as much as the specifics.
If you have previous martial arts experience, then we offer you a proverb from Eastern martial arts: In order to fill your tea cup, you must first empty it. In other words, approach these techniques with an open mind. In the end, you will probably incorporate those you like into your own collection of techniques. This is fine with us, but please remember that Krav Maga is an integrated system whose movements are designed to work with each other, not necessarily with movements from a totally different system.
The Organization of This Book
We have organized this book to mirror the belt, or level, system we follow in our program. While we don’t wear colored belts in our classes, we do use terms such as “yellow belt” and “orange belt” to describe each level of the system because these terms are familiar to people who come from the martial arts world. In our schools, you’ll often hear these divisions referred to simply as “Level 1,” “Level 2,” etc. Below, we’ve listed the belt color, corresponding level, and the main area of emphasis for each.

The next level after this is Black Belt, which involves additional material such as third-party protection, hostage scenarios, and multiple attackers. Because we can only fit so much into one book, we have elected to stop this book at Brown Belt, or Level 5. You will find, though, that this material covers the most likely attacks you will see on the street.
A Note Regarding Stance: Throughout this book, we have assumed that the defender is either in a passive stance, or in a left-leg forward stance. We prefer a left-leg forward stance for right-handed people. In other words, we have our strong side back. Our reason is simple: Most attackers (especially with a weapon) will attack with their right hand. We want to block with our left and counterattack with our strongest weapon—our right. Once you’ve mastered these techniques, you should try them from an opposite fighting stance. We require all our black-belt candidates to perform every technique from both stances—but remember, they are testing at a very high level. The average person interested in defending herself will face a right-handed attacker using his right hand most often. If you train for that situation, the odds are you will learn to deal with the most common attacks.
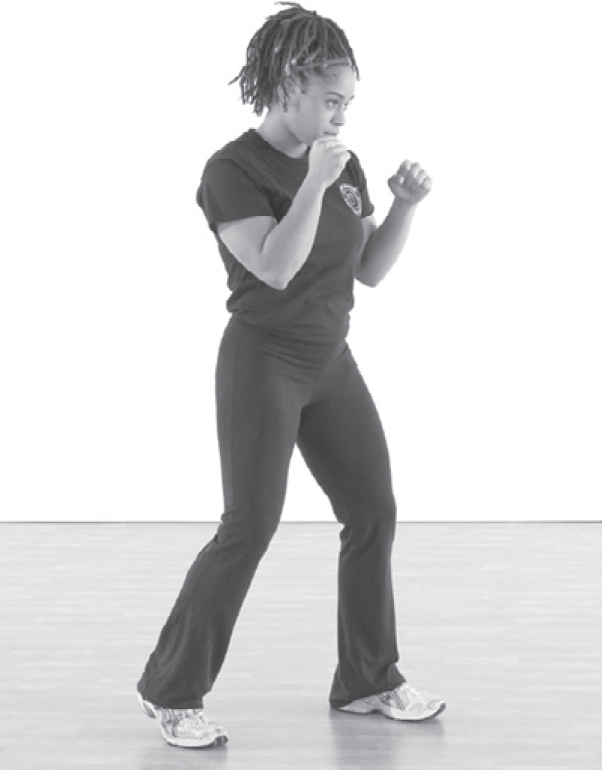
Left-leg forward stance.
Safety in Training
You should absolutely try these techniques with a partner. This knowledge is worth nothing until you’ve made it your own. However, you must learn to train with a combination of realism and safety. Never be afraid to practice a technique slowly. Keep this phrase in mind: Slow equals smooth and smooth equals fast. Of course, you do want to get to the aggressive, realistic attacks as soon as possible. But trust us, you’ll progress faster if you begin slowly and safely.
For this reason, start every technique slowly, with the attacker making a real attack, but at a slow speed and with minimal power. For instance, if you want to train against a choke from the front, your partner should place his hands on your throat and squeeze gently. You should feel pressure so that you can identify the danger, but the choke should not be applied with full power until much later in your training.
As noted earlier, if certified instructors are available in your area, we strongly recommend you take at least a few lessons with them. Not only can they teach you the techniques, they can provide you with some principles for safe training that will bring you to a higher level of proficiency quickly.
The following are additional notes regarding training to defend against weapons. First, NEVER use a real weapon. Various types of training weapons are available, including rubber hand guns, metallic but inert hand guns, and rubber knives.
Handguns: NEVER put your finger in the trigger—our techniques often cause damage to the trigger finger.
Knives: NEVER stab at the eyes, ALWAYS stab at the chest or neck. Even a rubber knife can damage an eye if the defender makes a mistake.
Sticks: Use padded sticks at the beginning of your training. If you decide to graduate to wooden or composite-material batons, train slowly until your technique is correct.

Coauthor John Whitman (right) defends against a knife attack on the attacker’s “live side.”
Terminology
There are a few words and phrases in this book that might require definition. Many of these phrases are used because we try to avoid terms like “right” and “left.” “Right” and “left” become confusing for people fighting in a left-handed stance, and they sometimes stop the mind from being able to switch sides. We’ve surrendered to common usage, of course, and we DO use “right hand” and “left hand,” often for the sake of clarity, but we also use some of the terms below.
Live side: the side of the body from which you can easily launch more attacks. Stand in a fighting stance with your left foot forward and your hands up: Your right side is your live side.
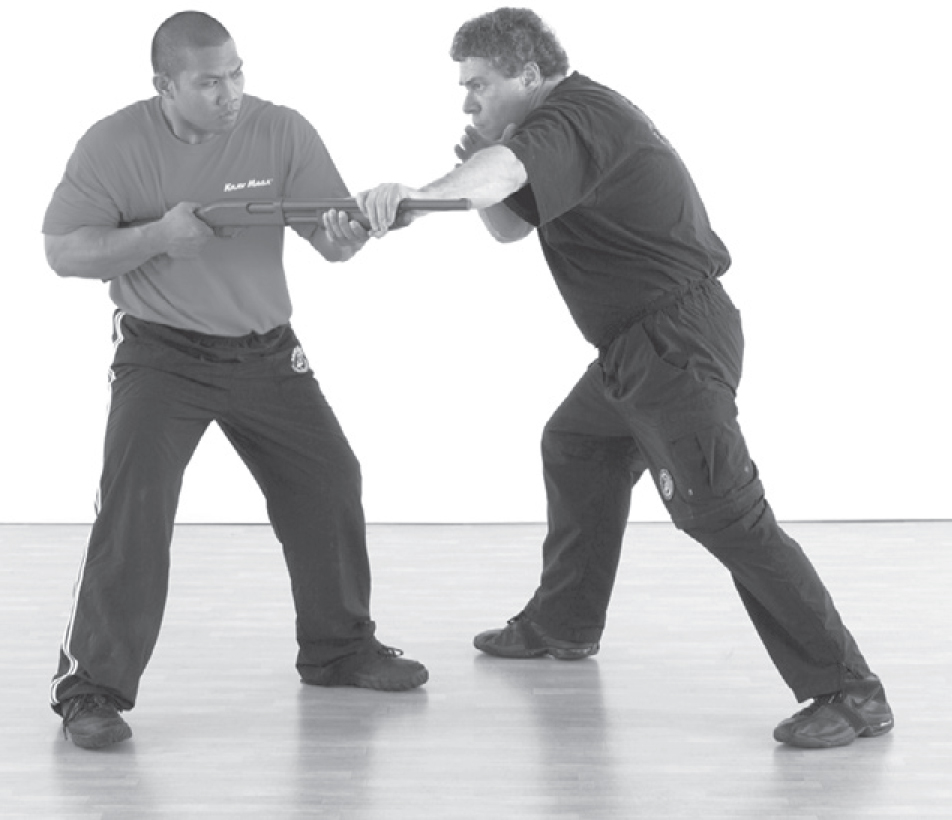
Coauthor Darren Levine (right) bursts forward with his feet to the rifleman’s “dead side” to grab the weapon.
Dead side: the side of the body from which you cannot easily launch as many attacks. Stand in a fighting stance with your left foot forward and your hands up: Your left side is your dead side.
Inside defense: any redirecting defense in which the defending limb moves inward toward the center of the body.
Outside defense: any redirecting or stopping defense in which the defending limb moves outward from the center of the body.
Inside arm or leg: this term refers to the limb or body part that is closer to the attacker; it can also apply to the “inside hip,” “inside foot,” etc.
Outside arm or leg: this term refers to the limb or body part that is farther away from the attacker; it can also apply to the “outside hip,” “outside foot,” etc.
Burst: any explosive movement (usually, forward) of the feet. We “burst” in when we do gun defenses, stick defenses, etc.
Guard: a ground position in which one fighter is on his back and the other is on top inside the bottom person’s legs. In this case, the top person is in the bottom person’s guard.