CHAPTER 9
Working with Git
This chapter aims to introduce you to Git, a tool to help you work in the same code, and collaborate with other developers in the same project in a remote way.
Structure
In this chapter, we will discuss the following topics:
- Git
- GitFlow
- GitHub
Objectives
After studying this unit, you should be able to:
- Install and use Git with the local repositories
- Understand the GitFlow and how it can be applied in the daily work
- Share your code with other people using GitHub
Git
Git is a tool created by Linus Torvalds, the creator of the Linux system. The tool was created to help the Linux developers control the development flow among many developers around the world. It helps to solve conflicts, track the modifications, or even revert the configurations that were working before and stopped working in a new version.
To install Git, you can access the following link:
https://git-scm.com/download/win
The installation process is the same that we did for all Windows applications; just Next, Next, and Finish. After the installation, you will find a new program called Git Bash, which allows you to create your local repos and use the Git commands to create versions of your application:
Figure 9.1
In the next steps, I will show you some basic commands which are enough for you to use Git in your daily work. Of course, it is possible to create an entire book just to explain the Git commands and how to deal with conflicts and different strategies of versioning code. However, let's keep with the basics because “done is better than perfect":
1511 MXTI@avell MINGW64 ~
$ mkdir Chapter09
1511 MXTI@avell MINGW64 ~
$ cd Chapter09/
Aforementioned, you have the output of my Git Bash. Creating a folder, called Chapter09 and get inside that folder. Here, I will create my first repository:
1511 MXTI@avell MINGW64 ~/Chapter09
$ git init
Initialized empty Git repository in C:/Users/1511 MXTI/Chapter09/.git/
The command git init is responsible to initialize any folder of a Git repository. It basically creates a folder, called .git with a pre-defined folder structure which will store the files with the metadata for your code, like what was changed from the current version of the code and your modifications, which files you want to send to the new version, and other things. A repository is a folder where you store and track the modifications of your code.
Now, we can use any text editor to create some code and track the changes. I will use the Visual Studio Code, because it is my favorite. But, feel free to use any according to your preference:
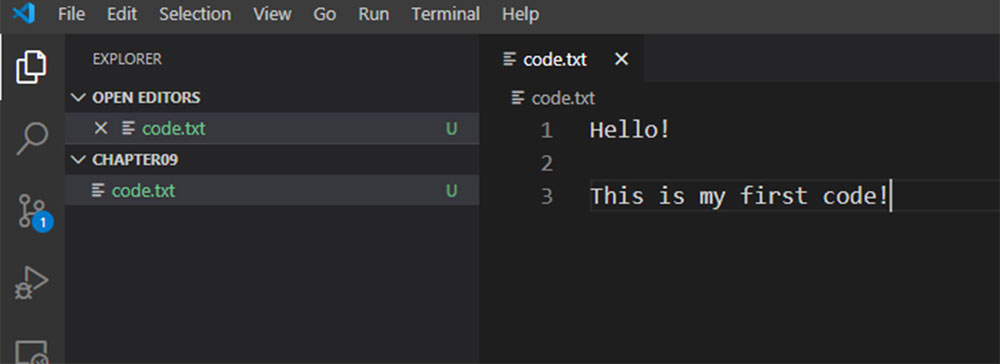
Figure 9.2
I created a new file called code.txt in the text editor, just too as an example with some random content. Within the Git repositories, we can track the modifications of any kind of the text file, Python codes, C++ codes, Java, or whatsoever.
The next step is to check what changed since the beginning when I created the repository and created the file, the Visual Studio Code as integration with the PowerShell. Thus, I will use it to run the Git commands.
The first command is git status:
PS C:\Users\1511 MXTI\Chapter09> git status
On branch master
No commits yet
(use "git add <file>…" to include in what will be committed)
code.txt
nothing added to commit but untracked files present (use "git add" to track)
In the preceding command, we can see that we are on the branch master and we have one untraced file, called code.txt. The branches are the versions that you can have of the same project. You can use it in the way that you want, with the name that you want. However, create a flow which helps you to keep a standard of the organization. Otherwise, each project would have a versioning strategy.
GitFlow
Now, when we start working on a project, we have the code files that are already in production, and we cannot work in the main branch, because of the CI/CD pipelines. We need to generate a new version of our software with the complete code.
Let's commit the first version of the code, which will be shared among all the developers working in the same project:
PS C:\Users\1511 MXTI\Chapter09> git add --all
PS C:\Users\1511 MXTI\Chapter09> git commit -m "uploading the scaffold of the project"
[master (root-commit) f6284bf] uploading the scaffold of the project
1 file changed, 3 insertions(+)
create mode 100644 code.txt
If we run the git status again, nothing is untraced or pending to commit:
PS C:\Users\1511 MXTI\Chapter09> git status
On branch master
nothing to commit, working tree clean
To check the branches you have, run the following command:
PS C:\Users\1511 MXTI\Chapter09> git branch
* master
Now, we need to work on that code without breaking the version in production, which corresponds to the branch master. Then, we will create a new branch, called develop, which is the branch respective to a new version of our software:
PS C:\Users\1511 MXTI\Chapter09> git checkout -b develop
Switched to a new branch 'develop'
We created a new branch. Now, if we run the command git branch again, we can see that another version of our current code is created, which we can modify without changing anything in the current version:
S C:\Users\1511 MXTI\Chapter09> git branch
* develop
master
We created a new branch, then if we run the command git branch again, we can see that another version of our current code was created, which we can modify without changing anything in the current version:

Figure 9.3
In the preceding figure, I have added a new line into our code. This book is about infrastructure. Therefore, I want to show that we can include the new code respective to infrastructure, and we also have the development infrastructure and the production infrastructure, whichever one has their configurations and codes.
I can run the command git status again, and see what has changed:
PS C:\Users\1511 MXTI\Chapter09> git status
On branch develop
Changes not staged for commit:
(use "git add <file>…" to update what will be committed)
(use "git restore <file>…" to discard changes in working directory)
modified: code.txt
no changes added to commit (use "git add" and/or "git commit -a")
Different from the first file, the code.txt is now modified, not untraced as we saw in the first command, which means that it is not a new file and the file was modified. If you want to check what has changed from the old version, you can use the following command:
PS C:\Users\1511 MXTI\Chapter09> git diff code.txt
diff --git a/code.txt b/code.txt
index 70274ce..9c5fd1c 100644
--- a/code.txt
+++ b/code.txt
@@ -1,3 +1,5 @@
Hello!
-This is my first code!
\ No newline at end of file
+This is my first code!
+
+This is the configuration respective to the VMs size.
\ No newline at end of file
Here, we can see the differences between the two versions. Where we have the (+) plus sign, means that the lines were included in the file, with the (-)minus sign, we have what was removed from the old version. To save this new version and share with the other developers, we must add the file in this new version and commit the changes:
PS C:\Users\1511 MXTI\Chapter09> git add --all
PS C:\Users\1511 MXTI\Chapter09> git commit -m "adding new configurations"
[develop 806990f] adding new configurations
1 file changed, 3 insertions(+), 1 deletion(-)
Now, let's assume that we tested everything and we want to put the development version in production. Now, we need to merge the development code with the production code. To do this, we can use the following command:
PS C:\Users\1511 MXTI\Chapter09> git checkout master
Switched to branch 'master'
PS C:\Users\1511 MXTI\Chapter09> git merge develop
Updating f6284bf..806990f
code.txt | 4 +++-
1 file changed, 3 insertions(+), 1 deletion(-)
Perfect! Now we have the development version in production. So, we can deploy it and start to work again in the other version. But, let's make the things a little bit more sophisticated. Firstly, we have to go back to the development branch:
PS C:\Users\1511 MXTI\Chapter09>git checkout develop
Switched to branch 'develop'
We can suppose that we want to change the current operating system of the infrastructure. Assuming that it is based on CentOS, we want to change to Ubuntu. However, we cannot change it in the development environment, because it can stop the developers working on their own projects. Therefore, I have to create a new branch based on the development branch which we usually call the feature branch.
PS C:\Users\1511 MXTI\Chapter09>git checkout -b feature-ubuntu
Switched to a new branch 'feature-ubuntu'
Now, I will write the new code:
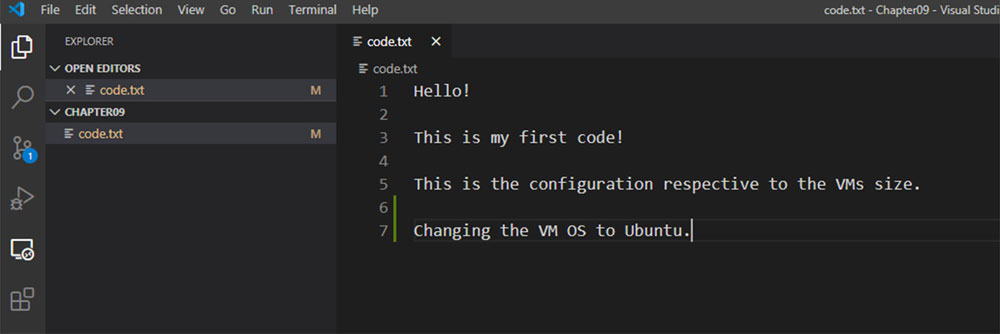
Figure 9.4
After testing the code in the ephemeral environment which was created based on the development environment and making sure that it is working, we can commit the changes and merge it with the development environment:
PS C:\Users\1511 MXTI\Chapter09> git add --all
PS C:\Users\1511 MXTI\Chapter09> git commit -m "changing the os"
[feature-ubuntu 5b4ce7a] changing the os
1 file changed, 3 insertions(+), 1 deletion(-)
Now, we can change from the feature branch to the development branch and merge the code:
PS C:\Users\1511 MXTI\Chapter09> git checkout develop
Switched to branch 'develop'
PS C:\Users\1511 MXTI\Chapter09> git merge feature-ubuntu
Updating 806990f..5b4ce7a
Fast-forward
code.txt | 4 +++-
1 file changed, 3 insertions(+), 1 deletion(-)
The code was merged successfully and now assuming that we have tested it in the development environment and everything worked seamlessly, it is time to merge with the production environment:
PS C:\Users\1511 MXTI\Chapter09> git checkout master
Switched to branch 'master'
PS C:\Users\1511 MXTI\Chapter09> git merge develop
Updating 806990f..5b4ce7a
Fast-forward
code.txt | 4 +++-
1 file changed, 3 insertions(+), 1 deletion(-)
GitHub
The commands ran in the local machine and in a local environment. It was just the basic steps, but I am pretty sure that with these commands you will be able to do 80% of your work every day. If you cannot, there are many tools to help you with the Git commands, like git kraken, or you can even use plugins for Visual Studio Code. We need to have in mind that as bigger as your team is, you will have more conflicts and more changes happening at the same time.
To share our code, we can use many tools, like GitLab, GitHub, Bitbucket. There are dozens of services to help you with it. Let's use the GitHub because it is the most famous. But, for some of my personal projects, I use the Bitbucket, because we can have unlimited private repos.
You can create your own GitHub account for free on their website:
After creating your account, you will be able to create your first repository, as I am doing in the following screenshot:
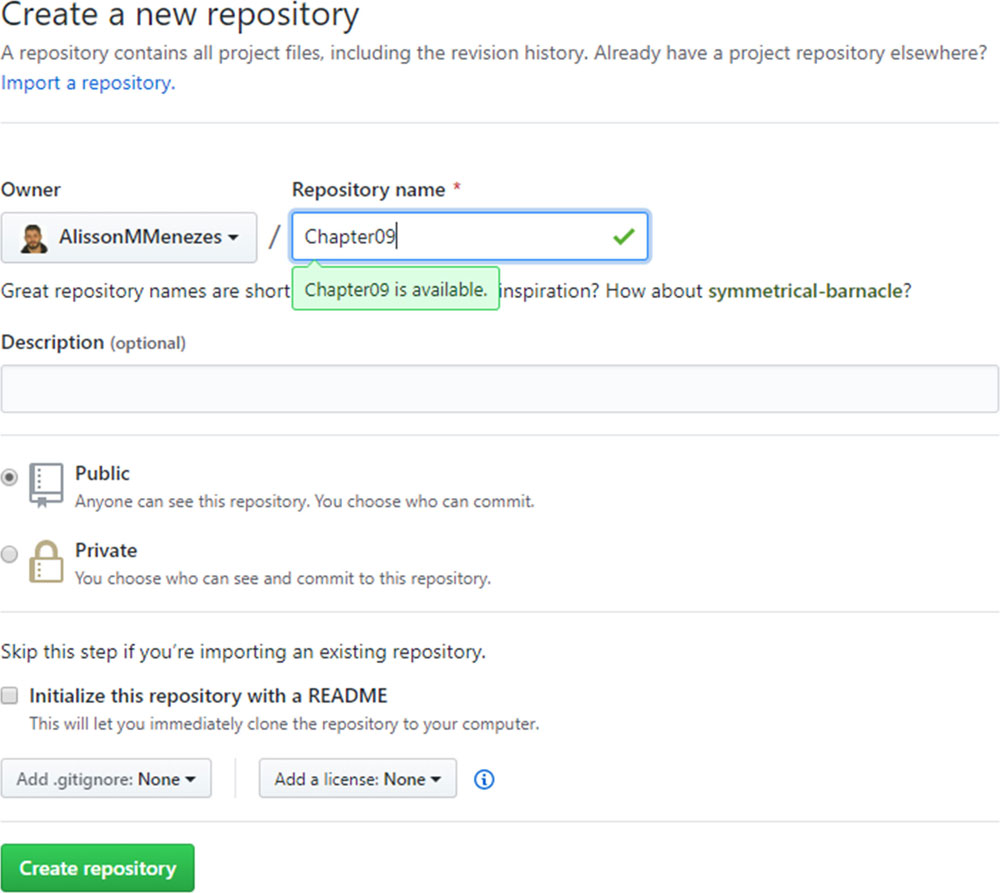
Figure 9.5
After creating the repository, the initial page will show some commands in case you have an existing repo and you want to upload it, or if you want to clone the empty repository. In our case, we already have the code with some commits and we want to send it to Git.
The next screenshot will show the initial page. But the most important information is the following one:
https://github.com/AlissonMMenezes/Chapter09.git
Which corresponds to the address of our remote repository:
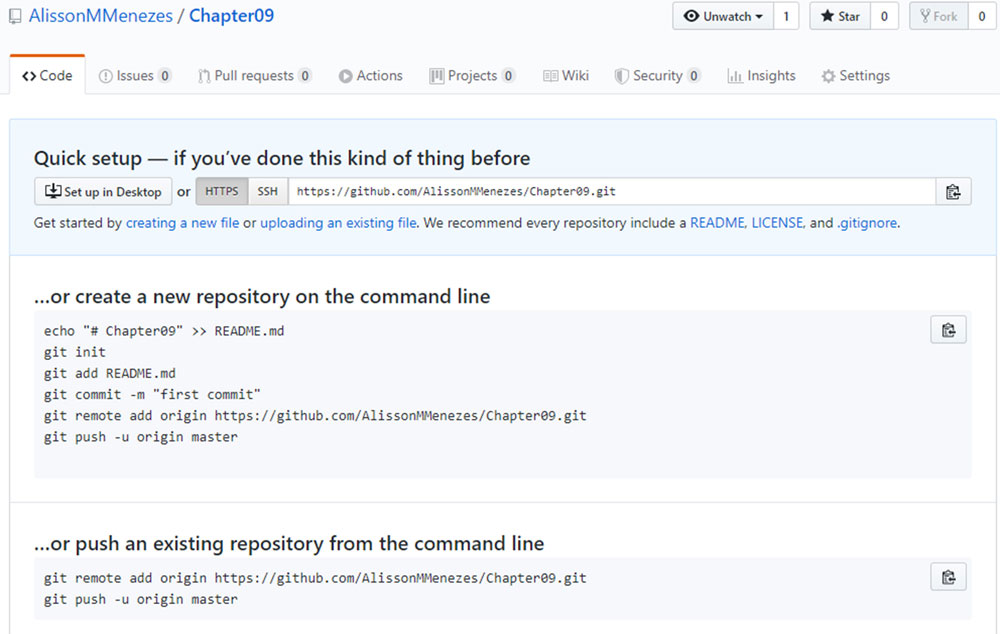
Figure 9.6
Going back to the Visual Studio Code, I will add the remote URL to my local repository using the following command:
PS C:\Users\1511 MXTI\Chapter09> git remote add githubhttps://github.com/AlissonMMenezes/Chapter09.git
PS C:\Users\1511 MXTI\Chapter09> git remote -v
github https://github.com/AlissonMMenezes/Chapter09.git (fetch)
github https://github.com/AlissonMMenezes/Chapter09.git (push)
Now that we have this configured, I can send the code to the remote repository. We call that action push, because the command that we will use is the git push:
PS C:\Users\1511 MXTI\Chapter09> git push github master
Enumerating objects: 9, done.
Counting objects: 100% (9/9), done.
Delta compression using up to 8 threads
Compressing objects: 100% (5/5), done.
Writing objects: 100% (9/9), 789 bytes | 394.00 KiB/s, done.
Total 9 (delta 1), reused 0 (delta 0), pack-reused 0
remote: Resolving deltas: 100% (1/1), done.
To https://github.com/AlissonMMenezes/Chapter09.git
* [new branch] master -> master
The push command follows that sequence. git push repo_name branch. Now, we push the code to GitHub and the branch master. If we go back to GitHub, it is possible to see the code there:
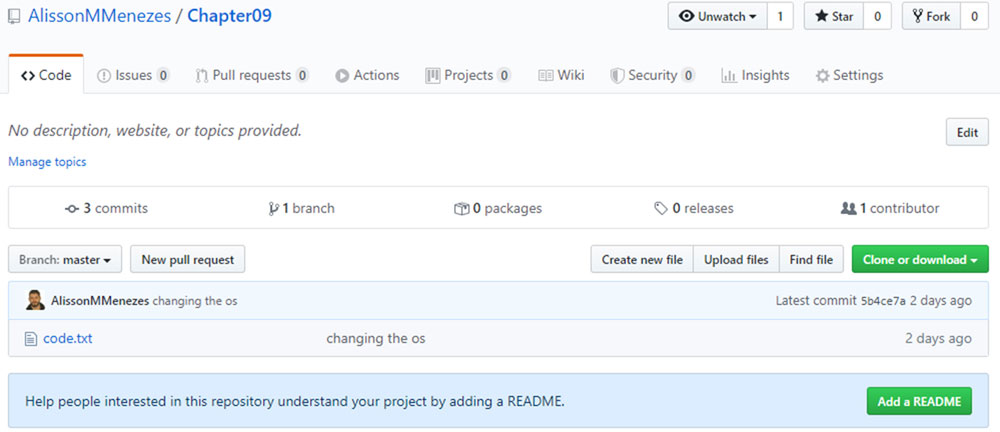
Figure 9.7
Now, it is so much easier to see what has changed, because we have a graphical interface with the number of commits, the branches and so much more information. Now, you can delete your local repository because your code is safe on GitHub.
I deleted my local repository and let's assume that I am a new developer. Now, I have to fetch the code from GitHub, make my changes, and push it back. However, when we are working in a team, it is a good practice to create a new branch, push my branch, and create a pull request. But, why that? We do that for another developer to do what we call code review. Thus, he will analyze your code and validate if it is in the good practices defined by the company.
As a new developer, the first thing I have to do is clone the repository using the following command:
PS C:\Users\1511 MXTI>git clone https://github.com/AlissonMMenezes/Chapter09.git
Cloning into 'Chapter09'…
remote: Enumerating objects: 9, done.
remote: Counting objects: 100% (9/9), done.
remote: Compressing objects: 100% (4/4), done.
remote: Total 9 (delta 1), reused 9 (delta 1), pack-reused 0
Receiving objects: 100% (9/9), done.
Resolving deltas: 100% (1/1), done.
So, now we will create a new branch and edit the file:
PS C:\Users\1511 MXTI\Chapter09> git checkout -b new_feature
Switched to a new branch 'new_feature'
Following this, we have the new code:
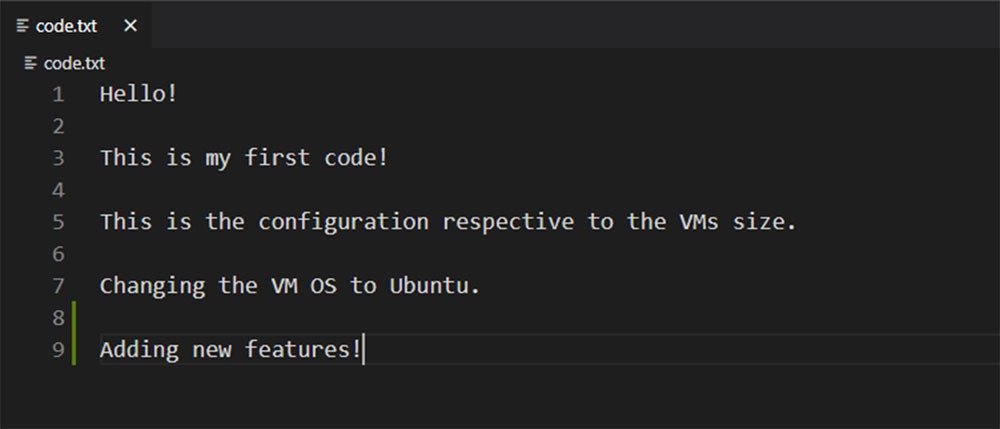
Figure 9.8
Now, we can commit and push to GitHub:
PS C:\Users\1511 MXTI\Chapter09> git add –all
PS C:\Users\1511 MXTI\Chapter09> git commit -m "adding new feature"
[new_feature 938b554] adding new feature
1 file changed, 3 insertions(+), 1 deletion(-)
PS C:\Users\1511 MXTI\Chapter09> git push origin new_feature
Enumerating objects: 5, done.
Counting objects: 100% (5/5), done.
Delta compression using up to 8 threads
Compressing objects: 100% (2/2), done.
Writing objects: 100% (3/3), 294 bytes | 294.00 KiB/s, done.
Total 3 (delta 1), reused 0 (delta 0), pack-reused 0
remote: Resolving deltas: 100% (1/1), completed with 1 local object.
remote:
remote: Create a pull request for 'new_feature' on GitHub by visiting:
remote: https://github.com/AlissonMMenezes/Chapter09/pull/new/new_feature
remote:
To https://github.com/AlissonMMenezes/Chapter09.git
* [new branch] new_feature -> new_feature
The code was sent and the GitHub command returned as an URL:
https://github.com/AlissonMMenezes/Chapter09/pull/new/new_feature
That URL will redirect you to the new pull request page based on the branch that we just created. Let's take a look:
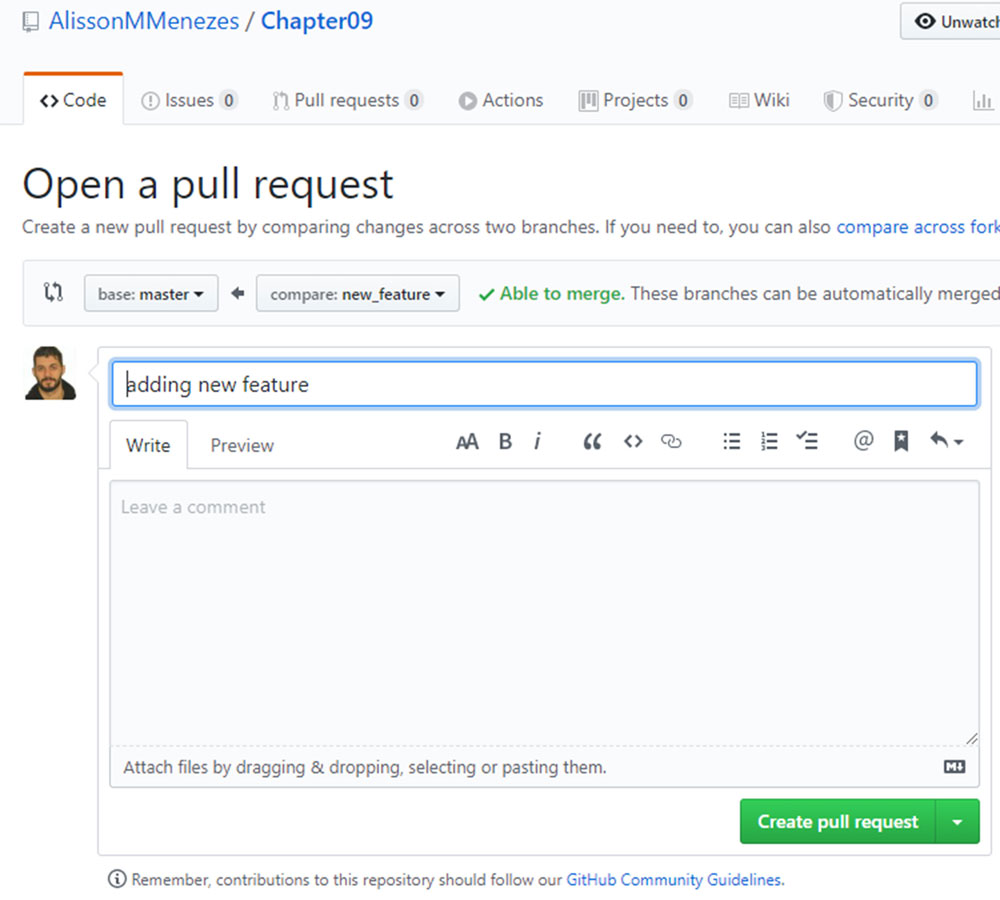
Figure 9.9
We can give a title that corresponds to what we've done. For example, it could be the name of your Jira task, something like DASF-158: changing the SSH keys. You can describe what you’ve done if you want, or just give a message for the code reviews. For example, please give a look at the lines between 55 and 99. I am not sure if my logic is correct. Now, you can create the pull request:
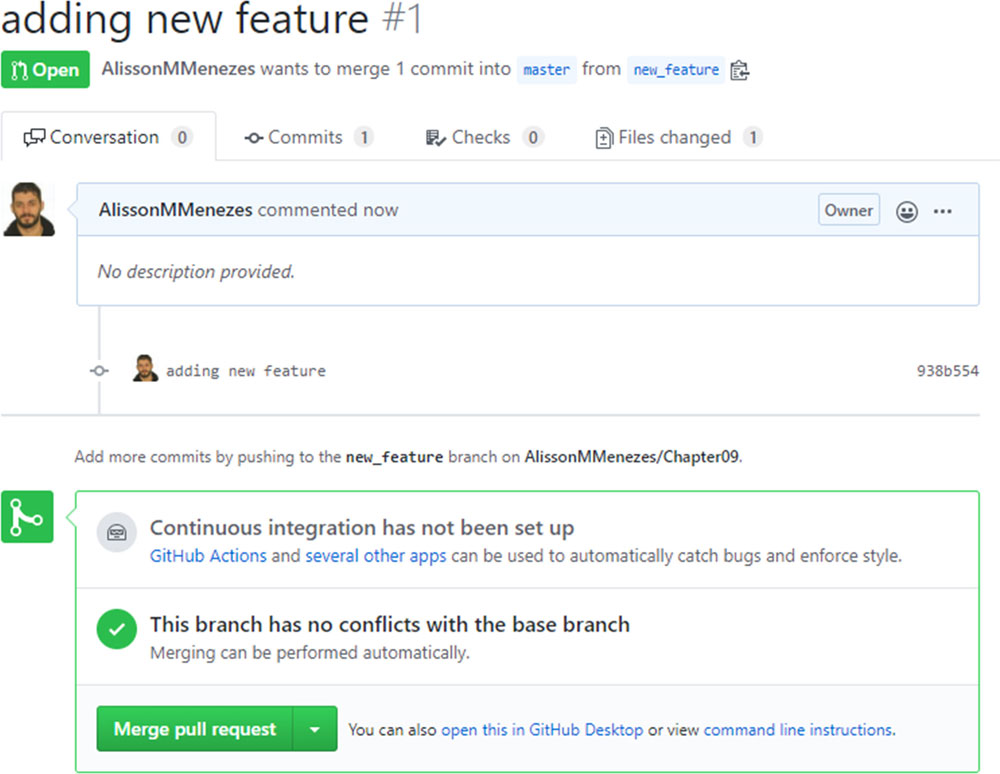
Figure 9.10
This is how a PR (Pull Request) looks like. And now, we can merge with the master branch or another branch we want to:
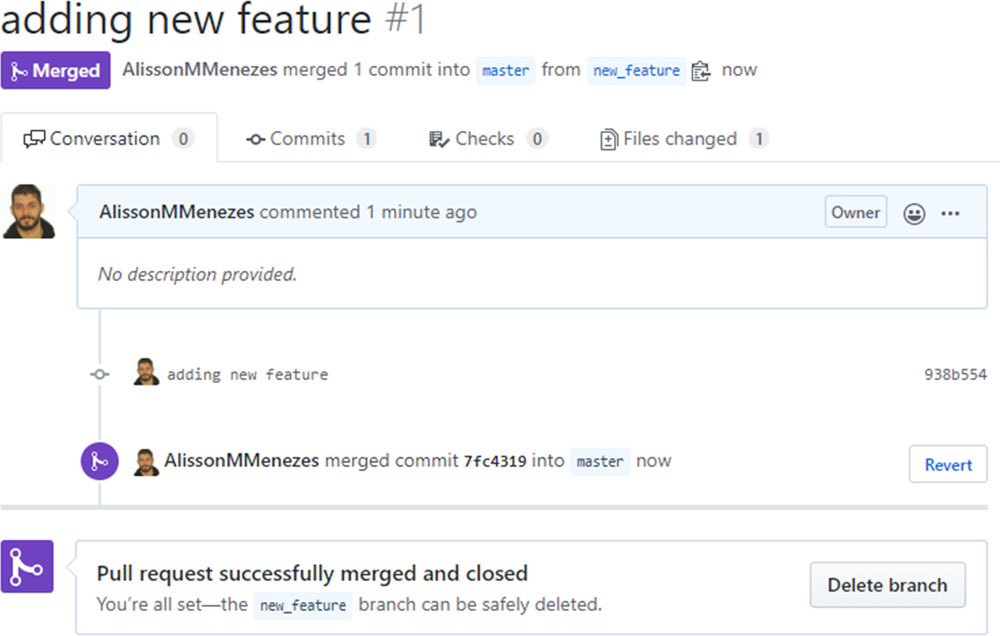
Figure 9.11
Conclusion
That was a really quick and short introduction to Git. But, I am pretty sure that it is enough for your daily tasks. Of course, in the real world, we will face many conflicts. As bigger the team is that you work with, more challenges and more complex will it be to manage the code, the branches, and the reviews. If you are in lucky work startup and you are the DevOps guy who is in charge of all the Cloud Infrastructure, this probably will attend to 100% of your necessities.