CHAPTER 11
Deploying and Scaling Your Application Using Kubernetes
This chapter aims to introduce you to Kubernetes, showing how to create YAML files to deploy, and scale your applications with the most popular and reliable container orchestration tool.
Structure
In this chapter, we will discuss the following topics:
- Kubernetes
- Introduction to Kubernetes
- Deploying on Cloud
Objectives
After studying this unit, you should be able to:
- Know about Kubernetes
- Explain the benefits of Kubernetes
- Create YAML files to deploy your application
- Test your application running in the cluster
Kubernetes
Kubernetes is a container orchestration tool. In the previous chapters, we have been using Docker a lot for deploying applications, creating new images, etc. However, imagine if you have more than one hundred containers to manage. It is an impossible task for just one guy. The Docker, by itself, has the Docker Swarm, which helps you with that task. But, it is not commonly adopted by the market, since it misses some features and integrations that we have on Kubernetes. It was created by Google some years ago, based on a project, called Borg, which was also a container orchestration tool. With the release of Docker, that project was adapted to use it, and now it has become the official platform to manage your cluster.
Introduction to Kubernetes
Like the other chapters, our focus is always on how to implement it in the real-world. Let's have a short introduction of how we can setup our local environment to learn Kubernetes, and then, we can setup a real environment and deploy an application. You will see that the commands are same when we run it in our local environment and on the Cloud environment.
First of all, we will install minikube. It is a tool to set up a local Kubernetes environment on the top of a Virtual Box, like we have been doing along with the book:
wget https://github.com/kubernetes/minikube/releases/download/v1.11.0/minikube-windows-amd64.exe -O minikube.exe
If you are using another OS, you can follow the official documentation: https://kubernetes.io/docs/tasks/tools/install-minikube/
Then, we can start the cluster:
PS C:\Users\1511 MXTI>.\minikube.exe start
* minikube v1.11.0 on Microsoft Windows 10 Pro 10.0.19041 Build 19041
* Automatically selected the virtualbox driver
* Downloading VM boot image …
* Starting control plane node minikube in cluster minikube
* Downloading Kubernetes v1.18.3 preload …
* Creating virtualbox VM (CPUs=2, Memory=6000MB, Disk=20000MB) …
* Preparing Kubernetes v1.18.3 on Docker 19.03.8 …
* Verifying Kubernetes components…
* Enabled addons: default-storageclass, storage-provisioner
* Done! kubectl is now configured to use "minikube"
We also need to install the kubectl, a command which we will use to manage your cluster, for dev, stg, and prd. If you are using another operating system, you can follow the official documentation: https://kubernetes.io/docs/tasks/tools/install-minikube/
PS C:\Users\1511 MXTI> wget https://storage.googleapis.com/kubernetes-release/release/v1.18.3/bin/linux/amd64/kubectl -O kubectl.exe
To begin with, we can run a simple command to see how many clusters we have configured in our environment:
PS C:\Users\1511 MXTI>.\kubectl.exe config get-clusters
NAME
Minikube
For now, it is just the minikube. But we will have more, one important thing to know is where the kubectl get this informationfrom:
PS C:\Users\1511 MXTI>cat 'C:\Users\1511 MXTI\.kube\config'
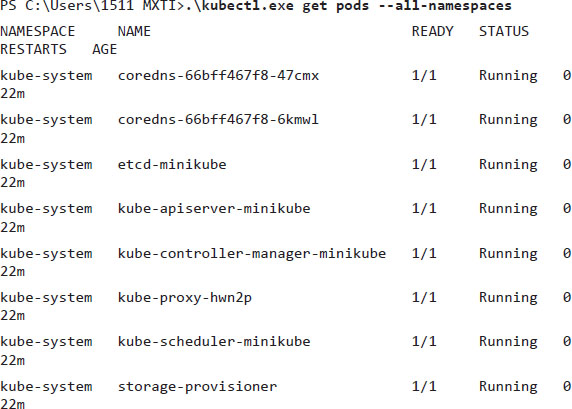
After the minikube installs the k8s cluster, it configures within the config file, inside of .kube folder which is located in your home directory. All the authenticate information is located within that file. If you want to know everything running inside your cluster, you can run the following command:

I used the parameter to get pods, and another parameter –all-namespaces. It shows us all the running containers in the cluster among all the namespaces. For now, we just have one, called kube-system. Before we move on with more commands, it is important to understand pod, namespace, and not just it.
- POD: It represents a set of one or more containers running.
- NAMESPACE: It is the logical separation among the objects. For example, in the same cluster I can have,
dev – stg – prd, namespaces, each one running on different versions of the same application, or it could be,project1,project2, andproject3. You can divide your cluster in as many namespaces as you want. - SERVICE: This is a resource which you will use to connect the external world with your pods. If you remember the Docker chapter, we had to map the host port
8080to the container port8080.But it was for only one container. On Kubernetes, we have aPODwhich can have one or more containers that can be destroyed and recreated at any time. However, we cannot lose the port mapping, that is, theSERVICEjob, where we configure aNODEPort, which will redirect to aPODport, exactly in the same way we did with Docker. It was one of the usages of the services, but, we can also have other implementations, like a load balancer, which has aclusterIPthat will receive the incoming connections and forward it to the containers. - DEPLOYMENT: It is a set of rules to make sure that you have a specific number of running containers. All the containers are running the same image, and if any container dies, it will be recreated. In other words, it will create your
PODsautomatically, and theREPLICASETwill ensure the running containers. - INGRESS: This resource can be compared to a Virtual Host, like we did in the Apache chapter. Here, we will have a
NAME, which will point toSERVICE,which will point to aPOD. If you are not using a DNS, theINGRESSis not mandatory.
The aforementioned items are called the Kubernetes objects. There are so many more objects that we can explore to understand more about Kubernetes, but we could write a whole book just explaining it. For now, I think it is enough to deploy some micro-services at last. If you are deploying stateful applications, you will probably have to extend your reading to VOLUMES.
So, now we can create the first NAMESPACE and start to play around some objects:
PS C:\Users\1511 MXTI>.\kubectl.exe create namespace chapter11
namespace/chapter11 created
PS C:\Users\1511 MXTI> .\kubectl.exe get ns
NAME STATUS AGE
default Active 38m
kube-node-lease Active 38m
kube-public Active 38m
kube-system Active 38m
Notice that we can use the full form of the parameters, and also the short form, like, when I listed the namespaces, I used just the ns.
The INGRESS is a separate resource from Kubernetes. When you are using it on the Cloud, some give it to you already installed. But, in an on-premises environment, you usually have to install. For our local environment, we will have to install it using the following command:
PS C:\Users\1511 MXTI>.\minikube.exe addons enable ingress
* The 'ingress' addon is enabled
To run your first application in the cluster, run the following command:
PS C:\Users\1511 MXTI>.\minikube.exe addons enable ingress
PS C:\Users\1511 MXTI>.\kubectl.exe --namespace=chapter11 run python -dti --port=8080 --image=alissonmenezes/python:latest -l app=python
This command will download the python_app:v1 from my personal repository alissonmenezes and expose the port 8080. If you want to check if the pod is running, you can use the following command:
PS C:\Users\1511 MXTI>kubectl get pods --namespace=chapter11
NAME READY STATUS RESTARTS AGE
python 1/1 Running 1 6m43s
Now we have one pod running with one container in it. However, we want to access the application, but at this moment it is available only inside the cluster. The other applications inside the cluster are already capable of accessing it, but for us, from the outside, we will have to create a service for it:
PS C:\Users\1511 MXTI>.\kubectl.exe --namespace=chapter11 create service clusterip python --tcp=80:8080
service/python created
We just created the SERVICE with clusterip type. It does not expose the NODE port, and we need the ingress to make the mapping from the outside to the inside of the cluster. Create a file called app.yaml with the following content:
apiVersion: extensions/v1beta1
metadata:
name: python
namespace: chapter11
annotations:
nginx.ingress.kubernetes.io/rewrite-target: /
spec:
backend:
serviceName: python
servicePort: 80
The INGRESS is composed of Nginx server, which we call the “Ingress Controller”. It is basically doing a proxy pass of the incoming connections from any addresses or names being forwarded to a service, called Python.
To apply the file, you must use the following command:
PS C:\Users\1511 MXTI>.\kubectl.exe apply -f .\app.yaml
ingress.extensions/python created
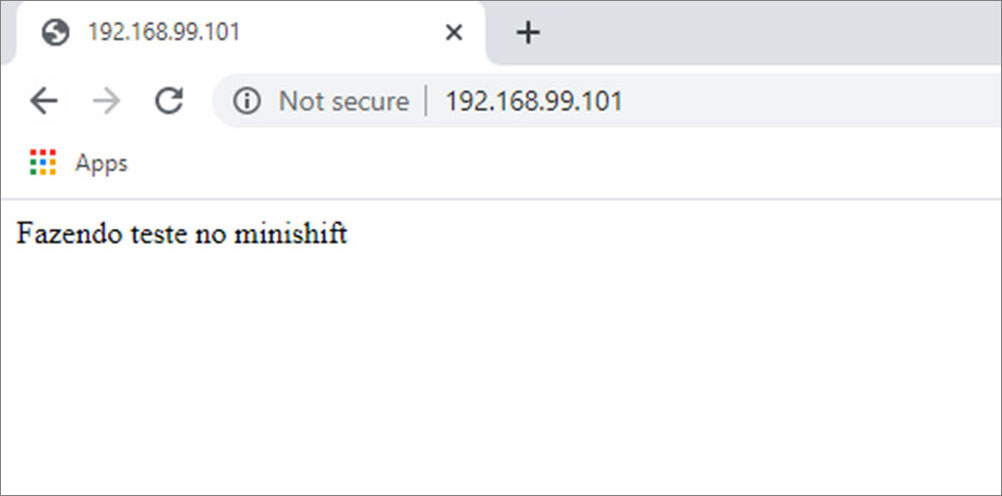
To get the minikube IP address, run the following command:
PS C:\Users\1511 MXTI>.\minikube ip
192.168.99.101
If you type this address on your web browser, you must see the following page:

Figure 11.1
The application is running!
We have successfully created everything using the commands and just the Ingress using a YAML file. However, it is possible to create everything just using the files that are the most used way to deploy everything on Kubernetes, because we can version the files and run it on the pipeline as we did in the previous chapter.
We can create everything in one file as follows:
---
apiVersion: apps/v1
kind: Deployment
metadata:
name: python
namespace: chapter11
labels:
app: python
spec:
replicas: 1
selector:
matchLabels:
app: python
template:
metadata:
labels:
app: python
spec:
containers:
- name: python
image: alissonmenezes/python:latest
ports:
- containerPort: 8080
---
apiVersion: v1
kind: Service
metadata:
labels:
app: python
name: python
namespace: chapter11
spec:
ports:
port: 80
protocol: TCP
targetPort: 8080
selector:
app: python
type: ClusterIP
---
apiVersion: extensions/v1beta1
kind: Ingress
metadata:
name: python
labels:
app: python
namespace: chapter11
annotations:
nginx.ingress.kubernetes.io/rewrite-target: /
spec:
backend:
serviceName: python
servicePort: 80
To make sure that everything will run properly, you can delete everything:
PS C:\Users\1511 MXTI>.\kubectl.exe delete all -l app=python --all-namespaces
pod "python-779879dbb6-w57pr" deleted
Apply the file with the whole content:
PS C:\Users\1511 MXTI>.\kubectl.exe apply -f .\app.yaml
deployment.apps/python created
service/python created
ingress.extensions/python unchanged
Now, you already know the basics. Let's see it deploying in a real environment.
Deploying on Cloud
In order to deploy on the Cloud, we will use exactly the same app.yaml that we have been using until now. But firstly, we need to create the Kubernetes cluster. I will use the GCP for it.
I have created a project, called chapter11, where I will provision the cluster:
PS C:\Users\1511 MXTI>gcloud config set project chapter11-280417
Updated property [core/project].
Define where the compute nodes will be created:
PS C:\Users\1511 MXTI>gcloud config set compute/zone us-central1-c
Updated property [compute/zone].
Define where the compute nodes will be created:
PS C:\Users\1511 MXTI>gcloud container clusters create chapter11 --num-nodes=1
NAME LOCATION MASTER_VERSION MASTER_IP MACHINE_TYPE NODE_VERSION NUM_NODES STATUS
chapter11 us-central1-c 1.14.10-gke.36 35.193.191.37 n1-standard-1 1.14.10-gke.36 1 RUNNING
Once the cluster is running, we need to login into the cluster using the following command:
PS C:\Users\1511 MXTI>gcloud container clusters get-credentials chapter11
Fetching cluster endpoint and auth data.
kubeconfig entry generated for chapter11.
And just like that, everything is perfect. Now, we can work exactly as we worked with minikube:
PS C:\Users\1511 MXTI>.\kubectl.exe config get-clusters
NAME
minikube
gke_chapter11-280417_us-central1-c_chapter11
By running the same command, we can see that we have another cluster configured, called gke_chapter11. When we ran the command get-credentials, the gke was set by default, and now, we do not need to think about running the commands in one cluster or another.
We also can check what is running with the following command:
PS C:\Users\1511 MXTI>.\kubectl.exe get pods --all-namespaces
NAMESPACE NAME READY STATUS RESTARTS AGE
kube-system event-exporter-v0.2.5-599d65f456-v2h9f 2/2 Running 0 4m50s
kube-system fluentd-gcp-scaler-bfd6cf8dd-c4b6c 1/1 Running 0 4m42s
kube-system fluentd-gcp-v3.1.1-pj6pp 2/2 Running 0 3m51s
kube-system heapster-gke-7bff5f7474-9vgtb 3/3 Running 0 3m42s
kube-system kube-dns-5995c95f64-742kn 4/4 Running 0 4m53s
kube-system kube-dns-autoscaler-8687c64fc-w7w2d 1/1 Running 0 4m41s
kube-system kube-proxy-gke-chapter11-default-pool-e3952147-h0gc 1/1 Running 0 4m41s
kube-system l7-default-backend-8f479dd9-tpmk6 1/1 Running 0 4m53s
kube-system metrics-server-v0.3.1-5c6fbf777-4xmlf 2/2 Running 0 4m5s
kube-system prometheus-to-sd-692dh 2/2 Running 0 4m41s
kube-system stackdriver-metadata-agent-cluster-level-79974b544-8n5gg 2/2 Running 0 3m58s
There are so many more pods running. If we compare with minikube, one example is the stackdriver, which is the Google tool to retrieve the logs from your cluster. Let's create the namespace:
PS C:\Users\1511 MXTI>.\kubectl.exe create namespace chapter11
namespace/chapter11 created
In the case of Google Kubernetes Engine, they have a Load Balancer as a service and it can be attached to our Kuberntes SERVICE. Thus, the service will have an external address, and we can point the DNS directly to it. In this case, we do not need the Ingress. Therefore, let's change this:
apiVersion: apps/v1
kind: Deployment
metadata:
name: python
namespace: chapter11
labels:
app: python
spec:
replicas: 1
matchLabels:
app: python
template:
metadata:
labels:
app: python
spec:
containers:
- name: python
image: alissonmenezes/python:latest
ports:
- containerPort: 8080
As you can see the last line from the service part. Deploy the application:
PS C:\Users\1511 MXTI>.\kubectl.exe apply -f .\app.yaml
deployment.apps/python created
service/python created
Check if the pods are running with the following command:
PS C:\Users\1511 MXTI>.\kubectl.exe get pods -n chapter11
NAME READY STATUS RESTARTS AGE
python-5bb87bbb45-6hwv7 1/1 Running 0 23s
Then, check if the service already has an external IP:
PS C:\Users\1511 MXTI>.\kubectl.exe get svc -n chapter11
NAME TYPE CLUSTER-IP EXTERNAL-IP PORT(S) AGE
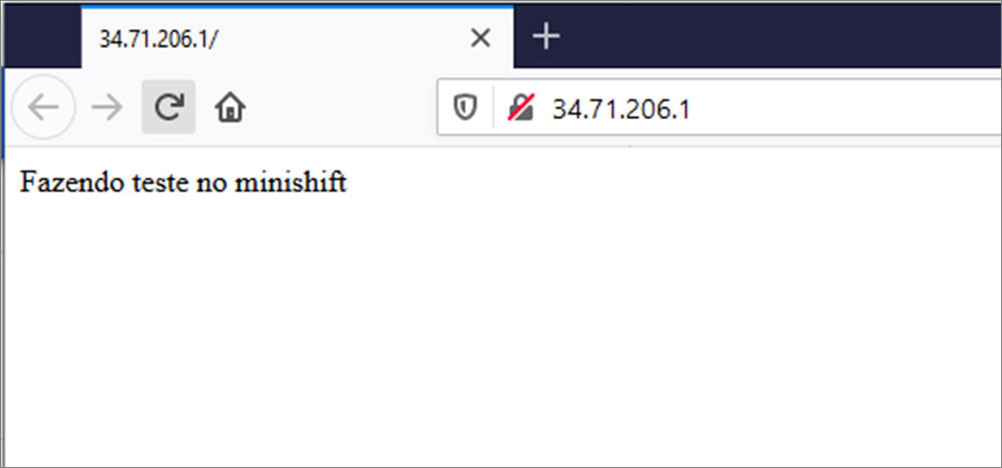
python LoadBalancer 10.47.252.232 34.71.206.1 80:31693/TCP 68s
You must see the following page:

Figure 11.2
In the end, if you do not want to spend more money running this, you can delete the cluster by running the following command:
PS C:\Users\1511 MXTI>gcloud container clusters delete chapter11
The following clusters will be deleted.
- [chapter11] in [us-central1-c]
Do you want to continue (Y/n)? y
Deleting cluster chapter11…|
Conclusion
This chapter introduced to you the basic steps of Kubernetes. It was a very short introduction. As I mentioned earlier, it is possible to write an entire book about Kubernetes. The goal here is just to deploy an application as an example and see how it works in your local environment and on the cloud using GKE.
I recommend you to read more about Kubernetes and Istio. You will discover amazing things, like fine-grain routes, A/B tests, canary deployment, going deep into the deployment strategies, and so much more.
I have a post in my personal blog giving a short introduction to Istio. You can translate the page using Google Chrome and see what we are doing.
https://alissonmachado.com.br/istio-e-minikube-teste-a-b/
Questions
- What is the tool used to orchestrate a large number of containers?
- What is the name of the Kubernetes object to map a node port to a container port?
- What is the Kubernetes object that represents one or more containers?
- What is the Kubernetes command to apply a
YAMLfile? - What does Ingress do?