GETTING STARTED
Speaking of starting, in this section, we will be discussing how to get started with Adobe Photoshop. It is always better to know where everything is so that it will be much easier to navigate the software interface.
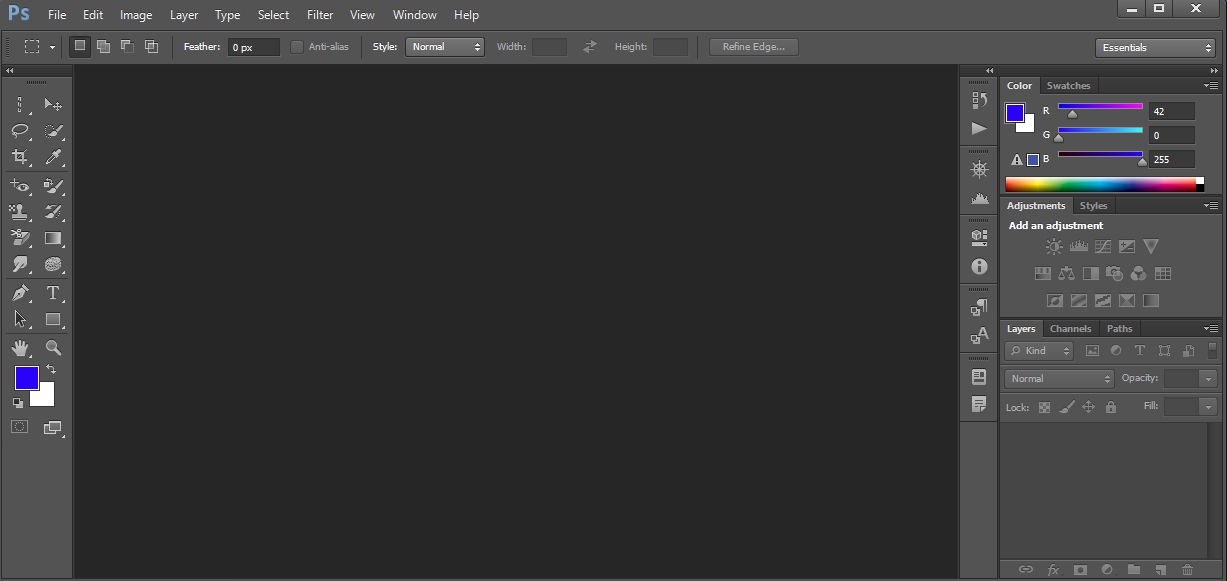
THE INTERFACE
Of course, the interface is the first place you see once you open the software program. We will be discussing those features that are easily found on the interface.
THE MENU
This is where we have the menu bar. The menus are File, Edit, Image, Layer, Type, Select, Filter, View, Window, Help.
THE OPTIONS BAR
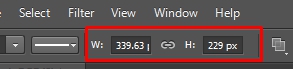
The Options bar is frequently used when a tool is selected. It lets you adjust the settings specific to an active tool. Here, the text tool was selected:
THE TOOLBOX
By default, you can find the Toolbox on the left side of the screen, and it houses all the available tools for PhotoShop.
When you are about to select a tool and notice a small black arrow at the bottom right corner of such a tool, there are other tools related to the one you are about to choose. To display those other tools, simply click and hold the mouse on the tool, and the other tool(s) will be displayed.
THE PANELS
Panels in PhotoShop give you more control of the document you are working on. Examples of panels are the Layers panel, which helps you create and manage additional layers, and the Color panel, which gives you a wide range of color effects. The Toolbox is also referred to as the Tools panel, and it opens along with the current Photoshop document.
However, you can rearrange these panels to suit your taste, and you can place and dock panels together in a bid to consolidate your Photoshop workspace. This is a useful strategy for you if you would be working with a smaller screen. You can achieve that by clicking and dragging the title tab of one of the panels over another. When you are about to drag one panel on another, the panel outline turns blue; this shows you that it is possible to dock the panel on another. Once your mouse is released, you now have more panels in one window. One good rule would be to dock similar items together.
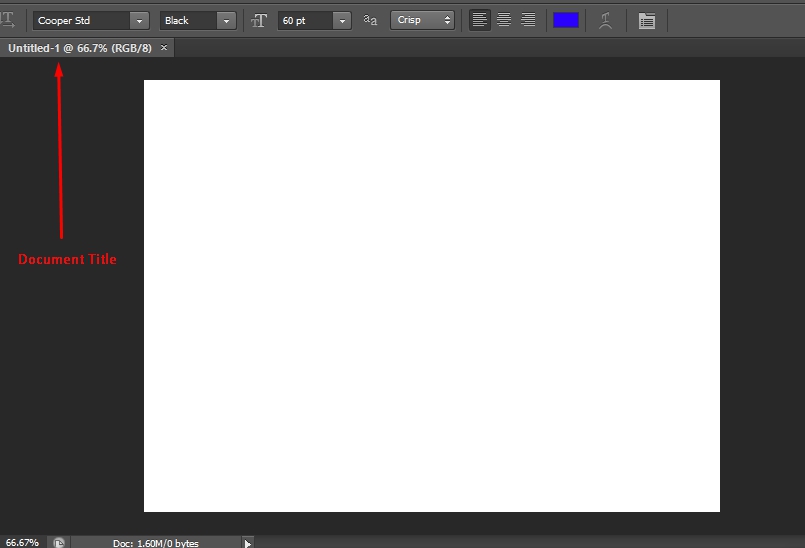
THE DOCUMENT WINDOW
Some call it the Artboard; this is the page you work on your actual file or image in the software. You can have more than one image opened at once in Photoshop.
Below are the basic things you should when you open new documents:
To Open New Documents
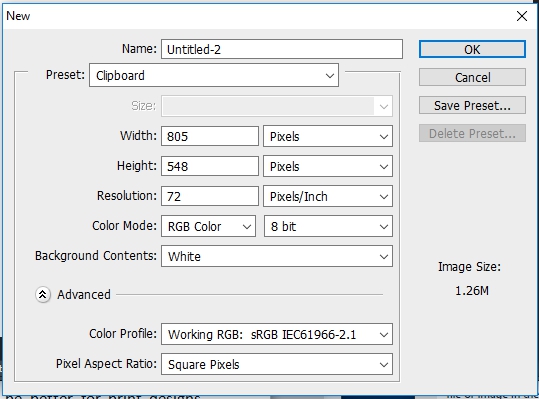
To open a new document, go to File > New for an empty document or use the shortcut CTRL + N (Windows) or Command + N (macOS). A new window would be displayed with several options. Here, you choose your file size, color mode, and resolution.
As a beginner, you need to understand the following:
-
Name:
Give your new document a name.
-
New document Presets:
Apart from color modes and resolutions, Photoshop makes things easier by incorporating document presets, meaning you may not need to remember the dimensions for all your documents. So, Photoshop includes the presets out of the box where sizes have been saved. You could always choose one if you already knew what you wanted.
-
Width and Height:
These two are significant in any new document. You can decide to work in pixels, inches, millimeters, columns, centimeters, points, or picas. It
would be best if you stuck to inches for now as a beginner. However, the pixel is the smallest color information block that makes up any image. The preferred selection would be the pixels for web designers because that is the default for web dimensions. Inches may be better for print designs since you may be dealing with the physical size of documents. Picas, points, millimeters, and centimeters were used for prints but have now almost gone extinct.
-
Resolution:
This is also as vital as the width and height (size of the document). Most works done on the web are done in 72 pixels per inch (PPI), which is the standard resolution that monitors display images. Three hundred pixels per inch may be better for printing purposes as they give denser and sharper images.
-
Color Mode:
This feature depends precisely on what you want to do (the result you want). The widely used options are CMYK and RGB. There are other options like Bitmap, Grayscale, and Lab Color. Stick with RGB as a beginner.
ADDING TEXT
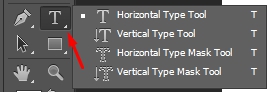
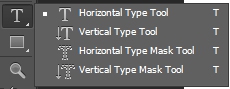
Text of different styles, colors, and effects can be added to an image using the Horizontal Type and Vertical Type tools to edit or create text. You can even create a paragraph or single-line text. The new text you type is automatically entered into another layer. Each line of the single-line text is independent, and the length of each line grows or shrinks as you add or delete text, but it does not go over to the next line. After typing, press Enter to create. Paragraph text wraps within any boundary you specify. So, to add text, do the following:
-
Go to the Toolbar and select the Horizontal Type tool or
Vertical Type tool.
-
Do one of these two operations: Either select a single line of text and click in the image to set a point of insertion for the type OR create a paragraph text and drag a rectangle to create the textbox for typing. There is a small like through the I-beam that marks the position of the type baseline. For the vertical type, the baseline marks the center axis of the type of character, while for the horizontal type, the baseline marks the line on which the type rests.
-
Select the type options like size, font, style, or color in the Tools option bar.
-
Type your letters. If you did not create a textbox, click Enter to create a new line, and the text appears in its layer.
-
Then, accept the text layer by doing one of these:
-
Click the Accept button.
-
Click Enter on the numerical keypad.
-
Click the image outside the text.
-
Grab a different tool in the Toolbox.
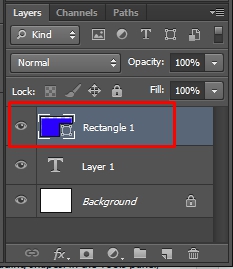
ADDING SHAPES
In the Tools panel, simply click and hold the Rectangle tool (or any shape tool showing in the Tools panel at the time) to get a view of all the shape tools.
Select the tool for the shape you would like to draw. In the Options bar, choose a Fill color and other available options for your shape.
Press and hold the Shift key on your keyboard to prevent distorting the shape while you drag. This will automatically create a new shape layer in the Layers panel just as we have a new text layer when you type.
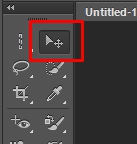
To Move Your Shape
Then, the Move tool can be used to move the shape into position in your image.
You can scale, rotate, or transform the shape without affecting its quality by selecting Edit > Free Transform or by simply pressing CTRL + T (Windows) or Command + T (macOS).
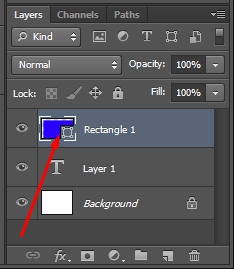
To Change Your Shape's Color
To change your shape's color, go to the Layers panel and find the shape layer you would like to change. Double-click the thumbnail on that layer, and then the Color Picker will open. Click on any color in the Color Picker to see a live preview of the shape's selected color. Accept by clicking OK when you have found the color you would like to use.
To Add Text To Shapes
To add text to shapes, do these:
-
Draw the shape and select the Text.
-
Change the font, size, and color of your text at the options bar.
-
Then, place the mouse on the shape until the cursor icon changes to show text mode.
-
Click the point you would like to add your text and type. Proceed to modify the text and then click "Commit" to accept your text.
ADDING IMAGES
There are many ways to insert images in Photoshop or transfer them from an image database. These images will be imported in the best
possible quality, but this is not a guarantee because there are ways to check the import's image data.
-
To insert images using the drag-and-drop method. This method is the easiest and most frequently used method. Simply open your Photoshop and drag a picture from your File Explorer folder or your desktop onto the software interface. Once the mouse has been released, the image is opened as a new document. The document containing the image has the same resolution, width, color mode, and length as the original image.
-
To insert photos from existing documents, you can still use the drag-and-drop method. If the image is not fully displayed after the import, there is an indication that the newly imported image may be too big to be scaled to the size of the existing document. This is because the image was inserted with maximum quality. But you can scale down the picture by clicking Image > Image Size. Smart Objects are also useful because once a photo is imported into an existing document, Photoshop automatically turns it into a smart object.
USING THE FREE TRANSFORM TOOL
This tool lets you apply transformations like perspective, distort, skew, scale, and rotate in one operation. You can even use a warp transformation. So, to transform an object, do these:
-
Click to select the object you would like to transform.
-
Choose Edit > Free Transform.
-
If it is a selection, selection border, pixel-based layer, or shape you would like to transform, you can also use the Move tool and then select "Show Transform Controls" in the options bar.
-
You can scale numerically by entering percentages of width and height in the options bar on the Path Selection tool.

-
You can rotate your object by dragging or using Edit > Transform Path.
-
Adjust the sides equally by pressing and hold Alt (for Windows) or Option (for macOS), and then drag the handle.
-
To skew an item, press and hold CTRL + Shift (Windows) or Command + Shift (macOS), and then adjust a side handle or skew numerically by entering the degrees in the Horizontal skew (H) or Vertical view (V) in the options bar.
-
To apply perspective to an item, press and hold CTRL + Alt + Shift (Windows) or Command + Option + Shift (macOS), and then adjust a side handle.
-
You can do one of these to accept:
-
Simply select a new tool.
-
Click the commit button or press enter.
-
You can also cancel any transformation changes by clicking Esc or Cancel in the options bar.
COMMON SHORTCUT KEYS
There are many shortcut keys in Photoshop, but you do not need to memorize all of them. We will be discussing some of them shortly.
-
Press "Z" on your keyboard to zoom.
-
Press Alt or Option key to zoom out.
-
Press Ctrl or Command + 0 to fit to screen.
-
Press "H" to use the hand tool.
-
Press "R" click and drag the mouse to rotate the image.
-
To use the ruler, press Ctrl or Command + R.
-
To create guides, click and drag the rulers.
-
To hide and show guides, click Ctrl or Command + H.
-
To copy, click Ctrl or Command + C.
-
To cut, click Ctrl or Command + X.
-
To undo, click Ctrl or Command + Z or Ctrl or Command +
Alt or Opt + Z.
-
Deselect using Ctrl or Command + D.
-
To duplicate an object, press and hold Alt or Option and drag out the new object.
-
Press "G" to use the gradient tool.
-
Press "C" to use the crop tool.
-
Press "I" to use the eyedropper tool.
-
Press "X" to toggle the background/foreground color.
-
Press "D" to set the default colors.
-
Press "W" to use the Magic wand tool.
-
Press "L" to use the Lasso tool.
-
Press "P" to use the Pen tool.
-
Press "M" to use the Marquee selection tool.
-
Press "J" to use the Healing brush tool.
-
Press "S" to use the Clone Stamp tool.
-
Use Ctrl or Command + T to use free transform.
-
For more tools shortcuts, go to the tools panel to display the shortcuts for any tool.
There are many other shortcut keys, but mastering some of these shortcuts listed above will go a long way in helping you on your journey.
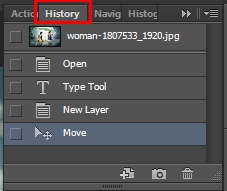
HOW TO DO MULTIPLE UNDOS
Maybe you changed your mind, or due to a mistake, you might want to recreate something. By default, PhotoShop will allow you to use the common undo shortcut (Ctrl or Command + Z) once. But most of the time, you might need to step back still more than once.
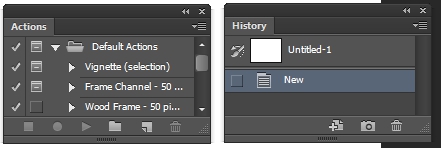
To do this in PhotoShop, go to the Window menu, select History. This will bring out the History panel; you can undo as much as you want by clicking exactly where you want to be from the History panel.
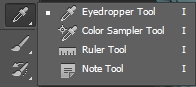
PICK COLORS FROM ANYWHERE
You can pick colors from anywhere on your screen comfortably with the use of the Eyedropper tool. This helps you to blend colors while designing efficiently.
To do this, grab the Eyedropper tool, click and hold while you locate your preferred color. As you move, your foreground color changes. After that, you can use the color by getting the color code through the Color Picker; double-click the picker for your color.
EXERCISE
-
Design a simple logo with text and a shape. Make the color of the text white and the shape blue.
-
Draw a cube.
-
Choose your color and do this: