COLOR CORRECTION AND WHITE BALANCE
This section is about how to correct and tone colors in your image. Sometimes when you take an excellent picture, you might later discover a color imbalance due to lighting. Or you might be interested in using filters just like we have on our phones these days, be rest assured your picture color can be corrected.
BASIC COLOR CORRECTION
You may have some unwanted colors spoiling your photo. Correcting this color problem is simple, contrary to what people believe. Color correction is as simple as telling Photoshop to make one part of the photo white and making the software correct the rest of the photo to suit the white color you picked. To do this:
-
If no part of the photo has the color you want, you might want to choose the color closest to it by simply creating a solid adjustment layer for color by clicking "Shift + Backspace" and selecting a color from the drop-down. Next, you will click the "Difference" blend mode with the layer selected. Now, delete the color adjustment layer and choose the spot with the eyedropper tool for better color correction.
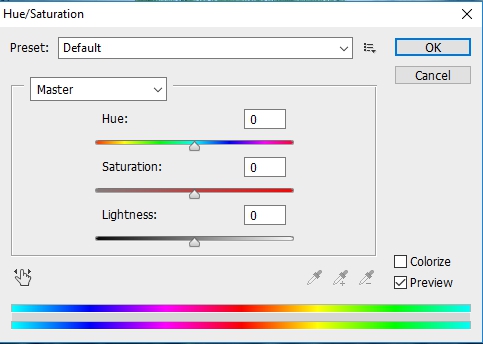
THE THREE DIMENSIONS OF COLOR
There are ways of representing one particular color because every color has its dimensions. The primary colors of light are usually mixed additively to produce light on a monitor or computer screen.
These colors are red, green, and blue. Graphic designers, though, use the CYMK system for printing. However, colors can be represented in three different dimensions, namely Lightness, Saturation, and Hue. We will be discussing them one by one in this section:
-
Hue: Hue represents pure colors at full strength, and it changes as movement occurs around the color circle. It is the main characteristic that differentiates one color from the other, and colors that lie opposite each other in the color wheel are complementary.
-
Lightness: Color brightness or lightness is another essential dimension of color. Two colors can have the same shade but not the same color brightness. We can quickly identify two different colors because of their color brightness. Most colors in the color spectrum have natural grades of lightness when saturated. The level of lightness in colors can be altered by merely adding darker or lighter colors to them. Theoretically, once you add two colors together, the first and most apparent change is lightness. Increasing the lightness in photos make the primary color less saturated. Its effect also depends on the surface brightness, and it is essential to note that every color seems lighter when it is next to a darker color and vice versa.
-
Saturation: This is the last dimension of color. It is possible to have colors of the same shade and brightness but different saturation grades. Grades of saturation can be reduced by merely adding gray, black, white, or complementary colors. Like brightness, a color can look more saturated if a less saturated color is placed next to it and vice versa.
You can utilize these three dimensions in your photo; Select your image layer, go to Image > Adjustment > Hue/Saturation or use Ctrl or Command + U, and then adjust the setting till you get your preferred result.
Understanding how the dimensions of colors interact in the color wheel can enhance your abilities to justify and describe any action you want to take in picture development.
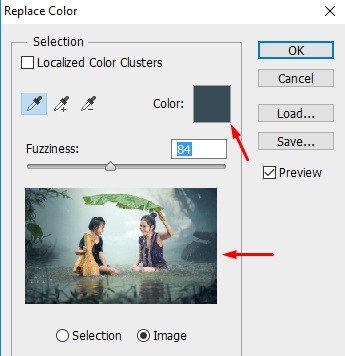
COLOR REPLACEMENT
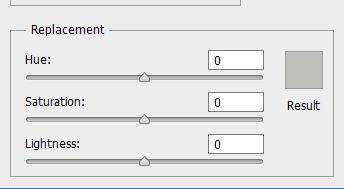
There is a special command in Photoshop called Replace Color. This command offers you some extra creative effects by giving you the luxury of switching between sets of colors. It will build a mask using the colors you have selected and then replaces them with the colors you have chosen. You can even adjust the dimensions of color (saturation, hue, and lightness). To replace color, do the following:
-
Select your image layer.
-
Click Image > Adjustments > Replace Color, and a dialog box will appear.
-
Choose between Selection and Image. Selection displays the mask in the preview where the masked area is black, while
semitransparent areas are gray and the unmasked regions possess white color. Image shows the image in full in the preview window.
-
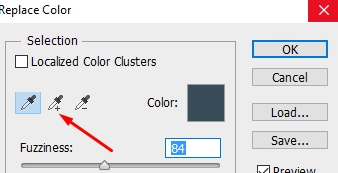
Select the colors you want by either using the image or using the color picker.
-
Press the Alt (Windows) or Options (macOS) and click or make use of the click and minus (-) eyedropper tool to remove colors.
-
If you need to add more colors similar to those you have previously selected, you can use the Fuzziness slider to define your selection. You may be having some issues with the selection, and if so, you may need to use the option of Localized Color Clusters for a more precise and cleaner selection.
-
Move the dimensions of color (hue, lightness, and saturation) sliders to set new values.
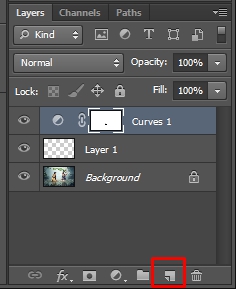
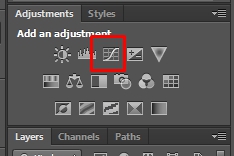
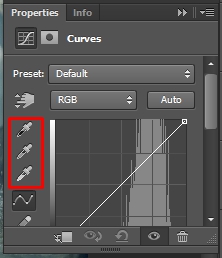
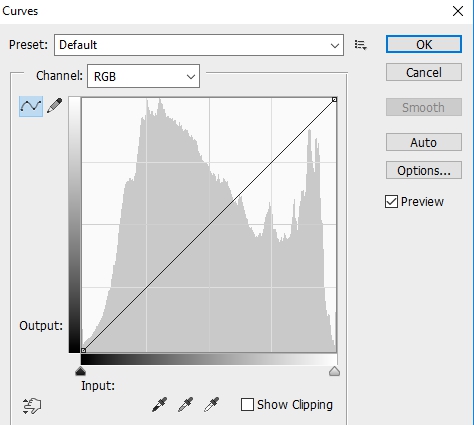
LEVELS AND CURVES
Many people do not know the importance and need to use levels and curves, and we will be handling that in this section. The question is, is there any difference between levels and curves? If there is, then what are they?
Well, Levels and Curves are used in digital photography after taking a beautiful picture to perform one of the essential editing tasks, which is the Image tone control. Levels and Curves allow the users to change the white and black endpoints of tonal ranges in images. Changing these endpoints gives you the ability to change the overall contrast of photographs. However, the effects and methods are the same, no matter the one you use. Both features allow you to change the intermediate appearance between white and black endpoints.
There is little distinction between these two commands. Adjustments to Levels change the tones found in the tonal range while changes to Curves allow you to make choices on which part of the tone scale you want to change. You get only three adjustments slider with Levels while Curves provides you with up to 16, literally, as much as you want.
So, when do you use what?
You can use Levels when:
-
You wish to darken or lighten the tonal ranges to fix exposure errors.
-
You wish to adjust the white or black Output Levels to alter the contrast.
-
You can access Levels here Image > Adjustments > Levels or press Ctrl + L.
You can use Curves when:
-
You wish to adjust the tone values' relationship, and it requires the shaped "S" curve adjustment.
-
You wish to alter only the dark or light tones.
-
You wish to have total control of the tonal editing.
-
You can access Levels here Image > Adjustments > Curves or press Ctrl + M.
Learning Curves may take more patience than learning Levels, but generally, Curves are more user-friendly and can allow more changes than Levels. But it is important to note that making too many changes can also come with more problems as too many changes can alter the image. Levels, on the other hand, are suitable for general adjustments.
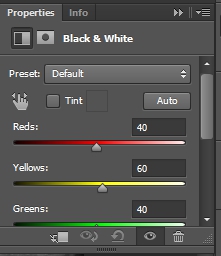
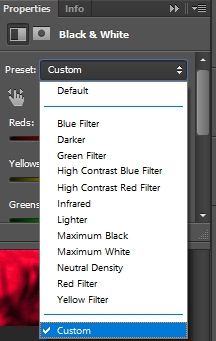
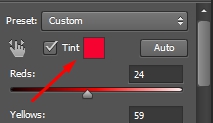
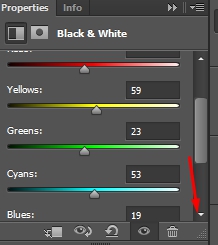
BLACK AND WHITE
This is a better photography option when focusing on the image's textures and subject without the distraction posed by colors. To convert an image to black and white, you would use the Black & White adjustment layer and do the following:
-
Select your image layer in the Layers panel.
-
Now, locate Black & White under the Adjustments panel. If you could not find the Adjustments panel, go to Window > Adjustments to display the panel.
CREATING PHOTO FILTERS
Filters are used to retouch or clean pictures, apply special effects, and image amazing transformations using lighting effects and distortions. You can make your picture speak more through the use of a Photo Filter. These filters are usually found in the Filter menu of PhotoShop. To add filters from the Filter menu, do this:
-
Select a filter from the Filter menu, and if no dialog box pops up, the settings have been applied. You can apply Blur, Distort, Noise, and many more.
-
If a dialog box appears, you can enter values or make choices and then select OK.
Also, the Filter Gallery under the Filter menu provides previews of many special effects. Multiple filters can be applied, and effects can be turned off or on, reset, or changed. Once you are satisfied, apply the changes to the image. However, it is not all filters available in the Filter menu are present in the Filter Gallery.
You can use the Filter Gallery to apply filters by doing these: