SAVING MY PROJECTS
After everything, you need to finalize what you have created. You need to create a portable file you can work on another time or even share. Saving documents in PhotoShop is relatively easy and straightforward. Although the software offers different ways of saving images, we will be discussing the options in this section.
When you save a file, it is saved in a particular format, which can be reopened by PhotoShop or any other Picture software. Below are some of the formats you should be aware of:
-
PSD:
This is the default file format for PhotoShop documents. You can share this format if you would love someone else who has PhotoShop to work on your document. They will have access to your layers, and the ability to re-edit. However, if you do not want this, consider saving your file in other file formats.
-
Other file formats:
Images can also be saved in common file formats like PNG and JPEG. These formats are widely supported and can be viewed on any computer device, including mobile phones. This is your final output. However, these files cannot be re-edited since they do not preserve the layer information.
-
Save for Web:
If you plan to upload images to the Web, you can do that by using the "Save for Web" feature. Just go to File > Save for Web. This feature allows you to download and view the photos online.
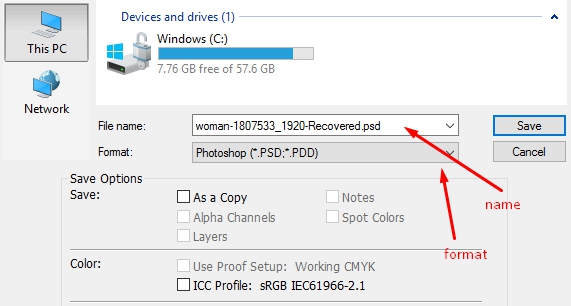
Now, you can save your file by going to File > Save. If you are just saving the file, you will get a pop-up to give your file a name and choose a format. You should choose PSD here.
But the File > Save As command will allow you to save your files and documents in JPEG, PNG, and more. This is required if you are making a copy of your file or sharing your file in other formats.
Now, for you to save documents for the Web, click File> Save for Web. In the "Save for Web" dialog box that appears, choose your preferred quality level and file type. Resize the images if needed by entering the specifications under Image Size, and the dimensions will be adjusted to maintain the aspect ratio automatically. Select "Save" and input your preferred file name and location and then click OK.
EXPORTING IMAGES
This is another way of saving your files, but you can save your file in other Adobe packages format like Adobe Illustrator, for instance. To export images in different formats and sizes, open the document in Photoshop. Go to File > Export. Choose your Export Preferences, which may include quality, destination, and format.
ORGANIZING MY PHOTOSHOP FILES
As you proceed in your designing career, you must understand that you have to be organized. Your files must be well kept and arranged.
It is unprofessional to have different files littered on your desktop. Learn the habit of organizing files properly. Surprisingly, it does not require much to do this; all you have to do is remember and follow the guidelines below:
-
Learn to name your file according to its content.
-
Organize all your documents in folders and subfolders.
-
Backup all your important documents and folders to avoid complete file loss should your system crash.
-
Delete unwanted and irrelevant documents.