6
Disassembly and Decompilation

In the previous chapter, we covered various static analysis tools useful for triaging unknown Mach-O binaries. However, if you want to comprehensively understand a novel Mac malware specimen, you’ll need a foundational understanding of assembly code, as well as an ability to leverage sophisticated binary analysis tools.
In this chapter, we’ll first discuss assembly language basics and then move on to the static analysis approaches of disassembly and decompilation. We’ll conclude by applying these analysis approaches with Hopper, a popular reversing tool capable of reconstructing binary code in a human-readable format. While Hopper and other advanced binary analysis tools require an elementary understanding of low-level reversing concepts, and may necessitate time-consuming analysis sessions, their abilities are invaluable. Even the most sophisticated malware specimen is no match for a skilled analyst wielding these tools.
Assembly Language Basics
As the source code of most compiled Mach-O malware generally isn’t available, analysts must leverage tools that can understand the compiled binary’s machine-level code and translate it back into something more readable: assembly code. This process is known as disassembling. Assembly is the low-level programming language that gets translated directly into binary instructions for the computer to execute. This direct translation means that binary code within a compiled binary can later be directly converted back into assembly. For example, on 64-bit Intel systems, the binary sequence 0100 1000 1000 0011 1100 0000 0010 1010 can be represented in assembly code as add rax, 42 (which adds 42 to the RAX register).
At its core, a disassembler takes as input a compiled binary, such as a malware sample, and performs this translation back into assembly code. Of course, it’s then up to us to make sense of the provided assembly code. This process of disassembling binary code and understanding the subsequent assembly code is often what malware analysts are talking about when they refer to reverse engineering a malicious sample.
In this section, we’ll cover various assembler basics by focusing on x86_64, the 64-bit version of Intel’s x86 instruction set. We’ll also stick to the standard Intel assembly syntax. Though Apple recently introduced Apple Silicon, backed by the M1 system on a chip with an ARM-based processor, the overwhelming majority of macOS malware is still compiled into x86_64 code. Moreover, all malware natively targeting the M1 architecture will be distributed in the form of universal binaries for the foreseeable future. As we discussed in Chapter 5, universal binaries contain multiple architecture-specific binaries, such as those compatible with ARM and Intel. For the purposes of reverse engineering malware, these binaries should be logically identical, so an understanding of Intel’s x86_64 instruction set should suffice. Finally, many assembly language concepts are applicable to both Intel- and ARM-based architectures. However, if you are interested in learning more about the Apple M1’s ARM instruction set architecture as it pertains to analyzing macOS malware, see my 2021 BlackHat presentation, “Arm’d and Dangerous: Analyzing arm64 Malware Targeting macOS” or my white paper on the same topic.1
Entire books have been written on the topics of assembly language and reverse engineering. If you want to delve deeper, several excellent books on the topic of disassembly and reverse engineering include Art of Assembly Language, Hacker Disassembling Uncovered, and Reversing: Secrets of Reverse Engineering.2
Here, I aim to provide only the necessary basics, taking some liberties to simplify various ideas, as even a foundational understanding of such concepts is sufficient for becoming a competent malware analyst.
Registers
Registers are temporary storage slots on the CPU that can be referenced by name. You can think of them as akin to variables in higher-level programming languages.
The Intel x86_64 instruction set contains 16 general purpose 64-bit registers, including the registers RAX, RCX, RDX, RBX, RSP, RBP, RDI, RSI, and R8 through R15. However, some of these registers are often used for specific purposes. For example, the RSP and RBP registers are used to manage the stack, a region of memory that facilitates function calls and the storage of temporary, or local, variables. You’ll often encounter assembly instructions accessing local variables via a negative offset from the RBP register. The instruction set also contains non-general purpose registers, such as RIP, which contains the address of the next instruction to execute.
We can reference many of the 64-bit general purpose registers by their lower 8-bit, 16-bit, or 32-bit components, which you’ll sometimes come across during binary analysis. For the registers without numbers in their names, a two-letter abbreviation usually identifies the 8- or 16-bit register component. For the 32-bit component, the R is replaced with an E. As an example, consider the 64-bit general purpose register RAX. Its 8-bit component is named AL while its 16-bit component is named AX. Finally, its lower 32 bits are named EAX. For the R8–R15 registers, the B, D, and W suffixes denote the lower 8, 16, and 32 bits, respectively.
Assembly Instructions
Assembly instructions map to specific sequences of bytes that instruct the CPU to perform an operation. All instructions contain a mnemonic, which is a human-readable abbreviation of the operation. For example, the add mnemonic maps to the binary code to perform, you guessed it, an addition operation.
The majority of assembly instructions also contain one or more operands. These operands specify either the registers, values, or memory that the instruction uses. A few mnemonics and example instructions are provided in Table 6-1.
Table 6-1: Mnemonics and Example Instructions
| Mnemonic | Example | Description |
add |
add rax, 0x100 |
Adds the second operand (0x100) to the first. |
mov |
mov rax, 0x100 |
Moves the second operand (0x100) into the first. |
jmp |
jmp 0x100000100 |
Jumps to (continues execution at) the address in the operand (0x100000100). |
call |
call rax |
Executes the subroutine specified at the address in the operand (the RAX register). |
Calling Conventions
You can often gain a fairly comprehensive understanding of a Mach-O binary by studying the system API methods it invokes. For example, a malicious binary that makes a call to a file-writing API method, passing in both the contents of a property list and path that falls within the ~/Library/LaunchAgents directory, is likely persisting as a launch agent. Thus, we often don’t need to spend hours understanding all the assembly instructions in a binary. Instead, we can focus on the instructions located near API calls in order to determine what API calls are invoked, what arguments are passed in to the API call, and what actions it takes based on the result of the API call.
When a program wants to invoke a method or a system API call, it first needs to prepare any arguments for the call. At the assembly level, there are specific rules about how to pass arguments to a method or API function. This is referred to as the calling convention. The rules of the calling convention are articulated in an application binary interface (ABI). Table 6-2 shows the ABI for Intel-based 64-bit macOS systems.
Table 6-2: The macOS (Intel 64-Bit) Calling Convention
| Item | Register |
| 1st argument | RDI |
| 2nd argument | RSI |
| 3rd argument | RDX |
| 4th argument | RCX |
| 5th argument | R8 |
| 6th argument | R9 |
| 7th+ argument(s) | via the stack |
| Return value | RAX |
As these rules are consistently applied, malware analysts can use them to understand exactly how a call is being made. For example, if a method takes a single parameter, the value of this parameter will always be stored in the RDI register prior to the call. Once you’ve identified a call in the disassembly by locating the call mnemonic, looking backwards in the assembly code will reveal the values of the arguments passed to the method or API. This can often provide valuable insight into the code’s logic, like what URL a malware sample is attempting to connect to, or the path of a file it is creating to infect a system.
Likewise, when the call instruction returns, the application binary interface specifies that the return value of the invoked function will be stored in the RAX register. Thus, you’ll often see disassembly immediately following a call instruction that examines and takes an action based on the result of the value in RAX. For example, as you’ll see shortly, a malicious sample might not beacon out to its command and control server for tasking if a function that checks for network connectivity returns zero (false) in the RAX register.
The objc_msgSend Function
When compiled, invocations of Objective-C methods become calls to the objc_msgSend function (or a close variant), which routes the original Objective-C method call to the appropriate object at runtime. As malware analysts, we’re not really interested in the objc_msgSend function itself; rather, we’d like to discover what Objective-C object and method are being invoked, as these can shed valuable insight into the sample’s capabilities. Luckily, by understanding objc_msgSend’s parameters, we can often reconstruct a representation of the original Objective-C code. Table 6-3 summarizes objc_msgSend’s arguments and return value.
Table 6-3: Calling Convention, in the Context of the objc_msgSend Function
| Item | Register | (for) objc_msgSend |
| 1st argument | RDI |
self: object that the method is being invoked upon |
| 2nd argument | RSI |
op: name of the method |
| 3rd+ argument(s) | RDX, RCX, . . . |
Any arguments for the method |
| Return value | RAX |
Return value from the method |
For example, consider the short snippet of Objective-C code in Listing 6-1, which constructs a URL object using the NSURL class’s URLWithString: method.
NSURL* url = [NSURL URLWithString:@"http://www.google.com"];Listing 6-1: Initializing a URL object via Objective-C
When we disassemble the compiled code (Listing 6-2), we see the objc_msgSend function.
1 lea  rdx, qword [http___www_google_com]      ; @"http://www.google.com"
2 mov  rsi, qword [0x100008028]                ; @selector(URLWithString:)
3 mov  rdi, qword [objc_cls_ref_NSURL]         ; objc_cls_ref_NSURL
call qword [objc_msgSend]
Listing 6-2: Initializing a URL object, disassembled
Consulting Table 6-3, we see that the objc_msgSend function’s first parameter, named self, contains a pointer to the object upon which the method is being invoked. If the method is a class method, this will be a reference to the class, and in the case of an instance method, self will point to an instance of the class as an object. Recall that a function’s first parameter is stored in the RDI register. In Listing 6-2 you can see that the self parameter references the NSURL class (as the method, URLWithString:, discussed shortly, is a class method) 3.
The second parameter of the objc_msgSend function, named op, is a pointer to the name of the method invoked. Apple documentation calls this value a selector, which represents the name of the method as a null-terminated string. Recall that you can find the second parameter of a function call in the RSI register. In this example, we can see that the parameter is set to a pointer that references the string URLWithString: 2.
The remaining parameters passed to the objc_msgSend function are those required by the invoked method. Since the URLWithString: method takes a single parameter, the disassembly initializes the RDX register (the third parameter in this case) with a pointer to a string object containing http://www.google.com 1. Finally, objc_msgSend returns whatever the invoked method returns. Like any other function or method call, the return value can be found in the RAX register.
For an in-depth discussion of the objc_msgSend function, as well as the Objective-C runtime and its internals, consult the Phrack articles “Modern Objective-C Exploitation Techniques” and “The Objective-C Runtime: Understanding and Abusing.”3 This wraps up our very brief discussion on assembly language basics. Armed with a foundational understanding of this low-level language and various Objective-C internals, we’ll now take a deeper look at disassembled binary code.
Disassembly
In this section we’ll discuss various disassembly concepts and illustrate them with real-world examples taken directly from malicious code. Later in this chapter we’ll walk through the process of leveraging a fully featured disassembler to generate and explore a binary’s full disassembly.
It is important to remember that the goal of analyzing a malicious program is to understand its general logic and capabilities, not necessarily each and every assembly instruction. As I noted earlier, focusing on the logic around method and function calls can often provide an efficient means to gain such an understanding. As such, let’s look at a few examples of disassembled code to illustrate how you can identify such calls, their parameters, and the API response. I’ve chosen these snippets because they highlight idiosyncrasies that creep into a disassembly from the higher-level languages used to write the binary. Note that I’ve abridged them to improve readability.
Objective-C Disassembly
In my experience, Objective-C remains the language of choice for malware authors who target Mac users. Yet reversing Objective-C code presents several challenges, such as the widespread use of the objc_msgSend function discussed earlier in this chapter. Luckily, we can still glean plenty of useful information from the disassembly.
Komplex is a backdoor with ties to a prolific Russian APT group.4 It contains various components, including an installer and a second-stage payload. Taking a peek at the installer reveals multiple calls to the objc_msgSend function, indicating we’re looking at compiled Objective-C code. Our goal is to determine the Objective-C objects and methods passed to objc_msgSend function, as these can help us figure out the installer’s actions.
In the installer’s main function, we find the following code (Listing 6-3):
0x00000001000017De    lea        rsi, qword [_joiner]
0x00000001000017e5    movabs     rdi, 0x20f74

0x0000000100001824    mov        qword [rbp-0x90], rdi
...
0x000000010000182e    mov        qword [rbp-0x98], rsi
...

0x0000000100001909    mov        rax, qword [objc_cls_ref_NSData] 1
0x0000000100001910    mov        rsi, qword [0x1001a9428] ; @selector(dataWithBytes:length:)
0x0000000100001917    mov        rdi, rax 2
0x000000010000191a    mov        rdx, qword [rbp-0x98] 3
0x0000000100001921    mov        rcx, qword [rbp-0x90]
0x0000000100001928    call       objc_msgSend
0x000000010000192d    mov        qword [rbp-0x60], rax
Listing 6-3: Initializing a NSData object, disassembled (Komplex)
First, we see two local variables (rbp-0x90 and rbp-0x98) being initialized, the first with a hardcoded value of 0x20f74, and the second with the address of a global variable named _joiner.
Moving on, we then see a reference to the NSData class moved into the RAX register 1. Two lines later, it is moved into the RDI register 2. We know that when a function is called, its first parameter is stored in the RDI register, and that for calls to the objc_msgSend function, this parameter is the class or object upon which a method is to be invoked. Therefore, we now know that the malware is invoking an NSData class method. But which one?
Well, the second parameter passed to the objc_msgSend function identifies the method, and we know we can find it in the RSI register. In the disassembly, we see the RSI register initialized with a pointer stored at 0x1001a9428. Moreover, the disassembler has annotated this address to let us know the installer is invoking a method named dataWithBytes:length:, which belongs to the NSData class.
Next, take a look at the two parameters for this method, which get passed into the objc_msgSend function via the RDX and RCX registers 3. The RDX register will contain the value for the dataWithBytes: parameter and is initialized from the local variable rbp-0x98. Recall that this variable contains the address of a global variable named _joiner. The RCX register holds the value for the length: parameter and is initialized from the local variable rbp-0x90, which contains 0x20f74.
From this analysis, we can reconstruct the original Objective-C call as follows (Listing 6-4):
NSData* data = [NSData dataWithBytes:_joiner length:0x20f74]; Listing 6-4: Reconstructed Objective-C code (Komplex)
The created NSData object is then saved into a local variable found at rbp-0x60.
Next, we find another Objective-C call (Listing 6-5).
0x00000001000017d2    lea       rcx, qword [cfstring__tmp_content]   ; @"/tmp/content"
0x00000001000017d9    mov       edx, 0x1
...
0x0000000100001838    mov       dword [rbp-0x9c], edx
...
0x0000000100001848    mov       qword [rbp-0xb0], rcx

0x0000000100001931    mov       rax, qword [rbp-0x60] ; ret value from dataWithBytes:length:.
0x0000000100001935    mov       rsi, qword [0x1001a9430] ; @selector(writeToFile:atomically:) 1
0x000000010000193c    mov       rdi, rax
0x000000010000193f    mov       rdx, qword [rbp-0xb0]
0x0000000100001946    mov       ecx, dword [rbp-0x9c] 2
0x000000010000194c    call      objc_msgSend
Listing 6-5: Writing out a file, disassembled (Komplex)
Two more local variables are initialized here, the first with a path to a file named content in the /tmp directory and the second with the hardcoded value of 1. Then the NSData object created in the previous snippet of disassembly is loaded into RAX, and then into RDI. As the RDI register holds the first parameter for the objc_msgSend function call, we now know the installer is invoking a method call on this object.
The method is stored in the RSI register and identified by the disassembler as writeToFile:atomically: 1. The parameters for this method are stored in the RDX and RCX registers. The former, which corresponds to the writeToFile: parameter, is initialized from the local variable holding the path /tmp/content. The latter is a Boolean flag for the atomically: parameter and is initialized from the local variable that contained the value 1. As the full 64-bit register is not needed, the compiler chose to use only the lower 32 bits, which explains the reference to ECX instead of RCX 2.
From this analysis, we can again reconstruct the original Objective-C call (Listing 6-6):
[data writeToFile:@"/tmp/content" atomically:1] Listing 6-6: Reconstructed Objective-C (Komplex)
Combined with our analysis of the previous Objective-C call, we’ve uncovered the fact that the malware is writing an embedded payload, found in the global variable named joiner, to the /tmp/content file. We can confirm that indeed joiner contains an embedded (Mach-O) payload by viewing its contents, which are found at 0x100004120 (Listing 6-7).
_joiner:
0x0000000100004120         db  0xcf ; '.'
0x0000000100004121         db  0xfa ; '.'
0x0000000100004122         db  0xed ; '.'
0x0000000100004123         db  0xfe ; '.'
0x0000000100004124         db  0x07 ; '.'
0x0000000100004125         db  0x00 ; '.'
0x0000000100004126         db  0x00 ; '.'
Listing 6-7: An embedded Mach-O binary (Komplex)
Taking into account Intel’s little-endian format, which specifies that the least significant byte of a word is stored at the smallest address, the first four bytes make up the value 0xfeedfacf. This value maps to the MH_MAGIC_64 constant, which indicates the start of a 64-bit Mach-O executable. Continued analysis of the installer’s disassembly reveals that, once the embedded binary payload has been written to disk, it is executed. Triaging this binary reveals it is in fact Komplex’s persistent second-stage payload.
Swift Disassembly
Of course, not all malware is written in Objective-C. The Swift programming language is the trendy new kid on the block, and several macOS malware specimens have been written in it. Reversing a Swift binary is slightly more difficult than reversing one written in Objective-C due to factors such as name mangling and other programming abstractions. Name mangling encodes items such as method names to ensure they are unique within a compiled binary. Unfortunately, unless demangled, this greatly impacts the readability of the item’s name, complicating analysis.
However, modern disassemblers are now able to produce reasonably understandable disassembly listings from compiled Swift binaries with, for example, mangled names fully decoded and added as annotations. Moreover, as the Swift runtime leverages many Objective-C frameworks, our discussion of the objc_msgSend function is still relevant. In mid-2020, researchers discovered a new macOS backdoor, which they named Dacls and attributed to the Lazarus APT Group. Its malicious installer application was written in Swift. Here we’ll highlight several snippets of its disassembly, which show the malware initializing and then launching an Objective-C NSTask object to execute installation commands (Listing 6-8).
0x000000010001e1f1    mov        r15, rax
0x000000010001e1f4    movabs     rdi, '/bin/bash' 1
0x000000010001e1fe    movabs     rsi, 'h\x00\x00\x00\x00\x00\x00\xe9'
0x000000010001e208    call       imp___stubs__$sSS10FoundationE19_bridgeToObjectiveCSo8NSString
                                 CyF ; (extension in Foundation):Swift.String._bridgeToObjectiv
                                 eC() -> __C.NSString 2

0x000000010001e20d    mov        rbx, rax
0x000000010001e210    mov        rsi, qword [0x100045ba0] ; @selector(setLaunchPath:)
0x000000010001e217    mov        rdi, r15
0x000000010001e21a    mov        rdx, rax
0x000000010001e21d    call       objc_msgSend 3
Listing 6-8: Swift disassembly of an NSTask initialization (Dacls)
This chunk of Swift disassembly bridges a Swift string to an Objective-C NSString 2. From the disassembly, it is apparent that this string is the path to a shell: /bin/bash 1. Next, as an Objective-C string, it is passed to the NSTask’s setLaunchPath: method, which gets invoked via the objc_msgSend function 3. Though the NSTask object (found in the R15 register) is not visible in this snippet of disassembly, the method selector setLaunchPath: and its argument (stored in RAX, as the return of the bridging call) are. Often, knowing a method name is sufficient to ascertain the class or object type, due to the fact that this name can be unique to the class. For example, a quick Google search of, or consulting Apple’s documentation on, the setLaunchPath: method reveals it belongs to the NSTask class.
Once the malware has set the NSTask’s launch path to /bin/bash, it initializes the task’s arguments (Listing 6-9).
0x000000010001e273    call       swift_allocObject 1
0x000000010001e278    mov        rbx, rax
...
0x000000010001e286    mov        qword [rax+0x20], '-c' 2
...
0x000000010001e2a4    mov        r14, qword [rbp+var_80]
0x000000010001e2a8    mov        qword [rbx+0x38], r14
...
0x000000010001e2c0    mov        rsi, qword [_$sSSN_10003d0b8]  ; type metadata for Swift.
                                                                  String ;
0x000000010001e2c7    mov        rdi, rbx
0x000000010001e2ca    call       imp___stubs__$sSa10FoundationE19_bridgeToObjectiveCSo7NSArrayC
                                 yF ; (extension in Foundation):Swift.Array._bridgeToObjectiveC
                                 () -> __C.NSArray 3
0x000000010001e2cf    mov        r13, rax
...
0x000000010001e2da    mov        rsi, qword [0x100045ba8] ; @selector(setArguments:)
0x000000010001e2e1    mov        rdi, r15
0x000000010001e2e4    mov        rdx, r13
0x000000010001e2e7    call       objc_msgSend 4
Listing 6-9: More Swift disassembly of an NSTask initialization (Dacls)
As you can see, the method creates an object containing various Swift strings 1, then bridges this to an NSArray 3. This is then passed to the NSTask’s setArguments: method, which is invoked via the objc_msgSend function 4. The -c argument 2 instructs bash to treat the following string as a command. It isn’t easy to figure out the method’s remaining arguments from this snippet of disassembly, but by using dynamic analysis (as described in the following chapters) we can passively recover these arguments, as well as determine that they are partially hardcoded within the binary at 0x0000000100033f70 (Listing 6-10):
0x0000000100033f70    db        " ~/Library/.mina > /dev/null 2>&1 && chmod +x
~/Library/.mina > /dev/null 2>&1 && ~/Library/.mina > /dev/null 2>&1", 0
Listing 6-10: Embedded arguments (Dacls)
These hardcoded arguments are prefixed at runtime with the copy command (cp) and the name of the malware’s persistent backdoor, SubMenu.nib. Cumulatively the arguments instruct bash to first copy the persistent backdoor to ~/Library/.mina, set it to be executable, and finally launch it. To trigger these actions, the malware invokes the NSTask launch method (Listing 6-11).
0x000000010001e300    mov        rdi, qword [rcx+rax]
0x000000010001e304    mov        rsi, qword [0x100045bb0]   ; @selector(launch) 1
0x000000010001e30b    call       objc_msgSend 2
Listing 6-11: Disassembly of an NSTask launch (Dacls)
As expected, the Objective-C method call is routed through the objc_msgSend function 2. Helpfully, though, the disassembler has annotated the selector: NSTask’s launch method 1.
At this point, from just these snippets of disassembled Swift code, we’ve been able to extract the malicious installer’s core logic. Specifically, we determined that a persistent payload (SubMenu.nib) was copied to the ~/Library/.mina directory and then launched.
C/C++ Disassembly
Malware authors occasionally craft Mac malware in non-Apple programming languages such as C or C++. Let’s look at another abridged snippet of disassembly, this time from a Lazarus Group first-stage implant loader named AppleJeus, originally written in C++.5 The snippet is from a function named getDeviceSerial, though due to C++ name mangling it shows up in the disassembler as Z15getDeviceSerialPc.
As you peruse the rather large chunk of disassembly (Listing 6-12), first observe that the disassembler has extracted the function declaration as an annotation, which (luckily for us) includes its original name and the number and format of its parameters. From the demangled name, getDeviceSerial, let’s assume that this function will retrieve the serial number of the infected system (though we’ll also validate this). Since the function takes, as its only parameter, a pointer to a string buffer (char*), it seems reasonable to assume the function will store the extracted serial number in this buffer so that it is available to the caller.
__Z15getDeviceSerialPc:          // getDeviceSerial(char*)

0x0000000100004548    mov        r14, rdi 1

0x0000000100004559    mov        rax, qword [_kIOMasterPortDefault]
0x0000000100004560    mov        r15d, dword [rax] 2

0x0000000100004563    lea        rdi, qword [IOPlatformExpertDevice] ;"IOPlatformExpertDevice"
0x000000010000456a    call       IOServiceMatching 3

0x000000010000456f    mov        edi, r15d
0x0000000100004572    mov        rsi, rax
0x0000000100004575    call       IOServiceGetMatchingService 4

0x000000010000457e    mov        r15d, eax
0x0000000100004581    mov        rax, qword [_kCFAllocatorDefault]
0x0000000100004588    mov        rdx, qword [rax]
0x000000010000458b    lea        rsi, qword [IOPlatformSerialNumber]
0x0000000100004592    xor        ecx, ecx
0x0000000100004594    mov        edi, r15d
0x0000000100004597    call       IORegistryEntryCreateCFProperty 5

0x000000010000459c    mov        edx, 0x20
0x00000001000045a1    mov        ecx, 0x8000100
0x00000001000045a6    mov        rdi, rax
0x00000001000045a9    mov        rsi, r14
0x00000001000045ac    call       CFStringGetCString 6

return
Listing 6-12: Disassembly of a getDeviceSerial function (AppleJeus)
First, the function moves its single argument stored in RDI, the output buffer, into the R14 register, effectively locally saving it 1. It does so because if the getDeviceSerial function makes any other calls that expect arguments (which it does), the RDI register will be reinitialized for those other calls. As you’ll see, at the end of the getDeviceSerial function, this output buffer is populated with the device’s serial number. Thus, the function must save this argument into an unused register. The use of such “scratch” registers to preserve values is quite common, and their annotations often facilitate the reversing of complex functions.
The function moves a pointer to kIOMasterPortDefault into RAX and dereferences it into the R15 register 2.
According to Apple developer documentation, kIOMasterPortDefault is the default mach port used to communicate with IOKit services.6 (A mach port is a mechanism to facilitate inter-process communications.) From this observation, it seems likely that the malware will leverage IOKit to extract the infected device’s serial number.
Next, we see the getDeviceSerial function make its first call into an Apple API: the IOServiceMatching function 3. Apple notes that this function, which takes a single parameter, will create and return a dictionary that facilitates the searching of and matching on a target IOKit service.7 We know that the RDI register holds the first argument of a function or method call. Just prior to making the call, we see the assembly code initialize this register with the value of "IOPlatformExpertDevice". In other words, it’s invoking the IOServiceMatching function with the string "IOPlatformExpertDevice".
Once the matching dictionary has been created, the code invokes another IOKit API, the IOServiceGetMatchingService function 4. Apple documentation states that this function will find the IOService that matches the specified search criteria.8 For parameters, it expects a master port and a matching dictionary. The disassembled code moves a value from the R15 register into the EDI register (the 32-bit part of the RDI register). A few lines earlier, the code moved kIOMasterPortDefault into the R15 register. Thus, the code is simply moving kIOMasterPortDefault into the EDI register, making it the first argument for the call to IOServiceGetMatchingService. Likewise, notice RAX being moved into the RSI register before the call, as the RSI register is used as the second parameter for function calls. Because the RAX register holds the result of the call, the RSI register will contain the matching dictionary from the call to IOServiceMatching. After the call to IOServiceGetMatchingService, an io_service_t service is returned in the RAX register. As the matching dictionary was initialized with "IOPlatformExpertDevice", a reference to the IOPlatformExpertDevice IOKit object will be found and returned. As you’ll see, this object can be queried for information about the system (platform), including its serial number.
Next, the code sets up the parameters for a call to a system function that extracts the value of an IOKit registry property: IORegistryEntryCreateCFProperty 5. This parameter setup begins by loading kCFAllocatorDefault into RDX, the register used for the third argument. Apple’s documentation of the function specifies that this is the memory allocator to use.9 Following this, the address of the string "IOPlatformSerialNumber" is loaded into the RSI register. Used for the second argument, this register is the property name of interest. Next, the 32-bit component of the RCX register (ECX), the fourth argument, is initialized to zero, as the XORing of one register with itself sets the register to zero. Finally, before making the call, the value from R15D (the D indicating the 32-bit part of the R15 register) is moved into EDI, the 32-bit part of the RDI register. This has the effect of initializing the RDI parameter with the value of kIOMasterPortDefault previously stored in R15D. After the call to IORegistryEntryCreateCFProperty, the RAX register will hold the value of the required property: IOPlatformSerialNumber.
Finally, the function invokes the CFStringGetCString function to convert the extracted property, a CFString object, to a plain, null-terminated C-string 6. Of course, the parameters must be initialized prior to this call. The EDX register (the 32-bit part of the RDX) is set to 0x20, which specifies the output buffer size. The ECX register (the 32-bit part of the RCX) is set to kCFStringEncodingUTF8 (0x8000100). The RDI register is set to the value of RAX, which contains the extracted property value of IOPlatformSerialNumber. Lastly, the second argument, RSI, is set to R14. Remember that the R14 register contains the value from RDI passed to getDeviceSerial. Since Apple’s documentation for CFStringGetCString states that the second argument is the buffer into which to copy the string, we now know that the parameter passed to the getDeviceSerial function is indeed an output buffer for a serial number.10
It’s worth noting that although higher-level languages such as C++ require passing the arguments in a specified order, the only requirement at the assembly level is that the parameters are stored in the appropriate registers or stack location before a call is made. As a result, you may see instructions that initialize the arguments “out of order.” For example, here you see the second argument being set last.
By focusing on the API calls made by the getDeviceSerial function, we were able to confirm its functionality: retrieving the infected system’s serial number (IOPlatformSerialNumber) via IOKit. Moreover, using parameter analysis we were able to determine that the getDeviceSerial function would be invoked with a buffer for the serial number. Who needs source code, right?
Control Flow Disassembly
So far, our analysis has focused on the logic contained solely within functions, not on the interactions of the functions and the code that invokes them. Understanding such interactions is important when analyzing malware, as malicious code will often take decisive actions based on the return value of a single function. Komplex’s payload provides an illustrative example.
Komplex’s persistent payload contains logic in a function named __Z19connectedToInternetv (which demangles to connectedToInternet). This aptly named function checks if an infected host is connected to the internet. If the host is offline, the malware will understandably wait until network connectivity is restored before attempting to connect to its command and control server for tasking. (This check also doubles as a basic anti-analysis mechanism, based on the assumption that most analysis systems are not connected to the internet.)
Let’s examine the disassembly of malware code that invokes the connectedToInternet function and then acts upon its response (Listing 6-13).
0x0000000100005b15:
0x0000000100005b15    call       connectedToInternet()
0x0000000100005b1a    and        al, 0x1
0x0000000100005b1c    mov        byte [rbp+var_19], al
0x0000000100005b1f    test       byte [rbp+var_19], 0x1
1 0x0000000100005b23    jz         loc_100005b2e
2 0x0000000100005b29    jmp        loc_100005b40

3 0x0000000100005b2e:
0x0000000100005b2e    mov        edi, 0x3c
0x0000000100005b33    call       sleep
0x0000000100005b38    mov        [rbp+var_3C], eax
4 0x0000000100005b3b    jmp        0x0000000100005b15

loc_100005b40:
...
Listing 6-13: Network connectivity check and control flow (Komplex)
First, the malware invokes the connectedToInternet function. As this function takes no parameters, no register setup is required. Following the call, the malware checks the return value via a test and a jz (jump zero) instruction. The test instruction bitwise ANDs two operands (discards the result) and sets the zero flag based on the result. Thus, if the connectedToInternet function returns a zero, the jz instruction will be taken 1, jumping to the instructions at 0x0000000100005b2e 3. Here, the code invokes the system’s sleep function before looping back to the instructions at 0x0000000100005b15 to check for connectivity once again 4. Once the connectedToInternet function returns a non-zero value, an unconditional jump is taken 2, exiting the loop. In other words, the malware will wait until the system is connected to the internet before continuing on.
Now that we understand the malware’s functionality, we can reconstruct the logic with the following Objective-C code (Listing 6-14).
while(0x0 == connectedToInternet()) {
    sleep(0x3c);
}
Listing 6-14: Network connectivity check and control flow, reconstructed (Komplex)
After walking through these various chunks of disassembly, we can probably all agree that reading assembly code is rather tedious. Luckily, due to recent advances in decompiler technologies, there is hope!
Decompilation
You’ve seen how a disassembler can parse a file and translate the binary code back into human-readable assembly. Decompilers seek to take this translation one step further by recreating a source-code level representation of extracted binary code. This source-code representation can be both more succinct and readable than assembly, making analysis of unknown binaries a simpler task. Advanced reverse-engineering tools often contain both disassembler and decompiler capabilities. Examples of such tools include Hopper (discussed in the next section), IDA Pro, and Ghidra.
Recall the getDeviceSerial function from the Lazarus Group first-stage implant loader? While the full disassembly of this function is about 50 lines long, the decompilation is much more succinct, clocking in at roughly 15 lines (Listing 6-15).
int getDeviceSerial(int * arg0) {
    r14 = arg0;
    ...
    r15 = kIOMasterPortDefault;
    rax = IOServiceMatching("IOPlatformExpertDevice");
    rax = IOServiceGetMatchingService(r15, rax);
    if (rax != 0x0) {
        rbx = CFStringGetCString(IORegistryEntryCreateCFProperty(rax,
              @"IOPlatformSerialNumber", kCFAllocatorDefault, 0x0), r14, 0x20,
              kCFStringEncodingUTF8) != 0x0 ? 0x1 : 0x0;
        IOObjectRelease(rax);
    }
    rax = rbx;
    return rax;
}
Listing 6-15: Decompilation of the getDeviceSerial function (AppleJeus)
The decompilation is quite readable, making it relatively easy to understand the logic of this function. For example, we can see that the malware obtains a reference to the IOPlatformExpertDevice service and then leverages it to look up the system’s serial number.
Similarly, the connectedToInternet function discussed earlier in the chapter decompiles decently (Listing 6-16). Notice, though, that the decompiler seems a little confused by the Objective-C syntax, with @class and @selector keywords remaining in the output. Behind the scenes, this is due to a compiler optimization that invokes an optimized version of the objc_msgSend function called objc_msgSend_fixup. Still, it should be clear that the malware determines the host’s network connectivity, or lack thereof, via a request to www.google.com.
int connectedToInternet()
{
    if( (@class(NSData), &@selector(dataWithContentsOfURL:), (@class(NSURL),
         &@selector(URLWithString:), @"http://www.google.com")) != 0x0)
    {
         var_1 = 0x1;
    }
    else {
         var_1 = 0x0;
    }
    rax = var_1 & 0x1 & 0xff;
    return rax;
}
Listing 6-16: Decompilation of the connectedToInternet function (Komplex)
Taking into consideration the many benefits of decompilation over disassembly, you might be wondering why we bothered discussing disassembly at all. There are a few reasons why disassembly might still be useful. First, even the best decompilers occasionally struggle to analyze complex binary code, such as malware with anti-analysis logic (discussed in Chapter 9). Disassemblers that simply translate binary code are far less susceptible to errors. Thus, dropping down to the assembly level code provided by the disassembler may sometimes be your only option. Second, as we saw in the decompilation of the getDeviceSerial and connectedToInternet functions, assembly code concepts such as registers remain present in the code and are thus relevant to your analysis. While decompilation can greatly simplify the analysis of binary code, the ability to understand assembly code is (still) a foundational skill for any malware analyst.
Reverse Engineering with Hopper
So far we’ve discussed the concepts of disassembly and decompilation without mentioning specific tools that provide these services. These tools can be somewhat complex and a bit daunting to the beginner malware analyst. As such, we’ll briefly walk through the use of one such tool, Hopper, for binary analysis. Reasonably priced and designed natively for macOS, Hopper boasts a powerful disassembler and decompiler that excels at analyzing Mach-O binaries.11
If you’d rather use another disassembler or decompiler, such as IDA Pro or Ghidra, the specifics of this section may not apply. However, the concepts we’ll discuss are broadly applicable across most reverse-engineering tools.
Creating a Binary to Analyze
In this brief introduction to Hopper, we’ll disassemble and decompile Apple’s standard “Hello, World!” Objective-C code, shown in Listing 6-17.
#import <Foundation/Foundation.h>

 int main(int argc, const char * argv[]) {
    @autoreleasepool {
        NSLog(@"Hello, World!");
    }
    return 0;
}
Listing 6-17: Apple’s “Hello, World!”
Though trivial, it affords us an example binary sufficient for illustrating many of Hopper’s features and capabilities. Compile the code using clang or Xcode to generate a 64-bit Mach-O binary (Listing 6-18):
% clang main.m -fmodules -o helloWorld

% file helloWorld
helloWorld: Mach-O 64-bit executable x86_64
Listing 6-18: Compiling “Hello, World!”
Loading the Binary
After opening the Hopper application, start the analysis by selecting File▶Open. Choose the Mach-O binary for analysis. In the resulting loader window, leave the defaults selected and click OK (Figure 6-1).
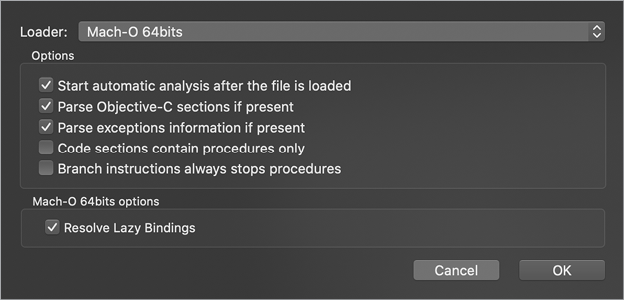
Figure 6-1: Loader window in Hopper
Hopper will automatically begin its analysis of the binary by parsing the Mach-O header, disassembling the binary code, and extracting embedded strings, function and method names, and so on. Once its analysis is complete, Hopper will automatically display the disassembled code at the binary’s entry point, extracted from the LC_MAIN load command in the Mach-O header.
Exploring the Interface
Hopper’s interface offers several ways of exploring the data it produces. On the far right is the inspector view. This is where Hopper displays general information about the binary being analyzed, including the type of binary, its architecture and CPU, and its calling convention (Figure 6-2).
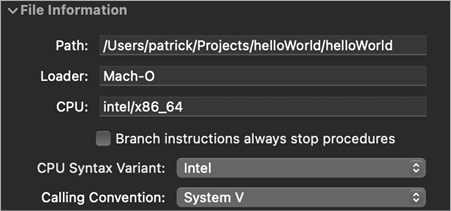
Figure 6-2: Basic file information in Hopper
On the far left is a segment selector that can toggle between various views related to symbols and strings in the binary. For example, the Proc view shows procedures (functions and methods) that Hopper has identified during its analysis (Figure 6-3). This includes functions and methods from the original source code, as well as APIs that the code invokes. For example, in our “Hello, World!” binary, Hopper has identified the main function and the call to Apple’s NSLog API.
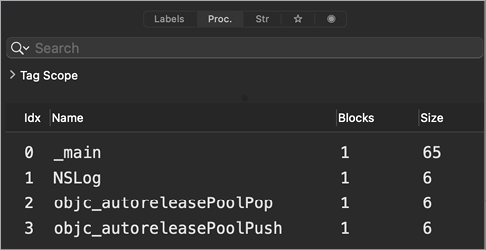
Figure 6-3: Procedure view in Hopper
The Str view shows the embedded strings that Hopper has extracted from the binary (Figure 6-4). In our simple binary, the only embedded string is “Hello, World!”
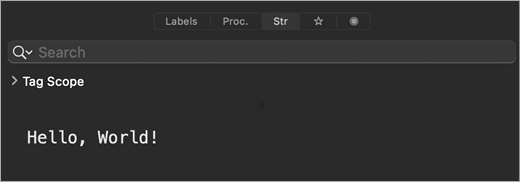
Figure 6-4: Embedded strings view in Hopper
Before diving into any disassembly, it’s wise to peruse the extracted procedure names and embedded strings, as they are often an invaluable source of information about the malware’s possible capabilities. Moreover, they can guide your analysis efforts. If a procedure name or embedded string looks interesting, click it and Hopper will show you exactly where it’s referenced in the binary.
Viewing the Disassembly
By default, Hopper will automatically display the disassembly of the binary’s entry point (often the main function). Listing 6-19 shows the disassembly of the main function in its entirety. Note that the method of compilation and the compiler version can both impact the disassembly. Most commonly, addresses (of functions or instructions) may change, though the order of instructions may vary as well.
main:
0x0000000100003f20    push       rbp
0x0000000100003f21    mov        rbp, rsp
0x0000000100003f24    sub        rsp, 0x20
0x0000000100003f28    mov        dword [rbp+var_4], 0x0
0x0000000100003f2f    mov        dword [rbp+var_8], edi
0x0000000100003f32    mov        qword [rbp+var_10], rsi
0x0000000100003f36    call       objc_autoreleasePoolPush
0x0000000100003f3b    lea        rcx, qword [cfstring_Hello__World] ; @"Hello, World!"
0x0000000100003f42    mov        rdi, rcx ; argument "format" for method NSLog 1
0x0000000100003f45    mov        qword [rbp+var_18], rax
0x0000000100003f49    mov        al, 0x0
0x0000000100003f4b    call       NSLog
0x0000000100003f50    mov        rdi, qword [rbp+var_18] ; argument "pool" for method objc_
                                                           autoreleasePoolPop
0x0000000100003f54    call       objc_autoreleasePoolPop
0x0000000100003f59    xor        eax, eax
0x0000000100003f5b    add        rsp, 0x20
0x0000000100003f5f    pop        rbp
0x0000000100003f60    ret
Listing 6-19: “Hello, World!” disassembled by Hopper
Hopper provides helpful annotations, identifying embedded strings as well as function and method arguments. For example, consider the assembly code at address 0x0000000100000f42, which moves the RCX register, a pointer to the “Hello, World!” string, into RDI 1. Hopper has identified this code as initializing the arguments for a call to NSLog a few lines later.
You’ll often notice that various components of the disassembly are actually pointers to data elsewhere in the binary. For example, the assembly code at 0x0000000100000f3b loads the address of the “Hello, World!” string into the RCX register. Hopper is smart enough to identify the cfstring_Hello__World_ variable as a pointer. Moreover, if you double-click any pointer, Hopper will jump to the pointer’s address. For example, clicking twice on the cfstring_Hello__World_ variable in the disassembly takes you to the string object at address 0x0000000100001008. This string object of type CFConstantString contains pointers, too, and double-clicking those takes you to the specified address.
Note that Hopper also tracks backwards cross-references. For example, it has identified that the string bytes at address 0x0000000100000fa2 are cross-referenced by the cfstring_Hello__World_ variable. That is to say, the cfstring_Hello__World_ variable contains a reference to the 0x0000000100000fa2 address. Cross-references like these greatly facilitate static analysis of the binary code; if you notice a string of interest, you can simply ask Hopper where in the code that string is referenced. To view such cross-references, CTRL-click the address or item and select References To. Alternatively, select the address or item and press X. For example, say we wanted to see where in the disassembly the “Hello, World!” string object is referenced. We’d first select the string object at address 0x0000000100001008, CTRL-click to bring up the context menu, and click References to cfstring_Hello__World (Figure 6-5).
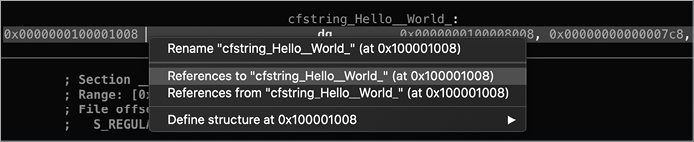
Figure 6-5: Selecting the option to view cross-references to the “Hello, World!” string.
This should bring up the Cross References window for that item (Figure 6-6).
![The Cross References window for “References to 0x1000001008” shows two columns, Address (“0x100000f3b (_main + 0x1b)”) and Value (“lea rcx, qword [cfstring_Hello_World_]”).](image_fi/501942c06/f06006.png)
Figure 6-6: Cross-references to the “Hello, World!” string
Now you can see that this string has only one cross-reference: the code at address 0x0000000100000f3b, which falls within the main function. Double-click it to jump to that location in the code.
Hopper also creates cross-references for functions, methods, and API calls, allowing you to easily determine where in the code these are invoked. For example, the Cross References window in Figure 6-7 tells us that the NSLog API is invoked within the main function at 0x0000000100000f4b.
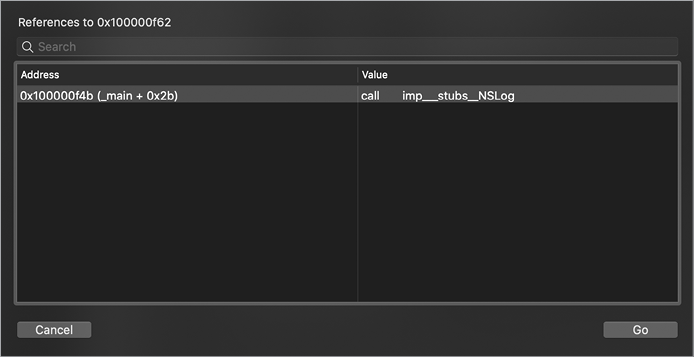
Figure 6-7: Cross-references to the NSLog function
Cross-references greatly facilitate analysis and can efficiently lead to an understanding of the binary’s functionality or capabilities. For example, imagine you’re analyzing a suspected malware sample and want to uncover the address of its command and control server. In Hopper’s Proc view, you can locate APIs, such as Apple networking methods, which are often used by the malware to connect to its server. From the Proc view, follow cross-references to understand how these APIs are being invoked (for example, with the URL or IP address of the command and control server).
When bouncing around in Hopper, you’ll often want to quickly return to a previous spot of analysis. Luckily, the escape key will take you back to where you just were.
Changing the Display Mode
So far, we’ve stayed in Hopper’s default display mode, Assembly mode. As the name suggests, this mode displays the disassembly of binary code. You can toggle the display mode using a segment control found in Hopper’s main toolbar (Figure 6-8).
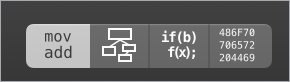
Figure 6-8: Display modes in Hopper
Hopper’s supported display modes include the following:
- Assembly (ASM) mode: The standard disassembly mode, in which Hopper displays a binary’s assembly instructions.
- Control Flow Graph (CFG) mode: A mode that breaks down procedures (functions) into code blocks and illustrates the control flow between them.
- Pseudocode mode: Hopper’s decompiler mode, in which a source-code-like or pseudocode representation is generated.
- Hexadecimal mode: The raw hex bytes of the binary.
Of the four display modes, the pseudocode mode is arguably the most powerful. To enter this mode, first select a procedure, and then click the third button in the Display modes segment control. This will instruct Hopper to decompile the code in the procedure in order to generate a pseudocode representation of it. For our simple “Hello, World!” program, it does a lovely job (Listing 6-20):
int _main(int arg0, int arg1) {
    var_18 = objc_autoreleasePoolPush();
    NSLog(@"Hello, World!");
    objc_autoreleasePoolPop(var_18);
    return 0x0;
}
Listing 6-20: “Hello, World!” decompiled
After taking into account that @autoreleasepool blocks are compiled into paired objc_autoreleasePoolPush and objc_autoreleasePoolPop calls, the decompilation looks quite similar to the original source code (Listing 6-21).
#import <Foundation/Foundation.h>

 int main(int argc, const char * argv[]) {
    @autoreleasepool {
        NSLog(@"Hello, World!");
    }
    return 0;
}
Listing 6-21: The original “Hello, World!” source code for comparison
For a more comprehensive guide to using and understanding Hopper, consult the application’s official tutorial.12
Up Next
Armed with a solid understanding of static analysis techniques, ranging from basic file type identification to advanced decompilation, we’re now ready to turn our attention to methods of dynamic analysis. As you’ll see, dynamic analysis often provides a more efficient way of understanding malware. Ultimately though, static and dynamic analysis are complementary, and you’ll probably find yourself combining them.