Chapter 15
Getting Answers with Microsoft Forms
IN THIS CHAPTER
 Understanding Microsoft Forms
 Building a form with Forms
 Displaying a form in SharePoint
 Sending Forms data to SharePoint
Microsoft Forms is a new cloud-based tool for creating digital forms. A digital form is just like a paper form, but you fill it out by opening it in a web browser on your computer. In this chapter, you learn how to integrate Microsoft Forms with SharePoint. You start by learning how to access the Microsoft Forms service. Then, you learn how to create a simple form and display it on a SharePoint page. Next, you see how you can use a form in Microsoft Forms to collect data and send it to SharePoint.
Signing into Microsoft Forms
Your existing Office 365 credentials (which you create in Chapter 1) are used to sign into Microsoft Forms. Open your web browser of choice and head over to https://forms.office.com. Click the Get Started button. If you are not already logged into Office 365, you will be asked to log in. After you do, a welcome screen appears with information on how to create a new form, as shown in Figure 15-1.
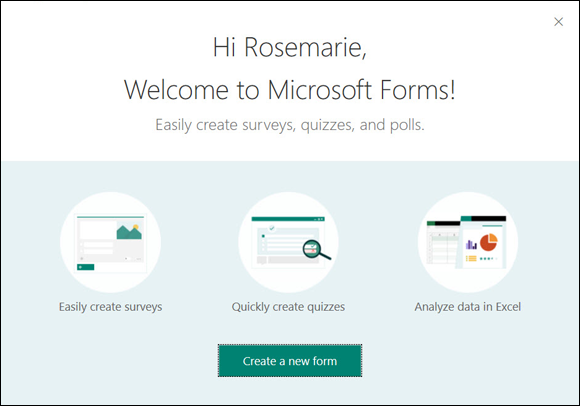
FIGURE 15-1: Signing into Microsoft Forms.
Now, let’s get on with creating our first form!
Creating a Form in Microsoft Forms
From the welcome screen (that you see after you log into Microsoft Forms), click the Create a New Form button to pull up the form creation page, as shown in Figure 15-2.
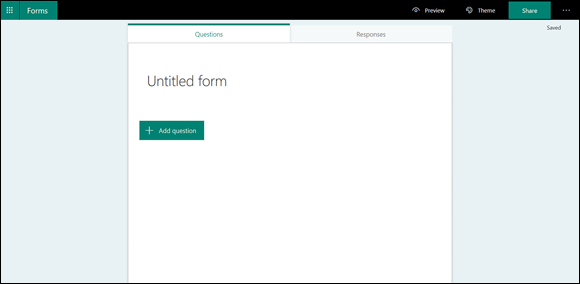
FIGURE 15-2: Creating a new form in Microsoft Forms.
On the surface, Microsoft Forms might seem trivial and somewhat like a toy. When we first looked at it, we thought we must be missing something. A Microsoft Forms form is really just a list of questions! How useful could that be? Well, it turns out, it can be incredibly powerful. Yes, getting started creating a form is trivial, but when you start thinking about collecting data from people by asking questions, you can start to see the opportunity for this simple tool.
Let’s create a simple form to ask folks about SharePoint.
From the form creation page, click the Untitled form text and give the form a name.
We called our form “SharePoint For Dummies Survey.”
Click the picture icon to the left of the title and select an icon for the form.
We chose the famous pencil-headed geek guru of the For Dummies brand.
Provide a description for the form.
Now we are onto the primary purpose of the form. Let’s add some questions.
Click the Add Question button and then choose how you want the question answered.
Your choices are: Choice, Text, Rating, Date, Ranking, Likert, or Net Promoter Score. We will choose Choice for this question.
Enter a question you want to ask the people taking the survey.
We want to know if the person taking the survey has ever heard of SharePoint.
Once we enter the question, Microsoft Forms is smart enough to give us some default answers. It suggests we add Yes, No, and Maybe.
Click the Add All button to add all of these choices to the answer section.
The result is shown in Figure 15-3. You can select some additional options such as allowing multiple answers and requiring this question be answered. Play around with these and the other options.
Next, let’s give the form some attitude.
Click the Theme button that appears in the upper-right corner of the screen and select a theme.
We chose an “undersea” theme (see Figure 15-4).
Click the Preview button to preview the form.
You can select options to see how the form will be displayed on a computer or on a mobile device.
Go ahead and take the survey and click Submit.
Your answers will be recorded, and you will see a success screen that lets you know your response was submitted.
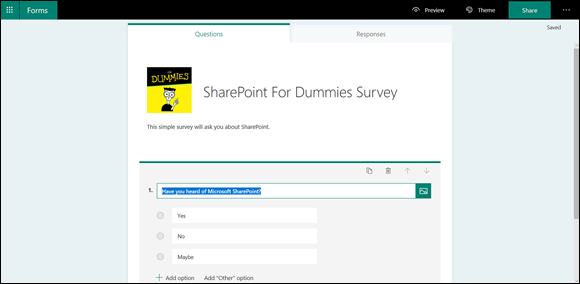
FIGURE 15-3: Adding questions to a form.
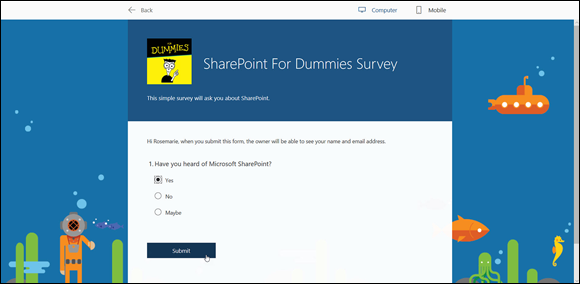
FIGURE 15-4: A simple SharePoint Survey form in Microsoft Forms.
And that is all there is to building a form! Next up, analyzing the data (and don’t worry, we are getting to SharePoint integration).
Analyzing Microsoft Forms Data
In the previous section, you created a new form and then submitted an answer. Over the course of a survey, you may want to check on the form’s responses. To view the responses of any form, navigate your web browser to https://forms.office.com and log in to see all of your existing forms. Open the form you wish to view and then click the Responses tab to see all the responses that have come in for this form, as shown in Figure 15-5.
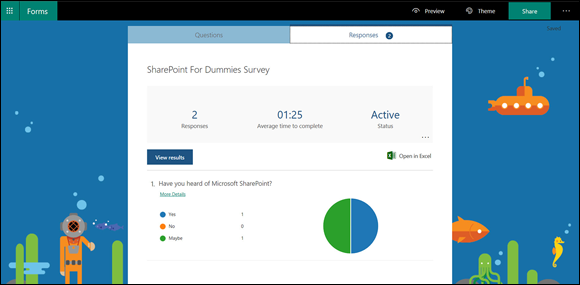
FIGURE 15-5: Viewing form responses.
Just like the rest of Microsoft Forms, the Responses tab appears deceptively simple. You can:
- See the summary of the responses for each question.
- Click the View Results button to see who responded with which answer, how much time they took to complete the question, delete the response, and print the response.
- Create a summary link.
- View the responses in Excel so you can analyze the results.
Displaying a Form in SharePoint
To send out a form, click the Share button that appears in the top-right corner of the page. When you click this button, the Share screen is displayed, as shown in Figure 15-6. In the Share screen you can share a link to the form, create a scannable bar QR code, get embed code for embedding the form in a web page, and email the form to someone. For our purposes, click the Copy button to copy the sharable link.
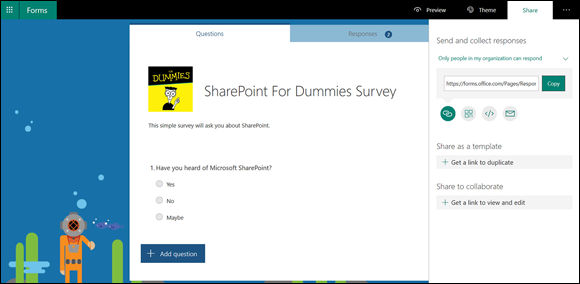
FIGURE 15-6: The Share screen for a form.
All of these methods of sharing a form are nice, but what we have found most useful is displaying a form right on a SharePoint page on an intranet site. That way everyone in the organization can see it when they open the SharePoint site. And if you send them a link to the form, you can actually send them a link to the SharePoint page instead of off to a stand-alone form. This nudges them toward SharePoint and some of the other benefits SharePoint has to offer.
To add a form to a SharePoint page, you add the Forms Web Part and then connect it to the form you want to display. (You learn how to add Web Parts to a SharePoint page in Chapter 6.)
To add a form to a SharePoint page:
- Open the SharePoint page where you want to add the form.
- Click the plus sign to add a web part and choose the Microsoft Forms Web Part, as shown in Figure 15-7.
Click Add Existing Form and paste the sharable link you copied from the Share screen in Microsoft Forms earlier in this section.
You can also create a brand-new form from the Microsoft Forms Web Part in SharePoint. Clicking that button will take you to the Forms site.
Choose whether you want to show the questions from the form or the responses from the form, as shown in Figure 15-8.
In this example, we want people to be able to take the survey so we leave the default, which is to collect responses.
Click OK and then publish your page.
Your form is now embedded in your SharePoint page and anyone landing on the page can take the survey.
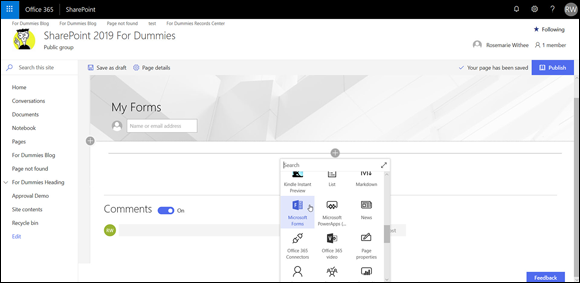
FIGURE 15-7: Selecting the Microsoft Forms Web Part.
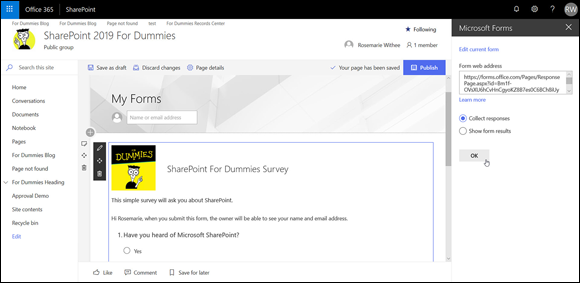
FIGURE 15-8: Configuring the Microsoft Forms Web Part.
Capturing Forms Data in SharePoint
One common question we get asked about Microsoft Forms is regarding data. People love having their data inside SharePoint itself in a List-based app. At first glance you might not think Forms can do this since it appears to be so simple, but that is where Flow comes in. Microsoft Flow is a workflow tool that you can use to submit your Forms data, or pretty much any other data, into and around your SharePoint site. We cover Microsoft Flow in Chapter 14.
 Forms works with all sorts of Microsoft products and not just with SharePoint. However, Forms and SharePoint are great partners, since the former deals with taking in data from people, and the latter deals with managing digital content.