


Sometimes a girl likes to feel pretty. Whether at a special celebration, or just when she’s playing Queen for a Day at home, these paper crowns are sure to draw the attention of loyal admirers and worthy subjects. The stunning tiaras won’t have you breaking the royal bank, either, as the main supplies are a plastic headband, a six-pack carrier that you’ve probably got in the recycle bin right now, and, of course, glitter—lots and lots of glitter.
SUPPLIES

SCISSORS
1 EMPTY SIX-PACK CADDY
1 THIN PLASTIC HEADBAND
HOT GLUE GUN
PAPER TOWEL
CRAFT GLUE
PAINTBRUSH
GLITTER, SEQUINS, GLITTER GLUE, AND OTHER EMBELLISHMENTS

1Open a beer. You’ll want to relax and ponder your design options a bit.
2Use the scissors to cut out your desired shapes from the box. I look for one central piece about 8 inches wide, for the base of my tiara.
3Set the headband on a work surface and hot glue the central cardboard piece to it.
4Hot glue the accent shapes behind the central piece. Tall and thin ribbon shapes, radiating stripes, or clusters of circles look great for this.
5 Place your tiara on a paper towel. Brush on some craft glue wherever you want extra sparkle, then sprinkle liberally with the glitter. Allow to dry, then dust off the excess onto the paper towel. You could also use glitter glue for highlights. Allow to dry.
6 Use craft glue to attach sequins or other small treasures. Allow to dry.

 eing a beer crafter doesn’t involve special skills or talents. It’s an everyman (or woman) occupation, packed with pleasure, and the resources are readily available. As with so many other hobbies, there are some folks who take tinkering with cans and bottles to artistic extremes.
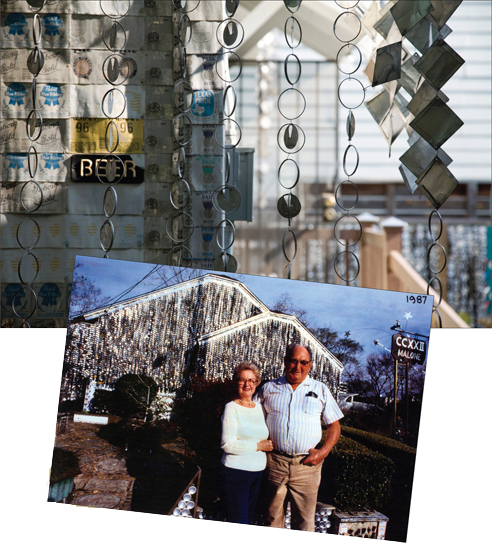
John Milkovisch was just that sort of guy. With an equal supply of ingenuity and time, and an ever increasing collection of empty beer cans, John converted his Houston bungalow on Malone Street into a folk art masterpiece with the outside of his house and property tastefully decorated with what Ripley’s Believe It or Not! estimates is fifty thousand beer cans.
Working nights and on weekends, John covered the exterior walls with cut and flattened cans, then moved on to decorating planter boxes, making garden art, dangling curtains of can tops from the roof eaves, and stringing garlands of aluminum from the trees.
His wife, Mary, put her foot down at the front door, declaring the inside of the house her turf, and in the interest of a harmonious marriage, John kept his ambitious beer crafted embellishments strictly on the outside. Looking back at his visionary achievement, Mary speculated his motivation came from “not wanting to mow the grass.”
John’s workdays were spent doing interior upholstery work for the Southern Pacific Railroad, and he was especially skilled in linoleum tile cutting and design. Examples of his stunning floor work are in several rooms of his home.
John had an excellent sense of humor and unassuming perception of his magnum opus. When asked about all the folks who’d come to see his home, he played it cool, saying, “I had no idea that people would be so interested in beer cans. I wouldn’t travel around the block to see something like that.” He spent more than eighteen years building his dream, before moving into a retirement home after a stroke. Claiming his preferred brand of beer was “whatever was on sale,” John played no favorites.
If there was a Beer Crafter Hall of Fame (and there should be), John would top the list. Ambitious and dedicated, he built his dream one beer at a time, illustrating for the rest of us just how far our collection can go.
These days, John’s Beer Can House is curated and maintained by the Orange Show Center for Visionary Arts, which promotes other awesome Houston creations, including the Orange Show, which is an outdoor folk art environment built by Jeff McKissack to honor his favorite fruit, and the annual Art Car Parade, where more than 250 embellished, blinged, and funked-out vehicles cruise through the city to an appreciative crowd of more than thirty thousand during a full weekend of curiosities and events.
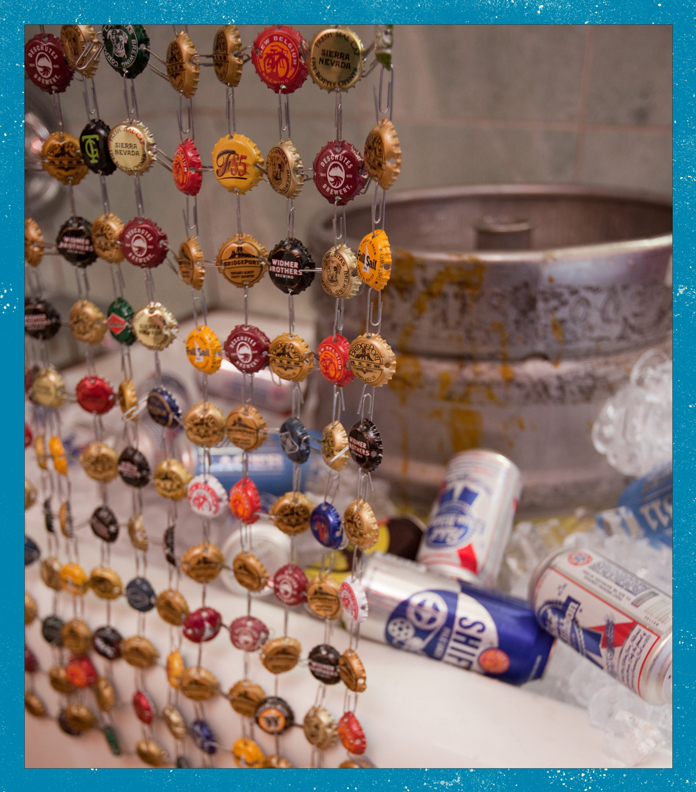
Truly a craft for the beer enthusiast, this stunning curtain transforms your voluminous cap collection into a magnificent conversation piece. You can drape it across a window or in front of a shower curtain, hang it against a wall for a dramatic statement, or suspend it from runners for a completely unique room divider. Best of all, since the only additional supplies you’ll be needing are paper clips and hole punch pliers, your objet d’art is only going to set you back a couple of bucks in pocket change, freeing up the rest of your hard-earned dough for a couple of quality six-packs that are completely display worthy.
Because making something this impressive can be time consuming, you’ll probably want to have a few friends over to help you out—just like an old-fashioned sewing bee, but with beer.
SUPPLIES
A ZILLION BOTTLE CAPS
HOLE PUNCH PLIERS
500 OR MORE PAPER CLIPS
1Open a beer and one for your friends, too. This is going to take a team effort.
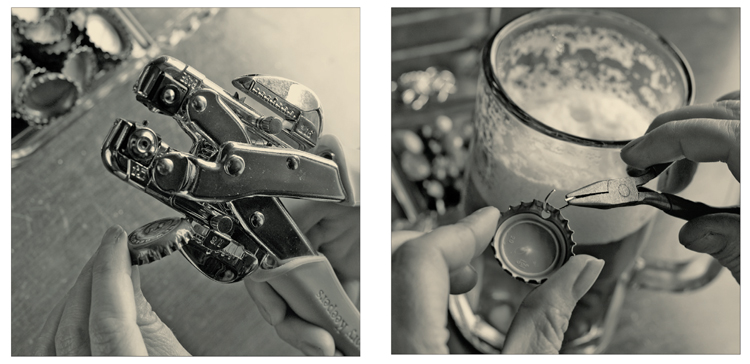
2Punch four holes into the edge of your bottle cap: one at the top, one at the bottom, and one on each side.
3Thread a paper clip completely through each hole.
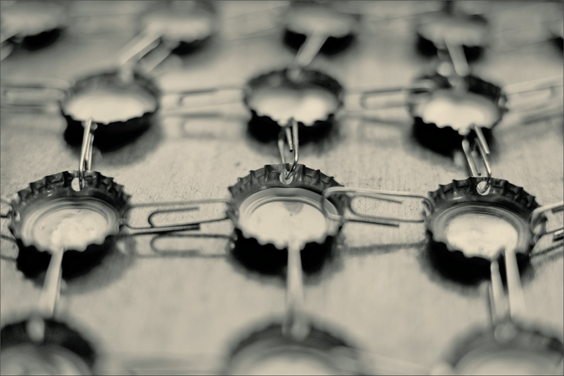
4Punch four more holes in another cap and connect it to one of the paper clips from your first cap, with the tops of the caps all facing the same way. Similarly connect three more caps to the remaining paper clips.
5 Keep punching holes in the caps and connecting the clips and caps until your curtain is the size you want it to be.


As you may suspect, I have an extensive collection of labels from favorite beers. Part of me hangs on to them for decoration’s sake alone, but I also keep them around for reference. There’s nothing like a little solid evidence to kick start the brain into a trip down memory lane.
Turning your labels into coasters with tasting notes on the back is a great way to track your favorite brews. I usually make two coasters for each beer I sample, writing down my own notes on one and leaving the other blank. When I’m having tasting parties with friends, I bust out the blanks, where they can take their own notes using dry-erase markers, which wipe clean for the next soiree.
SUPPLIES
LARGE POT
1 OR MANY BOTTLES OF BEER
SCRAP PAPER
BLANK WRITING PAPER
PEN OR FELT-TIP MARKER
SCISSORS
PHOTOCOPIER (optional)
LAMINATING MATERIALS (optional)
PINKING SHEARS OR OTHER FANCY PAPER CUTTERS
1Fill the large pot with water and soak the bottles for several hours or up to overnight.
2Gently peel off the labels and lay them on the scrap paper to dry.
3Trace the labels onto the blank writing paper and cut out along the outlines.
4Write down your tasting notes.
5 Alternatively, you can copy the tasting template and enlarge or shrink it to fit on the back of your labels.
6 Laminate the labels (most copy shops can do this if you lack the materials). Cut out the laminated labels, leaving a ¾-inch margin.
7 Use pinking shears or fancy paper cutters to create a decorative border.

Download a PDF of template HERE.
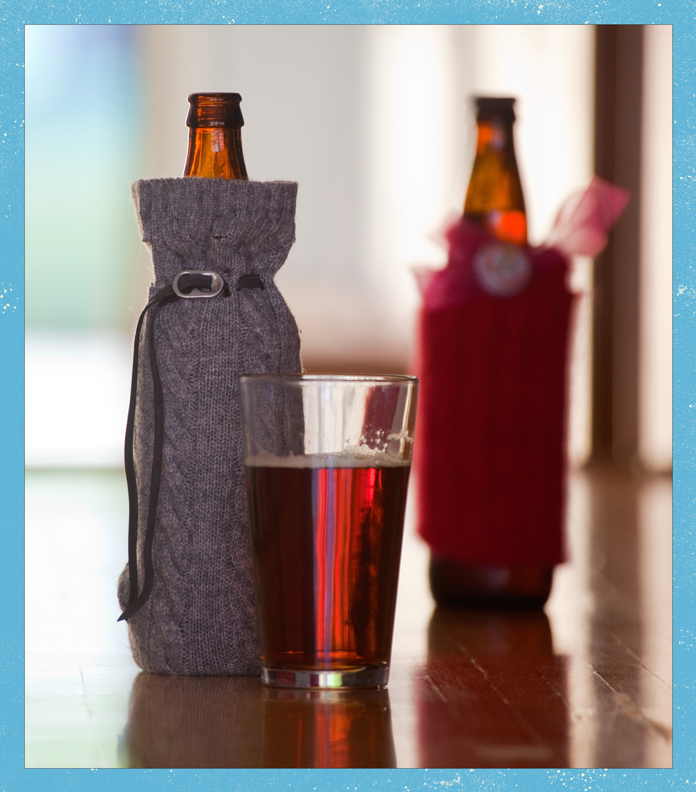
For the best flavor, you’ve got to serve your beer at its proper temperature. More and more often, beer companies will list recommended serving temperatures—and even what type of glass to use—on the label. I like my pilsners and IPAs almost icy, my stouts just a tad cooler than room temperature, and my Belgians somewhere in between.
Getting your beer temperature right and keeping it there can be a bit tricky, especially an on hot day. That’s why I’m a big fan of cozies, which keep your beer cool and look pretty fabulous, too. My favorite cozies are made from the hacked-off sleeves of old sweaters. I use kid-size sweaters for normal-size beer bottles, and grown-up sweaters for the 22-ounce variety. A simple stitch sewn at the bottom edge of a sleeve and a little ribbon transform your thrift store find into a fetching gift bag, which I seal closed with a pull-tab cinch.
SUPPLIES
 FOR THE BEER COZY
RULER
SCISSORS
CHILD-SIZE SWEATER (something with ribbed sleeves works great)
SEWING MACHINE (optional)
FOR THE GIFT BAG
RULER
SCISSORS
SWEATER WITH SLEEVES
no larger than 12 inches around at the widest point
SEWING MACHINE
18 INCHES OF 1/2-INCH-WIDE RIBBON
PULL TAB from a beer can
Beer Cozy
1 Open a beer.
2 Measure and cut off one sleeve of the sweater about 41/2 inches from the wrist opening.
3 For a hemmed edge, take the cut end of the fabric and roll it under 1/2 inch to the inside of the sleeve, then stitch around the edge. Of course, hems are an option, and a frayed edge on your cozy can look pretty cool, too.
4Put the cozy over your beer and enjoy.
Gift Bag
1Normally I’d start with, “Open a beer,” but because this is a gift for a friend, we’ll just skip ahead to step 2.
2Measure and cut off one sleeve of the sweater about 101/2 inches from the wrist opening.
3Using the pattern for reference, cut an arch shape into the wider opening of the sleeve.
4Turn the sleeve inside out and sew a line about 1/2 inch from the cut edge.
5Turn the sleeve right side out. About 2 inches down from the top of the sleeve, cut 1/2-inch slits every inch around the sleeve.
6Thread the ribbon through the slits, leaving two equal tails at the starting and ending point. Thread the ends through the pull tab, insert a beer, and cinch closed.
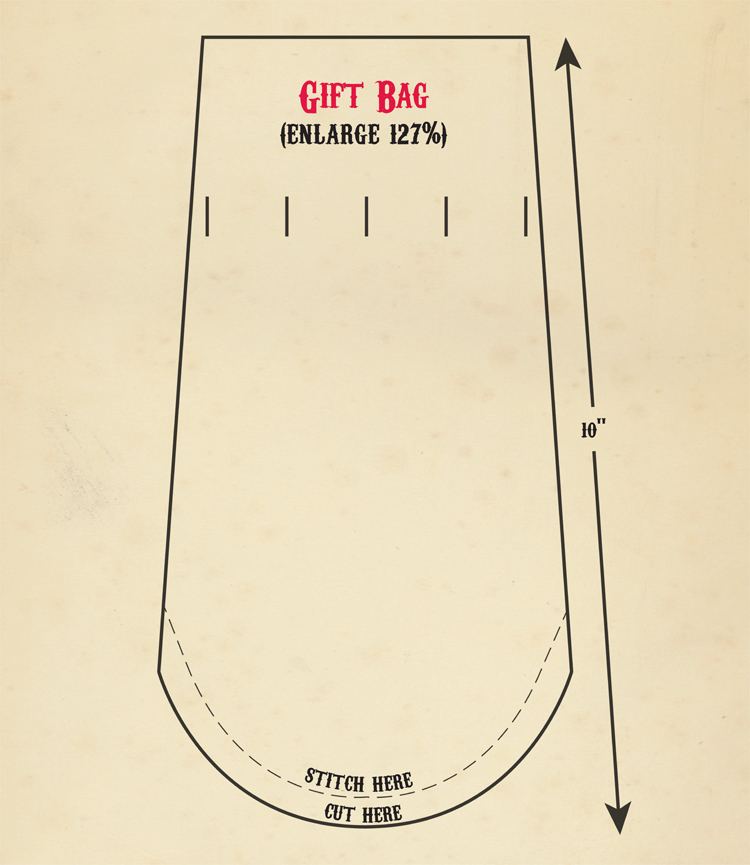
Download a PDF of template HERE.
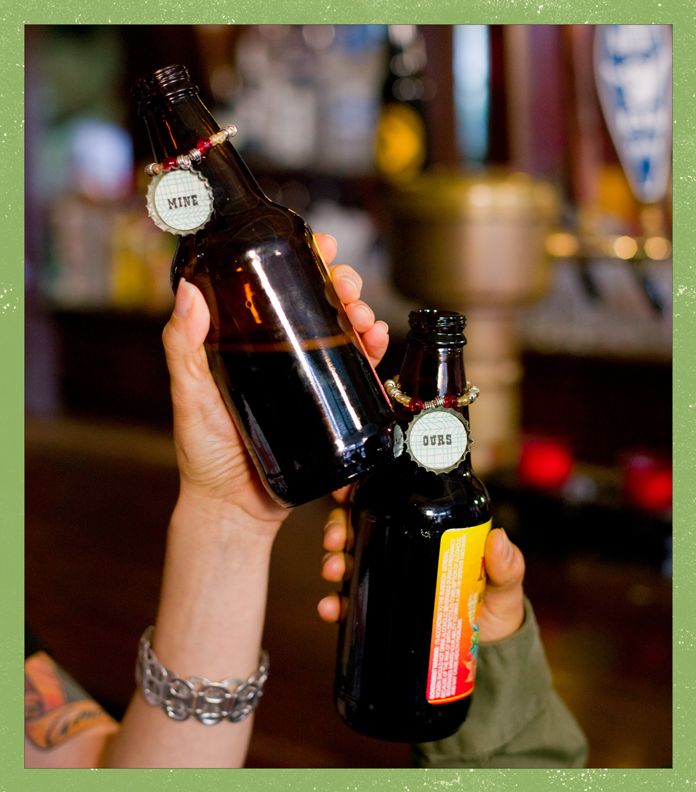

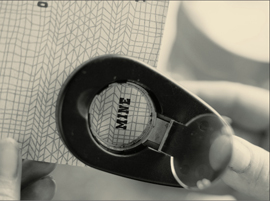
I have a hard time keeping track of my beer at parties. I’ll get to gabbing with friends, set down my cold one on the table, and then have no idea which bottle among the throng belongs to me. Back in the day, I’d pretty much drink whichever beer was closest, figuring the fuller, the better. That was up until I discovered that some people will use bottles for emergency ashtrays—lesson learned, the hard way. I’ve tried the old trick of peeling the label off my beer, but even that can lead to some confusion about which beer belongs to whom. With this project, we’ll all know which beer is his, hers, and theirs, the rest being all mine.
SUPPLIES
6 BOTTLE CAPS
LASER PHOTOCOPIER AND PAPER
CLEAR PACKING TAPE
SCISSORS
GLUE STICK
RESIN EPOXY SEALER OR GLOSSY ACCENTS, a clear, dimensional embellishment sealer
6 JEWELRY-BACK CHAIN ATTACHMENTS
6 JUMP RINGS
ELASTIC THREAD (see Note)
ASSORTED BEADS AND CHARMS
1 Open a beer. Think about ownership. This is your beer; it belongs to you. Think about how you’ll mark your territory.
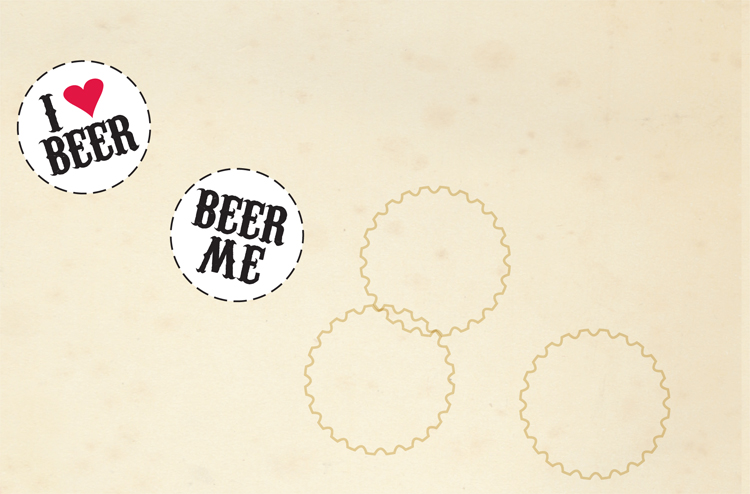
2Copy the cap templates with a laser photocopier or design your own, to create six cap inserts.
3Cover the front and back sides of the copied or designed cap inserts with clear packing tape. Cut out the cap insert shapes and use the glue stick to tack them to the inside of the caps.
4Fill the caps with sealant and let them dry overnight or as recommended by the manufacturer’s directions.
5Turn over each cap and attach a chain attachment with hot glue. Let cool.
6 Attach a jump ring to the back of each cap.
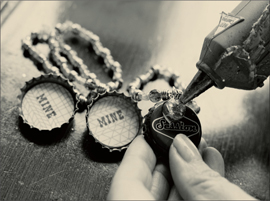
7 Tie a knot in a piece of elastic thread and string on enough beads to fit halfway around a beer bottle snugly. String on a cap and additional beads and tie off. Repeat for the remaining five caps.

It’s really important to use elastic thread for the charms. The tension from the elastic keeps the charm held up against the bottle neck instead of sliding forward and smacking you in the face when you go to take a swig—yet another lesson I learned the hard way.

Download a PDF of template HERE.


You love your beer; yes, you do. This affair of the heart is no secret. Your bartender knows it. The guy at the liquor store knows it. How about shouting it out loud and proud to the rest of the world? You can put all sorts of fun messages in a cap, as well as photos and artwork. Most craft stores carry paper punches that will cut paper perfectly to fit inside your cap, and you can go to town with your artsy self and throw in a little glitter and rhinestones, while you’re at it.
Make sure you’re printing your work with a laser printer. Some resins and sealers will make the ink from ink-jet printers run, and you’ll end up with a blurry pendant. If you’re unsure about your ink running, you can either test by making an extra copy and immersing the image in resin OR cover your print, front and back sides, in packing tape to make sure you don’t get a bleed.
SUPPLIES
LASER PHOTOCOPIER
RESIN EPOXY SEALER OR GLOSSY ACCENTS, a clear, dimensional embellishment sealer
BOTTLE CAP from a favorite beer
HOT GLUE GUN
PULL TAB from a can of beer, OR 1 PENDANT BACK
PLIERS (optional)
JUMP RING
NECKLACE CHAIN of desired length
1Copy the template with a laser photocopier. Cut out the design. Put a small dot of resin on the inside of your bottle cap and place the design on top. Allow to dry.
2Fill the cap with sealant and let it dry overnight or as recommended by the manufacturer's instructions.
3Hot glue the pull tab or pendant back to the back side of your cap.
4Using pliers or your fingers, open the jump ring and thread it through the top of the pull tab. Close the ring.
5Thread your chain through the jump ring.
Download a PDF of template HERE.