All of the assets for this exercise are provided in this book's source code. However, if you want to go through the steps of converting the models, here are the steps. For this exercise, we will be using Blender (v2.6).
Blender
If you do not have Blender, you can download it for your operating system from https://www.blender.org/download/.
If you do not have Blender, you can download it for your operating system from https://www.blender.org/download/.
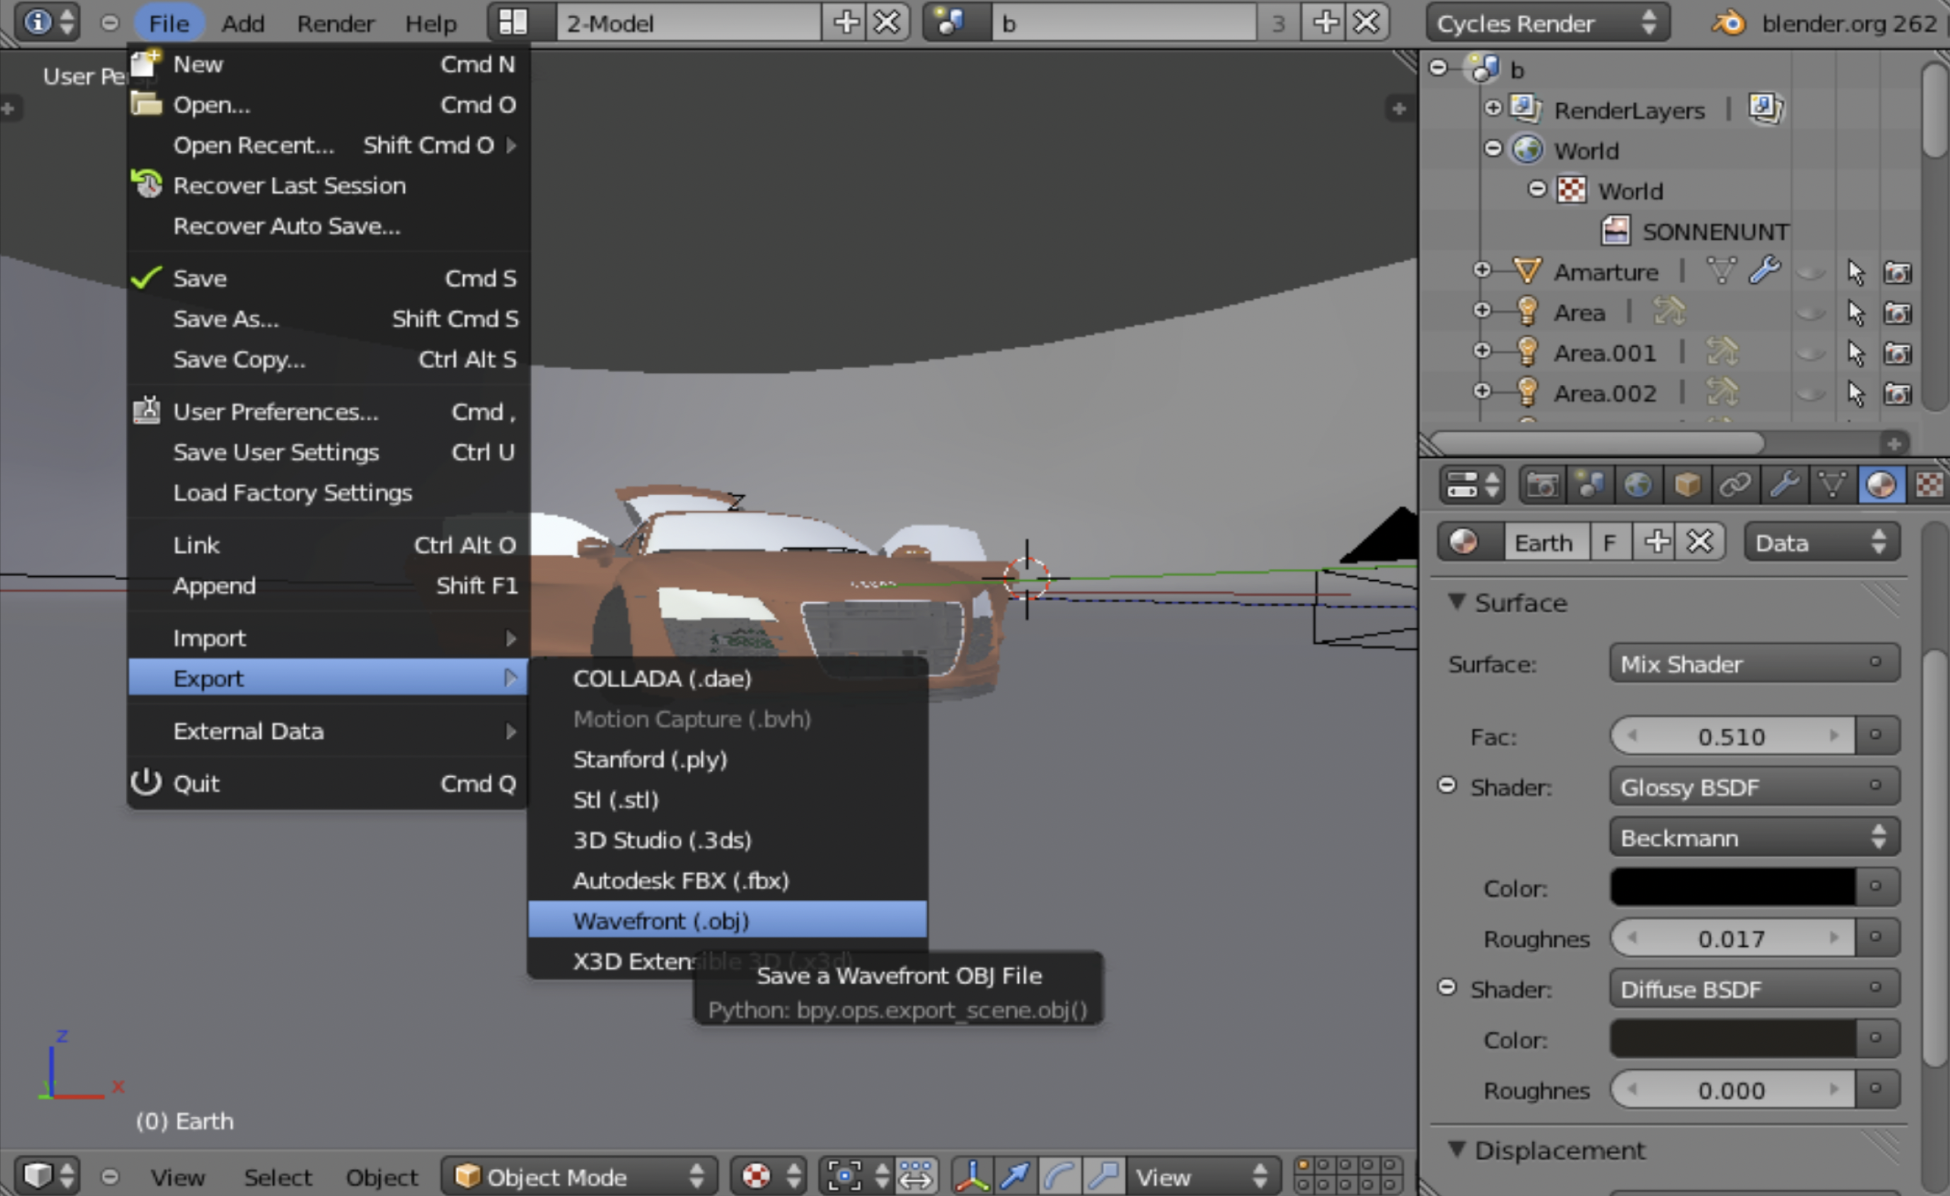
Once you have loaded the car into Blender, you need to export it as an OBJ file. To do so, go to File | Export | Wavefront (.obj), as shown in the following screenshot:
In the Export OBJ panel, make sure that the following options are active:
- Apply Modifiers: This will write the vertices in the scene that are the result of a mathematical operation instead of direct modeling. If you do not check this option, the model may appear incomplete in the WebGL scene.
- Write Materials: Blender will create the matching Material Template Library (MTL) file. We'll cover more on this in the following section.
- Triangulate Faces: Blender will write the indices as triangles. This is ideal for WebGL rendering.
- Entity as OBJ Objects: This configuration will identify every object in the Blender scene as an object in the OBJ file.
- Material Groups: If an object in the Blender scene has several materials, for example, a car tire that can be made of aluminum and rubber, then the object will be subdivided into groups, one per material in the OBJ file.
OBJ file. Then, click on Export. Once you have checked these export parameters, select the directory and name for your