Now, let's write a test for the multiplyByTwo() method of the SimpleMath class, because we would like to make sure that the multiplyByTwo() method works as expected. Such tests are useful as long as the project exists, because you can run them every time the code is changed, and verify that the existing functionality has not been changed accidentally.
A method is the smallest testable part of an application. That's why such a test is called a unit test. It is a good idea to have a unit test for each method that you create (except the trivial ones, such as getters and setters, for example).
We will use a popular test framework called JUnit. There are several versions of it. At the time of this writing, version 5 is the latest one, but versions 3 and 4 are still actively used. We will use version 5. It requires Java 8 or later, and we assume that on your computer, you have installed Java 9, at least.
As we have already mentioned, in order to use a third-party library or a framework, you need to specify it as a dependency in the pom.xml file. As soon as you do it, the Maven tool (or the built-in Maven feature of the IDE) will look for the corresponding .jar file in the Maven repository online. It will download that .jar to your local Maven repository in the .m2 folder, which was automatically created in the home directory on your computer. After that, your project can access it and use it at any time.
We have already set values in pom.xml for the dependency on JUnit 5 in the Maven project configuration section. But, let's assume that we have not done it yet, in order to show you how programmers usually do it.
First, you need to do some research and decide which framework or library you need. For example, after searching the internet, you may have read JUnit 5 documentation (http://junit.org/junit5) and figured that you need to set the Maven dependency on junit-jupiter-api. With that, you can search the internet again, and this time, look for maven dependency junit-jupiter-api, or just maven dependency junit 5. Chances are, the first link in your search results will bring you to the following page:
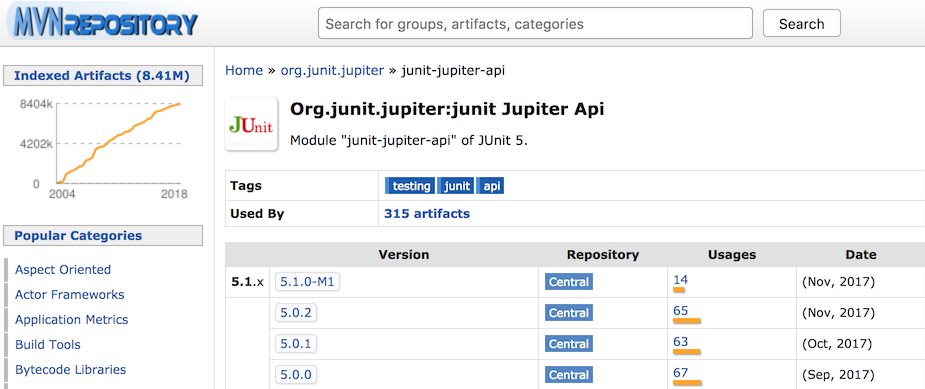
Select any version you like (we have chosen the latest, 5.1.0-M1) and click on it.
A new page will be opened, which tells you how to set the dependency in pom.xml:
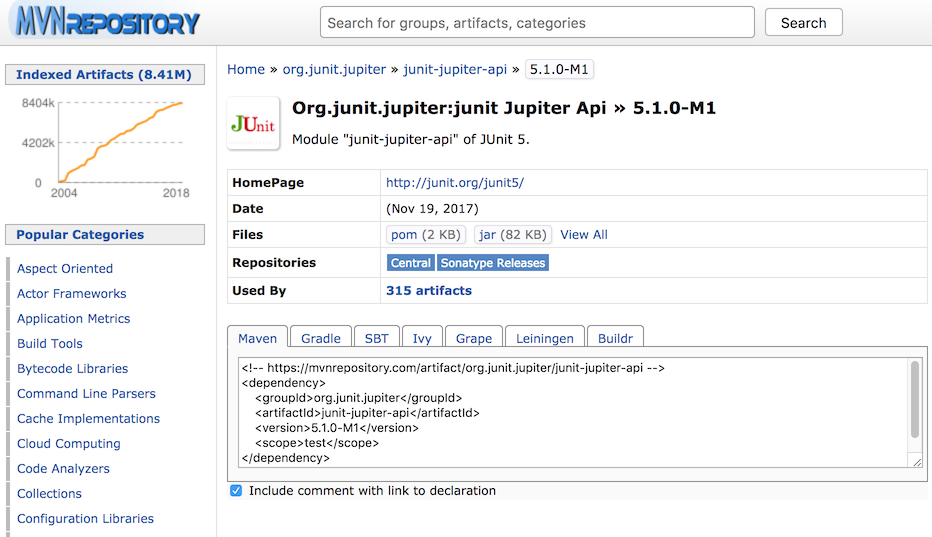
Alternatively, you can go to the Maven repository site (https://mvnrepository.com) and type junit-jupiter-api in its search window. Then, click on one of the provided links, and you will see the same page.
If you did not add the junit-jupiter-api dependency while reading the Chapter 3, Your Development Environment Setup, you can do it now by copying the provided dependency into your pom.xml file inside the <dependencies></dependencies> tag:

Now, you can use the JUnit framework to create a unit test.
In IntelliJ IDEA, the junit-jupiter-api-5.1.0-M1.jar file is also listed in the External Libraries folder, in the left pane. If you open the list, you will see that there are two other libraries that were not specified in the pom.xml file: junit-latform-commons-1.0.0-M1.jar and opentest4j-1.0.0.jar. They are there because junit-jupiter-api-5.1.0-M1.jar depends on them. That is what Maven does—it discovers all of the dependencies and downloads all necessary libraries.
Now, we can create a test for the SimpleMath class. We will use IntelliJ IDEA to do it. Open the SimpleMath class and right-click on the class name, then select Go To, and click on Test:

You will get a small pop-up window:

Click on Create New Test... and the following window will allow you to configure the test:
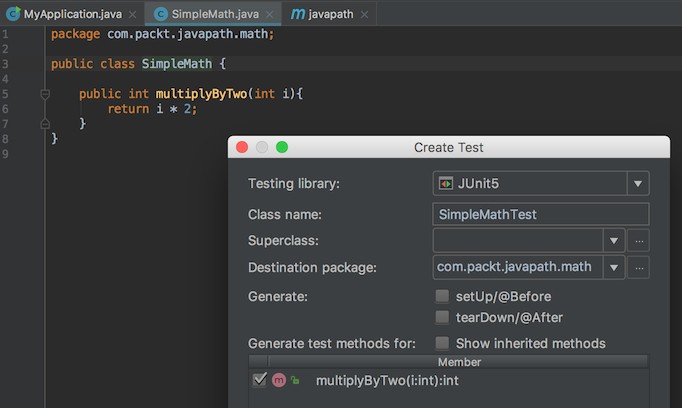
There is built-in support for JUnit 5 in IntelliJ IDEA. In the preceding screen, select JUnit5 for Testing library, and check the checkbox for the multiplyByTwo() method. Then, click the OK button in the bottom-right corner. The test will be created:

Notice that in the left pane, under the test/java folder, a package structure is created that matches the package of the SimpleMath class exactly. In the right pane, you can see the SimpleMathTest test class with one test (empty, so far) for the multiplyByTwo() method. The test method can have any name, but it has to have @Test in front of it, which is called an annotation. It tells the test framework that this is one of the tests.
Let's implement the test. For example, we can do it like this:
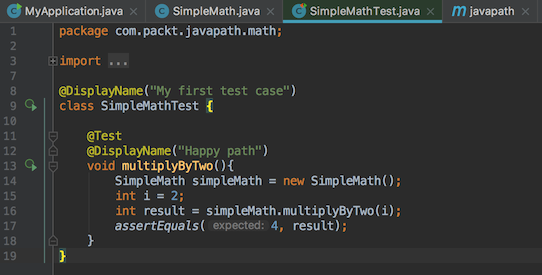
As you can see, we have created an object of the SimpleMath class and called the multiplyByTwo() method with a parameter of 2. We know that the correct result has to be 4, and we check the result using the assertEquals() method that comes from the JUnit framework. We also added the @DisplayName annotation to the class and to the test method. You will see what this annotation does shortly.
Let's now modify the mutliplyByTwo() method in the the SimpleMath class:

Instead of just multiplying by 2, we also add 1 to the result, so our test will break. It is a good practice to run a test on the incorrect code, first, so we can make sure that our test catches such errors.