Chapter 1: How Do I Get My Photos into iPhoto?
You’ve taken the photos with your digital camera and now you’re ready to add them to your iPhoto library so that you can view, improve, and use them. Importing photos from a digital camera takes only moments, but you can also import photos from folders on your Mac (or other computers) or directly from e-mail messages. If you have hard copies of photos (or other documents), you can also add them to your library by using Image Capture. First, take a moment to explore the iPhoto interface and set iPhoto’s preferences to suit your needs.
Navigating the iPhoto Interface
Setting iPhoto’s Preferences so You Can Work Quickly
Importing Photos
Scanning Photos Using Image Capture
Sharing a Scanner or Camera Using Image Capture
Telling Your Mac How to Handle Different Cameras
Navigating the iPhoto Interface
iPhoto, iLife’s photo-editing and viewing application, packs a ton of power into an easy-to-use interface, so first make sure you know what’s what in iPhoto. Figure 1.1 shows the main iPhoto window with the key elements labeled. Most of the action takes place in this window, but you can also expand iPhoto to a full-screen view so that you can see as much as possible of the albums or photos you’re working on.

1.1 The main iPhoto window.
 If you’ve upgraded to iPhoto ’11, use Software Update to download the latest updates for iPhoto before you run iPhoto for the first time. See the Appendix for details.
Here’s what the main elements in the user interface do:
• Source list. This pane shows your iPhoto library, recent items, libraries other people are sharing on your network, any connected devices (such as a digital camera), photo albums, MobileMe Gallery, keepsakes (such as books), and slide shows you’ve created. You can click the gray disclosure triangle to the left of a category to expand or collapse its contents.
• Viewing area. This is where you view your photos, either as small thumbnails or taking up the whole area. Drag the Zoom slider to change the size of the thumbnails. From here, you can open a photo for viewing or editing.
• Toolbar. This contains buttons for manipulating the photo or photos you’ve selected.
• Work pane. This pane on the right of the iPhoto window shows information about the photo or photos or other items you’ve selected, as well as tools for working with your selection. For example, when you click the Info button, you see the Information pane shown in the figure. When you click the Edit button, you see tools for editing the current photo.
Setting iPhoto’s Preferences so You Can Work Quickly
Before you start importing photos, take a few minutes to choose suitable settings for iPhoto’s preferences. Like most applications, iPhoto has several screens of these. Getting settings that suit you enables you to work much more quickly and comfortably.
Choose iPhoto→Preferences to display the Preferences dialog. Then, work through the following sections, choosing settings in the six categories as you go.
Choosing General preferences
The General preferences (see Figure 1.2) are essential for working quickly and easily in iPhoto, so you’ll want to check or change all of them.
If the General preferences are not automatically displayed when you choose iPhoto→Preferences, click the General button. You can then work through the following sections, choosing settings in the six categories as you go.
On the Sources line, select the Show last check box if you want to show the last 12 months album in the Source list. (An album is one way to group photos in iPhoto.) In the text box, you can change the number of months this album shows. For example, if you take many photos, two or three months may be a better choice than the last 12 months.
If you want to display the number of photos each item contains next to the item in the Source list, select the Show item counts check box. This setting can be helpful if you need to identify large groups of photos, but it can also be distracting.
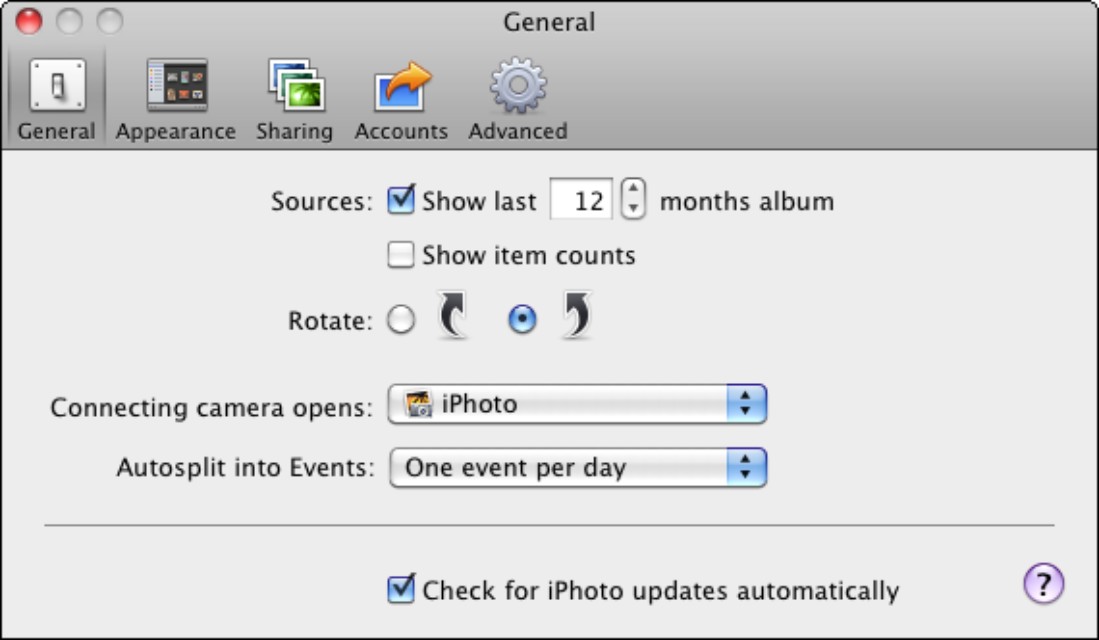
1.2 The General preferences let you tell iPhoto how to behave.
On the Rotate line, select the clockwise-rotation option or the counterclockwise-rotation option to specify the default direction of rotation. You can reverse the rotation by holding down Option as you click the Rotate button on the panel for editing a photo quickly.
In the Connecting camera opens pop-up menu, choose the application you want Mac OS X to launch when you connect a camera. If you use iPhoto for managing your photos, iPhoto is the best choice here. The alternatives are normally Image Capture and No application.
In the Autosplit into Events pop-up menu, choose how long you want each event to be. Your options are One event per day, One event per week, Two-hour gaps, or Eight-hour gaps.
 Events are the main means of dividing your photos into different groups. A photo can belong to only one Event, but you can move a photo from one Event to another as needed. iPhoto can automatically create Events for you based on the dates and times of the photos you import. You can also create Events manually if you prefer.
Select the Check for iPhoto updates automatically check box if you want iPhoto to automatically check for software updates when you launch it. Clear this check box if you prefer to use Software Update. The updates contain fixes for problems or other improvements to iPhoto, so it’s a good idea to check for them frequently and to install those you find.
Choosing Appearance preferences
In Appearance preferences (see Figure 1.3), choose how you want iPhoto to display and organize your photos.

1.3 In Appearance preferences, you can choose the border style, background color, how to organize the view, and the size of text in the Source list.
Experiment with the Photo Border settings — you can apply an outline, a drop shadow, or both — and the Background slider. iPhoto shows the changes immediately while you work in the Preferences dialog, so you can quickly find settings that suit you.
Select the Show reflections check box if you want to see a small reflection of the Event underneath it. This effect is visually cool, but of no practical use.
 The Photo Border settings and reflections make your Mac’s graphics card work harder. If iPhoto runs slowly on your Mac, turn off these options.
Select the Show informational overlays check box if you want iPhoto to display information about the current photos as you scroll down — for example, the month and year. Scrolling information is useful for locating photos within large albums or Events.
To choose the size of the text, click the Source Text pop-up menu, and then select Small or Large.
Choosing Sharing preferences
iPhoto’s Sharing preferences (see Figure 1.4) let you share your photos with other iPhoto users on your network and enjoy the photos they’re sharing.

1.4 Choose which of your photos to share and specify if you want to look for photos others are sharing.
To see the photos others are sharing, select the Look for shared photos check box.
To share your own photos, follow these steps:
1. Select the Share my photos check box. iPhoto enables all the controls below this check box.
2. Select the Share entire library option if you want to share all your photos. To share just some of it, select the Share selected albums option, and then select the check box for each album you want to share.
3. Type a descriptive name for your shared photos in the Shared name box.
4. If you want to password-protect your shared photos, select the Require password check box and type a password.
Choosing Accounts preferences
In iPhoto’s Accounts preferences (see Figure 1.5), you can set up the e-mail accounts and social networking accounts that you will use directly from iPhoto.
When you open Accounts preferences, iPhoto automatically loads details for various accounts you have set up on your computer. You’ll find instructions for removing an account later in this chapter.

1.5 In Accounts preferences, set up the e-mail and social networking accounts you want to use directly from iPhoto.
When you first open the Accounts preferences pane, it displays the e-mail accounts that you have set up on your Mac. To add another account, such as MobileMe, Facebook, or Flickr, click the add (+) button. iPhoto displays the Add Account pane (see Figure 1.6), and you can then work as described in the following four subsections.

1.6 In the Add Account dialog, click the type of account you want to add to iPhoto, and then click the Add button.
Adding a MobileMe account to iPhoto
To add a MobileMe account to iPhoto, follow these steps:
1. In the Add Account pane, click the MobileMe button.
2. Click Add. iPhoto displays the Log in to the MobileMe dialog (see Figure 1.7).
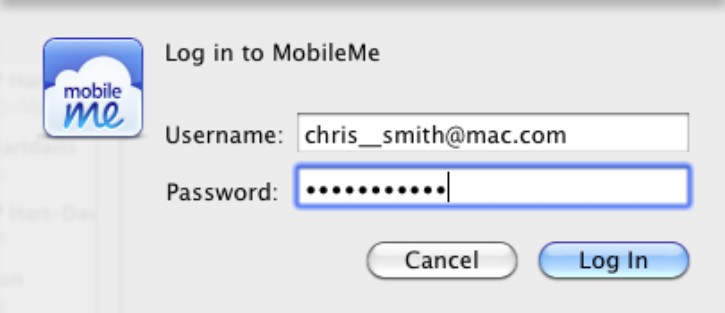
1.7 To add a MobileMe account to iPhoto you need provide only your username and password.
3. Type your username and password.
4. Click Log In. iPhoto validates the information with the MobileMe service and then adds the account to the Accounts list.
Adding a Facebook account to iPhoto
To add a Facebook account to iPhoto, follow these steps:
1. In the Add Account pane, click the Facebook button.
2. Click Add. iPhoto displays the Login to Facebook dialog (see Figure 1.8).
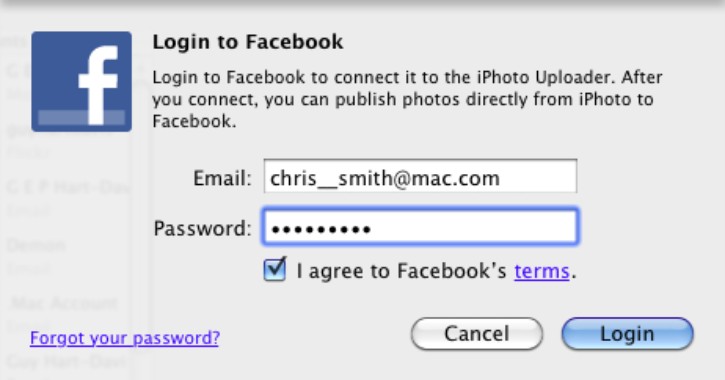
1.8 When adding a Facebook account to iPhoto you must agree to Facebook’s terms.
3. Type your e-mail address and password.
4. Select the I agree to Facebook’s terms check box. Click the terms link if you want to read through the terms first.
5. Click Login. iPhoto validates the information with Facebook and then adds the account to the Accounts list. The main part of the pane displays a message that your Facebook account is enabled.
Adding a Flickr account to iPhoto
To add a Flickr account to iPhoto, follow these steps:
1. In the Add Account pane, click the Flickr button.
2. Click Add. iPhoto displays the Do you want to set up iPhoto to publish to Flickr? dialog (see Figure 1.9).
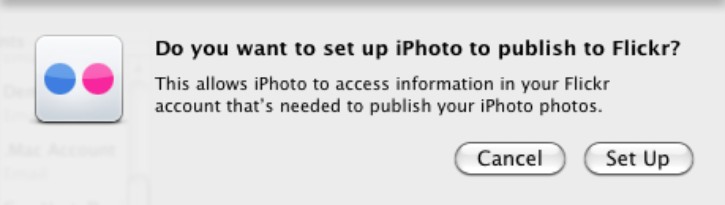
1.9 To add a Flickr account to iPhoto, click Set Up in the Do you want to set up iPhoto to publish to Flickr? dialog.
3. Click Set Up. iPhoto launches or activates your default Web browser (for example, Safari) and displays the Yahoo! login page for Flickr.
4. Log in to your Flickr account as usual. The browser then displays the first Flickr: Authorize iPhoto Uploader page, which checks that you’ve deliberately made this request from iPhoto (as opposed to malware faking the request).
5. In the shaded “If you arrived at this page because you specifically asked iPhoto Uploader to connect to your Flickr account, click here” box, click the Next button. The browser then displays the second Flickr Authorize iPhoto Uploader page, which details the permissions you give to the iPhoto Uploader (such as uploading photos to your Flickr account).
6. Click the “OK, I’ll Authorize It” button. The browser displays a page telling you that you’ve authorized iPhoto Uploader.
7. Close the Flickr tab or window in the browser. The browser sends iPhoto a signal saying that you’ve authorized the account. iPhoto closes the Do you want to set up iPhoto to publish to Flickr? dialog, adds the account, and displays a message saying that the Flickr account is enabled.
Adding an e-mail account to iPhoto
To add an e-mail account to iPhoto, follow these steps:
1. In the Add Account pane, click the e-mail button.
2. Click the Add button. iPhoto displays the Choose Service dialog (see Figure 1.10).

1.10 To add an e-mail account to iPhoto, select the e-mail provider in the Choose Service dialog.
3. Click the e-mail provider for the account. For example, if you have a Hotmail account or MSN account, click the Windows Live Hotmail button.
4. Click the Add button. iPhoto displays a dialog containing fields for the information required to set up the account. For example, Figure 1.11 shows the Add Hotmail Account dialog.

1.11 Type the details of the e-mail account in the dialog that iPhoto displays. The various types of accounts require different pieces of information.
5. Click OK. iPhoto validates the information with the e-mail provider and adds the account to the Accounts list.
Removing an account from iPhoto
If the Accounts list includes an account that you don’t want to use from iPhoto, you can remove the account from the list. For example, if you have several e-mail accounts set up in Mail by the time you open Accounts preferences, iPhoto grabs all of their details, even if you want to use only some of them.
To remove an account, click it in the Accounts list and then click the Remove (–) button. iPhoto confirms the removal, double-checking about any items that it will remove from your iPhoto library as a result. Figure 1.12 shows the dialog for removing a Flickr account to which you’ve published albums from iPhoto. Click the Remove button if you want to go ahead.
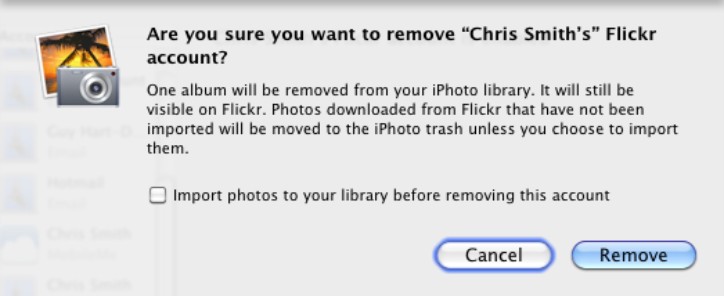
1.12 When you remove an account from iPhoto’s preferences, iPhoto warns you about any items (such as albums) that it will delete from your library.
Choosing Advanced preferences
iPhoto’s Advanced preferences (see Figure 1.13) contains widely varied settings — but many you’ll find helpful to set.
In the Importing area, select the Copy items to the iPhoto Library check box if you want iPhoto to make copies of photos you import from folders on your Mac or your network. This is iPhoto’s normal behavior, and it’s usually helpful because it puts all your photos in one place and makes backup simpler. But if you already have a ton of photos on your Mac and want to use the photos in their current folders, clear this check box to prevent iPhoto from making copies of them. You’ll need to make sure you back up the current folders as well as your iPhoto library.
If you clear the Copy items to the iPhoto Library check box, iPhoto adds to your library only a reference to each photo you import — a pointer that tells iPhoto in which folder the photo is located. But if you edit the photo in iPhoto and save the changes, iPhoto creates a copy of the photo so that it can save the changes while leaving the original untouched. This setting doesn’t affect files you import from your digital camera.

1.13 In the Advanced preferences, choose whether to copy items to your library, how to edit photos, how to handle RAW photos, and whether to look up Places.
In the Edit Photos pop-up menu, choose how you want to edit your photos. If you want to use iPhoto, which you’ll want to do if you don’t have another photo-editing application, choose In iPhoto. If you want to use another application, such as Adobe Photoshop CS, choose that application from the list. In the RAW Photos area, choose how to deal with RAW images. If you’re unfamiliar with RAW images, see the sidebar, “Understanding What RAW Image Files Are.”
• Use RAW when using an external editor. Select this check box to use an external graphics editor (such as Photoshop or Aperture) for editing your RAW image files. With this check box selected, iPhoto passes the RAW image file to the external graphics editor, rather than passing the JPEG or TIFF file that iPhoto uses (see the next option).
• Save edits as 16-bit TIFF files. When you import or edit a RAW image file, iPhoto normally saves the result as a JPEG file, which has lower quality but takes up less space. Select this check box to make iPhoto save the imported edited file as a 16-bit TIFF file instead, which is higher quality than the JPEG file.
In the Look up Places pop-up menu, choose whether to look up the places in your photos. The choice is simple: Automatically or Never.
Select the Include location information for published photos check box if you want iPhoto to include location information in photos you publish online. Including location information can be useful for both business purposes and personal publishing, but for reasons of privacy you may prefer that others do not know where you took each photo.
On the e-mail line, select the Automatically Bcc myself check box if you want iPhoto to automatically send your e-mail account a BCC copy of each message you send via e-mail. Most e-mail applications and services automatically keep copies of messages you’ve sent in a folder with a name such as Sent, but if your application or service doesn’t, you can select this check box to keep copies.
In the Print Products Store pop-up menu, select the country in which you want to order print products, such as books and cards.
Importing Photos
After you choose preferences, you’re ready to import photos from your digital camera, memory card, folder, or even an e-mail message.
Importing photos from your digital camera
Here’s how to import photos from your digital camera:
1. If the camera connects directly to your Mac via USB, connect the camera and turn it on if it doesn’t turn on automatically. Otherwise, remove the memory card from the camera and insert it in a memory card reader connected to your Mac.
2. When Mac OS X notices the camera or memory card containing photos, it launches or activates iPhoto and displays the photos, as shown in Figure 1.14.

1.14 Mac OS X automatically opens iPhoto and displays thumbnails of the photos on the camera or storage card you’ve connected.
3. Type a descriptive name for the event in the Event Name text box.
4. If you want iPhoto to split the photos into different events by date and time, select the Split Events check box at the bottom of the screen. iPhoto uses the event length you set in Events preferences earlier in this chapter — for example, one day or two hours.
5. If the camera or memory card contains photos you’ve imported before, select the Hide Photos Already Imported check box to make iPhoto hide these photos so you don’t try to import them again. Hiding the photos you’ve already imported also lets iPhoto show you the new photos on the camera or memory card more quickly.
If you chose No application or another application than iPhoto in the Connecting camera opens pop-up menu in iPhoto’s General preferences (as discussed earlier in this chapter), you must import the photos into iPhoto manually. See the next section in this chapter for details. If you want Mac OS X to activate iPhoto for some cameras but not for others, see the final section in this chapter.
If you want to add photos to a specific album, you can simply drag them from the camera or memory card to that album. In the album, iPhoto creates references to the photos so they show up in it. iPhoto also adds the photos to your library, as usual.
6. Choose which photos you want to import.
• To import all the photos shown, click Import All.
• To import only some of the photos, select them by dragging across a range, or by clicking the first photo and holding down  while you click each of the other photos. Then click Import Selected.
7. iPhoto imports the photos you chose, and then prompts you to delete the photos from the camera or memory card (see Figure 1.15). To delete the photos, click Delete Photos; to keep them on the camera, click Keep Photos.

1.15 Choose whether or not you want iPhoto to delete photos from the camera or memory card.
Having iPhoto delete your photos automatically from your digital camera after import can be convenient, but often it’s better to keep the photos on the camera until you’ve checked that iPhoto has imported them successfully. You may also want to keep the photos on the digital camera so that you can import them on another computer.
Dealing with duplicate imported photos
When importing pictures from a camera, it’s all too easy to import some of them twice. For example, maybe you forgot to reformat the memory card after putting it back in the camera.
iPhoto helps you avoid duplicate imports by displaying the Duplicate Photo dialog, as shown in Figure 1.16, to warn you when you’re about to import a photo you’ve already added, even if you’ve changed the version that’s already in iPhoto.
Select the Apply to all duplicates check box if you want iPhoto to apply your decision to all duplicate photos in the batch you’re importing, rather than prompt you to rule on each one. Then, click Import if you want to import the photo anyway, Don’t Import to skip importing it, or Cancel if you want to cancel the import.
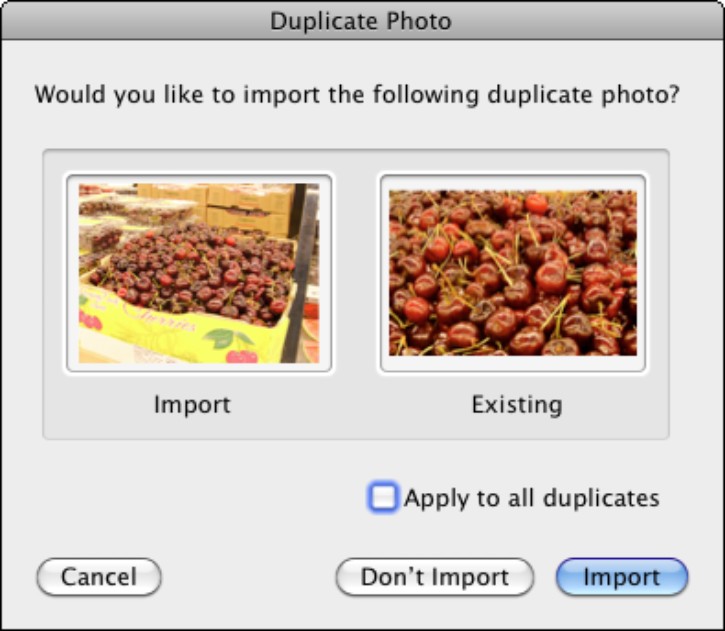
1.16 iPhoto makes certain you know you’re importing a duplicate photo. In this example, the version that’s already in the library has been changed.
Never unplug your digital camera or memory card reader without ejecting it. Doing so normally produces a Device Removal error message in Mac OS X, but it can also cause iPhoto or even Mac OS X to stop responding. If iPhoto stops responding, Ctrl-click or right-click its icon on the Dock, and then click Force Quit to close the application.
Ejecting the camera or memory card
After importing all the pictures you want from the camera or the memory card, eject the camera or memory card by clicking the Eject button next to it in the Source list. Alternatively, Control+click or right-click the camera or memory card in the Source list, and then click Eject. When iPhoto removes the camera or memory card from the Source list, you can safely unplug it.
Importing photos with the Import command
If your photos are in a folder, or on a CD or DVD, rather than on a camera or a memory card, you can bring them into your library by using the Import command:
1. Choose File→Import to Library or press +Shift+I to open the Import Photos dialog.
2. Select the photos you want to import. You can import either an entire folder, or one or more photos from within a folder.
3. Click Import.
Importing photos from the Finder or e-mail
Instead of using the Import command, you can also add photos to your library via a Finder window. Simply select a photo — or several, or a folder containing photos — in a Finder window and drag it to the viewing area in iPhoto.
If you receive a photo in the body of an e-mail message, you can also drag the photo from your e-mail application (such as Mail or Entourage) to the viewing area in iPhoto.
If you receive a photo as an attachment in Mail, click and hold down the Save button on the attachment line. Then choose Add to iPhoto from the menu that appears. In other e-mail applications, you may need to save the attached photo to a folder and then drag the photo from a Finder window to the viewing area in iPhoto.
Understanding Which Picture Formats iPhoto Can Handle
You can use the following three photo file formats in iPhoto:
• JPEG. A file format developed by the Joint Photographic Experts Group, JPEG is the most widely used format for digital photos. JPEG typically uses lossy compression (compression in which data is discarded) to reduce the file size of the photos, but maintains high-enough quality for general use. Many digital cameras take only JPEGs; others take JPEGs unless you change the file format.
• TIFF. The Tagged Image File Format uses either no compression or lossless compression (compression in which no data is discarded) to store images at full quality. Some digital cameras can create TIFF files as well as JPEG files.
• RAW. As discussed earlier in this chapter, a RAW file is a digital negative that stores minimally processed data. When you work with RAW files in iPhoto, it saves the results as either a JPEG or TIFF file, depending on what you selected in Advanced preferences.
These three file formats can all contain metadata — information about the photos, such as the date and time they were taken, the camera and exposure used, and other details. You can view this information by choosing Photos→Show Extended Photo Info or by pressing +I. iPhoto can read metadata from all three formats, but can write metadata only to the JPEG and TIFF formats.
You can import other types of photos into iPhoto, such as PNG (Portable Network Graphics) files, but iPhoto doesn’t fully support them.
Scanning Photos Using Image Capture
To get photos that you have as prints (hard copies) into your iPhoto library, you need to create digital versions of the photos by using a scanner. If your scanner has a film attachment, you can also scan negatives or slides.
Scan at a high bit depth and resolution to get as high-quality a file as possible. You can then create lower-resolution versions from iPhoto if you need them. Watch the little Size readout above the Scan To Folder pop-up menu to see the file size of the scanned image.
Mac OS X includes a powerful scanning application called Image Capture that you can use to control most scanners. However, if your scanner came with its own software, you may prefer to use that application instead because it may offer extra features that tie in with the scanner’s capabilities.
Here’s how to scan a picture using Image Capture:
1. Turn on the scanner and place the picture on the scanning surface. If you want to scan multiple pictures at once, place each of them on the scanning surface with some space between them so that Image Capture can identify each separate picture.
Scanning multiple pictures at the same time can be a great timesaver, but each picture receives the same type of image correction (for example, adjusting the brightness or color temperature). Make sure the pictures you scan at the same time need similar treatment.
2. Press the Start or Wake-up button on the scanner. Your Mac notices the scanner and launches Image Capture.
3. Image Capture makes the scanner run a quick scan of the picture or pictures to provide an overview, which it then displays (see Figure 1.17). If you’re scanning multiple items, make sure the Detect Separate Items check box is selected.
4. If you want to scan a picture quickly, choose the destination folder in the Scan To pop-up menu. Click Scan, and skip the rest of these steps. Usually, though, you’ll want to choose settings. To do so, click Show Details to display the scanning controls (see Figure 1.18).
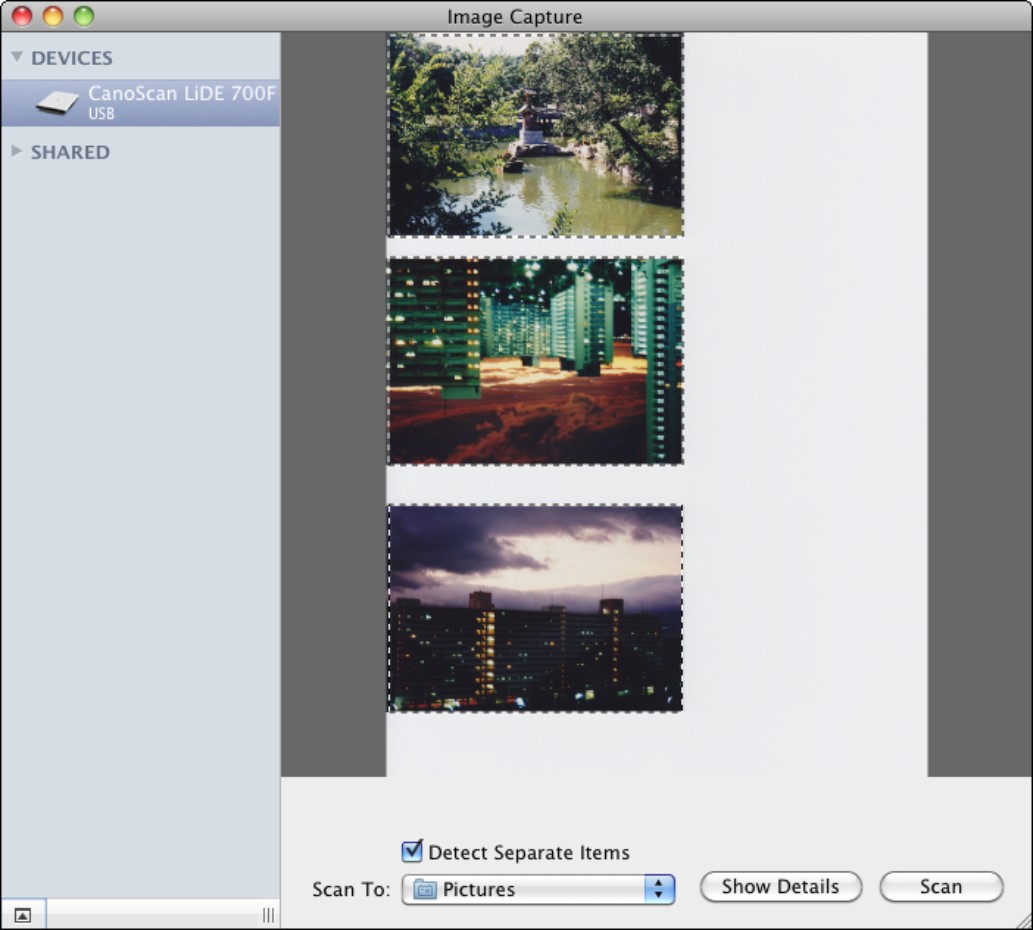
1.17 Image Capture is Mac OS X’s built-in application for scanning pictures. Unless you want to scan with default settings, click Show Details to display the scanning controls.
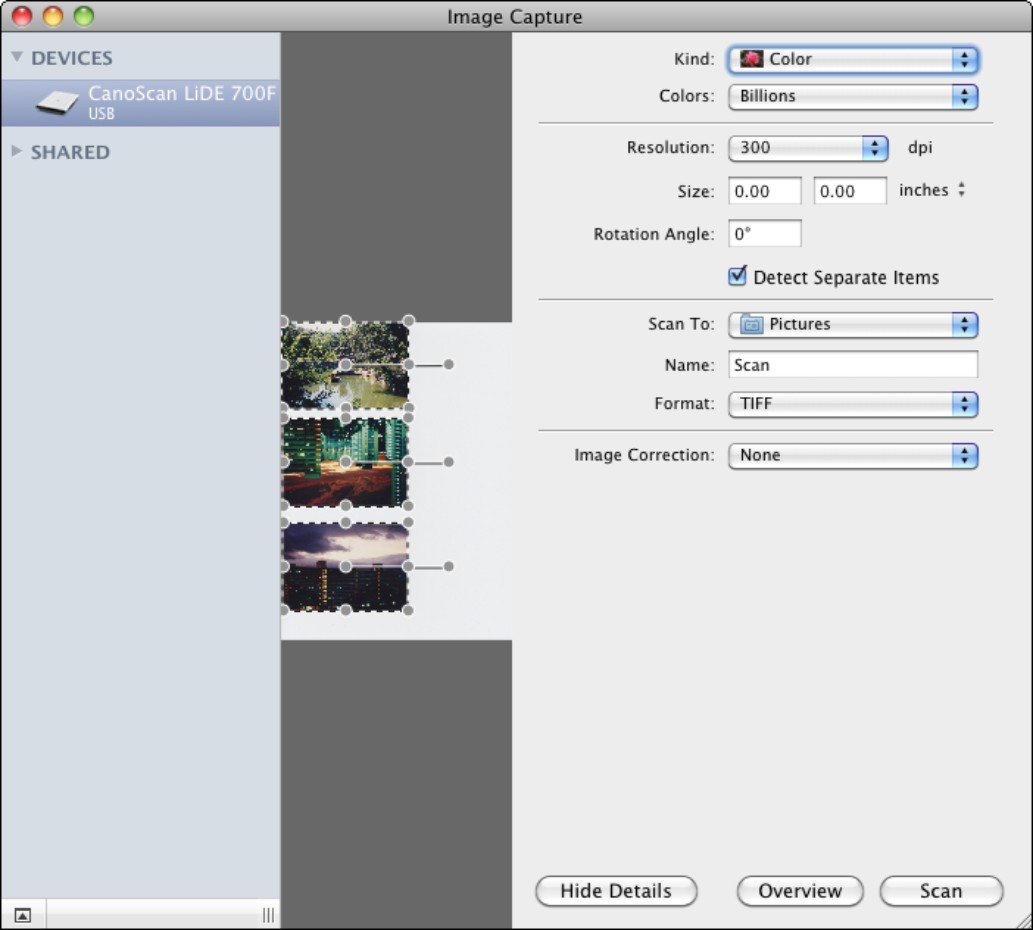
1.18 Image Capture’s scanning controls let you choose what kind of scanned pictures to produce, where to store them, and what to name them. You may see different controls depending on your scanner.
5. In the Kind pop-up menu, choose the scan kind: Color, Black & White, or Text.
6. In the second pop-up menu at the top of the right pane, choose how many colors or grays to use:
• If you choose Color in the Kind pop-up menu, choose Millions or Billions in the Colors pop-up menu.
• If you choose Black & White in the Kind pop-up menu, choose 256 Grays or Thousands of Grays in the Grays pop-up menu (which replaces the Colors pop-up menu).
7. In the Resolution pop-up menu, choose the resolution. For good results in photographs, choose 300 dots per inch (dpi). Using resolutions higher than this will make the files much larger and also make the scans take longer, so it may not be worthwhile.
8. When scanning a single picture, use the Size boxes to adjust the width and height of the area you’re scanning. You can choose pixels, inches, or centimeters in the pop-up menu to the right of the boxes. For either a single picture or multiple pictures, you can drag the handles around the selected part or parts of the image.
9. If you need to rotate the picture or pictures, type the angle in the Rotation Angle text box. For example, type 90 degrees to rotate the pictures a quarter-turn to the right.
10. In the Scan To pop-up menu, choose the folder in which you want to store the scanned files.
11. Type a name for the scanned files in the Name box. When you scan multiple pictures, Image Capture adds numbers after this name to distinguish the files — for example, Japan.tiff for the first photo, Japan 1.tiff for the second, and Japan 2.tiff for the third.
12. Select the format in the Format pop-up menu. Your choices are JPG, TIFF, PNG, JPEG 2000, and PDF. TIFF is the best choice for high-quality pictures you will use with iPhoto. JPEG 2000 is the best choice for compressed pictures for use with iPhoto. JPG is good for general use on the Web or with older operating systems. PNG is good for high-quality Web use. PDF is good for scanning documents.
13. If you need to tweak the colors on the image, open the Image Correction pop-up menu and choose Manual instead of Automatic. You can then use the Brightness, Tint, Hue, and Saturation sliders that Image Capture displays (see Figure 1.19) to produce the colors you want.
14. Click Scan to scan the picture. Image Capture saves the files using the folder and filenames you specified.
15. Scan further images as necessary or quit Image Capture.

1.19 Choose Manual in the Image Correction pop-up menu if you need to adjust the colors in the picture you’re scanning.
Sharing a Scanner or Camera Using Image Capture
Image Capture makes it easy to share a scanner or camera among the Macs on your network. By sharing a scanner, you avoid having to move it from one Mac to another, or buying a scanner for each Mac. You can also share a camera so that any computer on the network can access its contents.
Sharing a scanner using Scanner Sharing
To share a scanner, first set up Scanner Sharing on the Mac to which the scanner is connected:
1. Choose Apple→System Preferences to open the System Preferences window.
2. Choose View→Sharing from the menu bar to open the Sharing pane.
3. In the Services list on the left, select the Scanner Sharing check box. Mac OS X turns on Scanner Sharing and displays the Scanner Sharing pane (see Figure 1.20).
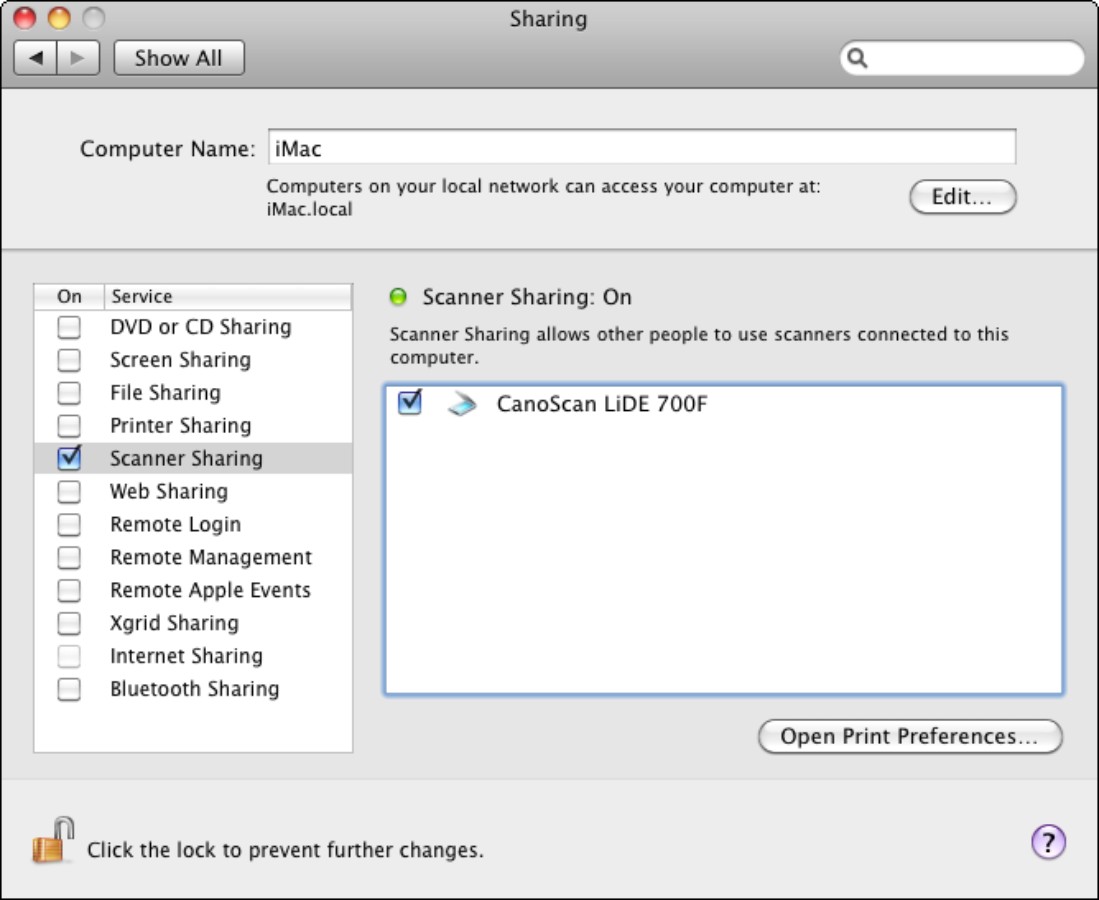
1.20 To share a scanner or camera with other Macs and PCs on your network, select the Scanner Sharing check box in Sharing preferences.
4. In the list of scanners, select the check box for the scanner you want to share.
5. Choose System Preferences→Quit System Preferences or press +Q to quit System Preferences.
Sharing a camera using Image Capture
You can also use Image Capture to share a camera on the network. This is great for when you need to give several people access to the same photos directly from the camera, without connecting it to each Mac or PC in turn.
Here’s how to set up Image Capture on the Mac to which you connect the camera:
1. Click the desktop, choose Go→Applications, and then double-click Image Capture to open Image Capture.
2. In the Devices list on the left, click the camera. Image Capture displays the camera’s contents.
3. In the lower-left corner of the Image Capture window, click the Show Device Settings button (the button with the upward triangle). Image Capture displays the camera’s settings pane in the lower-left corner of the window (see Figure 1.21).

1.21 Use the Device Settings pane in the lower-left corner of the Image Capture window to share a camera with other Macs and PCs on your network.
4. Select the Share camera check box.
5. Choose Image Capture→Quit Image Capture if you’re ready to quit Image Capture.
Connecting to a shared scanner or camera
Now that you’ve shared the scanner or camera, you can connect to it from another Mac like this:
1. Click the desktop, choose Go→Applications, and then double-click Image Capture to open Image Capture.
2. In the left pane, click the disclosure triangle next to the Shared category to display the shared devices.
3. Click the shared scanner or camera you want to use.
You’re now ready to use the scanner or camera across the network, just as if it were connected to your Mac rather than the remote Mac.
If you see the message “The scanner is being used by a remote user” when you try to connect to a remote scanner, but you know you’re the only remote user, Image Capture is open on the Mac that’s sharing the scanner. Quit Image Capture on that Mac, and you’ll be able to use the scanner on your Mac.
Telling Your Mac How to Handle Different Cameras
If you use multiple digital cameras, you may want your Mac to treat each one differently. For example, you may want to have iPhoto open when you connect your digital SLR, but not when you connect your iPhone, even though the iPhone has a digital camera.
To tell your Mac how to handle different cameras, you use Image Capture. Follow these steps:
1. Connect the camera you want to affect.
2. Click the desktop, choose Go→Applications, and then double-click Image Capture to open Image Capture.
3. In the Devices list on the left, click the camera. Image Capture displays the camera’s contents.
4. In the lower-left corner of the Image Capture window, click the Show Device Settings button (the button with the upward triangle). Image Capture displays the camera’s settings pane in the lower-left corner of the window.
5. Open the Connecting this camera opens pop-up menu, and then click the item you want:
• No Application. Select this item if you don’t want Mac OS X to launch an application when you connect this camera.
• iPhoto. Select this item to launch iPhoto. On most Macs, this is the default setting.
• Image Capture. Select this item to launch Image Capture.
• Preview. Select this item to launch Preview. You can then import photos by choosing File→Import from Camera, where Camera is the name by which Mac OS X knows the camera.
• AutoImporter. Select this item to import photos automatically using Image Capture’s AutoImporter feature. If you use this, you need to choose settings for AutoImporter. Open a Finder window, go to the /System/Library/Image Capture/Support/Application/ folder, and then double-click the AutoImporter item to launch the AutoImporter application. Choose AutoImporter→Preferences from the menu bar to display the AutoImporter Preferences window (see Figure 1.22), and then choose the destination folder for imports, whether to create a subfolder, and whether to delete items from the camera after import. Choose AutoImporter→Quit AutoImporter when you’ve made your choices.

1.22 If you decide to use Image Capture’s AutoImporter feature to import photos automatically, set the destination folder in AutoImporter Preferences.
• Other. Click this item to display a dialog in which you can choose a different application to open when you connect the camera.
6. Choose Image Capture→Quit Image Capture if you’re ready to quit Image Capture.