There’s a lot to do as summer approaches. Enlist some help and get your warm-weather seeds in the ground.
There’s a lot to do as summer approaches. Enlist some help and get your warm-weather seeds in the ground.
May could be the most pleasant month to be in the garden. The sun reestablishes its dominance. The days slowly lengthen. The wind gives way to a breeze, picking up the fresh scent of unfurling leaves. The plants are showing the effect of spring rains and warming temperatures. Fruit trees are so heavy with blossoms that we celebrate them with festivals. Of course, the insects are back, but that’s not all bad. By now, we’re enjoying eating from the garden and planting is in full swing. Successions of cool-season vegetables, such as arugula, beets, radishes, lettuce, peas, and spinach are turning salad into a banquet. But their days are numbered, and it’s time to move the sun worshipers outdoors and get the garden set up for the sprint into summer.
 Make notes on the weather, which vegetables did well, and what to plant more of next spring
Double-check that you have all the seeds you need
Shop for transplants
Weed and mulch
Start a new compost pile
Scout for signs of insects and eggs
Cover seedlings that need protection from early season pests
Keep row covers handy for late spring frost warnings
Thin seedlings of beets, carrots, and salad greens
Set up trellises for vining crops
Place cutworm collars on new transplants
Remove blossoms from new strawberry plants
Plant sweet potatoes
Direct sow: beans, broccoli raab, corn, cucumbers, lettuce, melon, okra, pumpkins, rutabaga, and squash
Transplant outdoors: basil, celery, cucumbers, eggplants, endive, kohlrabi, melon, mint, okra, peppers, pumpkins, squash, thyme, and tomatoes
TIP Transplant these after the last frost date.
Arugula
Asparagus
Broccoli raab
Fava beans
Fiddleheads
Garlic scapes
Green onions
Lettuce
Radishes
Rhubarb
Spinach
Swiss chard
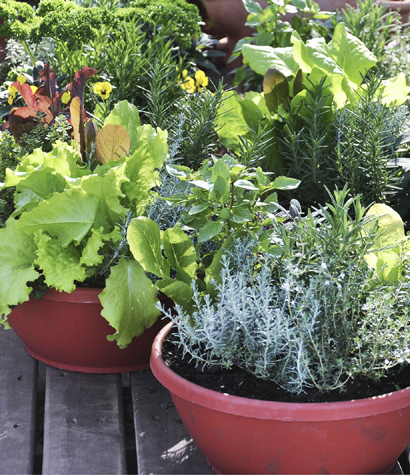
No vegetable garden is complete without herbs. Tomato dishes need basil. Mint excites peas. Chives make the baked potato. Herbs don’t need a lot of space; you can tuck them in between vegetables or give them a spot of their own. I plant my perennial herbs—sage, lavender, oregano, and thyme—in a corner of my vegetable garden, where they can grow undisturbed. I plant the annuals within the other vegetable beds. Many of the annual herbs attract beneficial insects, so they are doing double duty.
The key is to keep your herbs handy so you’ll use them often. When I go to the garden to see what looks good for dinner, the herbs are right there with my vegetables. Most herbs are also ideal for containers and can be grown near the kitchen or even inside on a sunny windowsill.
Sun is the secret to growing herbs. With the exception of mint, kitchen herbs need 6 to 8 hours of sun a day to thrive and become flavorful. Give them a little water and well-draining soil and they’ll take off with the warming weather.
What herbs do not need is lots of fertilizer or an overly rich soil. Although feeding them will give you lush, green growth, growing them on the lean side will concentrate their essential oils and intensify their flavors. You can coax more growth by pinching and snipping (and then using); every time you cut them back, you encourage the plants to branch out and get bushier. One of the biggest mistakes gardeners make with herbs is being afraid to cut them. The best flavor comes from herbs that are actively growing. Left unused, herb plants will flower and go to seed, which can make them tough and bitter, so don’t be afraid to indulge and enjoy.
These herbs are right at home in a New Jersey garden.
Basil. This fast-growing annual is as aromatic as it is tasty, and it comes in dozens of varieties with flavors from minty, to crisp and citrusy, to warm and spicy.
Bay. This small tree is best grown in a container in New Jersey because it needs to be brought indoors for the winter. Its fresh leaves have a pungent musky, mint flavor, and one leaf will work magic in a recipe. They make excellent houseplants.
Chives. This perennial herb is one of the first green shoots of spring. Clip entire blades and the plants will regrow. Its delicate onion flavor is best enjoyed uncooked.
Cilantro. Love it or hate it, cilantro needs to be grown quickly in the cool of spring or fall. Its distinct aroma and flavor make it a staple ingredient in many Mexican and Asian cuisines.
Dill. The aroma of this lovely, feathery plant is so strong you will pick up the fragrance from across the yard. Both the delicate leaves and the seeds are used in cooking, and even the flowers are edible.
Fennel. Fennel may look similar to dill, but it’s flavor is reminiscent of minty licorice. This biennial goes to seed in its second year. It will readily self-sow, and both the seeds and flowers are edible.
Lavender. In New Jersey gardens, few lavender plants will grow into shrubs, but we can still enjoy the glorious flowers on smaller plants. Both the leaves and flowers are delicious in savory and sweet dishes.
Lemon balm. As a perennial that spreads readily, this mint family plant is an enthusiastic grower. Its wonderfully fresh lemon flavor is used in seasoning and tea.
Mint. The Northeast has a love-hate relationship with mint. Yummy in all its many flavors, including peppermint, chocolate, orange, and pineapple, it can take over a garden quickly. I recommend growing it in a container.
Oregano. Greek oregano is the variety associated with tomato sauce and Mediterranean cooking, but all varieties grow well here. Bees love the flowers, which is a big plus in the garden.
Parsley. A biennial plant, parsley grows all season without going to seed. Fresh parsley has a grassy, herbal flavor that you won’t want to waste as a mere garnish.
Rosemary. This evergreen also needs to be brought indoors for the winter. Its dark green needles and an intense pine-like scent and flavor envelopes the kitchen and is perfect for fall comfort food. A little goes a long way.
Sage. Although this perennial herb gets woody with age, it tends to die back in New Jersey winters, and the new growth each spring is tender and flavorful. Common sage is the hardiest variety.
Salad burnet. Cooler than a cucumber, perennial salad burnet has an intense cucumber flavor in its attractive, serrated leaves. The more you use it, the more tender its leaves.
Summer savory. Less potent than the hardy winter savory, this mint relative has the ability to intensify the flavors of the foods it seasons. A classic pairing is summer savory and beans.
Thyme. One of the most versatile herbs, thyme has a subtle flavor like a cross between mint and oregano. It is at home in salad dressing as well as on grilled meat or fish.
It turns out you can eat the daisies. You might not want to, though, because there are better tasting flowers. Before you chomp on a blossom, however, make sure the plant has been grown organically, with no pesticides. In that case, here are some delicious choices to try:
 Anise hyssop
Bean blossoms
Bee balm
Borage
Calendula
Chrysanthemum
Daylily
Dianthus
Hollyhock
Lavender
Marigold
Nasturtium
Pansy
Pea blossoms
Rose
Sunflower
Squash blossoms
Violet
Some edibles, such as corn and pumpkins, would be impractical in a pot, but you’d be surprised by how much food you can grow in a small space.
When you’re choosing a container for edible plants, make sure it’s not made of material that could leach toxic substances into the soil. Old tires and pressure-treated wood, for example, are not good options. In addition, the container must contain drainage holes; few plants like to sit in mud. Another consideration is the pot’s color. Darker pots heat up faster and retain heat longer, particularly if you’re container gardening on blacktop or in a hotter climate; therefore, the soil will dry out faster and the roots can be burned. If you live in an area with cool or overcast weather, however, darker pots could offer the additional warmth required by heat-lovers such as eggplants and melons.
Use a quality, loose potting mix; don’t use regular garden soil. Potting mixes comprising ground bark, peat, and vermiculite are able to hold water long enough for the plant roots to absorb it, but still allow excess water to drain through. Regular garden soil has a tendency to compact, preventing good drainage and air flow.
Containerized plants demand more and more water as they grow larger and the root mass expands. Check your plants daily by poking your finger into the soil; if the soil feels dry a couple of inches down, it’s time to add water.
Because you are not building up the soil in the container the way you would by amending garden soil, you’ll need to add some nutrients to the pot. You could add a small amount of compost to the mix (1 part compost to 2 parts potting mix) to enrich the mix, but your plants will need more. Luckily, many new organic fertilizers work faster than soil amendments. You can either incorporate a time-release fertilizer at planting or feed the plant every week or two with a water-soluble fertilizer as you water.
Something container gardeners often overlook is the effect of wind. Although some air circulation is good for plants, frequent gusts, which you might get on a balcony or rooftop, will tip over containers of tall plants such as tomatoes, trellised vines, and fruit trees. Wind can also shred leaves and knock fruits off branches. Provide some type of wind block in particularly windy locations. To help ensure that your pots don’t tip over, make sure containers are wide and heavy enough to balance the weight of the top growth of your plants. You may need to anchor pots with bricks or heavy stones.
Space is not always an issue in edible gardening, because you can grow virtually any vegetable, herb, or fruit in a container.
Fruits. Many berry plants are particularly adaptable to containers, including strawberries, blueberries, currants, and gooseberries. They need large pots at least 2 feet wide and deep to balance their mature size. Choose a variety that is hardy to at least two zones cooler than your area if you will be leaving a container-grown fruit outside for the winter. Containers offer less soil to insulate roots than the plants would receive in the ground, and that extra measure of hardiness should offset the lack of insulation. The bigger the pot, the better the insulation.
Full-size tree fruits would not be practical in a pot, but some columnar fruit trees are bred for container growing. They are short and narrow and won’t yield like a spreading tree, but you’ll get more than enough fruit to snack on, and they are attractive on a patio, too.
Herbs. All but the tallest herbs do well in pots. Forsake the horseradish and go for bushy herbs such as oregano, mint, basil, and sage. You can bring annual herbs indoors for the winter, and most perennial herbs will be hardy enough to overwinter outside down to zone 6, but they can also be brought indoors to enjoy.
Vegetables. Vegetables in containers will require the same care you would give them in the ground, plus a lot more water. Dwarf or bush varieties are the best choices for containers, but if you want to plant a favorite variety, go ahead and give it a try. Fast-growing plants such as lettuce, beets, radishes, and leafy greens can be succession planted throughout the summer. Long-producing vegetables such as tomatoes, peppers, and zucchini pay off nicely all season long.
Many plants can be purchased and planted while they are dormant, with no soil around their roots. This is called bare-root planting, and it’s a great way to buy plants inexpensively. Fruit trees, strawberries, and perennial vegetables such as asparagus, rhubarb, and horseradish are often sold as bare-root plants. Bare-root trees and shrubs can look like lifeless twigs and perennial plants can resemble a mop of roots, but they are very much alive. They can’t survive for long in this state, however, so it’s very important that you get them in the ground as soon as you can. If their permanent spot is not ready for planting, plant them in a temporary holding bed and plan to move them later.
1. As soon as your plant arrives, remove it from its package and take off any packing material, such as shredded newspaper or peat moss.
2. Check to make sure the plant is healthy. The roots should feel fleshy, not dry, and they should smell fresh and earthy, with no rotting odor. Carefully prune away any damaged roots or shoots.
3. To ensure that the roots are well hydrated before planting, soak them in water for an hour or two. Don’t leave them in water longer than overnight or they can start to rot.
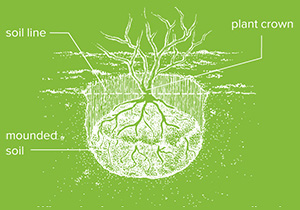
4. Dig a hole wide enough to allow for the roots to fan out. Then make a mound of soil in the center of the hole, high enough so the crown of the plant will sit at or above the soil line. It is very important that the crown is not buried.
5. Center the plant on the top of the mound and spread the roots around and down.
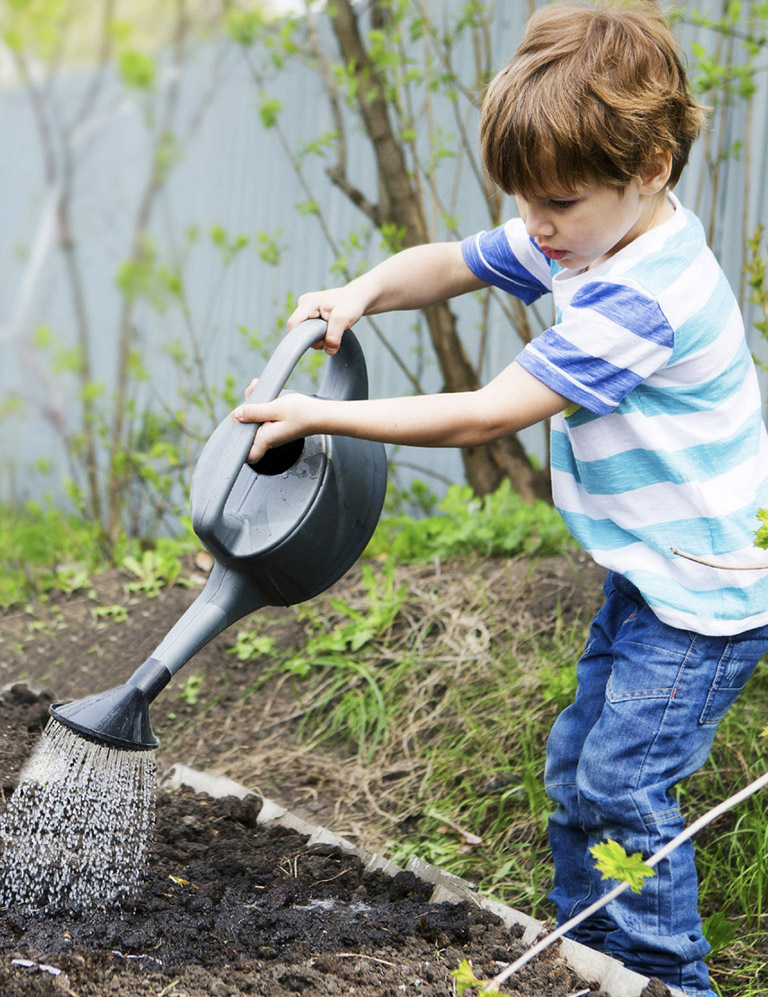
6. Fill the hole halfway with soil, and then water well. After the water has drained, finish filling the hole and water again.
7. Apply a layer of mulch.
8. Water the plant every 2 or 3 days, whenever the soil seems dry below the surface, until you see leaves sprouting. Then you can move to a watering schedule of 1 or 2 inches per week.