This chapter discusses how to test and deploy our Xamarin.Android and Xamarin.iOS apps in platform-specific device emulators to simulate the process. During the development stage, it is required to test the functionality of your applications. Visual Studio 2017 is equipped with built-in device emulators to test your application without having the need to use real devices, although it requires a few extra steps to simulate your app in Mac. As long as your machine is properly configured, it should be easy enough to test out your applications in Visual Studio.
Since the mobile application relies on API endpoints to communicate with the data from the database, then the API endpoints should be publicly accessible. Unfortunately, emulators do not have direct access to localhost. This means that your Web API application project should be hosted in a public-facing server or in the cloud, such as with the Azure web app, so virtual device emulators can consume the API endpoints. However, going to that approach to hosting the API publicly can be a big time-waster if we are still at the early stages of the development. This is because any type of change can happen during this stage and we don’t want to always push changes to the public-facing serve, plus there’s no way for you to debug your code and hit a breakpoint once your application is hosted publicly on a different server or cloud. You may end up relying on your application logs to troubleshoot any issues, which can be a time-consuming pain.
To overcome this hurdle, we will use a freely available plug-in or tool to test the application without needing to deploy it publicly on a different staging server or cloud.
Using the Conveyor Plug-in for Visual Studio 2017
Luckily, as mentioned, there’s an available plug-in that we can use to access a local hosted web application from various devices emulators. The plug-in is called Conveyor by Keyoti.
What Is Conveyor?
Open up IIS Express to allow access over your local network (e.g., access from phones, tablets, and other devices).
Tunnel a domain name to your machine, so anyone on the web can access your web development project through their browser.
Fix most 400 Bad Request errors coming from IIS Express.
For more information about this cool plug-in, see https://keyoti.com/blog/open-up-visual-studio-web-projects-for-access-over-the-internet-using-conveyor/
Install Conveyor
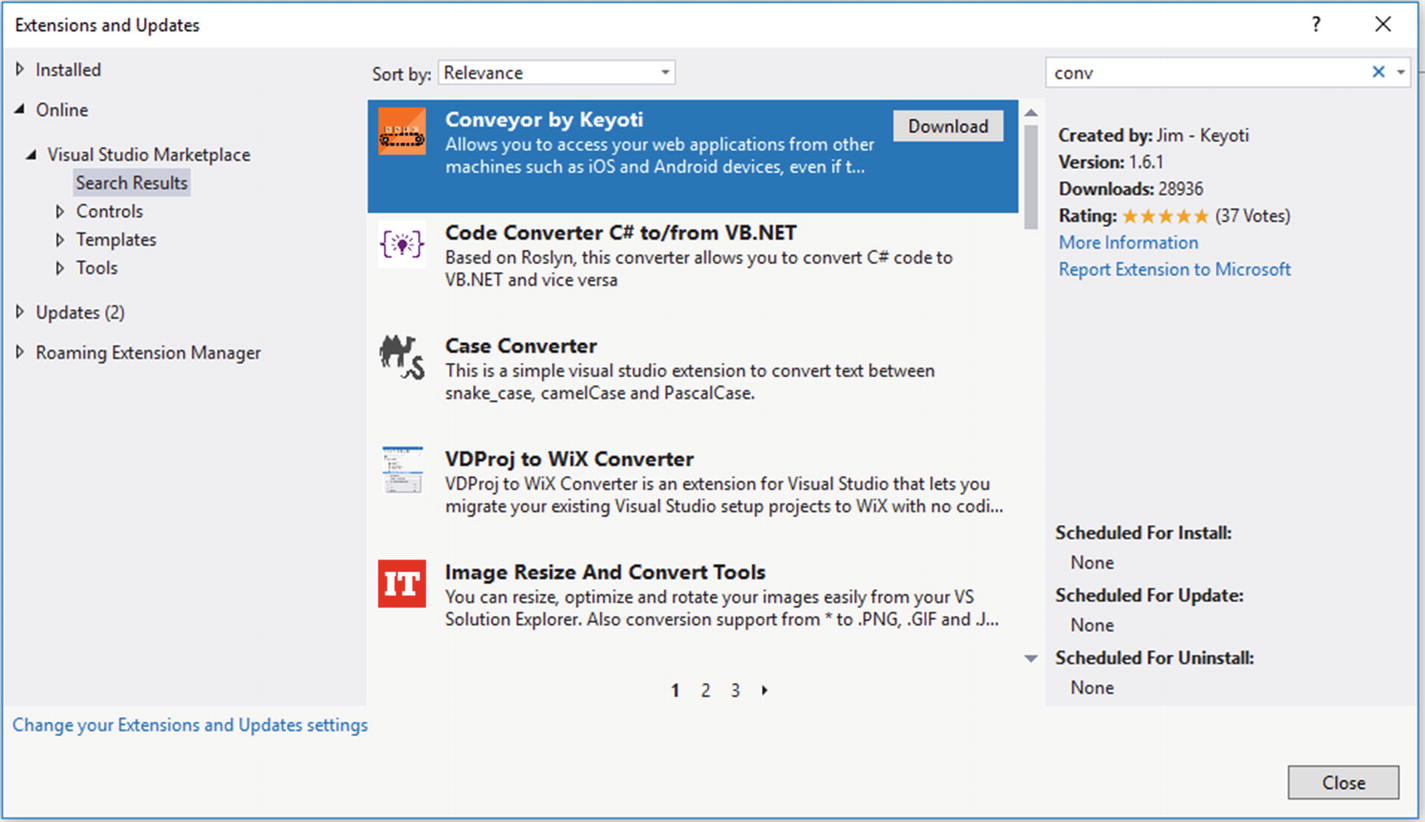
Install Conveyor by Keyoti plug-in
Click Download. You may need close Visual Studio to continue the installation, so make sure to save your work before attempting to install this plug-in.
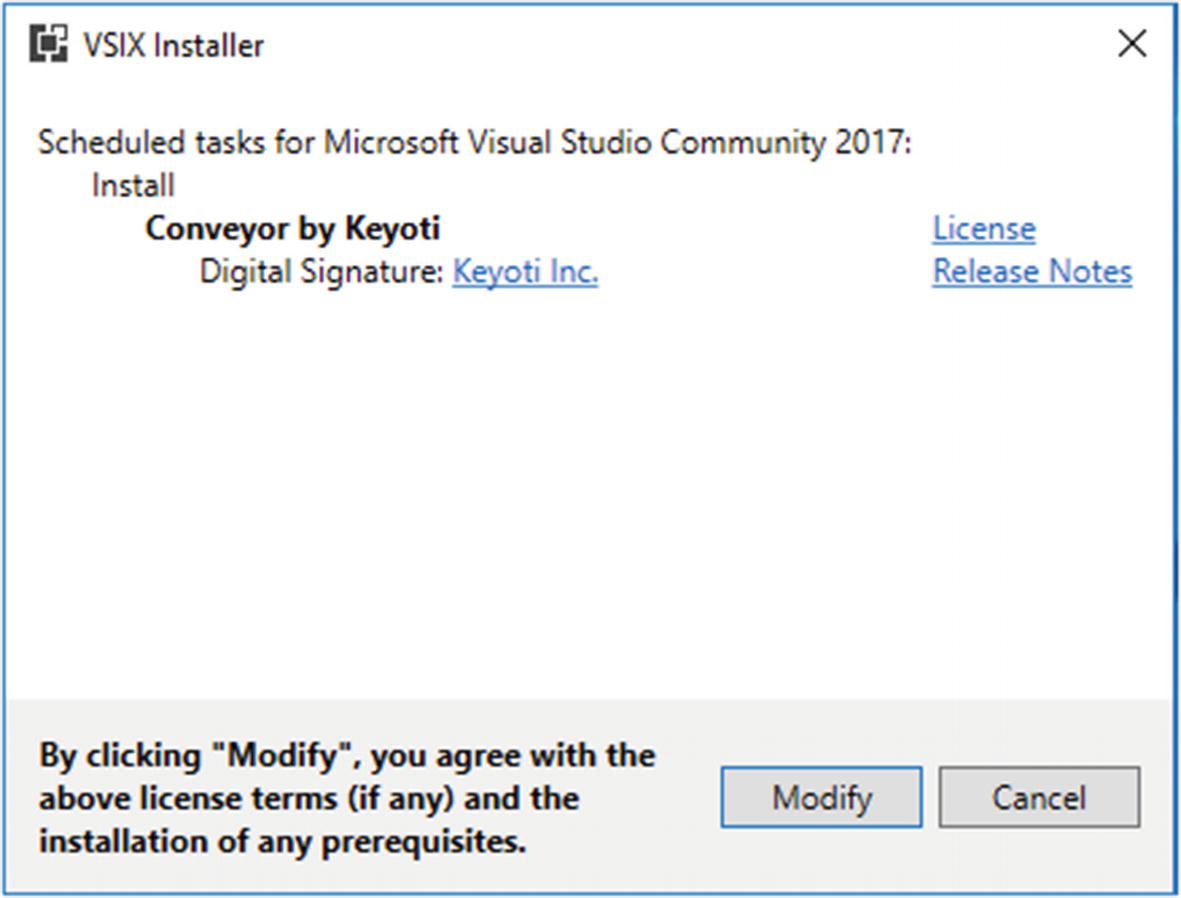
VSIX Installer license terms agreement
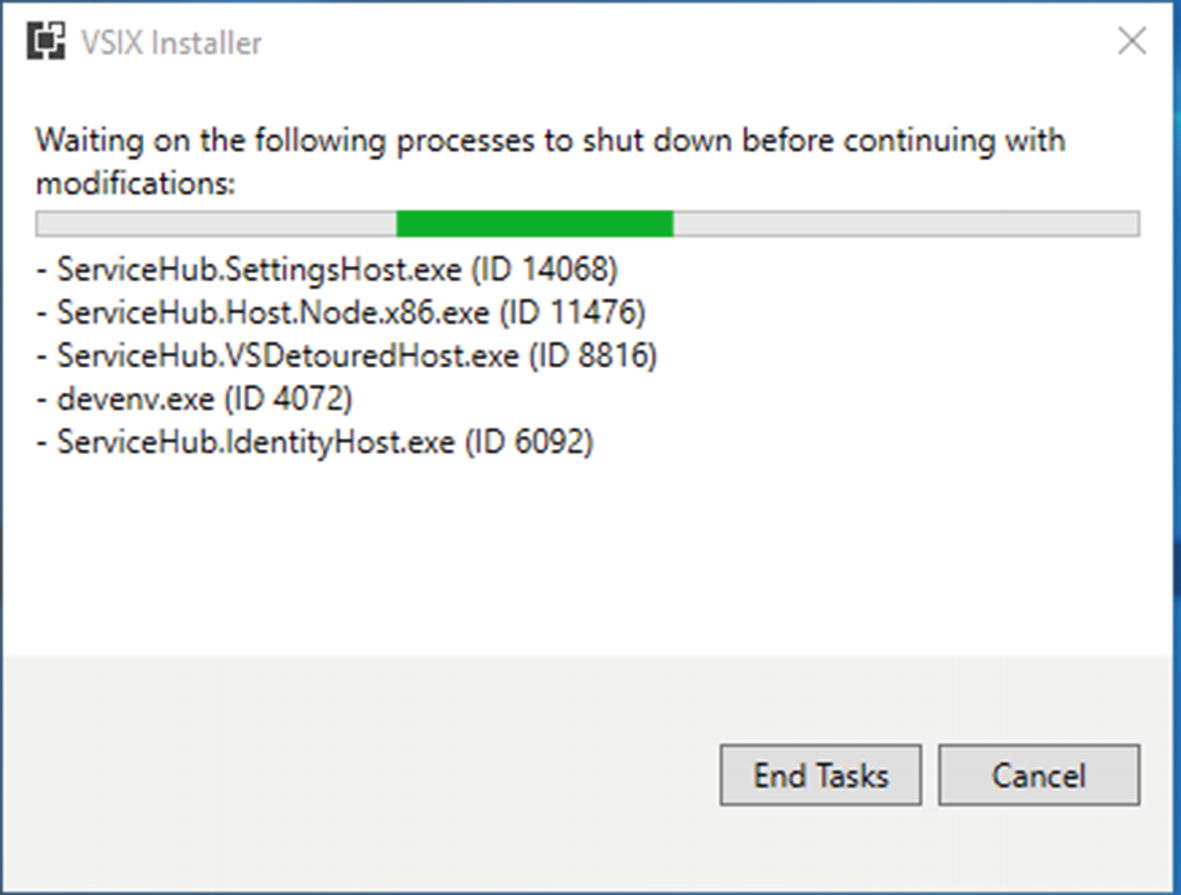
End existing running tasks
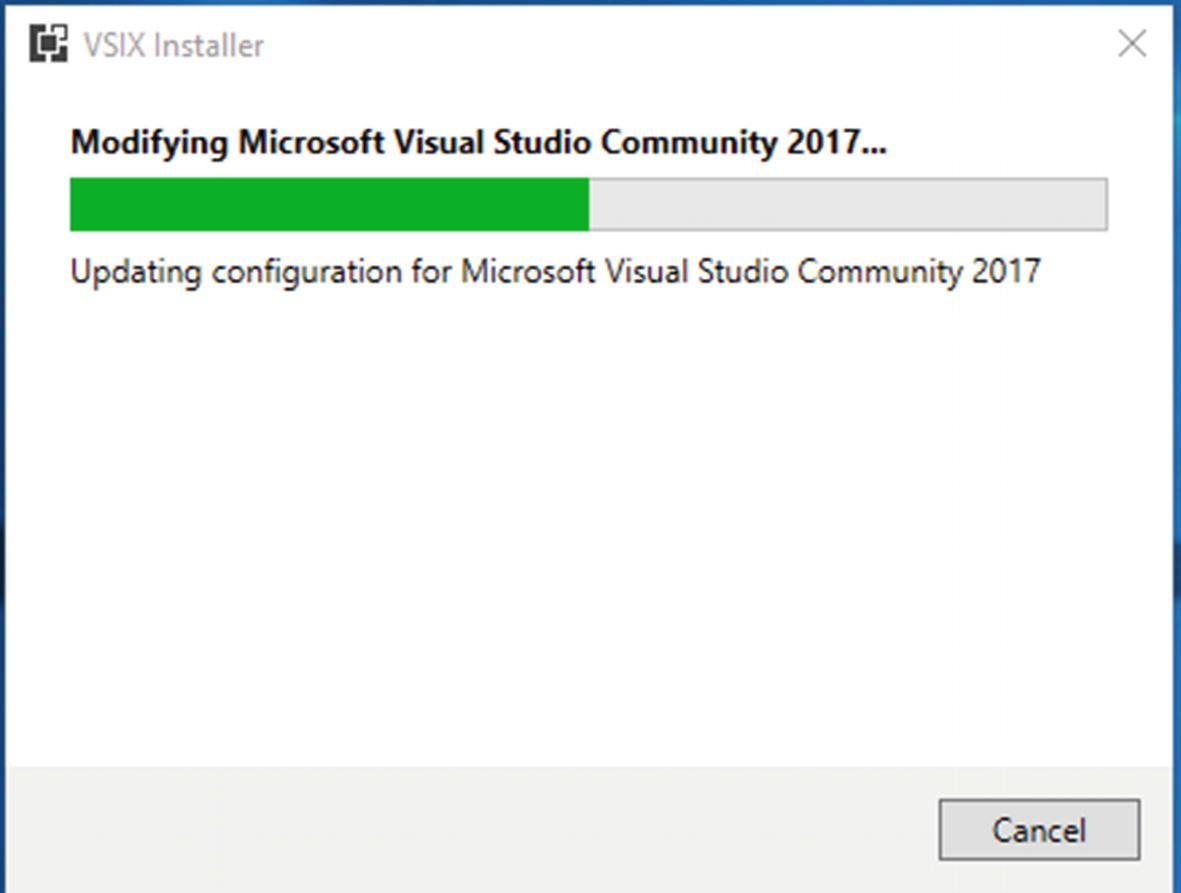
Modifying Visual Studio 2017 configuration
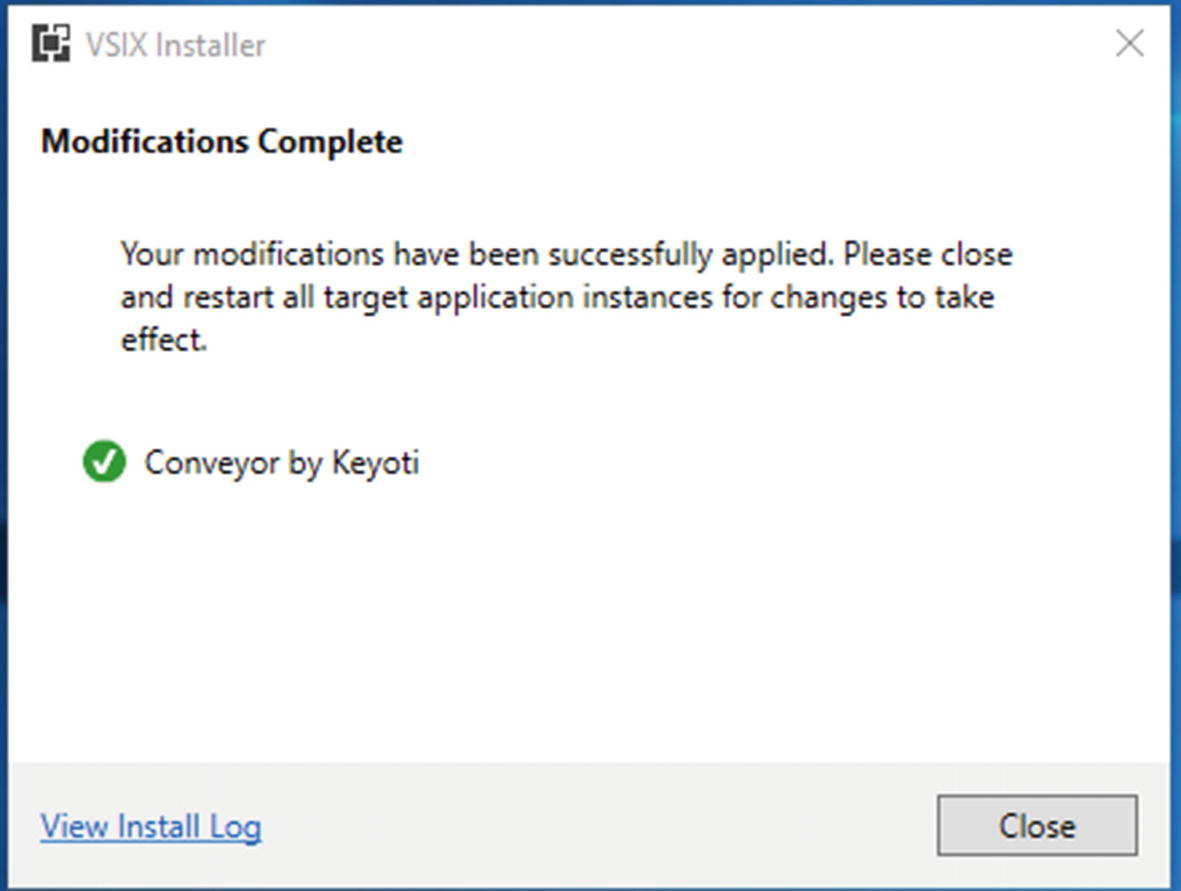
Modifications complete
Navigate to the Windows Search bar and type WF.msc.
Click “Inbound Rules” on the left pane.
Click “New Rules” on the right pane.
Choose “Port” in the new dialog, then click “Next”.
Select TCP, enter port 45455 from the Remote URL next to “Specific local ports”, and then click “Next”.
Next, and Next (you may want to disable ‘Public’), give it a name like ‘Conveyor: WebDev Server Access Enabled’.
Click Finish.

Conveyor UI
Using the generated remote URL, we can now easily test the mobile application’s whole process from different device emulators. All we need to do now is replace the APIUri value from the GameAPI class with the remote URL value.
Using SharpProxy
Another option that you can use to test and debug your mobile applications inside a simulator is a tool called SharpProxy. Here’s the definition taken from the documentation ( https://github.com/jocull/SharpProxy ):
SharpProxy is a simple proxy server developed with the intent of being able to open up local ASP.NET development servers. This allows you to test, hit breakpoints, and generally do development by using other machines and mobile devices. Simply enter the local port number of your .NET development server and map it with an external port to host on.
Download SharpProxy from https://github.com/jocull/SharpProxy
- Unzipp the file, and then run the SharpProxy project; it should display the following screen:
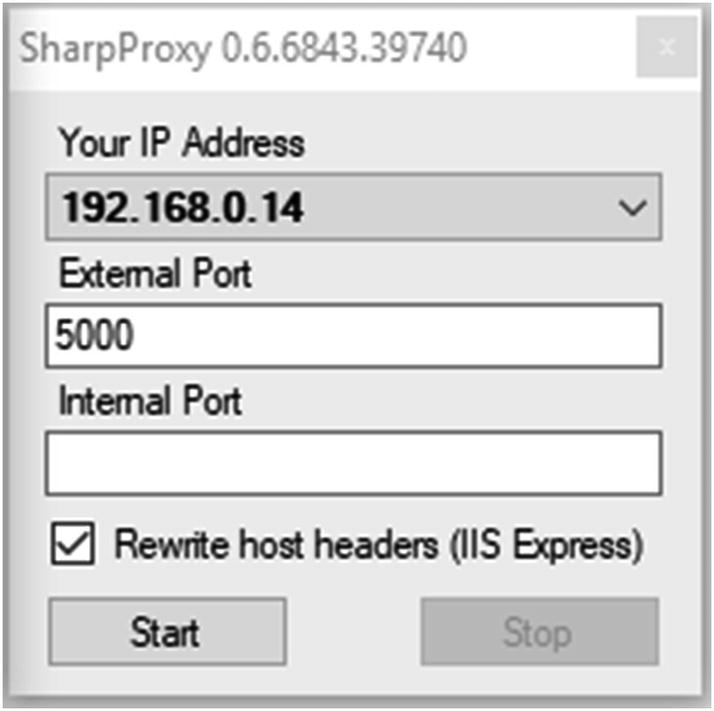 Figure 6-7
SharpProxy UI
- Navigate to Visual Studio, right-click MemoryGame.API on the project, and then select Properties. Click the web item from the left pane and you should see something like this:
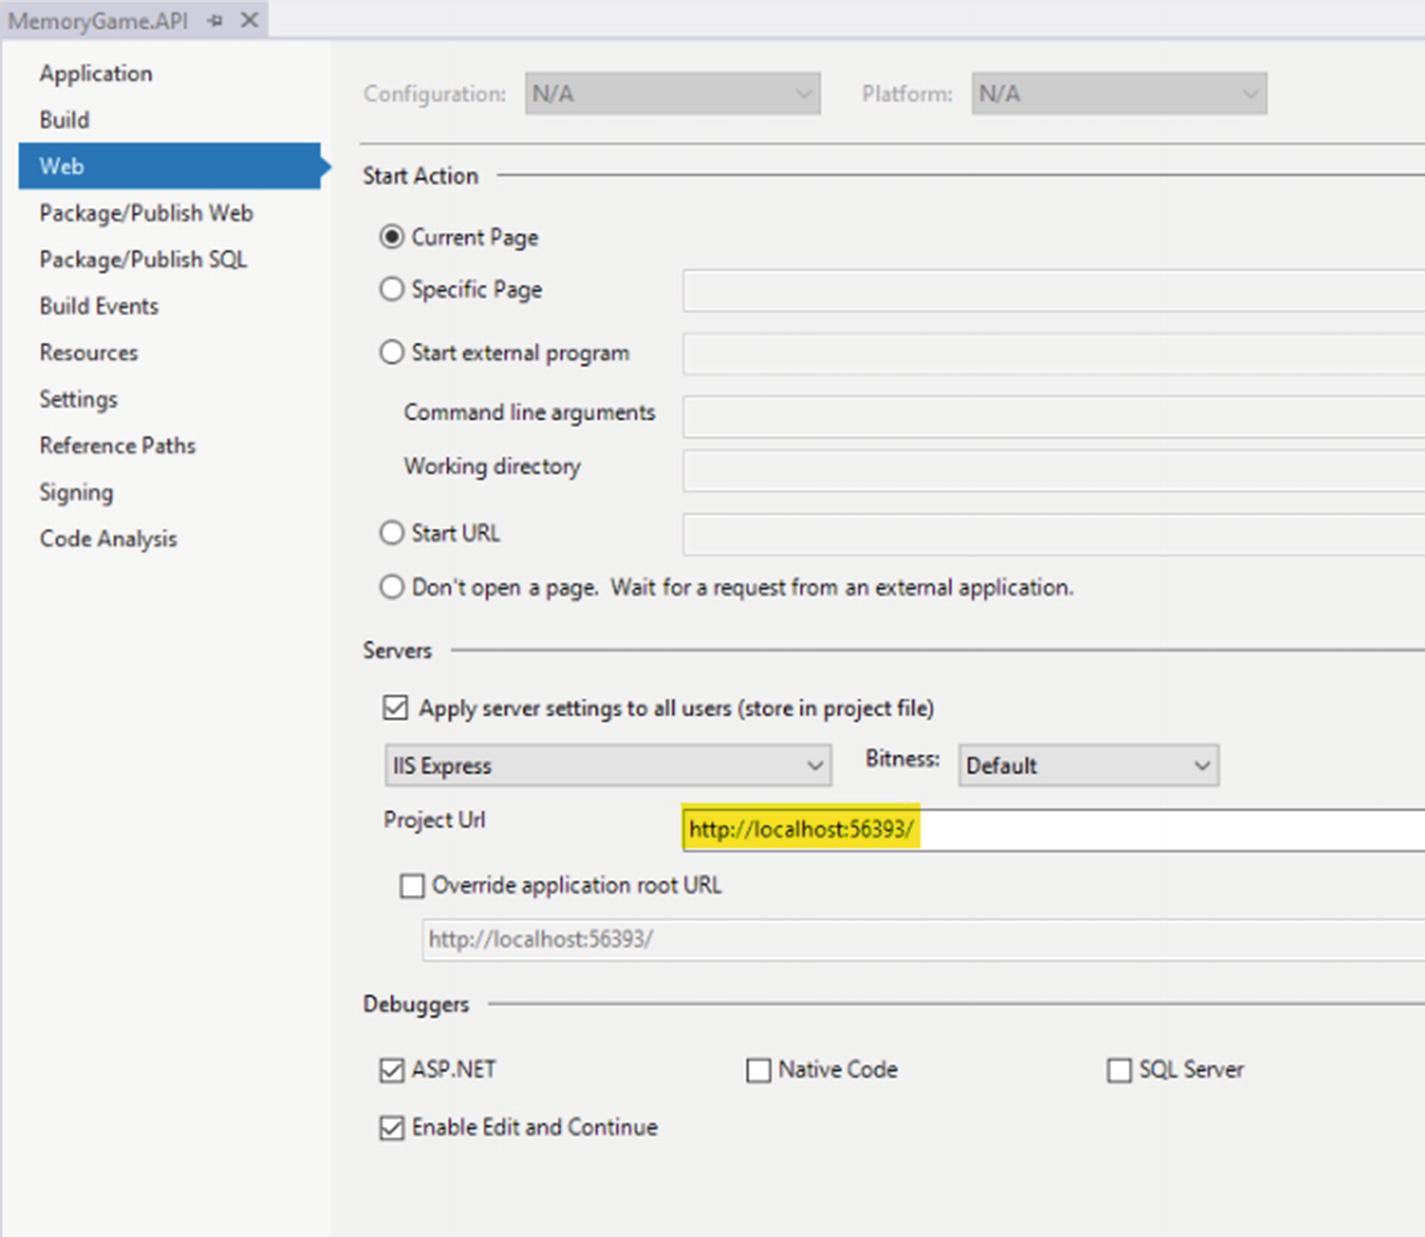 Figure 6-8
MemoryGame.API property configuration window
The Project Url field from the preceding figure indicates the local URL where the API should run in debug mode. Take the 56393 value from the URL.
Enter the 56393 port number in the Internal Port field of the SharpProxy UI.
Copy the IP Address generated from the SharpProxy and the External Port number. For this example, the values should be 192.168.0.14 for the IP address and 5000 for the external port.
Now, when your Android or iOS app is running in the emulator, you can simply reference the following URL to access your API: http://192.168.0.14:5000
Navigate to the MemoryGame.App project and open the GameAPI class under the REST folder. Replace the value of the APIUri variable with the following:
privateconststring APIUri = "http://192.168.0.14:5000/api/game/players"
Your Xamarin.Android and Xamarin.iOS applications should now be able to access the Web API endpoints.
Simulating the Application’s Process
At this point, we are not ready to test our applications locally. Since the application is composed of many projects and the ASP.NET.MVC application also relies on our Web API application, we need to make the Web API application accessible when testing the real-time leaderboard page too. Now, you might be asking yourself how to run them altogether at once. Typically, we would host or deploy both projects in the local IIS web server to be able to connect between projects. Luckily, one of the cool features of Visual Studio 2017 is to enable multiple startup projects. This means we could run both our Web API and MVC applications as well as the mobile application together within Visual Studio and be able to test them right away. All you need to do is
Right-click the Solution
Select Set Startup Projects
Select the Multiple Startup Projects radio button
- Select “Start” as the action for MemoryGame.API, MemoryGame.Web, MemoryGame.App.Android, and MemoryGame.App.iOS projects as shown in the following figure:
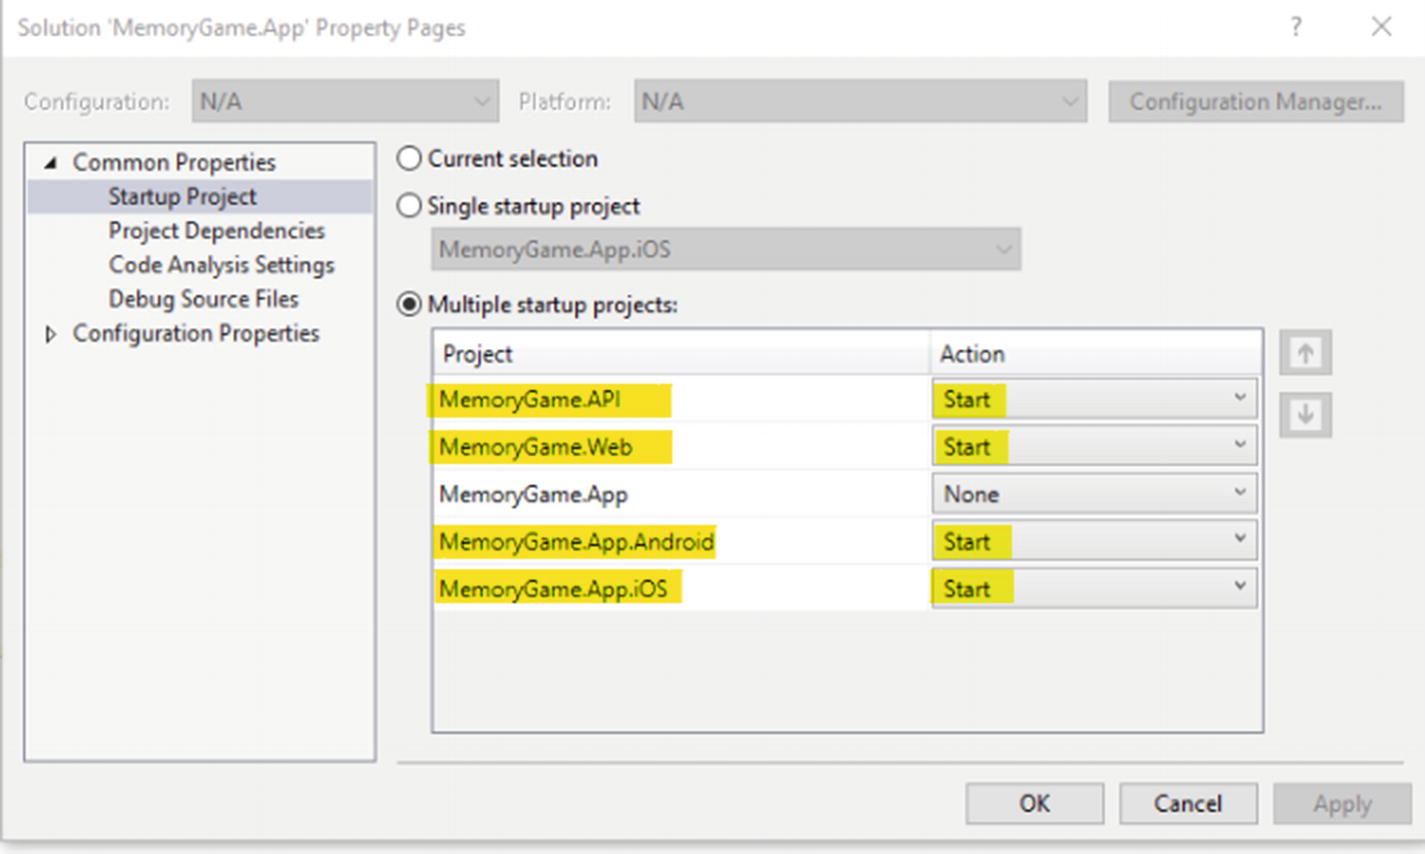 Figure 6-9
Set multiple startup projects
Click Apply and then OK
Now Build and press Ctrl + 5 to run all applications simultaneously.
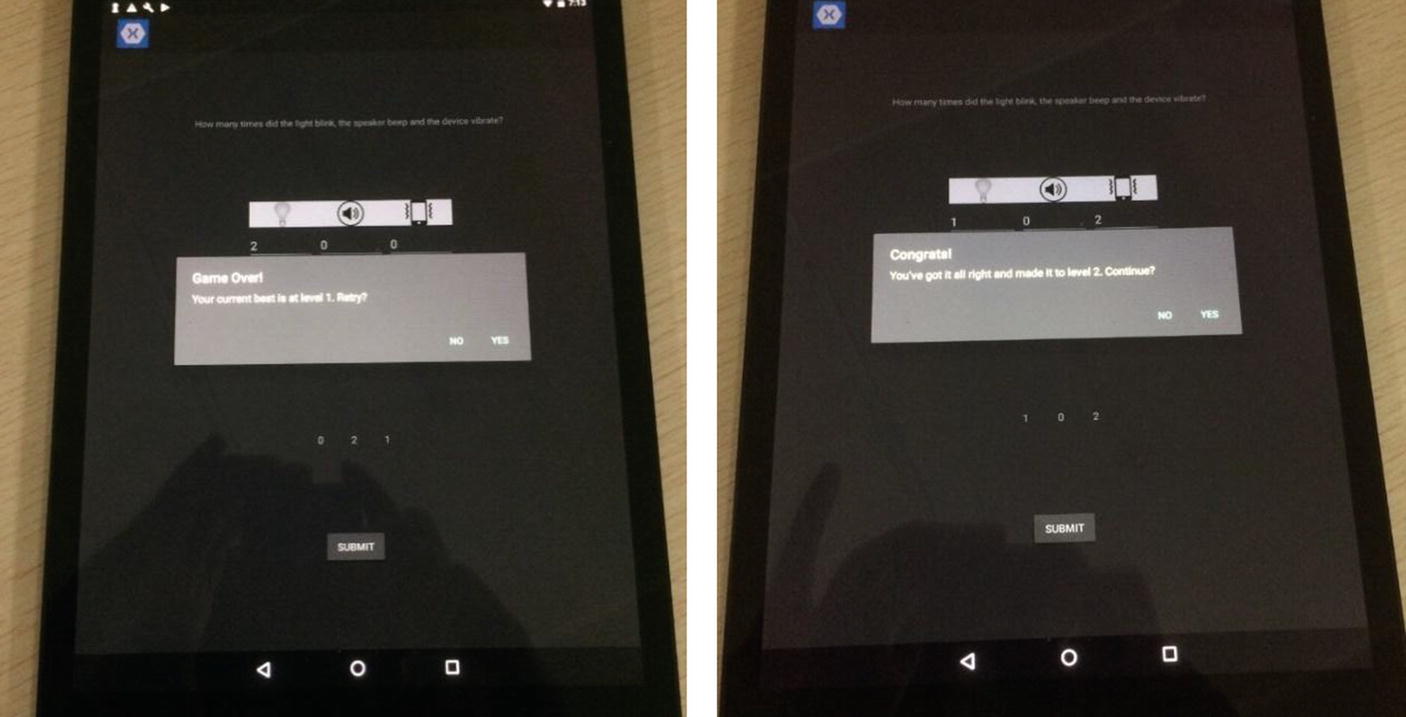
Android

Android device emulator outputs
iOS
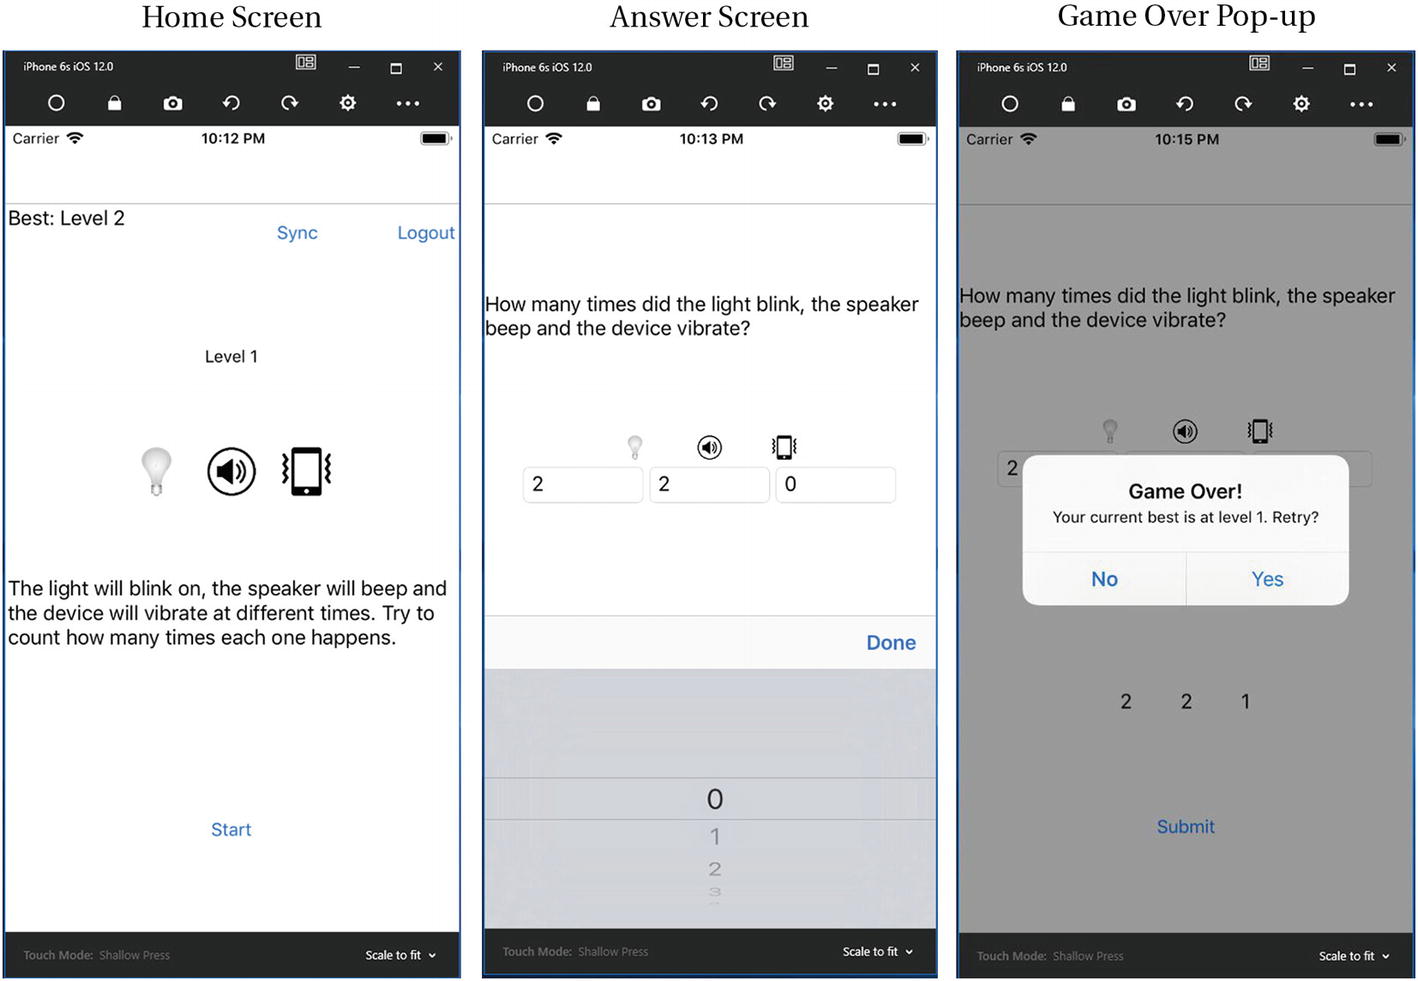
iPhone device simulator outputs
Next Steps
Output
Live output