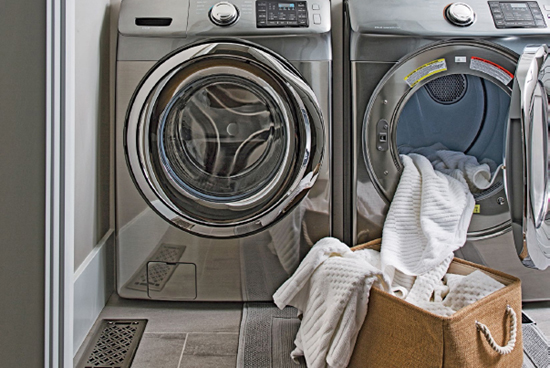
SMART SPIN
Today’s hi-tech appliances make doing laundry so easy, your family will be clamoring to help (almost)!
3

LAUNDRY & CLOTHING CARE
“An actress once advised me, ‘Make sure you do your own laundry—it will keep you honest.’”
—Cate Blanchett, actress
To some, laundry is a never-ending chore. To others, clean laundry is a satisfying accomplishment. Whichever camp you fall into, we’ve got you covered! In this chapter, you’ll find tips to help speed the process along; ways to ensure stain-removal success; a timetable for how often items need washing or dry cleaning; tips for better ironing results, safer clothing storage, and more. Doing laundry just got a whole lot easier!
These simple tips will help streamline this important task.

PRESORT BEFORE LAUNDRY DAY
Place dual baskets or divided hampers in each bedroom so family members can help sort lights from darks as they undress. This also helps keep clothes off the floor and the room looking neater.
STOP PAIRING
Matching socks takes time when you’re digging through a giant heap to find a mate. Invest in sock clips. Sock Cop® Sock Clips “handcuff” sock pairs together in the wash, through the dryer, and back into the drawer.
PRETREAT AHEAD OF WASHING
Make stains easier to remove by using a laundry pretreater that can be applied days before you do the laundry. Check the product label to be sure, because not all can. Apply it and then put the garment into the hamper. It will start to work before you are ready to wash. Shout® Advanced Ultra Concentrated Gel can be safely applied to fabrics up to one week before they’re washed.
MACHINE-WASH DELICATES
Today’s washers have very gentle cycles. Many items labeled as “hand wash” can be safely laundered in the machine. Place items in mesh laundry bags, select cool water, and begin the gentlest cycle your machine offers. Air-dry items unless you know they can be safely tumble-dried.
Just a few steps to keep colors bright and protect fabrics from damage.

1 START WITH COLOR. Clothes with saturated colors and deep hues are more likely to release dye, so group them together. If you have a possible bleeder (apply a drop of water and dab with a white paper towel to check), wash it separately the first few times.
2 MOVE ON TO FABRIC. Separate lint “givers” from lint “receivers.” That means towels or fuzzy sweaters shouldn’t be washed or dried with corduroy or velour. It’s also best to keep fabrics of similar weights together, so coarse fabrics don’t abrade and damage delicate ones and all items in the load finish drying at the same time.
3 FINISH WITH SOIL LEVEL. Very dirty or stained laundry needs extra attention. These items can often benefit from more detergent or longer, more aggressive cycles. Sorting by the amount of soil will keep excess soil from redepositing on less-dirty items.
Choosing the right formulas will give you the best results.
DETERGENTS A good laundry detergent is essential for removing stains, washing away soil, and keeping whites and colors bright. Powders are less expensive, liquids make good stain treaters, and packs are convenient to use. Always measure powders or liquids and add more of any detergent for large or heavily soiled loads.
PRETREATERS Formulated to remove a wide variety of stains, these sprays or gels penetrate deeply and start breaking down stains before items go in the wash. Most of these products should be applied only about 5 to 10 minutes before washing. Some can be applied up to one week before to help keep stains from setting and make them easier to remove. Double-check the label to be sure.
FABRIC SOFTENERS Liquid fabric softeners are added to the final rinse cycle. They coat and penetrate fibers to smooth and condition them. Dryer sheets impart light softness and help control static. Avoid using them on children’s sleepwear and fleece, athletic apparel, and microfiber cloths, where they reduce absorbency and flame resistance. To keep towels absorbent, don’t use more fabric softener than the label recommends, and don’t use it in every cycle.
BLEACHES Chlorine and color-safe bleaches are the two types to have on hand to remove stains from whites and colors. Follow care-label recommendations on which is safe to use, or test in a hidden spot.

Use this guide to help determine how frequently most items need laundering.

•Tights & Socks
•Blouses/Shirts
•Panties/Boxers & Briefs
EVERY 3 WEARS
•Pajamas
•Bath towels
•Bras/Camisoles
•Dresses/Skirts
•Sweaters
•Jeans/Dress pants
EVERY 1–2 DAYS
•Hand towels
•Dish towels
•Washcloths
EVERY WEEK
•Sheets
•Pillowcases
•Bathmats
EVERY 1–2 MONTHS
•Bathrobes
•Mattress pads
•Pillow liners
EVERY 3–6 MONTHS
•Shower curtains
•Throws
•Throw rugs
•Outerwear
•Comforters
•Pillows
4 STEPS TO FEWER WRINKLES
DON’T OVERLOAD the washer and dryer. Cramming items in can cause creases.
SHAKE OUT WET CLOTHES when moving them from the washer to the dryer, so they tumble more freely and wrinkles fall out.
IF YOUR DRYER HAS ONE, select the extended tumbling option, so clothes don’t sit and creases don’t set while waiting for you to unload the dryer.
REMOVE ITEMS PROMPTLY or while still damp, smooth them by hand, and fold or hang them immediately.

HOW OFTEN SHOULD YOU DRY-CLEAN IT?
Use this guide to help determine how often most things need dry cleaning.

WHAT IS DRY CLEANING?
In dry cleaning, clothing does get wet— just not with water. Instead, garments that would be damaged by water are washed and rinsed in a chemical solvent that cleans and removes stains. Afterward, items are dried, aired out to remove any lingering odors, and pressed. A good shop uses clean, filtered solvents, so none should remain in fabrics after cleaning. However, it is still a good idea to remove the plastic bags covering the dry-cleaned clothes once you get home, allowing clothes to breathe.
•Shirts
•Blouses
•Evening wear
EVERY 3 WEARS
•Sweaters
•Skirts
•Pants
•Everyday dresses
•Suits
EVERY 6 MONTHS
•Throw pillows
•Comforters
•Duvet covers
•Bedspreads
EVERY YEAR
•Curtains & Drapes
EVERY SEASON
•Outdoor Jackets & Coats

CAN I HAND-WASH IT WHEN THE LABEL SAYS “DRY CLEAN”?
5 COMMON HAND-WASHING MISTAKES
Avoid these common errors to give your delicates and specialty items the care they deserve.
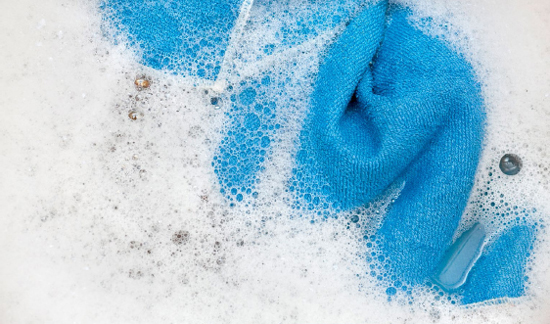
1 PUTTING GARMENTS IN FIRST. Think of hand-washing as giving your clothes a bath. Just as you don’t get into an empty tub, your sweater shouldn’t, either. Forceful water hitting a garment can stress it, and detergent poured directly on it can be harder to rinse out. Instead, fill the sink or basin with warm or cool water. As it’s filling, add detergent and swish the water to be sure it’s completely dissolved. Lay the garment in the water and press down to fully immerse it.
2 RINSING WITH THE FAUCET. Holding delicates up under running water can cause fabrics to stretch, so rinse them the same way you washed them: in a bath of clear water. Scoop up the entire garment and, if it’s lightweight, like lingerie or a bathing suit, place it in a colander. With a faucet sprayer, rinse it directly in the colander. If it’s not lightweight, fill the sink or basin with cool, clear water; immerse the item; and squeeze the water through it to rinse.
3 SCRUBBING STAINS. Aggressive scrubbing can damage fabrics, especially fragile ones. Treat stains by gently working laundry detergent into the stain with your fingertips. Then, as it soaks, gently squeeze sudsy water through the garment. Most items will be clean in about 15 minutes. Some heavily soiled items may need more time.
4 WRINGING OUT THE WATER. Twisting and tightly wringing wet, delicate fabrics is a surefire way to damage them. To remove excess moisture, carefully lift the garment out of the rinse water with both hands and gently squeeze out as much as you can.
5 BLOTTING OUT MOISTURE. Lay wet garments flat on an absorbent towel. Roll the towel and garment together, gently squeezing as you go, then unroll. If the garment is still wet, roll it in another clean, dry towel.
6 HANGING ITEMS TO DRY. To ensure that delicates, especially knits, don’t stretch out of shape, always lay them flat to dry. Lay a sweater or bathing suit on top of a dry towel or on a mesh drying rack, blocking it into shape, and allow it to air-dry. Once the front is dry, turn it over so the back can do the same.

1-MINUTE TIP! No time to hand-wash? Place items in a mesh bag and select your machine’s gentlest cycle. Some new models even have an extra-gentle hand-wash cycle. Skip the dryer, though. Reshape the item and lay it flat to dry.
Sometimes, even when you follow the rules, things go wrong. Here’s help for when they do.
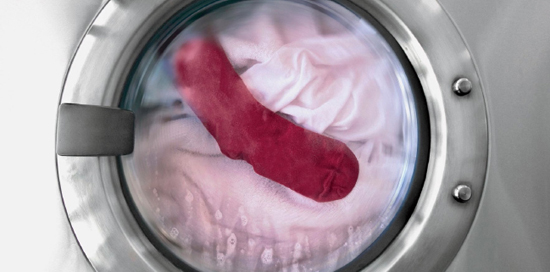
PROBLEM The colors from one item bled onto another.
THE FIX Try washing the stained item again by itself in warm water with detergent and color-safe bleach. Or try Good Housekeeping Lab pick Carbona® Color Run Remover, which safely removes transfer-dye stains from a single item or an entire load.
PROBLEM A tissue left in a pocket went through the wash.
THE FIX Before taking out the load, rewash it with a dose of fabric softener added to the final rinse. Pull off whatever you can by hand, then tumble-dry the load (the dryer’s lint filter will capture most of it). Use a lint roller or a dry scrubber sponge to remove any remaining specks.

1-MINUTE TIP! For loads with colors that you think might bleed, like jeans or brights, toss in a color-grabbing cloth like Shout Color Catcher® or Carbona Dye Grabber™. These disposable cloths pick up and hold on to small amounts of loose dye so they don’t resettle onto other garments. Keep in mind, though, that these cloths usually can’t prevent big disasters, like a red item that turns an entire load pink.
PROBLEM A stained item went through the dryer.
THE FIX This might be difficult to remedy—but it’s not impossible. Saturate the spot with Good Housekeeping Lab Pick Shout Advanced Gel, working it deep into the fabric, and allow it to set overnight. Apply a bit more and launder with chlorine or color-safe bleach in the warmest water that’s safe for the fabric. Repeat if necessary. Keep the item out of the dryer until you’re sure the stain is completely gone.
PROBLEM Your favorite sweater has shrunk.
THE FIX Sadly, this is one oops you might have to live with. If the shrinkage is minimal, try rewetting the sweater and then carefully stretching it out and reshaping it.
HOW TO WASH PILLOWS & COMFORTERS
Cleaning down- and polyester-filled bedding is easier than you think.

USE A LARGE-CAPACITY WASHER
Front-loading or top-loading washers without agitators are best for washing bulky pillows and comforters. These machines clean gently without damage. If you don’t own such a machine, consider using a laundromat.
SELECT THE CORRECT CYCLE.
Choose the Bulky Bedding cycle if your washer has one; if not, select Delicates. These cycles clean but aren’t overly aggressive, so they don’t destroy the shape of these items. Select a warm water temperature.
RUN AN EXTRA RINSE AND SPIN.
This extra step helps ensure that any detergent residue is removed and not trapped inside.
TUMBLE-DRY LOW.
Use a gentle heat and toss in a few dryer balls to keep pillows and comforters tumbling and prevent the filling from clumping. Stop the dryer midcycle and remove and fluff comforters and pillows two or three times to maintain loft.

1-MINUTE TIP! In most cases, foam bedding should not be washed unless recommended on the care label. Wash removable covers and spot-clean foam, if necessary.
THE GOLDEN RULES OF STAIN REMOVAL
With these basic principles, no stain on washable fabrics will get the best of you.

TACKLE STAINS PROMPTLY.
The longer a stain sits, the more difficult it is to remove. If you can’t launder a stained garment right away, spot-treat it with a little soap and water, or apply a stain remover that can sit for several days before washing to keep the stain from setting.
BLOT; DON’T RUB.
Use an absorbent cloth to gently blot stains out of fabric before applying any stain remover. Rubbing pushes a stain farther in and damages fibers.
START GENTLE, GO STRONGER.
When stains require multiple steps or products, try the gentlest method first and work up to the most aggressive, as needed.
TEST ANY METHOD IN A HIDDEN SPOT.
It’s hard to predict how every fabric will respond to a stain remover, so always test any product you are using for the first time on a hidden area, like the hem or a seam, for any color fading or spotting.
PUT A PAD UNDERNEATH TO ABSORB THE STAIN.
Place a paper towel or cloth under a stain as you remove it. The pad will absorb the stain as it dissolves and keep it from spreading.
SKIP THE DRYER UNTIL THE STAIN IS GONE.
Never place an item in the dryer until you know a stain is completely removed; otherwise, it may be permanently set.
Don’t take safety for granted; protect your family from hidden hazards.

STORE CLEANING PRODUCTS SAFELY
Detergents (especially single-use packs), bleaches, and all cleaning products should be kept well out of kids’ reach during use and while in storage. It takes only seconds for little ones to grab and ingest products that can harm them.
DON’T DECANT
Resist the urge to transfer products into decorative containers. It may look pretty, but it’s always safest to keep cleaning products in their original containers, which list ingredients, directions, and first-aid recommendations.
CLEAN THE WASHER
Studies show that bacteria can remain in a washing machine even at the end of a cycle. And water that puddles in dispensers and gaskets causes mold growth and musty smells. To keep your machine clean, run an empty cycle with Tide® Washing Machine Cleaner once a month. Regularly remove and wash dispensers and wipe gaskets dry after use. Leave the washer door open between uses to promote drying. 
VACUUM THE DRYER
Lint buildup inside and around the dryer is a fire hazard. Clean your dryer’s lint filter after every load. Vacuum and keep the floor under and around the dryer lint-free. Once a year, disconnect the vent and vacuum the back of the dryer and as far into each end of the vent as you can reach. Make sure any outside exhaust is free of leaves and debris.
Here’s how not to destroy your favorite clothes—or your iron.

BE BEST PRESSED
There’s no need to fear it. Knowing how to iron correctly takes you from shabby to chic in minutes.
1 IRONING DRY FABRICS. Wrinkles are easier to remove when fabrics are still damp. If you can’t iron garments as you take them from the dryer, use your iron’s spray feature to mist and soften the fabric before passing the iron over it. Zap extra-stubborn wrinkles with a burst of steam.
2 SAVING DELICATES FOR LAST. You can make the process go more smoothly and avoid any drips or burns by ironing the most delicate fabrics first, at lower temperature settings. Then work your way up to cotton and linen.
3 AUTOMATICALLY CRANKING UP THE HEAT. If a garment is made of a blend, select the setting for the more delicate fiber. It will help preserve your garment and eliminate shiny or burned spots.
4 NOT USING TAP WATER. Today’s irons can handle tap water better than older models could. Unless your area’s water is extremely hard, there’s no reason to use distilled water. For areas with very hard water, mix it 50/50 with distilled. And avoid using water that’s gone through a home water-softening system that uses salt. The salt can be corrosive to the inside of the iron.
5 USING VINEGAR TO CLEAN YOUR IRON. An iron’s metal interior is not designed to handle an acid like distilled white vinegar, so using it can damage the working parts of your iron. Clean the inside by holding it over a sink and pumping the steam-burst feature, or as recommended by the manufacturer. Clean the soleplate of burned-on residue with a baking soda paste or with Faultless® Hot Iron Cleaner.
6 STORING THE IRON WITH WATER IN IT. Always empty the iron’s water tank and allow the last few drops to steam out before putting the iron away, especially if you store it on its soleplate. This keeps excess water from damaging the internal parts and leaking through and discoloring the soleplate.
7 NOT LETTING SPRAY STARCH SOAK. To add a crisp finish, spray starch must soak in before the iron hits the fabric. If you just spray and press, you risk getting a burned, sticky residue on your iron’s soleplate.
A clothes steamer is a quick alternative to an iron, but it can’t do everything. Know what each appliance does best.

CREASE RELIEF
No steamer? No worries. Hold your iron vertically and press the burst-of-steam button to quickly freshen fabrics while they’re still on the hanger.
•A crisp finish, like on cotton dress shirts
•Sharp pleats and creases
•Large flat items, like tablecloths and sheets
•Heavy fabrics, like denim
•Flattening newly sewn seams and hems
•Applying decals and patches
USE A STEAMER FOR
•Soft fabrics with flowing details, like silks and chiffons
•Jackets, suits, and items that are difficult to iron flat
•Curtains and drapes while hanging on the rod
•Sequins and embellishments that ironing can damage
•Lace and embroidery to keep it from flattening
•Velvet, suede, and other napped or brushed fabrics
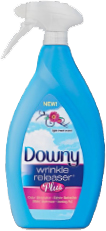
HOW IT WORKS: DOWNY® WRINKLE RELEASER® PLUS!
This spray completely eliminates the need to iron certain garments and makes the ironing of others much easier. Ingredients coat and relax the fibers to help creases fall out, and wrinkles disappear as the fabric dries. Just spritz, tug, and—presto! It smooths light-to medium-weight fabrics and removes odors from clothing and bedding. It’s water-based formula is not recommended for dry clean–only fibers, like silk and rayon. It also comes in a mini 3-ounce bottle to de-wrinkle at the office or while traveling. 
Fabrics will stay protected from one season to the next with these simple steps.

MAKE SURE EVERYTHING IS CLEAN
Launder anything you’ve worn—even once—or, if it’s not washable, take it to the dry cleaner. Unremoved stains and soil may yellow during storage and attract insects.
FOLD, DON’T HANG, KNITS
Sweaters and other knit fabrics can stretch if hung during storage. Fold or roll them instead. If space is tight, drape the sturdiest ones over the crossbar of a hanger that you’ve covered with a cloth or pillowcase.
CHOOSE THE RIGHT LOCATION
A hot attic or a damp basement is not an ideal clothing storage location. If you can, try to store clothes in the main part of your home, where temperature and humidity are regulated. Fabric garment bags, storage boxes, and even hard plastic storage bins are all acceptable containers. Just remove clothes from plastic dry-cleaning bags. These thin plastic bags can break down during storage and damage fabrics.
SKIP MOTHBALLS
In most cases, if clothing is clean and stored properly, mothballs, which can leave behind a hard-to-remove odor, aren’t necessary. Cedar repels young moths but not adult ones. Keep closets clean and dust-free to deter moths.


