Learning to Code on Your Raspberry Pi
In This Chapter

- The basics of programming on your Raspberry Pi
- Setting up and using Google Coder
- The basics of using Scratch
- More programming skills you can learn
If you pay attention to the tech industry at all, you know there’s a big push to teach people how to program. Many jobs today require at least a basic understanding of coding, and plenty of jobs require advanced coding skills.
The Raspberry Pi was initially created to teach kids basic programming skills, and that remains a goal today. You don’t have to be a kid to take advantage of this though. Even adults can learn plenty about programming using the Raspberry Pi. In fact, because you can’t really multitask much on the Pi, it’s a great way to learn how to code without distractions.
Countless programming languages exist, and you can learn just about any of them on your Raspberry Pi. Programming is a book in and of itself though, so let’s just take a look at a couple of the simpler tools available on the Raspberry Pi.
In this chapter, you learn how to set up and use Google Coder to teach yourself how to code websites. It might sound tough, but it’s a pretty straightforward tool and works great. You also learn about Scratch, the special programming language meant to teach kids the basics of how coding works.
Learning to code might sound intimidating, but it’s not nearly as difficult as it seems if you’re willing to put the time in to it. However, when you learn how to code, you’re teaching yourself a skillset that’s widely applicable in a variety of fields in today’s job market.
It’s not just about the career opportunities, though. It’s also about gaining a new appreciation for technology as a whole. When you start to peek behind the curtain of how software works, you get a better understanding of how to manipulate it to do what you want. In the case of the Raspberry Pi, this means you’re preparing yourself to not only write your own programs, but also to change how existing programs work.
Don’t let this scare you. You’ve already done a lot of this in the course of this book. You’ve changed configuration files, altered boot sequences, and even made a few tiny programs already. Sure, you’re not quite prepared to create the next best-selling iPhone app, but you already have a pretty good understanding of how coding works and are familiar with the toolset.
Coding is one of the most rewarding skills for anyone who loves troubleshooting. Nothing you make will work perfectly the first time, so you’ll always need to troubleshoot to correct any issues. Sound tedious? It is, but coding teaches you basic problem-solving skills you can use in any number of jobs. You’ll iterate on each problem until you get it, and that’s a skillset you won’t develop with many other jobs.

PI POINTER
Learning to code is a hot topic these days, and a number of schools have created coding classes starting as early as elementary school. Thousands of resources are available for learning to code online, and you can do many of them for free. Sites like Khan Academy (khanacademy.org) and Codecademy (codecademy.com) are excellent resources for learning how to code in a variety of languages.
Apple founder Steve Jobs famously said, “I think everybody in this country should learn how to program a computer because it teaches you how to think.” His view provides a great justification for learning how to code, and many in the industry share his opinion.
What Basic Coding Can Teach You
The Raspberry Pi can teach you all kinds of things, but you’re going to learn mostly about basic code literacy in this chapter. Again, learning programming is a book (or many books) in itself, so you’re just going to get a grasp on the basics here.
First off, you’ll learn the basics of the web. Using Google Coder, you’ll learn about HTML, JavaScript, and CSS, which are the primary skills you need to have to do anything online. This isn’t just about operating your own website, though. HTML and CSS are great when you’re trying to write a complex email or working on a blog post. Google Coder will set you up with the vocabulary and skillset to do all of that.

DEFINITION
HTML (HyperText Markup Language) is the standard language used on the internet to render web pages. HTML uses tags to tell a web browser how to render elements. For example, <h1> designates a header, and <img> designates an image. CSS (Cascading Style Sheets) is a style sheet language that tells a web browser how to render the look and formatting of a website. It’s usually used in conjunction with HTML. Whereas HTML covers the basics of a web page, CSS goes into the presentation and can change colors, layout, and fonts. JavaScript is a computer programming language commonly used in web pages to create dynamic content. CSS and HTML are typically static and unchanging; JavaScript allows for animations, widgets, and rendering of more complex miniature programs on web pages.
Scratch is more about teaching you the basics of how programming works and getting you familiar with the language. Boiled down to its simplest form, coding is just a series of if … then statements. If one thing happens … then another thing happens. This is the type of logic that rules all programs, and Scratch gets you familiar with how it works.
By the end of this chapter, and after a few weeks of playing around with Google Coder and Scratch, you’ll understand the basics. You’ll also be familiar enough with your skills and have a better idea if coding is something you want to pursue.
How Coding Can Help You Every Day
Let’s say you’re an accountant, or a school teacher, or a janitor–it doesn’t really matter. Let’s just say you’re not a programmer by trade. Why would you want to learn any of this?
It’s mostly about logic. Even if you don’t go on to become the world’s next great programmer, learning coding teaches you about logic and structure, and that’s easily applicable in nearly every job out there.
Coding also teaches you how to work with the technology you already have. We all carry around electronic devices, and most of us don’t even begin to utilize all they can do. The more you learn about coding, the more sharpened your sense of technology in general gets. This means you’ll breeze through setting up that new printer at the office, installing an operating system on your computer, or even repairing major problems with your home PC. It sounds far-fetched, but coding really does provide the building blocks for dealing with all kinds of real-world problems.
The important thing isn’t making your own computer software; it’s training your brain to understand how to think. To that end, everyone can benefit from learning the basics, so let’s get to it.
Learning Basic Coding with Google Coder
Google Coder teaches you three primary coding languages: HTML, CSS, and JavaScript. These are the main languages you need to know to program for the internet. Once you get everything set up, you’ll go through a series of tutorials that teach you how to code in these languages.
Instead of giving you a blank page and a book to build a website, Coder operates in the other direction. It gives you a web page and allows you to jump in and alter whatever you want. This helps you learn what a good web page looks like and reverse-engineer it to do whatever you want. It’s a nontraditional approach, but it works really well with web design.
Google Coder works a little differently from how you might expect, and it uses your Raspberry Pi in a rather interesting way. Instead of actually coding on your Raspberry Pi, you’ll turn your Raspberry Pi into a mini server using the Google Coder image and then hop over to your personal computer to complete the project. This gives you a private server in your house that you can use to learn how to code from any computer you want.

PI POINTER
Coding for the web is probably the most applicable type of programming for most of us. You can use HTML to write complex emails and having a basic understanding of HTML and CSS is required if you’re writing just about anything online.
Projects and Guides
Google Coder includes a series of projects and guides for you to complete. When you’re done, you’ll have a basic understanding of the basic web programming languages.
The nice thing here is that you won’t be building boring old web pages. Instead, you learn how to manipulate web pages and programs using just a few edits.
Out of the box, Coder contains three different projects:
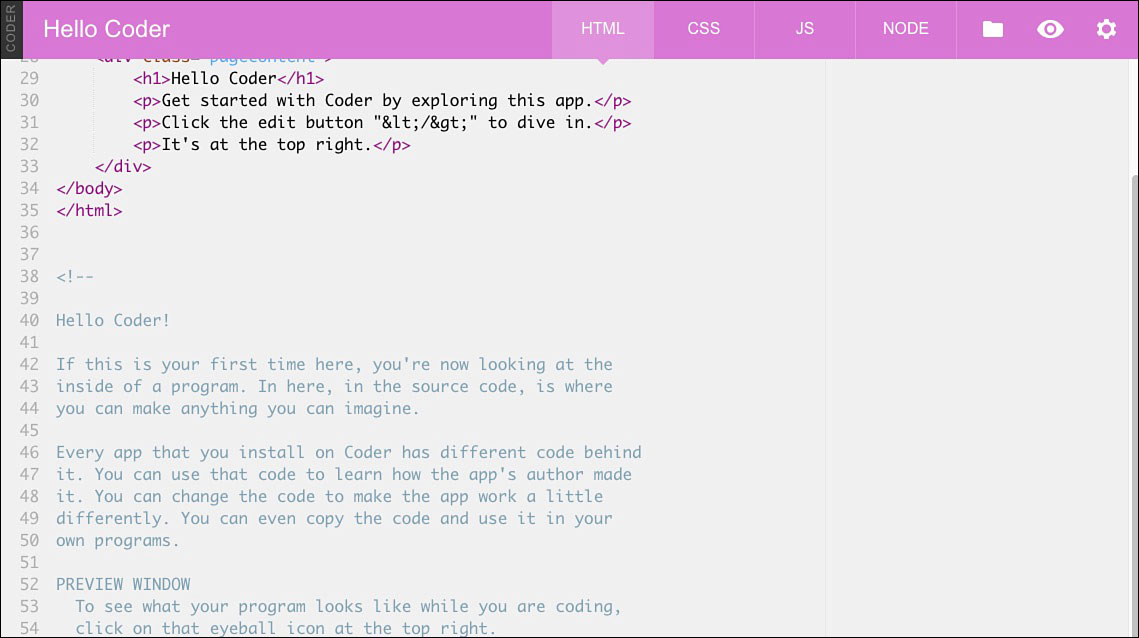
Hello Coder: Hello Coder is an introduction to Coder and the first place you should start when you get everything working. It familiarizes you with Coder, HTML, JavaScript, and CSS. All the tutorials are built into the code itself, so you’ll just follow the instructions on the screen.
The Hello Coder main screen is a colorful introduction to the software.
Eyeball: Eyeball is mostly about JavaScript and CSS. When you load the guide, you’re greeted by an eyeball that tracks your mouse movement around the screen. From there, you can pop into the code and manipulate it to do whatever you want.
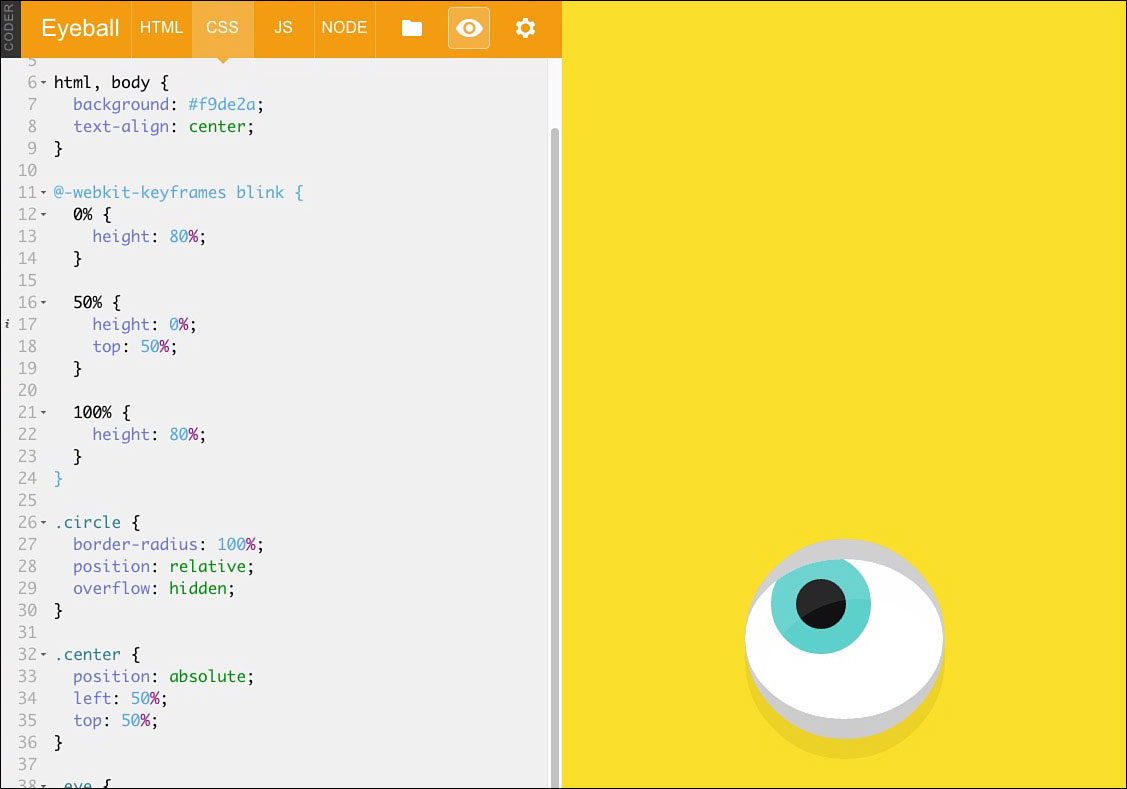
Eyeball teaches you all about JavaScript and CSS.
Space Rocks! Space Rocks! is an Asteroids-esque game built in such a way that you can hack it. In Coder, you can change all types of parameters to alter how the game works.
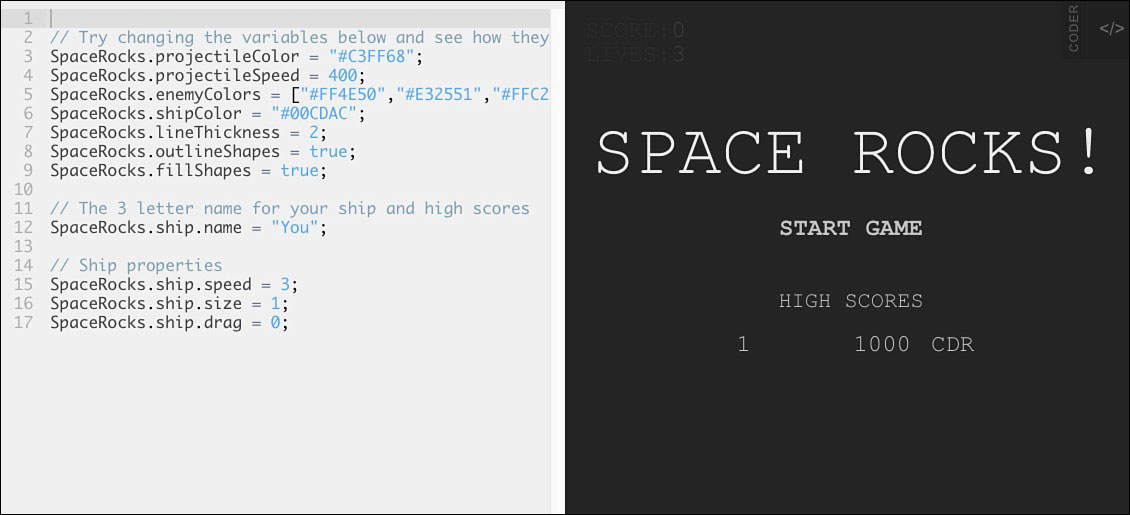
Space Rocks! shows you how to alter small bits of code in a game.
That’s it for the startup projects. They should keep you busy for a little while. When you finish with those, you can download more at googlecreativelab.github.io/coder-projects.
Learning Basic Web Development Skills
Google Coder teaches you the basics of web development with three languages—HTML, CSS, and JavaScript. Let’s take a closer look at exactly what that means.
HTML: When you’re using Coder, you can pop over to the HTML section of a page and edit whatever you like. You can change what the text says, move where it is, and alter some basic elements of the web page. HTML is the backbone of just about every website, so it’s good to know how to manipulate it to do whatever you want. With Coder, you learn how to alter all these elements.
CSS: CSS and Coder work really well together. CSS is all about changing the overall look of a web page, which includes the colors, fonts, and layout. With Coder, you can pop into any of the premade pages and change all those elements to whatever you want. You can change basic colors, move things around, and update the fonts.
JavaScript: JavaScript is a programming language, and because of that, it’s a bit harder to manipulate on your own. JavaScript uses the standard if … then formula of programming, so it’s much more complex than HTML or CSS. That said, JavaScript is one of the easier programming languages to learn, so it’s a good starting point. Coder does a good job of teaching the basics of how it works. You’ll be able to alter the behavior of a web page in Coder, make a game work a little differently, and change how certain elements on a page work.
When you have a good understanding of these three languages, you’ll be able to do just about anything online.

PI POINTER
Once you have a grip on HTML, CSS, and JavaScript, you can start making your own websites. It takes a while to master, but it doesn’t take long to get a working knowledge to start making stuff with.
Coder
Coder is pretty easy to set up, but Windows users have to set up a few more things than Mac users.
As mentioned earlier, Coder works a little differently from what you’d expect. You’ll burn a custom SD card, but instead of working on the Raspberry Pi, you’ll use your Raspberry Pi as a server that you can access from your personal computer, where you’ll do most of your work.
Downloading Coder
First, be sure you have a spare 4GB SD card. Coder is its own operating system and image, so you’ll burn that onto an SD card much like you did with other operating systems.
Once you have your SD card, download Google Coder. You can get the image from the Google Coder site at googlecreativelab.github.io/coder.

Download Coder just like any other software.
When the download is complete, unzip the file. What you do next depends on whether you’re using a Mac or Windows computer.
Windows:
On Windows, you’ll install Coder the same way you installed Raspbian, Raspbmc, and every other operating system so far. Here’s a refresher in case you’ve forgotten how to do that:
- Download Win32 Disk Imager from launchpad.net/win32-image-writer.
- Double-click the downloaded file to unzip it. This makes a new folder.
- Inside that folder is an application called Win32DiskImager.exe; double-click it to open it. If you’re on Windows 7 or 8, right-click the file and choose Run as Administrator.
- Win32 Disk Imager should automatically choose your SD card, but if it doesn’t, click on the drop-down menu and choose your SD card from the list.
- Click the folder icon, and select the Coder IMG file you downloaded earlier.
- Click the Write button, and wait for Win32 Disk Imager to run.
If your Raspberry Pi is wired through an Ethernet connection, you can insert the SD card into your Raspberry Pi, boot up your Raspberry Pi, and head to coder.local in your personal computer’s web browser to load Coder.
If you’re on Wi-Fi, you have one more thing to do:
- From your personal computer, join the Wi-Fi network CoderConfig. This is created automatically by the Coder operating system when you have a Wi-Fi card plugged in.
- From your browser, visit 192.168.0.1 and follow the on-screen instructions to set up your Wi-Fi card.
- When it’s set up, you can get to Coder by pointing your web browser to coder.local.
You’re now all set up to use Coder.

PI POINTER
You can always get into Coder’s main settings page by clicking the gear icon in Coder when it’s up and running. If you decide you don’t want to use Ethernet anymore and prefer Wi-Fi, you can set it up here.
If you’re on a Mac, Coder comes with an installation program so you don’t need to do much work:
- In the Coder folder you just unzipped, double-click CoderSetup. This is the Coder installation program.
- Remove any SD cards from your computer, and click Start.
- Insert your SD card into your computer, and click Next.
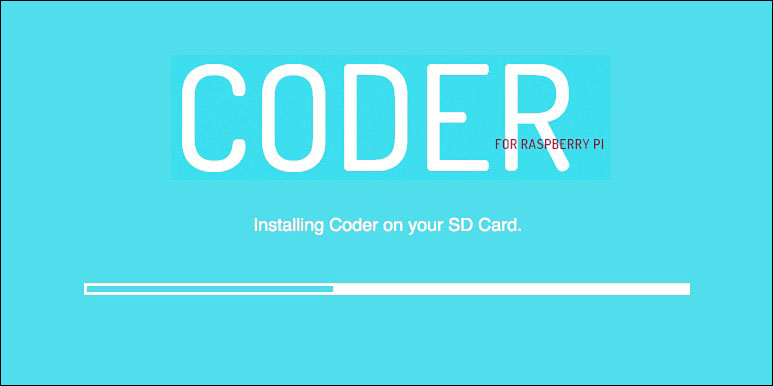
Installation of Coder on a Mac is simple.
- When your card is recognized, click Next again and wait for CoderSetup to do its job.
If your Raspberry Pi is wired through an Ethernet connection, you can just insert the SD card into your Raspberry Pi, boot your Raspberry Pi, and head to coder.local in your personal computer’s web browser to load Coder.
If you’re on Wi-Fi, you need to follow an additional step:
- From your personal computer, join the Wi-Fi network CoderConfig. This is created automatically by the Coder operating system when you have a Wi-Fi card plugged in.
- From your browser, visit 192.168.0.1 and follow the on-screen instructions to set up your Wi-Fi card.
- When it’s set up, you can get to coder by pointing your web browser to coder.local.
Now Coder is all set and ready to go.
When you first load Coder, you’ll need to create a password. Do that first. You might get a warning about Coder’s certificate here, too. This is just because Coder is running on your home network and your browser thinks that looks bad. Don’t worry about it, and click Proceed Anyway. You’ll be greeted with Coder’s landing page.
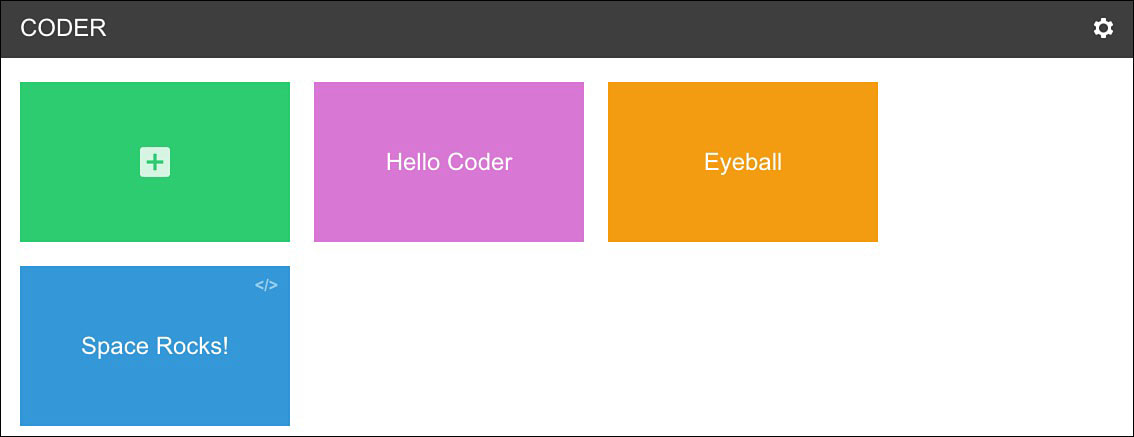
This is the landing page for Coder. It has three projects you can choose from.
Accessing Coder Projects
To open a project, just click on it. When you do, you’re taken to a guide that walks you through what you can do with it. To get started, click the </> button in the top-right corner of a project.
Unlike a traditional guide, Coder’s instructions are all inside the code itself. There are tabs for HTML, CSS, and JavaScript at the top of the page alongside a Node tab. The Node tab is connected to the JavaScript on your site and generates code based on your server. It’s meant for more advanced operations.
So to play around with Coder, just pick a tab and start fiddling around with different parameters. Coder has comments designated by lines that start with // that tell you what each section does. Play around and start learning what each thing does. Don’t worry about breaking anything; Coder resets to the defaults when you exit the project.

PI POINTER
Seriously, feel free to play around with Coder to your heart’s content. You won’t mess up anything, and you’ll learn more from “breaking” it than you will from making it work properly. Problem-solving is part of the game here, so get your mind ready for it.
After you’ve messed around with Coder for a while, you’ll slowly gain a basic understanding of how to code for the web.
Coder comes with just three different projects, but you can add more very easily. Once you get the basics of web design down, you can use Coder to learn all kinds of things.
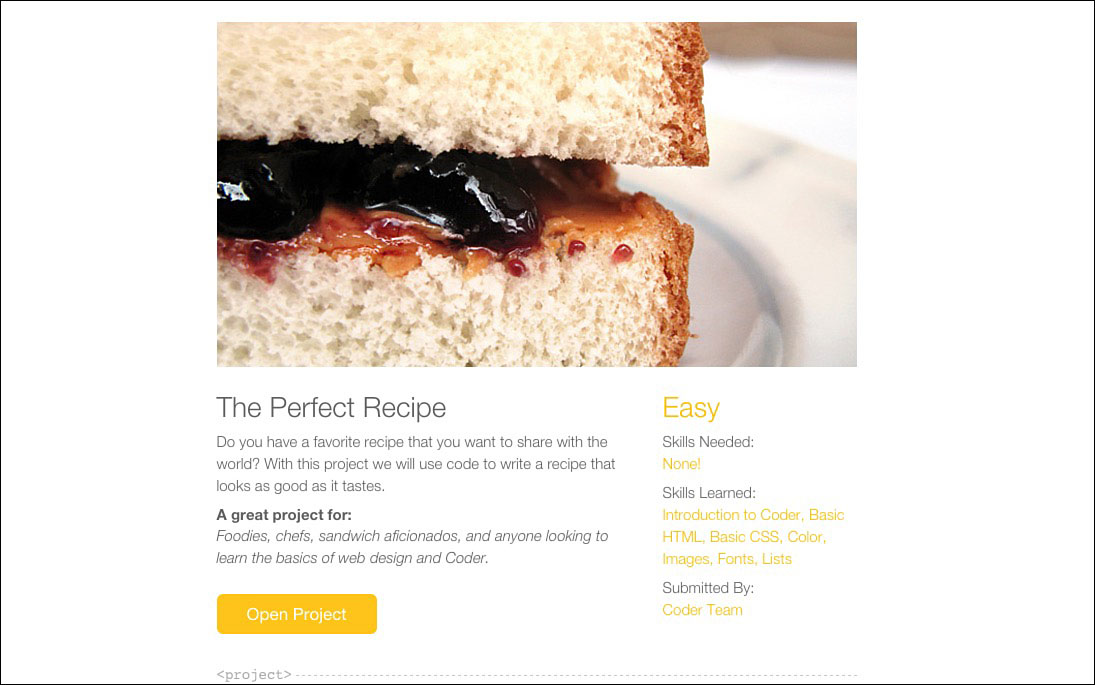
You can add new projects to Coder with just a couple clicks.
You can find a wide selection of new Coder projects on Google’s site at googlecreativelab.github.io/coder-projects, so take some time to browse through them and pick one that looks fun. When you find one, you’ll download it and add it to Coder. Here’s how:
- Click the Download Complete Project link. This downloads all the files you need for the Coder project onto your computer.
- In the Coder app, click the + button on the landing page.
- Name your project, pick a color, and click Create.
That’s it for creating a new project. Each project page has a step-by-step guide for running through the project, so follow the guide to learn everything you need to know.

PI POINTER
Each project page lists the skills you’ll learn, so take some time to decide what you’re interested in. Most of these are fun to do, so you’ll have a good time making a fun little website regardless. But because they each teach a different skillset, it’s worth spending some time picking the right project.
That’s it with Coder. After you run through the three basic projects and go through a handful of the additional projects you find online, you’ll have a pretty solid understanding of HTML, CSS, and JavaScript.
Bet you didn’t think you’d pick up on all this so quickly, huh? It’s not as hard as it looks, and the skills you learn are pretty applicable to basic web use.
Scratch
Scratch is a program included with Raspbian you can use to learn basic coding. It’s not just in Raspbian though; you can download Scratch for Window or Mac or just use it in your browser. It’s included in Raspbian because it’s free and open source. It’s also one of the best ways to teach kids basic programming skills, so it falls in line with the Raspberry Pi’s lineage.
Scratch was created by the Lifelong Kindergarten Group at the MIT Media Lab. It’s designed to teach kids aged 8 to 16 core programming principles, but it’s great for people of all ages. You’ll often find Scratch in elementary and high school computer labs.

PI POINTER
Because it’s free, you’ll find Scratch pretty much any place that’s teaching programming. Schools of all levels usually have it loaded on their computers, and you can even access it online if you don’t feel like downloading software.
Scratch was made so anyone can understand how to make programs. It uses a programming language called drag-and-drop programming. Instead of writing out complicated and hard-to-remember lines of syntax, you simply grab a block of programming you want to use and drag it into your program. You connect these blocks until you have a working program. It’s meant more for education than it is creating a final sellable product.
Instead of relying on a text editor, Scratch uses a graphical user interface. For people new to programming, this is often easier to understand because you’re able to see what you’re doing instead of just typing in text.
You’re not going to make a massive program with Scratch, but you will learn all about the basics of how programming works. Scratch teaches you core principles like structure, object orientation, and threading. Moving forward, this should help you along the way if you want to take on another programming language.
Scratch’s initial development at MIT Media Lab was led by Mitchel Resnick, Brian Silverman, and Paula Bonta. It was originally released in 2003. The first web-based version of Scratch was introduced in 2006, and since 2007, users can easily share their projects with other people on the Scratch website. It currently has around 4 million registered users.
According to Mitchell Resnick, the name Scratch comes from DJing. “We take the name ‘Scratch,’ from the way that hip-hop disk jockeys scratch with music. They take pieces of music and then combine them together in unexpected and creative ways,” he says. That’s the core principle of how Scratch works, too. You’re taking bits and pieces of one thing and remixing them into another. It’s surprisingly similar to a turntablist’s work.
How Scratch Works
Scratch was founded with a simple motto: “Imagine, program, share.” This also happens to describe the basic process for how Scratch programs work: first you think of an idea, then you program it, then you share it.
Unlike a traditional coding text editor, Scratch has a graphical user interface. It’s divided into several parts that are grouped into three columns. To create a program, you drop blocks onto each other to create a longer script.
The Main Screen
When you first open Scratch, you’re greeted with the Project Editor screen. This is the main screen you’ll be working in to create your programs.
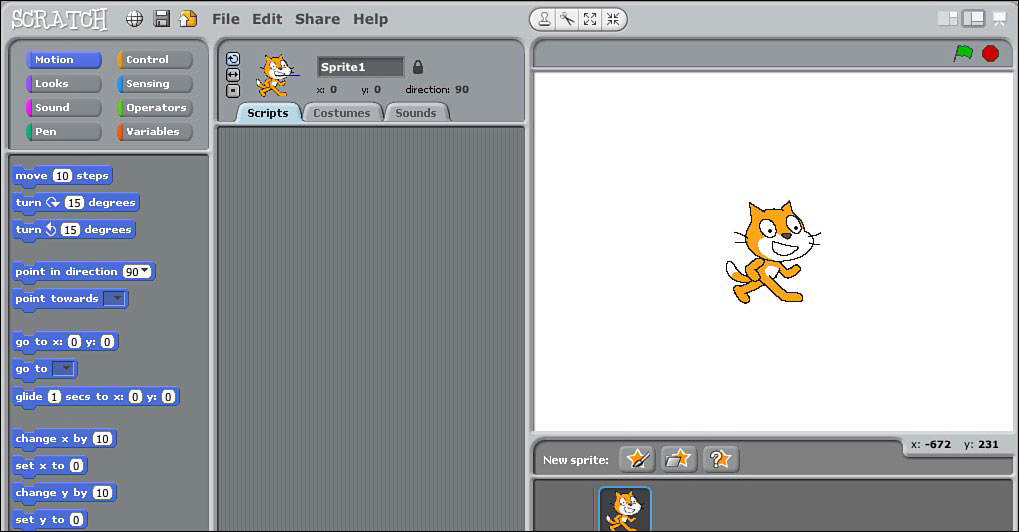
Scratch’s main screen is divided into three parts: the palettes (left), the sprites (center), and the stage (left).
This probably looks pretty confusing at first, but it’s actually very simple. Spend some time playing around on the main screen. Move stuff around, connect blocks to other blocks, and experiment with what happens.
The basic idea here is pretty simple: you take a block from the block palette, drag it into the scripts, and link them together to form a program that’s acted out on the stage.
The Block Palette
The block palette on the left side of the main screen includes all the different operations you can perform. Drag a block from here into the scripting area in the center to add it to your program. This is the coding side of Scratch and where you’ll define how your program works.
Let’s take a look at each of the different block categories.
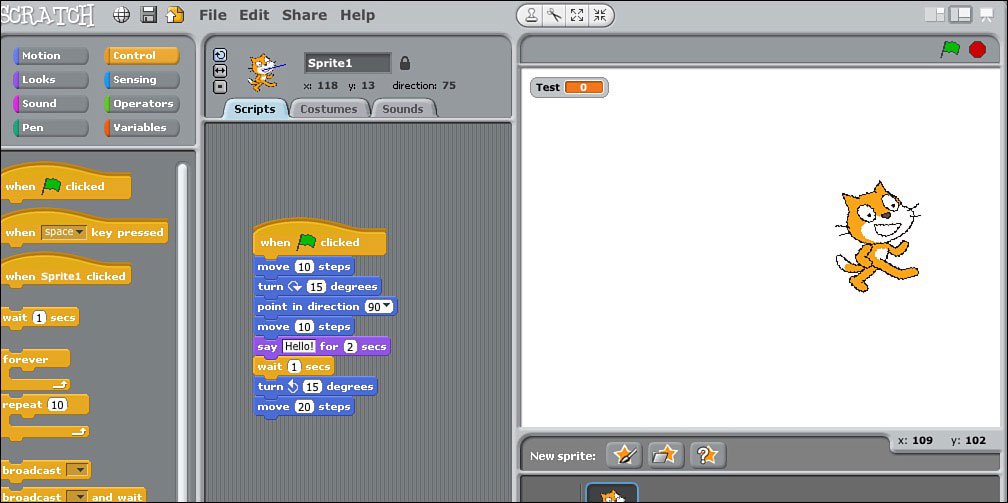
The block pallette is where you’ll find the scripts to make your program.
Motion: The motion block moves your sprite around the screen. You have a variety of options here. You can make your sprite move a number of steps, turn, point in a direction, go to a specific point, or even bounce off the edge.
Looks: This is a graphics section. You can make your sprite switch into a costume, say something in text, change color, change size, or hide completely.
Sound: This makes your sprite make a sound effect. You can play a specific sound, play a drum, play an instrument, change volume, or alter the tempo.
Pen: The pen tool enables you to trace the motion of a sprite as it moves.
Control: This section is all about setting up parameters for your program to execute. Regardless of what other blocks you drop into the scripting area, they can’t do anything until you add a control. For example, to start a program, you can add the When flag clicked block. This tells the program to start when you click the green flag icon. You can also add blocks for specific if variables, make sections repeat or your program repeat, and stop everything altogether. Remember, your program won’t work unless you include a control block to start it.
Sensing: Sensing blocks watch for mouse, keyboard, or other sensor signals. For example, you can set your program to perform an action when the mouse is moved to an area, or when you input a specific command into the keyboard.
Operators: These are math, logic, and string functions. It sounds complicated, but it’s actually pretty simple. For example, with an operator, you can set it up so math problems pop up on the screen and then have an answer box that needs the correct answer before it can move forward.
Variables: Variables are all about specific operations. These are basically known values. You can set a variable to read a correct answer, a string of text, or nothing at all.
That’s all for the block palette. Play around with it for a little while to see what you can make your sprite do.

PI POINTER
Like Coder, the best way to learn how to use Scratch is to just mess around with it. You’re not going to break anything on your Raspberry Pi, so feel free to try anything that comes to mind.
Sprites and Scripts
The center sprites and scripts section is where you drop your blocks to perform actions. A sprite is a Scratch object that’s associated with an image. When you first load Scratch, this is a cat.
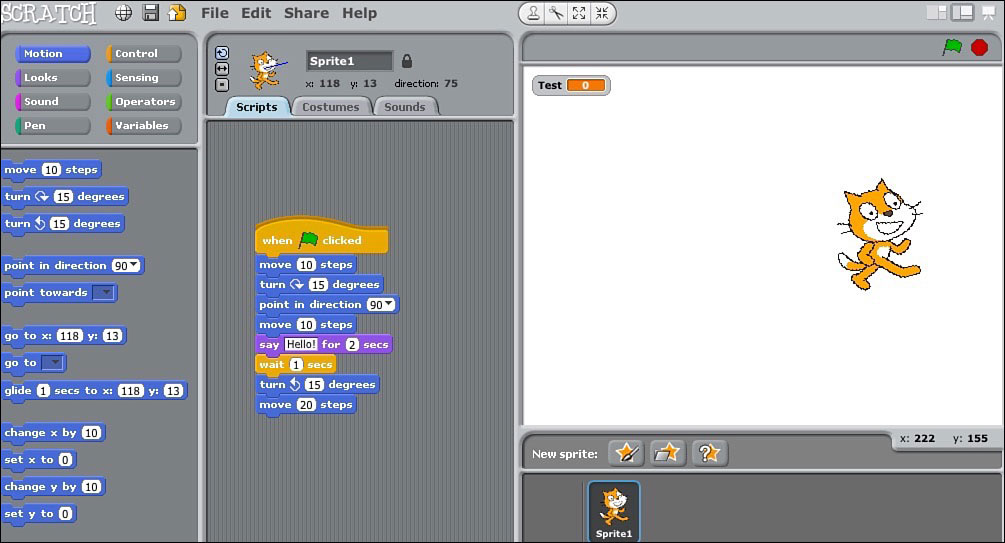
Set up all your actions in the sprites and scripts section.
Essentially, your sprite is the object you’re trying to manipulate with your program. You drag the blocks onto the sprite, and it then does whatever you tell it to do.
You can connect these blocks successively by just dragging one block to another. So you could start with the Walk 10 Steps block and add the Turn 15 Degrees block to make your sprite walk 10 steps and turn.
Play around with these for a while. Once you start playing with different variations on your scripts, you’ll get a better understanding of how they work.
Also in this section are the Costumes and Sounds tabs. With these, you can change your sprite’s costume and record sound effects. With Costumes, you can click the Paint button to change the colors, Import to bring in your own images, or Camera to take a picture from your camera. With Sounds, you can click the Record button to record your own voice or the Import button to import sounds from your computer.

PI POINTER
You can use the Camera button to take a picture of yourself and insert your likeness into the program. Give it a try if you have the camera module installed on your Raspberry Pi.
The Stage
The stage is where your program executes. When you get everything in order, you can execute your program and you’ll see it acted out on the stage.
Depending on what Control block you use, you can trigger it in the stage area. For example, if you used the green flag to start your program, click the green flag on the stage to see it execute.
Below the Stage you’ll find the sprite menu. Here you can create new sprites and drag them into the stage so you’re not stuck with just the default cat. Click the paint icon to draw your own sprite, and drag and drop it onto the stage when you’re done.
Going Further
Scratch might be made for kids, but it’s a big program that can do a lot. To really dig in, check out other people’s projects, run through a few tutorials, and share your creations with others. Here are a few resources for doing just that:
Scratch Video Tutorials: To learn everything you need to know about programming with Scratch, it’s best to start at the source. Scratch hosts a bunch of video tutorials that walk you through everything you need to know about programming with the software. You can find them at scratch.mit.edu/help/videos.
Check out other Scratch programs: Sometimes it’s best to see what other people are doing with Scratch to help you with the idea portion. Explore other people’s creations at scratch.mit.edu/explore.
Learn to Program with Scratch: This book covers everything you could possible need to know about programming with Scratch. You can make a ton of different programs, learn how Scratch works, and more. Get it from No Starch Press at nostarch.com/learnscratch.
Once you have a grasp on Scratch, you can move on to other programming languages if you’re still interested. Scratch provides the mental framework for coding, but you still have so much more to learn if you’re interested.
Other Programming Skills You Can Learn
on Your Pi
Many different programming languages exist, and your Raspberry Pi is a great place to learn about them.
You’ll need to track down books, online guides, and videos to really learn how to code, but the Raspberry Pi is set up to work with a few different programming languages out of the box.
Python
Python is already on your Raspberry Pi if you’re using Raspbian. You can program with Python using IDLE or IDLE3; both applications should be on your Raspbian desktop. Whatever programs you create, you’ll be able to execute them from your Raspberry Pi.
Python is a general-purpose programming language that works on a wide variety of operating systems. It was conceived in the late 1980s and released in 1991 by Guido van Rossum. Like many programming languages, Python uses standard statements like if, for, while, try, and others to designate when things happen. It’s far too complicated to cover here, but Python is a great language to learn on the Raspberry Pi because just about everything you make can be executed on your Raspberry Pi.
You can find a lot more information about Python and the Raspberry Pi on the Raspberry Pi site at raspberrypi.org/documentation/usage/python. If you’re looking for a fun project, writer Craig Richardson shows you how to use Minecraft to learn Python on the Raspberry Pi at arghbox.files.wordpress.com/2013/06/minecraftbook.pdf.
C++ was created by Bjarne Stroustrup in 1982. It’s one of the most popular programming languages today and is compatible with a range of operating systems.
It’s known as an object-oriented programming language, which means it works differently from a language like Python. Instead of variables, it uses objects in its language to define characteristics. It’ll make sense when you start actually using it.
C++ is a general-purpose programming language designed to work on all types of platforms. It’s great for everything from video games to the Raspberry Pi.
In Raspbian, you’ll use a program called Geany to write your C++ programs. It’s included free in most versions of Raspbian. At a glance, it looks like a regular text editor, but it’s made specifically for coding.
If you’re looking for a place to get started with C++, element14 has a great guide using the Raspberry Pi at element14.com/community/community/code_exchange/blog/2013/01/02/c-tutorial--hello-raspberry-pi.
Java
Java is a programming language that uses the same object-oriented design as C++. The difference is that once the code is created, it can run on any machine, regardless of what you made it on. In the case of a Raspberry Pi, this means you can make something on your Raspberry Pi and use it on your personal computer running Windows.
Java was created by James Gosling for Sun Microsystems in 1995. Currently, the Oracle Corporation handles development. Java’s used for all sorts of programs, but the most popular right now is Minecraft, which was developed in Java.
You can sign up for a free class that teaches you how to develop Java programs using
the Raspberry Pi at apex.oracle.com/pls/apex/f?p=44785:145:0::::P145_EVENT_ID,P145_PREV_PAGE:861,143.

PI POINTER
You can learn these programming languages on any computer you want, but the Raspberry Pi is great because it’s packed with everything you need from the start. Plus, if you can get your program working on the Raspberry Pi, there’s a pretty good chance it’ll work great on every other computer out there.
- The Raspberry Pi’s initial purpose was to teach coding, many programs for learning how to code were made for the Raspberry Pi.
- Learning to code is a great way to flex your mental muscles and learn basic logic and problem-solving skills.
- Google released a special SD card image called Google Coder that’s meant to teach basic web programming skills.
- Scratch is free programming software developed by MIT to teach the basics of coding to kids.
