Spoon Rack & Spoons
The simple wooden spoon, one of the earliest kitchen implements, is still used today and is, in fact, often recommended in order to prevent abrasion that would be caused by the use of a metal spoon. However, wooden spoons sold today are mere shadows of what they once were. Not only are they all standardized and mass-produced, they are also flat and uninteresting. However, antique wooden spoons vary enormously. They are often attractively designed, with deep bowls, perhaps made as decorative gifts, and all made by hand. Spoons would most often be stored in small, open wooden racks on the wall. Here, they were conveniently on hand as well as decorative features.

Spoon rack
ABILITY LEVEL
Novice/Intermediate
SIZE
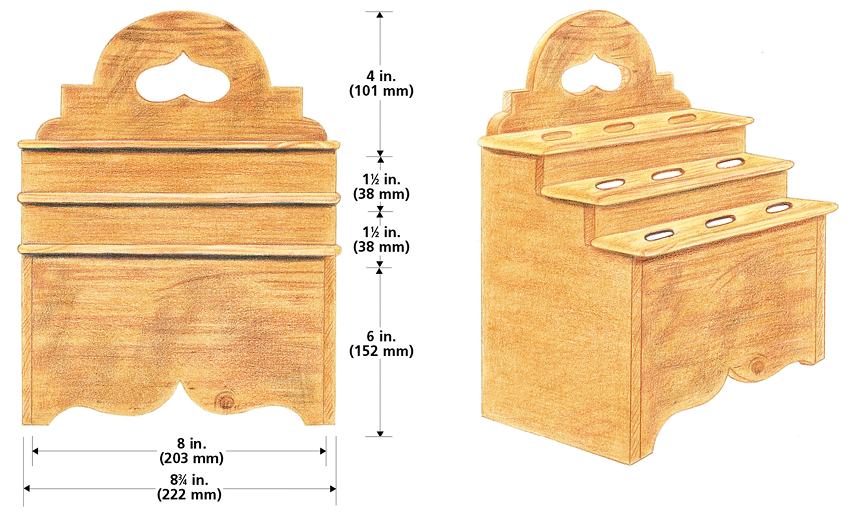
13 x 9 x 5.625 in. (330 x 229 x 143 mm)
MATERIALS
Pine, Cherry
CUTTING LIST
1 front
8 x 6 x .375 in. (203 x 152 x 10 mm)
1 back
8 x 6 x .375 in. (203 x 152 x 10 mm)
2 sides
9 x 5.625 x .375 in. (229 x 143 x 10 mm)
2 step fronts
8 .75 x 1.5 x .375 in. (222 x 38 x 10 mm)
3 step tops
9 x 1.875 x .375 in. (229 x 47 x 10 mm)
See template patterns for the back and front pieces.
Spoons
ABILITY LEVEL
Novice/Intermediate
SIZE
10 x 2.5 x 1.5 in. (254 x 64 x 38 mm)
MATERIALS
Sycamore, Lime, Beech
CUTTING LIST
10 x 2.5 x 1.5 in. (254 x 64 x 38 mm)
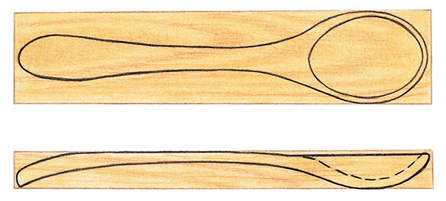
1: Mark out the required pieces and cut them to the sizes given.
2: On each of the two side pieces, mark out the “step” shaping. Take care when measuring and marking out to ensure that the separate pieces fit at the assembly stage.
3: Cut each side piece out to the drawn shape. You will cover the sawed edges later, but it is a good idea to clean them up to encourage a good glued fit of the step fronts and tops.
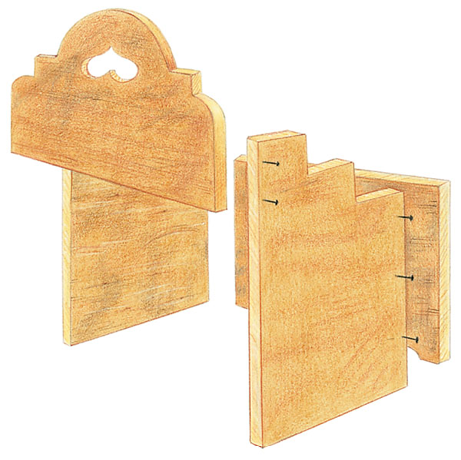
4: Enlarge and trace the template patterns of the back and front pieces (see Template chapter) and transfer these shapes to the appropriate pieces of wood.
5: Cut these pieces to shape (see Tools & Techniques chapter for advice on cutting wood). Cut the internal shape with a coping saw after first drilling through the wood.
6: Clean off all marks and sand smooth.
7: Mark out the three step top pieces as shown or to any other configuration of holes and slots of your choice.
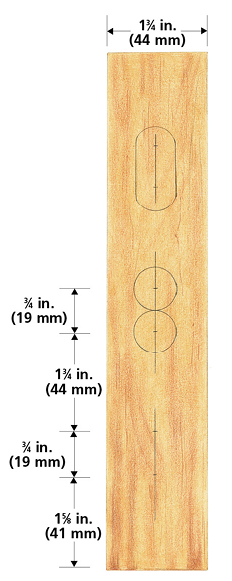
8: Drill or cut them as required. Drill through into a waste piece of wood to prevent the underside splintering. Sand back any rough edges.
9: Round over or bevel the front edges and ends of each step top.
10: Check that everything fits together correctly and, in particular, that the two step front pieces fit neatly under the overhang of the step tops.
11: Now clean off all surface marks and pencil lines before assembly.
12: Glue and nail the spoon rack together (see Tools & Techniques chapter for advice). Begin by assembling the front piece between the two side pieces and then add the back piece.
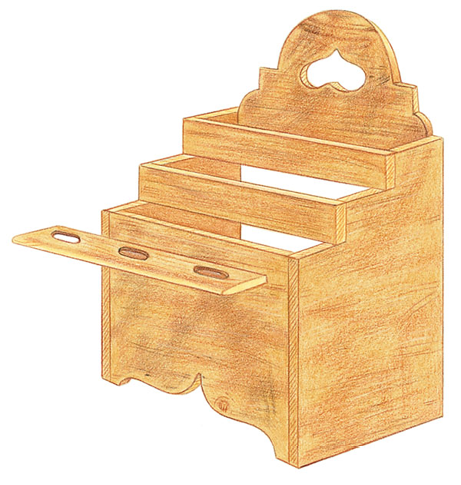
13: Next, put the two step fronts in position and, finally, add the three step tops, beginning at the bottom.
14: Wipe off any surplus glue. Punch all nail heads below the surface and fill the indentations. Leave the piece to dry.
15: Clean up and apply a finish of your choice (see Finishing chapter for options).
Spoons
1: Traditionally, wooden spoons were made by splitting a small sycamore log, about 4 in. (100 mm) in diameter, into two halves and then roughly chopping the outside shape with a sharp, short-handled axe.
2: After this, the bowl was hollowed out using a special crooked or bent knife. The traditional Welsh carving tool (a twca cam) has a short, hooked blade and a straight handle some 18 in. (457 mm) in length. Today, hooked knives, often of Swedish origin, are readily obtainable and can be used successfully instead.
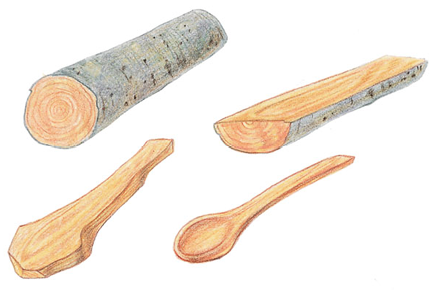
3: Final shaping and finishing was accomplished by means of another small knife and a spokeshave.
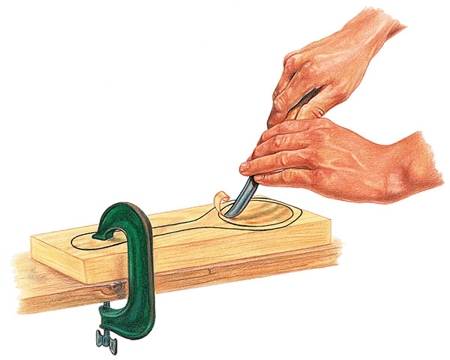
4: Spoons today can be shaped by sawing and hollowing out with a curved woodcarver’s gouge. The most suitable type is the long, bent gouge designed for scooping out concave shapes. A medium-size, medium-sweep gouge is best; a .75 in. (19 mm) No. 6 is fine for the job. However, you must keep the gouge sharp, (see Tools & Techniques chapter for advice).
5: In this method, the bowl of the spoon is hollowed out first, before the outside is shaped. This allows the work piece to be held safely while the hollowing out takes place.
6: Select the material and mark out the shape of your spoon and then clamp the piece securely to a bench in a comfortable working position.
7: Starting at the center, working outward and concentrically, remove the waste wood. Use a scooping action, going into and out of the material to remove a chip of wood each time. Don’t dig in and take care not to go too deep. Aim to get a good finish from a sharp gouge whenever possible.
8: Remove the piece from the clamp and saw the outside to shape (see Tools & Techniques chapter for advice).
9: Complete the shaping of the outside by whittling with a knife, or use a rasp and file. Finish off with sandpaper for a smooth appearance, if required. Tool marks can add character if they are left showing.
10: Don’t apply any finish. After use, clean spoons by washing and occasional scouring. Never leave a wooden spoon soaking in water for any length of time.
11: Sometimes handles had simple, carved decoration, and you can add this to your spoons if you wish.