WHAT’S IN THIS CHAPTER?
WROX.COM CODE DOWNLOADS FOR THIS CHAPTER
Please note that all the code examples in this chapter are available as a part of this chapter’s code download on the book’s website at www.wrox.com on the Download Code tab.
The authentication and authorization of users are important functions in many websites and browser-based applications. Traditionally, when working with Microsoft’s Windows Forms applications (thick-client), you depended on Windows Integrated Authentication; when working with browser-based applications (thin-client), you used forms authentication.
Forms authentication enabled you to take requests that were not yet authenticated and redirect them to an HTML form using HTTP client-side redirection. The user provided his login information and submitted the form. After the application authenticated the request, the user received an HTTP cookie, which was then used on any subsequent requests. This kind of authentication was fine in many ways, but it required developers to build every element and even manage the backend mechanics of the overall system. This task was daunting for many developers and, in most cases, it was rather time-consuming.
ASP.NET 4.5 includes an authentication and authorization management service that takes care of the login, authentication, authorization, and management of users who require access to your web pages or applications. This outstanding membership and role management service is an easy-to-implement framework that works out of the box using Microsoft SQL Server as the backend data store. This framework also includes an API that allows for programmatic access to the capabilities of both the membership and role management services. In addition, a number of membership and role management–focused server controls make it easy to create web applications that incorporate everything these services have to offer.
Before you look at the membership and role management features of ASP.NET 4.5, understanding the basic principles of authentication and authorization is vital. The following provides a quick review:
ASP.NET 4.5 provides the membership management service to deal with authenticating users to access a page or an entire site. The ASP.NET management service not only provides an API suite for managing users, but it also gives you some server controls, which in turn work with this API. These server controls work with the end user through the process of authentication. You look at the functionality of these controls shortly.
Before you can use the security controls that are provided with ASP.NET 4.5, you first have to set up your application to work with the membership service. How you do this depends on how you approach the security framework provided.
Up to and including Visual Studio 2010, the built-in SqlMembershipProvider instance is used for storing details about the registered users of your application. Visual Studio 2012 templates for ASP.NET MVC default to the new DefaultMembershipProvider, but ASP.NET Web Forms templates still use SqlMembershipProvider. From an API point of view, the kind of provider used will not matter in this chapter.
For the initial demonstrations, the examples in this chapter work with forms-based authentication. You can assume for these examples that the application is on the public Internet and, therefore, is open to the public for registration and viewing. If it were an intranet-based application (meaning that all the users are on a private network), you could use Windows Integrated Authentication for authenticating users.
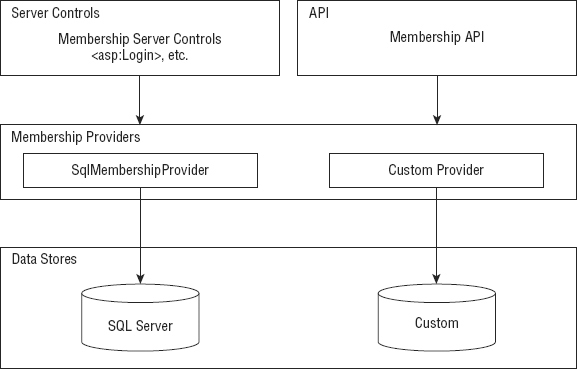
ASP.NET 4.5, as you know, offers a data provider model that handles the detailed management required to interact with multiple types of underlying data stores. Figure 19-1 shows a diagram of the ASP.NET 4.5 membership service.
From the diagram, you can see that, like the rest of the ASP.NET provider models, the membership providers can access a wide variety of underlying data stores. In this diagram, you can see the built-in Microsoft SQL Server data store. You can also build your own membership providers to get at any other custom data stores that work with user credentials. Above the membership providers in the diagram, you can see a collection of security-focused server controls that utilize the access granted by the underlying membership providers to work with the users in the authentication process.
To have the forms authentication element in your web application work with the membership service, the first step is to turn on forms authentication within the web.config file. To do so, create a web.config file (if you do not already have one in your application). Next, add the section shown in Listing 19-1 to this file.
LISTING 19-1: Adding forms authentication to the web.config file
<?xml version="1.0" encoding="utf-8"?>
<configuration>
  <system.web>
    <authentication mode="Forms" />
  </system.web>
</configuration>
The simple addition of the <authentication> element to the web.config file turns on everything that you need to start using the membership service provided by ASP.NET 4.5. To turn on the forms authentication using this element, you simply give the value Forms to the mode attribute. This is a forms authentication example, but other possible values of the mode attribute include Windows, Passport, or None.
IIS authentication schemes include basic, digest, and Integrated Windows Authentication. Passport authentication points to a centralized service provided by Microsoft that offers a single login and core profile service for any member sites. It costs money to use Passport, which has also been deprecated by Microsoft.
Because the mode attribute in this example is set to Forms, you can move on to the next step of adding users to the data store. You can also change the behavior of the forms authentication system at this point by making some modifications to the web.config file. These possibilities are reviewed next.
Using forms authentication, you can provide users with access to a site or materials based upon credentials they input into a web-based form. When an end user attempts to access a website, he is entering the site using anonymous authentication, which is the default authentication mode. If he is found to be anonymous, he can be redirected (by ASP.NET) to a specified login page. After the end user inputs the appropriate login information and passes the authentication process, he is provided with an HTTP cookie, which can be used in any subsequent requests.
You can modify the behavior of the forms-based authentication by defining that behavior within a <forms> section in the web.config file. You can see the possibilities of the forms authentication setting in Listing 19-2, which shows possible changes to the <forms> section in the web.config file.
LISTING 19-2: Modifying the form’s authentication behavior
<?xml version="1.0" encoding="utf-8"?>
<configuration>
  <system.web>
    <authentication mode="Forms">
      <forms name=".ASPXAUTH"
         loginUrl="Login.aspx"
         protection="All"
         timeout="30"
         path="/"
         requireSSL="false"
         slidingExpiration="true"
         cookieless="UseDeviceProfile" />
    </authentication>
  </system.web>
</configuration>
You can set these as you want, and you have plenty of options for values other than the ones that are displayed. Also, as stated earlier, these values are not required. You can use the membership service right away with only the configuration setting that is shown in Listing 19-1.
You can find some interesting settings in Listing 19-2, however. You can really change the behavior of the forms authentication system by adding this <forms> element to the web.config file. If you do this, however, make sure that you have the <forms> element nested within the <authentication> elements. The following list describes the possible attributes of the <forms> element:
Now that forms authentication is turned on, the next step is adding users to the Microsoft SQL Server Express Edition data store, ASPNETDB.mdf.
To add users to the membership service, you can register users into the Microsoft SQL Server Express Edition data store. The first question you might ask is, “Where is this data store?”
The Microsoft SQL Server provider for the membership system can use a SQL Server Express Edition file that is structured specifically for the membership service (and other ASP.NET systems, such as the role management system). ASP.NET is set to automatically create this particular file for you if the appropriate file does not exist already. To create the ASPNETDB.mdf file, you work with the ASP.NET server controls that utilize an aspect of the membership service. When the application requires the ASPNETDB.mdf file, ASP.NET creates this file on your behalf in the App_Data folder.
After the data store is in place, it is time to start adding users to the data store.
The CreateUserWizard server control is one that can be used in conjunction with the membership service. You can find this and the other controls mentioned in this chapter under the Login section in the Visual Studio 2012 Toolbox. The CreateUserWizard control enables you to plug registered users into your data store for later retrieval. If a page in your application allows end users to register for your site, you want, at a minimum, to retrieve a login and password from the user and place these values in the data store. This enables the end user to access these items later to log in to the application using the membership system.
To make your life as simple as possible, the CreateUserWizard control takes complete control of registration on your behalf. Listing 19-3 shows a simple use of the control.
LISTING 19-3: Allowing end users to register with the site
<%@ Page Language="C#" %>
<html xmlns="http://www.w3.org/1999/xhtml">
<head runat="server">
  <title>Creating Users</title>
</head>
<body>
  <form id="form1" runat="server">
    <asp:CreateUserWizard ID="CreateUserWizard1" Runat="server"
     BorderWidth="1px" BorderColor="#FFDFAD" BorderStyle="Solid"
     BackColor="#FFFBD6" Font-Names="Verdana">
      <TitleTextStyle Font-Bold="True" BackColor="#990000"
       ForeColor="White"></TitleTextStyle>
    </asp:CreateUserWizard>
  </form>
</body>
</html>
This page uses the CreateUserWizard control and nothing more. This one control enables you to register end users for your web application. This particular CreateUserWizard control has a little style applied to it, but this control can be as simple as:
<asp:CreateUserWizard ID="CreateUserWizard1" Runat="server">
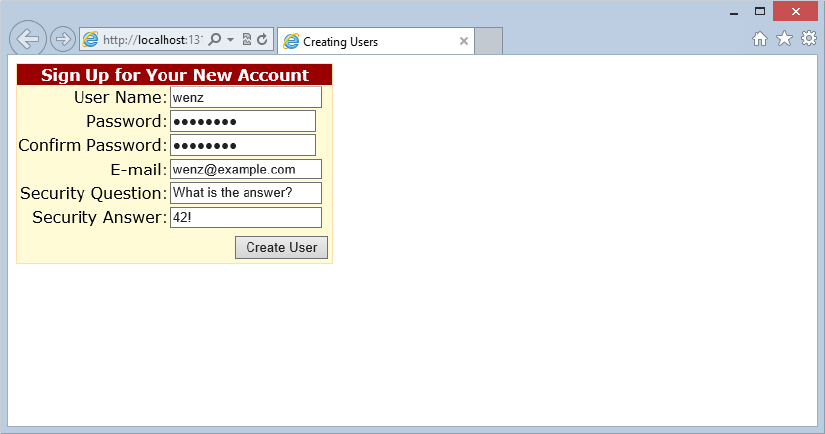
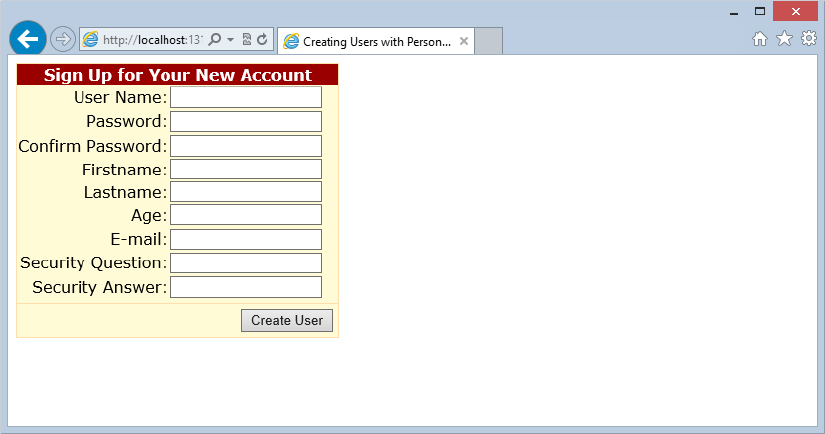
</asp:CreateUserWizard>When this code is run, an end user is presented with the form shown in Figure 19-2.
This screenshot shows the form as it would appear when filled out by the end user and includes information such as the username, password, e-mail address, as well as a security question-and-answer section. Clicking the Create User button places this defined user information into the data store.
The username and password provided via this control enable the end user to log in to the application later through the Login server control. A Confirm Password textbox is also included in the form of the CreateUser server control to ensure that the password provided is spelled correctly. An e-mail address textbox is included (in case end users forget their login credentials and want the credentials e-mailed to them at some later point in time). Finally, the security question and answer are used to verify the identity of the end user before any credentials or user information is changed or later provided via the browser.
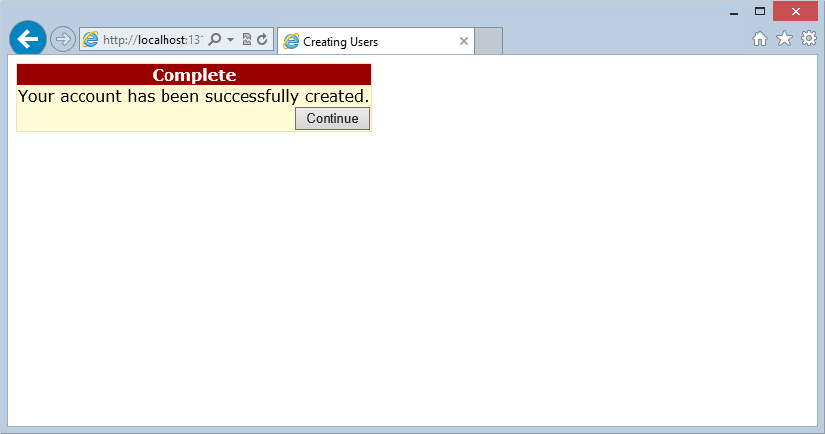
After the end user clicks the Create User button on this form, a confirmation of the information being stored appears (see Figure 19-3).
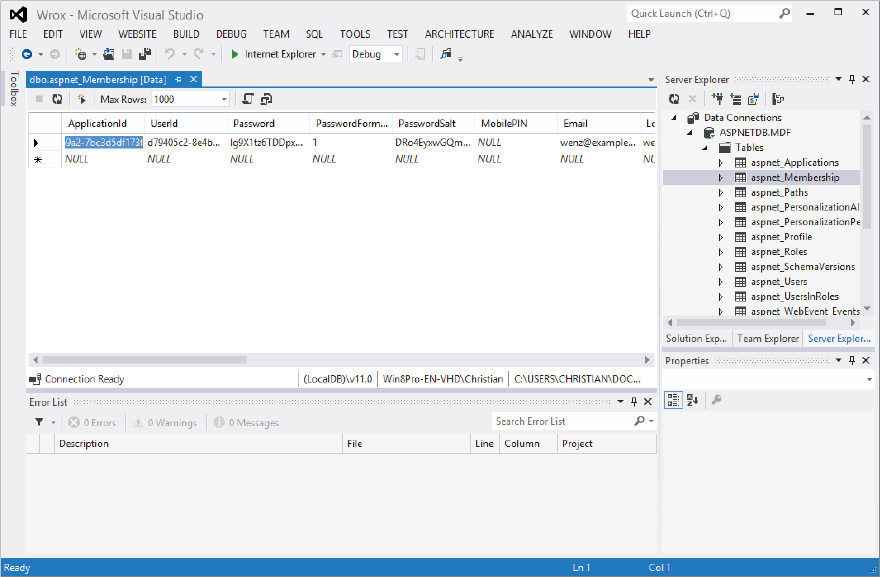
Now that you have used the CreateUserWizard control to add a user to the membership service, look at where this information is stored. If you used Visual Studio to create the Microsoft SQL Server Express Edition file in which you want to store the user information, the file is created when the previous example is run, and you complete the form process as shown in the preceding figures. When the example is run and completed, you can click the Refresh button in the Solution Explorer to find the ASPNETDB.mdf file, which is located in the App_Data folder of your project. Many different tables are included in this file, but you are interested in the aspnet_Membership table only.
When you open the aspnet_Membership table (by right-clicking the table in the Server Explorer and selecting Show Table Data), the users you entered are in the system, as illustrated in Figure 19-4.
The user password in this table is not stored as clear text; instead, it is hashed, which is a one-way form of encryption that cannot be reversed easily. When a user logs in to an application that is using the ASP.NET 4.5 membership service, his or her password is immediately hashed and then compared to the hashed password stored in the database. If the two hashed strings do not compare, the passwords are not considered a match. Storing clear-text passwords is considered a security risk, so you should never do so without weighing the risk involved.
A note regarding the passwords used in ASP.NET 4.5: If you are having difficulty entering users because of a password error, it might be because ASP.NET requires strong passwords by default. All passwords input into the system must be at least seven characters and contain at least one non-alphanumeric character (such as [, ], !, @, #, or $). Whew! An example password of this combination is:
$h@rd#2#cr@ck!Although this type of password is a heck of a lot more secure, a password like this is sometimes difficult to remember. You can actually change the behavior of the membership provider so that it doesn’t require such difficult passwords by reworking the membership provider in the web.config file, as shown in Listing 19-4. Note, however, that this can also facilitate attackers guessing a password.
LISTING 19-4: Modifying the membership provider in web.config
<configuration>
  <system.web>
    <membership>
     <providers>
      <clear />
      <add name="AspNetSqlMembershipProvider"
       type="System.Web.Security.SqlMembershipProvider, System.Web,
        Version=4.0.0.0, Culture=neutral, PublicKeyToken=b03f5f7f11d50a3a"
       connectionStringName="LocalSqlServer"
       enablePasswordRetrieval="false"
       enablePasswordReset="true"
       requiresQuestionAndAnswer="false"
       requiresUniqueEmail="true"
       passwordFormat="Hashed"
       minRequiredNonalphanumericCharacters="0"
       minRequiredPasswordLength="3" />
     </providers>
   </membership>
  </system.web>
</configuration>
This example shows the membership provider reworked for SQL Server so that it does not require any non-alphanumeric characters and allows passwords as small as three characters in length. You do this by using the minRequiredNonalphanumericCharacters and minRequiredPasswordLength attributes. With these in place, you can now create users with these password rules as set forth in these configuration settings. Modifying the membership provider is covered in more detail later in this chapter.
When you work with the CreateUserWizard control, be aware of the ContinueButtonClick() and the CreatedUser() events. The ContinueButtonClick() event is triggered when the Continue button on the second page is clicked after the user has been successfully created (see Listing 19-5). (Note Listings 19-5 and 19-6 are exemplary code that cannot run on their own and are therefore not included in the code download for this chapter.)
LISTING 19-5: The ContinueButtonClick event
VB
Protected Sub CreateUserWizard1_ContinueButtonClick(ByVal sender As Object, _
  ByVal e As System.EventArgs)
       Response.Redirect("Default.aspx")
End Sub
C#
protected void CreateUserWizard1_ContinueButtonClick(object sender, EventArgs e)
{
  Response.Redirect("Default.aspx");
}
In this example, after the user has been added to the membership service through the form provided by the CreateUserWizard control, he or she can click the Continue button to be redirected to another page in the application. This is done with a simple Response.Redirect statement. Remember when you use this event, you must add an OnContinueButtonClick = "CreateUserWizard1_ContinueButtonClick" to the <asp:CreateUserWizard> control.
The CreatedUser() event is triggered when a user is successfully created in the data store. Listing 19-6 shows the use of this event.
LISTING 19-6: The CreatedUser() event
VB
Protected Sub CreateUserWizard1_CreatedUser(ByVal sender As Object, _
  ByVal e As System.EventArgs)
       ' Code here
End Sub
C#
protected void CreateUserWizard1_CreatedUser(object sender, EventArgs e)
{
  // Code here
}
Use this event if you want to take any additional actions when a user is registered to the service.
As you saw in the previous chapter on personalization, using the personalization management system that comes with ASP.NET 4.5 and storing user-specific details is fairly simple. The registration process provided by the CreateUserWizard control is an ideal spot to retrieve this information from the user to store directly in the personalization system. The retrieval is not too difficult to incorporate into your code.
The first step, as you learned in the previous chapter, is to define some personalization points in the application’s web.config file, as shown in Listing 19-7.
LISTING 19-7: Creating personalization properties in the web.config file
<configuration>
     <system.web>
       <profile>
        <properties>
          <add name="FirstName" />
          <add name="LastName" />
          <add name="LastVisited" />
          <add name="Age" />
          <add name="Member" />
        </properties>
       </profile>
     </system.web>
</configuration>
Now that these properties are defined in the web.config file, you can use them when you create users in the ASP.NET membership system. Again, using the CreateUserWizard control, you can create a process that requires the user to enter his or her preferred username and password in the first step, and then the second step asks for these custom-defined personalization points. Listing 19-8 shows a CreateUserWizard control that incorporates this idea.
LISTING 19-8: Using personalization properties with the CreateUserWizard control
VB
<%@ Page Language="VB" %>
<script runat="server">
  Protected Sub CreateUserWizard1_CreatedUser(ByVal sender As Object, _
    ByVal e As System.EventArgs)
    Dim pc As ProfileCommon = New ProfileCommon()
    pc.Initialize(CreateUserWizard1.UserName.ToString(), True)
    pc.FirstName = Firstname.Text
    pc.LastName = Lastname.Text
    pc.Age = Age.Text
    pc.Save()
  End Sub
</script>
<html xmlns="http://www.w3.org/1999/xhtml">
<head id="Head1" runat="server">
  <title>Creating Users with Personalization</title>
</head>
<body>
  <form id="form1" runat="server">
    <asp:CreateUserWizard ID="CreateUserWizard1" Runat="server"
     BorderWidth="1px" BorderColor="#FFDFAD" BorderStyle="Solid"
     BackColor="#FFFBD6" Font-Names="Verdana"
     LoginCreatedUser="true" OnCreatedUser="CreateUserWizard1_CreatedUser" >
      <WizardSteps>
        <asp:WizardStep ID="WizardStep1" Runat="server"
         Title="Additional Information" StepType="Start">
          <table width="100%"><tr><td>
          Firstname: </td><td>
          <asp:TextBox ID="Firstname" Runat="server"></asp:TextBox>
          </td></tr><tr><td>
          Lastname: </td><td>
          <asp:TextBox ID="Lastname" Runat="server"></asp:TextBox>
          </td></tr><tr><td>
          Age: </td><td>
          <asp:TextBox ID="Age" Runat="server"></asp:TextBox>
          </td></tr></table>
        </asp:WizardStep>
        <asp:CreateUserWizardStep Runat="server"
         Title="Sign Up for Your New Account">
        </asp:CreateUserWizardStep>
        <asp:CompleteWizardStep Runat="server" Title="Complete">
        </asp:CompleteWizardStep>
      </WizardSteps>
      <StepStyle BorderColor="#FFDFAD" Font-Names="Verdana"
       BackColor="#FFFBD6" BorderStyle="Solid"
       BorderWidth="1px"></StepStyle>
      <TitleTextStyle Font-Bold="True" BackColor="#990000"
       ForeColor="White"></TitleTextStyle>
    </asp:CreateUserWizard>
  </form>
</body>
</html>
C#
<%@ Page Language="C#" %>
<script runat="server">
  protected void CreateUserWizard1_CreatedUser(object sender, EventArgs e)
  {
    ProfileCommon pc = new ProfileCommon();
    pc.Initialize(CreateUserWizard1.UserName.ToString(), true);
    pc.FirstName = Firstname.Text;
    pc.LastName = Lastname.Text;
    pc.Age = Age.Text;
    pc.Save();
  }
</script>
With this change to the standard registration process as is defined by a default instance of the CreateUserWizard control, your registration system now includes the request for properties stored and retrieved using the ProfileCommon object. Then, using the ProfileCommon.Initialize() method, you initialize the property values for the current user. Next, you set the property values using the strongly typed access to the profile properties available via the ProfileCommon object. After all the values have been set, you use the Save() method to finalize the process.
You can define a custom step within the CreateUserWizard control by using the <WizardSteps> element. Within this element, you can construct a series of registration steps in whatever fashion you choose. From the <WizardSteps> section, shown in Listing 19-8, you can see that three steps are defined. The first is the custom step in which the end user’s personalization properties are requested with the <asp:WizardStep> control. Within the <asp:WizardStep> control, a table is laid out and a custom form is created.
Two additional steps are defined within Listing 19-8: a step to create the user (using the <asp:CreateUserWizardStep> control) and a step to confirm the creation of a new user (using the <asp:CompleteWizardStep> control). The order in which these steps appear is the order in which they are presented to the end user.
After the steps are created the way you want, you can then store the custom properties using the CreateUserWizard control’s CreatedUser() event:
protected void CreateUserWizard1_CreatedUser(object sender, EventArgs e)
{
ProfileCommon pc = new ProfileCommon();
pc.Initialize(CreateUserWizard1.UserName.ToString(), true);
pc.FirstName = Firstname.Text;
pc.LastName = Lastname.Text;
pc.Age = Age.Text;
pc.Save();
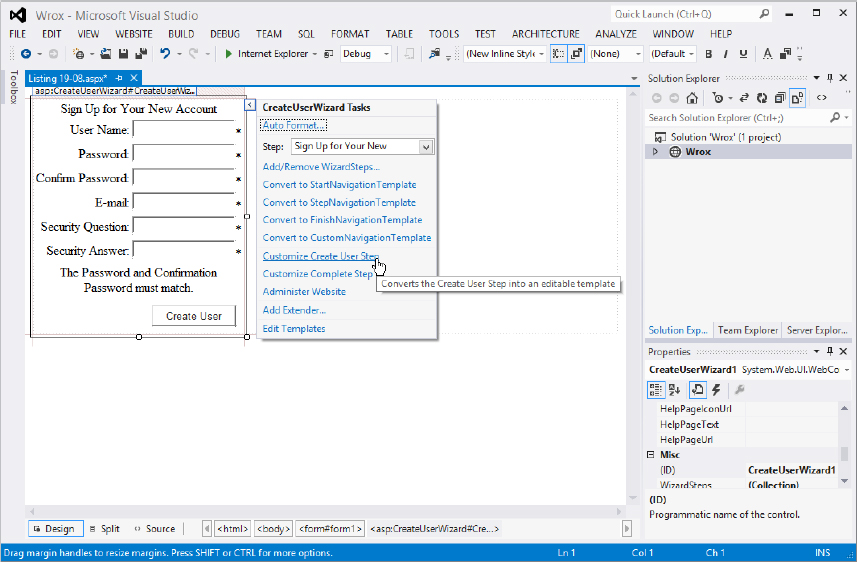
}You are not limited to having a separate step in which you ask for personal bits of information; you can incorporate these items directly into the <asp:CreateUserWizardStep> step itself. An easy way to do this is to switch to the Design view of your page and pull up the smart tag for the CreateUserWizard control. Then click the Customize Create User Step link (shown in Figure 19-5).
Clicking the Customize Create User Step link details the contents of this particular step within a new <ContentTemplate> section that is now contained within the <asp:CreateUserWizardStep> control. Within the <ContentTemplate> element, you can see the complete default form used for creating a new user. At this point, you are free to change the form by adding your own sections that request the end user’s personal information. You can also remove items from this detailed form. For example, if you are not interested in asking for the security question and answer, you can remove these two items from the form (remember that you must disable the question-and-answer requirement in the membership provider definition). By changing this default form, you can completely customize the registration process for your end users (see Figure 19-6).
You are not limited to using only server controls to register or add new users to the membership service. ASP.NET 4.5 provides a Membership API for performing this task programmatically. This feature is ideal for creating your own mechanics for adding users to the service — or if you are modifying a web application that was created using ASP.NET 1.0/1.1.
The Membership API includes the CreateUser() method for adding users to the service. The CreateUser() method includes four possible signatures:
Membership.CreateUser(username As String, password As String)
    Membership.CreateUser(username As String, password As String,
email As String)
    Membership.CreateUser(username As String, password As String,
email As String, passwordQuestion As String,
passwordAnswer As String, isApproved As Boolean,
  ByRef status As System.Web.Security.MembershipCreateStatus)
    Membership.CreateUser(username As String, password As String,
email As String, passwordQuestion As String,
passwordAnswer As String, isApproved As Boolean, providerUserKey As Object
  ByRef status As System.Web.Security.MembershipCreateStatus)
You can use this method to create users. The nice thing about this method is that you are not required to create an instance of the Membership class; you use it directly. Listing 19-9 shows a simple use of the CreateUser() method. (Don’t run the listing yet, but read on for more prerequisites.)
LISTING 19-9: Creating users programmatically
VB
<%@ Page Language="VB" %>
<script runat="server">
Protected Sub Button1_Click(ByVal sender As Object, _
    ByVal e As System.EventArgs)
  Try
   Membership.CreateUser(TextBox1.Text, TextBox2.Text)
   Label1.Text = "Successfully created user " & TextBox1.Text
  Catch ex As MembershipCreateUserException
   Label1.Text = "Error: " & ex.ToString()
  End Try
End Sub
</script>
<html xmlns="http://www.w3.org/1999/xhtml">
<head runat="server">
  <title>Creating a User</title>
</head>
<body>
  <form id="form1" runat="server">
    <h1>Create User</h1>
    <p>Username<br />
      <asp:TextBox ID="TextBox1" Runat="server"></asp:TextBox>
    </p>
    <p>Password<br />
      <asp:TextBox ID="TextBox2" Runat="server"
       TextMode="Password"></asp:TextBox>
    </p>
    <p>
      <asp:Button ID="Button1" Runat="server" Text="Create User"
       OnClick="Button1_Click" />
    </p>
    <p>
      <asp:Label ID="Label1" Runat="server"></asp:Label>
    </p>
  </form>
</body>
</html>
C#
<%@ Page Language="C#" %>
<script runat="server">
  protected void Button1_Click(object sender, EventArgs e)
  {
    try
    {
      Membership.CreateUser(TextBox1.Text.ToString(),
        TextBox2.Text);
      Label1.Text = "Successfully created user " + TextBox1.Text;
    }
    catch (MembershipCreateUserException ex)
    {
      Label1.Text = "Error: " + ex.ToString();
    }
  }
</script>
So, use either the CreateUserWizard control or the CreateUser() method found in the Membership API to create users for your web applications with relative ease.
From this bit of code, you can see that if a problem occurs when creating the user with the CreateUser() method, a MembershipCreateUserException is thrown. In this example, we intentionally trigger an exception (since the configuration requires us to have a security question and answer), and this exception is written to the screen within a Label server control. Here is an example of an exception written to the screen:
Error: System.Web.Security.MembershipCreateUserException: The password-answer
supplied is invalid. at System.Web.Security.Membership.CreateUser(String username,
String password, String email) at System.Web.Security.Membership.CreateUser(String
username, String password) at ASP.default_aspx.Button1_Click(Object sender,
EventArgs e) in c:\Documents and Settings\Christian\My Documents\Visual Studio
2012\WebSites\Wrox\Default.aspx:line 10
You might not want such details sent to the end user. You might prefer to return a simpler message to the end user with something like the following construct:
Label1.Text = "Error: " + ex.Message.ToString();This gives you results as simple as the following:
Error: The password-answer supplied is invalid.You can also capture the specific error using the MembershipCreateUserException and return something that might be a little more appropriate. Listing 19-10 presents an example of this usage.
LISTING 19-10: Capturing the specific MembershipCreateUserException value
VB
<%@ Page Language="VB" %>
    <script runat="server">
      Protected Sub Button1_Click(ByVal sender As Object, _
   ByVal e As System.EventArgs)
    Try
      Membership.CreateUser(TextBox1.Text, TextBox2.Text)
      Label1.Text = "Successfully created user " & TextBox1.Text
    Catch ex As MembershipCreateUserException
      Select Case ex.StatusCode
        Case MembershipCreateStatus.DuplicateEmail
          Label1.Text = "You have supplied a duplicate email address."
        Case MembershipCreateStatus.DuplicateUserName
          Label1.Text = "You have supplied a duplicate username."
        Case MembershipCreateStatus.InvalidEmail
          Label1.Text = "You have not supplied a proper email address."
        Case Else
          Label1.Text = "ERROR: " & ex.Message.ToString()
      End Select
    End Try
  End Sub
</script>
<html xmlns="http://www.w3.org/1999/xhtml">
<head id="Head1" runat="server">
  <title>Creating a User</title>
</head>
<body>
  <form id="form1" runat="server">
    <h1>Create User</h1>
    <p>Username<br />
      <asp:TextBox ID="TextBox1" Runat="server"></asp:TextBox>
    </p>
    <p>Password<br />
      <asp:TextBox ID="TextBox2" Runat="server"
       TextMode="Password"></asp:TextBox>
    </p>
    <p>
      <asp:Button ID="Button1" Runat="server" Text="Create User"
       OnClick="Button1_Click" />
    </p>
    <p>
      <asp:Label ID="Label1" Runat="server"></asp:Label>
    </p>
  </form>
</body>
</html>
C#
<%@ Page Language="C#" %>
<script runat="server">
  protected void Button1_Click(object sender, EventArgs e)
  {
    try
    {
      Membership.CreateUser(TextBox1.Text, TextBox2.Text);
      Label1.Text = "Successfully created user " + TextBox1.Text;
    }
    catch (MembershipCreateUserException ex)
    {
      switch(ex.StatusCode)
      {
        case MembershipCreateStatus.DuplicateEmail:
          Label1.Text = "You have supplied a duplicate email address.";
          break;
        case MembershipCreateStatus.DuplicateUserName:
          Label1.Text = "You have supplied a duplicate username.";
          break;
        case MembershipCreateStatus.InvalidEmail:
          Label1.Text = "You have not supplied a proper email address.";
          break;
        default:
          Label1.Text = "ERROR: " + ex.Message.ToString();
          break;
      }
    }
  }
</script>
In this case, you are able to look for the specific error that occurred in the CreateUser process. Here, this code is looking for only three specific items, but the list of available error codes includes the following:
In addition to giving better error reports to your users by defining what is going on, you can use these events to take any actions that might be required.
You determine how users register with your applications and what is required of them by the membership provider you choose. You will find a default membership provider and its applied settings are established within the machine.config file. If you dig down in the machine.config file on your server, you find the code shown in Listing 19-11.
LISTING 19-11: Membership provider settings in the machine.config file
<membership>
  <providers>
   <add name="AspNetSqlMembershipProvider"
    type="System.Web.Security.SqlMembershipProvider, System.Web,
     Version=4.0.0.0, Culture=neutral, PublicKeyToken=b03f5f7f11d50a3a"
    connectionStringName="LocalSqlServer"
    enablePasswordRetrieval="false"
    enablePasswordReset="true"
    requiresQuestionAndAnswer="true"
    applicationName="/"
    requiresUniqueEmail="false"
    passwordFormat="Hashed"
    maxInvalidPasswordAttempts="5"
    minRequiredPasswordLength="7"
    minRequiredNonalphanumericCharacters="1"
    passwordAttemptWindow="10"
    passwordStrengthRegularExpression="" />
  </providers>
</membership>
This section of the machine.config file shows the default membership provider that comes with ASP.NET 4.5 — named AspNetSqlProvider. If you are adding membership providers for server-wide use, add them to this <membership> section of the machine.config file; if you intend to use them for only a specific application instance, you can add them to your application’s web.config file.
The important attributes of the SqlMembershipProvider definition include the enablePasswordRetrieval, enablePasswordReset, requiresQuestionAndAnswer, requiresUniqueEmail, and PasswordFormat attributes. Table 19-1 defines these attributes.
| ATTRIBUTE | DESCRIPTION |
| enablePasswordRetrieval | Defines whether the provider supports password retrievals. This attribute takes a Boolean value. The default value is False. When it is set to False, passwords cannot be retrieved although they can be changed with a new random password. |
| enablePasswordReset | Defines whether the provider supports password resets. This attribute takes a Boolean value. The default value is True. |
| requiresQuestionAndAnswer | Specifies whether the provider should require a question-and-answer combination when a user is created. This attribute takes a Boolean value, and the default value is False. |
| requiresUniqueEmail | Defines whether the provider should require a unique e-mail to be specified when the user is created. This attribute takes a Boolean value, and the default value is False. When set to True, only unique e-mail addresses can be entered into the data store. |
| passwordFormat | Defines the format in which the password is stored in the data store. The possible values include Hashed, Clear, and Encrypted. The default value is Hashed. Hashed passwords use SHA1, whereas encrypted passwords use Triple-DES encryption. |
In addition to having these items defined in the machine.config file, you can also redefine them again (thus overriding the settings in the machine.config) in the web.config file.
After you have users who can access your web application using the membership service provided by ASP.NET, you can then give these users the means to log in to the site. This requires little work on your part. Before you learn about the controls that enable users to access your applications, you should make a few more modifications to the web.config file.
After you make the changes to the web.config file by adding the <authentication> and <forms> elements (Listings 19-1 and 19-2), your web application is accessible to each and every user that browses to any page your application contains. To prevent open access, you have to deny unauthenticated users access to the pages of your site.
Listing 19-12 shows the code for denying unauthenticated users access to your site.
LISTING 19-12: Denying unauthenticated users
<?xml version="1.0" encoding="utf-8"?>
<configuration>
  <system.web>
    <authentication mode="Forms" />
    <authorization>
      <deny users="?" />
    </authorization>
  </system.web>
</configuration>
Using the <authorization> and <deny> elements, you can deny specific users access to your web application — or (as in this case) simply deny every unauthenticated user (this is what the question mark signifies).
Now that everyone but authenticated users has been denied access to the site, you want to make it easy for viewers of your application to become authenticated users. To do so, use the Login server control.
The Login server control enables you to turn unauthenticated users into authenticated users by allowing them to provide login credentials that can be verified in a data store of some kind. In the examples so far, you have used Microsoft SQL Server Express Edition as the data store, but you can just as easily use the full-blown version of Microsoft’s SQL Server.
The first step in using the Login control is to create a new web page titled Login.aspx. This is the default page to which unauthenticated users are redirected to obtain their credentials. Remember that you can change this behavior by changing the value of the <forms> element’s loginUrl attribute in the web.config file.
The Login.aspx page needs an <asp:Login> control to give the end user everything he or she needs to become authenticated, as shown in Listing 19-13 (Login.aspx in the code download for the chapter).
LISTING 19-13: Providing a login for the end user using the Login control
<%@ Page Language="C#" %>

<html xmlns="http://www.w3.org/1999/xhtml">
<head runat="server">
  <title>Login Page</title>
</head>
<body>
  <form id="form1" runat="server">
    <asp:Login ID="Login1" Runat="server">
    </asp:Login>
  </form>
</body>
</html>
In the situation established here, if the unauthenticated user hits a different page in the application, he or she is redirected to the Login.aspx page. You can see how ASP.NET tracks the location in the URL from the address bar in the browser:
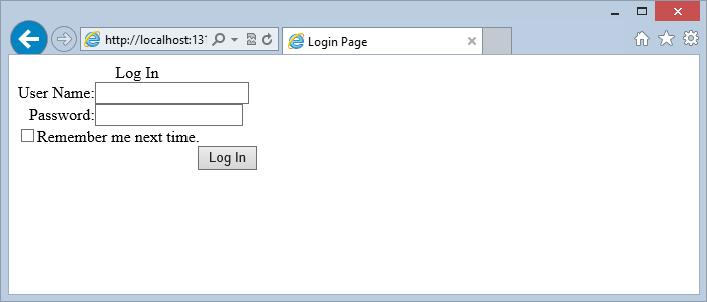
http://localhost:1315/Membership/Login.aspx?ReturnUrl=%2fMembership%2fDefault.aspxThe login page, using the Login control, is shown in Figure 19-7.
From this figure, you can see that the Login control asks the user for a username and password. A check box allows a cookie to be stored on the client machine. This cookie enables the end user to bypass future logins. You can remove the check box and related text created to remember the user by setting the Login control’s DisplayRememberMe property to False.
In addition to the DisplayRememberMe property, you can work with this aspect of the Login control by using the RememberMeText and the RememberMeSet properties. The RememberMeText property is rather self-explanatory because its value simply defines the text set next to the check box. The RememberMeSet property, however, is fairly interesting. The RememberMeSet property takes a Boolean value (by default, it is set to False) that specifies whether to set a persistent cookie on the client’s machine after a user has logged in using the Login control. If set to True when the DisplayRememberMe property is also set to True, the check box is checked by default when the Login control is generated in the browser. If the DisplayRememberMe property is set to False (meaning the end user does not see the check box or cannot select the option of persisting the login cookie) and RememberMeSet is set to True, a cookie is set on the user’s machine automatically without the user’s knowledge or choice in the matter. You should think carefully about taking this approach because end users sometimes use public computers, and this method would mean you are setting authorization cookies on public machines.
This cookie remains on the client’s machine until the user logs out of the application (if this option is provided). With the persisted cookie, and assuming the end user has not logged out of the application, the user never needs to log in again when he returns to the application because his credentials are provided by the contents found in the cookie. After the end user has logged in to the application, he is returned to the page he originally intended to access.
You can also modify the look-and-feel of the Login control just as you can for the other controls. One way to do this is by clicking the Auto Format link in the control’s smart tag. There you find a list of options for modifying the look-and-feel of the control (see Figure 19-8).
Select the Colorful option, for example, and the code is modified. Listing 19-14 shows the code generated for this selection.
LISTING 19-14: A formatted Login control
<asp:Login ID="Login1" Runat="server" BackColor="#FFFBD6"
 BorderColor="#FFDFAD" BorderPadding="4" BorderStyle="Solid"
 BorderWidth="1px" Font-Names="Verdana" Font-Size="0.8em"
 ForeColor="#333333" TextLayout="TextOnTop">
  <TextBoxStyle Font-Size="0.8em" />
  <LoginButtonStyle BackColor="White" BorderColor="#CC9966"
  BorderStyle="Solid" BorderWidth="1px" Font-Names="Verdana"
  Font-Size="0.8em" ForeColor="#990000" />
  <InstructionTextStyle Font-Italic="True" ForeColor="Black" />
  <TitleTextStyle BackColor="#990000" Font-Bold="True" Font-Size="0.9em"
  ForeColor="White" />
</asp:Login>
From this listing, you can see that a number of subelements are used to modify particular items displayed by the control. The available styling elements for the Login control include the following:
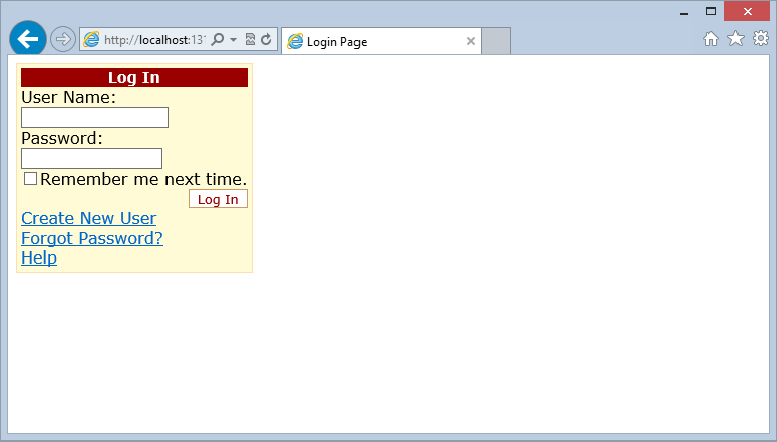
The Login control has numerous properties that enable you to alter how the control appears and behaves. An interesting change you can make is to add some links at the bottom of the control to provide access to additional resources. With these links, you can give users the capability to get help or register for the application so that they can be provided with any login credentials.
You can provide links to do the following:
When these links are used, the Login control looks like what is shown in Figure 19-9.
Besides using the prebuilt mechanics of the Login control, you can also perform this task programmatically using the Membership class. To validate credentials that you receive, you use the ValidateUser() method of this class. The ValidateUser() method takes a single signature:
Membership.ValidateUser(username As String, password As String)Listing 19-15 presents this method.
LISTING 19-15: Validating a user’s credentials programmatically
VB
If Membership.ValidateUser(TextBox1.Text, TextBox2.Text) Then
  FormsAuthentication.RedirectFromLoginPage(TextBox1.Text, False)
Else
  Label1.Text = "You are not registered with the site."
End If
C#
if (Membership.ValidateUser(TextBox1.Text, TextBox2.Text)) {
  FormsAuthentication.RedirectFromLoginPage(TextBox1.Text, false);
}
else {
  Label1.Text = "You are not registered with the site.";
}
The ValidateUser() method returns a Boolean value of True if the user credentials pass the test and False if they do not. From the code snippet in Listing 19-15, you can see that end users whose credentials are verified as correct are redirected from the login page using the RedirectFromLoginPage() method. This method takes the username and a Boolean value that specifies whether the credentials are persisted through a cookie setting.
When providing a user login form in any application you build, always guard against repeated bogus password attempts. If you have a malicious end user who knows a username, he may try to access the application by repeatedly trying different passwords. You want to guard against this kind of activity. You don’t want to allow this person to try hundreds of possible passwords with this username.
ASP.NET has built-in protection against this type of activity. If you look in the aspnet_Membership table, you see two columns focused on protecting against this activity. These columns are FailedPasswordAttemptCount and FailedPasswordAttemptWindowStart.
By default, a username can be used with an incorrect password in a login attempt only five times within a 10-minute window. On the fifth failed attempt, the account is locked down. You do this in ASP.NET by setting the IsLockedOut column to True.
You can actually control the number of password attempts that are allowed and the length of the attempt window for your application. These two items are defined in the SqlMembershipProvider declaration in the machine.config file. You can change the values either in the server-wide configuration files or in your application’s web.config file. Listing 19-16 presents code for changing these values in your web.config file.
LISTING 19-16: Changing the values for password attempts in the provider declaration
<configuration>
  <system.web>
   <membership defaultProvider="AspNetSqlMembershipProvider">
    <providers>
     <clear />
     <add connectionStringName="LocalSqlServer"
      applicationName="/"
      maxInvalidPasswordAttempts="3"
      passwordAttemptWindow="15"
      name="AspNetSqlMembershipProvider"
      type="System.Web.Security.SqlMembershipProvider, System.Web,
       Version=4.0.0.0, Culture=neutral, PublicKeyToken=b03f5f7f11d50a3a" />
    </providers>
   </membership>
  </system.web>
</configuration>
To determine the number of password attempts that are allowed, use maxInvalidPasswordAttempts. This example changes the value to 3, meaning that users are allowed to enter an incorrect password three times before being locked out (within the time window defined). The default value of the maxInvalidPasswordAttempts attribute is 5. You can set the time allowed for bad password attempts to 15 minutes using the passwordAttemptWindow attribute. The default value of this attribute is 10, so an extra five minutes is added.
Now that these items are in place, the next step is to test it. Listing 19-17 provides you with an example of the test. It assumes you have an application established with a user already in place.
LISTING 19-17: A sample page to test password attempts
VB
<%@ Page Language="VB" %>
<script runat="server">
  Protected Sub Button1_Click(ByVal sender As Object, _
   ByVal e As System.EventArgs)
        If CheckBox1.Checked = True Then
      Dim user As MembershipUser = Membership.GetUser(TextBox1.Text)
      user.UnlockUser()
    End If
    If Membership.ValidateUser(TextBox1.Text, TextBox2.Text) Then
      Label1.Text = "You are logged on!"
    Else
      Dim user As MembershipUser = Membership.GetUser(TextBox1.Text)
      Label1.Text = "Locked out value: " & user.IsLockedOut.ToString()
    End If
  End Sub
</script>
<html xmlns="http://www.w3.org/1999/xhtml">
<head runat="server">
  <title>Login Page</title>
</head>
<body>
  <form id="form1" runat="server">
  <div>
    <h1>Login User</h1>
    <p>
      <asp:CheckBox ID="CheckBox1" runat="server" Text="Unlock User" />
    </p>
    <p>
      Username<br />
      <asp:TextBox ID="TextBox1" Runat="server"></asp:TextBox>
    </p>
    <p>Password<br />
      <asp:TextBox ID="TextBox2" Runat="server"
       TextMode="Password"></asp:TextBox>
    </p>
    <p>
      <asp:Button ID="Button1" Runat="server" Text="Login"
       OnClick="Button1_Click" />
    </p>
    <p>
      <asp:Label ID="Label1" Runat="server"></asp:Label>
    </p>
  </div>
  </form>
</body>
</html>
C#
<%@ Page Language="C#" %>
<script runat="server">
  protected void Button1_Click(object sender, EventArgs e)
  {
    if (CheckBox1.Checked == true)
    {
      MembershipUser user = Membership.GetUser(TextBox1.Text);
      user.UnlockUser();
    }
        if (Membership.ValidateUser(TextBox1.Text, TextBox2.Text))
    {
      Label1.Text = "You are logged on!";
    }
    else
    {
      MembershipUser user = Membership.GetUser(TextBox1.Text);
      Label1.Text = "Locked out value: " + user.IsLockedOut.ToString();
    }
  }
</script>
This page contains two textboxes: one for the username and another for the password. Above these, however, is a check box that you can use to unlock a user after you have locked down the account because of bad password attempts.
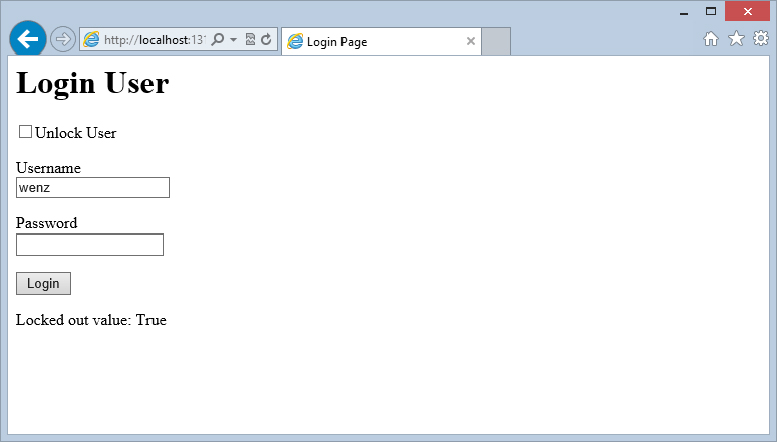
If you run this page and enter three consecutive bad passwords for your user, you get the results presented in Figure 19-10.
The IsLockedOut property is read through an instantiation of the MembershipUser object. This object gives you programmatic access to the user data points contained in the aspnet_Membership table. In this case, the IsLockedOut property is retrieved and displayed to the screen. The MembershipUser object also exposes a lot of available methods — one of which is the UnlockUser() method. This method is invoked if the check box is selected in the button-click event.
After users are authenticated, ASP.NET 4.5 provides a number of different server controls and methods that you can use to work with the user details. Included in this collection of tools are the LoginStatus and the LoginName controls.
The LoginStatus server control enables users to click a link to log in or log out of a site. For a good example of this control, remove the <deny> element from the web.config file so that the pages of your site are accessible to unauthenticated users. Then code your Default.aspx page so that it is similar to the code shown in Listing 19-18.
LISTING 19-18: Login and logout features of the LoginStatus control
<%@ Page Language="VB" %>
<html xmlns="http://www.w3.org/1999/xhtml">
<head runat="server">
<title>Login or Logout</title>
</head>
<body>
<form id="form1" runat="server">
<asp:LoginStatus ID="LoginStatus1" Runat="server" />
</form>
</body>
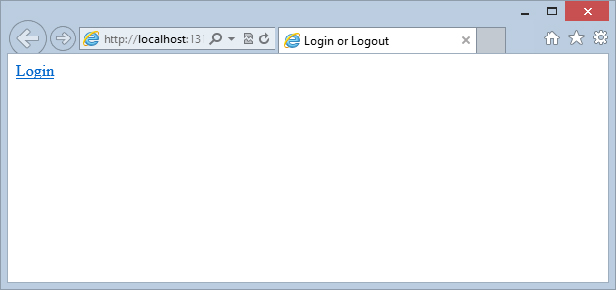
</html>Running this gives you a simple page that contains only a hyperlink titled Login, as shown in Figure 19-11.
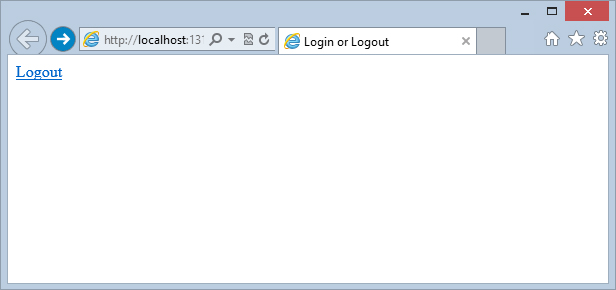
Clicking the Login hyperlink forwards you to the Login.aspx page where you provide your credentials. After the credentials are provided, you are redirected to the Default.aspx page — although now the page includes a hyperlink titled Logout (see Figure 19-12). The LinkStatus control displays one link when the user is unauthenticated and another link when the user is authenticated. Clicking the Logout hyperlink logs out the user and redraws the Default.aspx page — but with the Login hyperlink in place.
The LoginName server control enables you to display the username of the authenticated user. This practice is common today. For an example of it, change the Default.aspx page so that it now includes the authenticated user’s login name when that user is logged in, as illustrated in Listing 19-19.
LISTING 19-19: Displaying the username of the authenticated user
<%@ Page Language="VB" %>
<html xmlns="http://www.w3.org/1999/xhtml">
<head runat="server">
<title>Login or Logout</title>
</head>
<body>
<form id="form1" runat="server">
<asp:LoginStatus ID="LoginStatus1" Runat="server" />
<p><asp:LoginName ID="LoginName1" Runat="server"
Font-Bold="True" Font-Size="XX-Large" /></p>
</form>
</body>
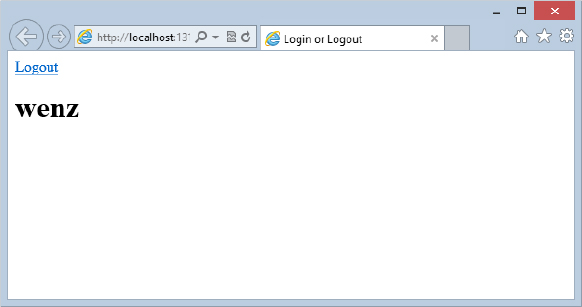
</html>When the user logs in to the application and is returned to the Default.aspx page, he sees his username displayed, as well as the hyperlink generated by the LoginStatus control (see Figure 19-13).
In addition to just showing the username of the logged-in user, you can also add text by using the LoginName control’s FormatString property. For example, to provide a welcome message along with the username, you construct the LoginName control as follows:
<asp:LoginName ID="LoginName1" Runat="Server"
 FormatString="Welcome to our Website {0}!" />
You can also use the following construction in one of the page events. (This is shown in C#; if you are using VB, remove the semicolon at the end of the line.)
LoginName1.FormatString = "Welcome to the site {0}!";When the page is generated, ASP.NET replaces the {0} part of the string with the username of the logged-in user. This provides you with a result similar to the following:
Welcome to the site Christian!If you do not want to show the username when using the LoginName control, simply omit the {0} aspect of the string. The control then places the FormatString property’s value on the page.
One cool feature of the membership service is that you can display how many users are online at a given moment. This option is an especially popular one for a portal or a forum that wants to impress visitors to the site with its popularity.
To show the number of users online, you use the GetNumberOfUsersOnline method provided by the Membership class. You can add to the Default.aspx page shown in Figure 19-11 with the code provided in Listing 19-20.
LISTING 19-20: Displaying the number of users online
VB
<%@ Page Language="VB" %>
<script runat="server">
  Protected Sub Page_Load(ByVal sender As Object, ByVal e As System.EventArgs)
    Label1.Text = Membership.GetNumberOfUsersOnline().ToString()
  End Sub
</script>
<html xmlns="http://www.w3.org/1999/xhtml">
<head runat="server">
  <title>Login or Logout</title>
</head>
<body>
  <form id="form1" runat="server">
    <asp:LoginStatus ID="LoginStatus1" Runat="server" />
    <p><asp:LoginName ID="LoginName1" Runat="server"
      Font-Bold="True" Font-Size="XX-Large" /></p>
    <p>There are <asp:Label ID="Label1" Runat="server" Text="0" />
     users online.</p>
  </form>
</body>
</html>
C#
<%@ Page Language="C#" %>
<script runat="server">
protected void Page_Load(object sender, EventArgs e)
{
Label1.Text = Membership.GetNumberOfUsersOnline().ToString();
}
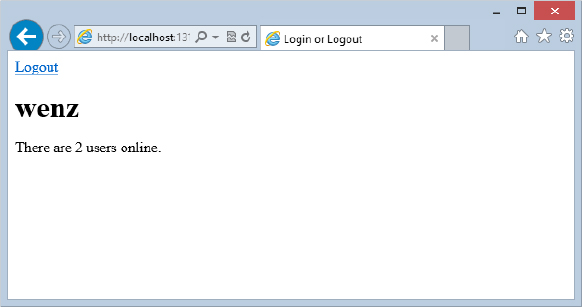
</script>When the page is generated, it displays the number of users who have logged on in the last 15 minutes. Figure 19-14 shows an example of what is generated.
You can see that two users have logged on in the last 15 minutes. This 15-minute period is determined in the machine.config file from within the <membership> element:
<membership userIsOnlineTimeWindow="15" >
</membership>
By default, the userIsOnlineTimeWindow is set to 15. The number is specified here in minutes. To increase the time window, you simply increase this number. In addition to specifying this number from within the machine.config file, you can also set this number in the web.config file.
Many of us seem to spend our lives online and have username/password combinations for many different websites on the Internet. For this reason, end users forget passwords or want to change them every so often. ASP.NET provides a couple of server controls that work with the membership service so that end users can either change their passwords or retrieve forgotten passwords.
The ChangePassword server control enables end users to change their passwords directly in the browser. Listing 19-21 shows a use of the ChangePassword control.
LISTING 19-21: Allowing users to change passwords
<%@ Page Language="C#" %>
<html xmlns="http://www.w3.org/1999/xhtml">
<head runat="server">
  <title>Change Your Password</title>
</head>
<body>
  <form id="form1" runat="server">
    <asp:LoginStatus ID="LoginStatus1" Runat="server" />
    <p><asp:ChangePassword ID="ChangePassword1" Runat="server">
      </asp:ChangePassword><p>
  </form>
</body>
</html>
This example is a rather simple use of the <asp:ChangePassword> control. Running this page produces the results shown in Figure 19-15.
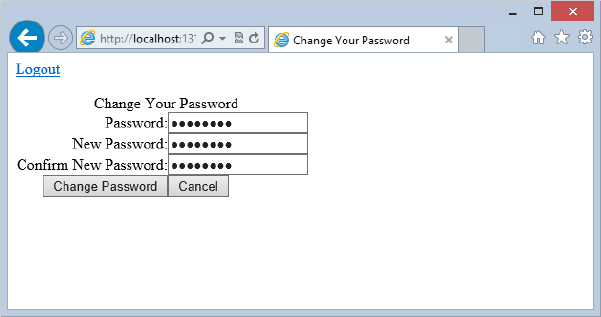
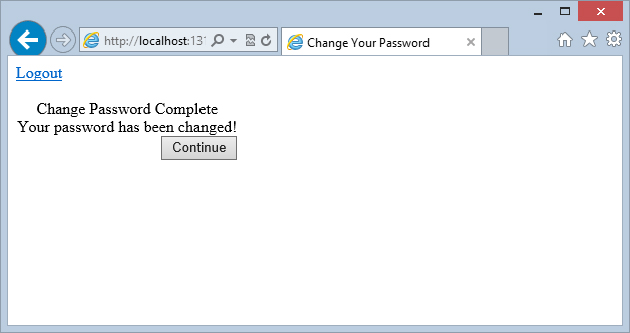
The ChangePassword control produces a form that asks for the previous password. It also requires the end user to type the new password twice. Clicking the Change Password button launches an attempt to change the password if the user is logged in. If the end user is not logged in to the application yet, he or she is redirected to the login page. Only a logged-in user can change a password. After the password is changed, the end user is notified (see Figure 19-16).
Remember that end users are allowed to change their passwords because the enablePasswordReset attribute of the membership provider is set to true. To deny this capability, set the enablePasswordReset attribute to false.
You can also specify rules on how the passwords must be constructed when an end user attempts to change her password. For instance, you might want to require that the password contain more than a certain number of characters or that it use numbers and/or special characters in addition to alphabetic characters. Using the NewPasswordRegularExpression attribute, you can specify the construction required for the new password, as shown here:
NewPasswordRegularExpression='@\"(?=.{6,})(?=(.*\d){1,})(?=(.*\W){1,})'Any new passwords created by the end user are checked against this regular expression. If there isn’t a match, you can use the NewPasswordRegularExpressionErrorMessage attribute (one of the lengthier names for an attribute in ASP.NET) to cause an error message to appear within the control output.
People simply forget their passwords. For this reason, you should provide the means to retrieve passwords from your data store. The PasswordRecovery server control provides an easy way to accomplish this task.
Password recovery usually means sending the end user’s password to that user in an e-mail. Therefore, you need to set up an SMTP server (it might be the same as the application server). You configure for SMTP in the web.config file, as illustrated in Listing 19-22.
LISTING 19-22: Configuring passwords to be sent via e-mail in the web.config file
<configuration>
  <system.web>
   <!-- Removed for clarity -->
  </system.web>
  <system.net>
   <mailSettings>
     <smtp from="wenz@example.com">
      <network host="localhost" port="25"
       defaultCredentials="true" />
     </smtp>
   </mailSettings>
  </system.net>
</configuration>
After you have the <mailSettings> element set up correctly, you can start to use the PasswordRecovery control. Listing 19-23 shows a simple use of the PasswordRecovery control.
LISTING 19-23: Using the PasswordRecovery control
<%@ Page Language="C#" %>
<html xmlns="http://www.w3.org/1999/xhtml">
<head runat="server">
  <title>Getting Your Password</title>
</head>
<body>
  <form id="form1" runat="server">
    <asp:PasswordRecovery ID="PasswordRecovery1" Runat="server">
      <MailDefinition From="wenz@example.com">
      </MailDefinition>
    </asp:PasswordRecovery>
  </form>
</body>
</html>
The <asp:PasswordRecovery> element needs a <MailDefinition> subelement. The <MailDefinition> element contains details about the e-mail to be sent to the end user. The minimum requirement is that the From attribute is used, which provides the e-mail address for the From part of the e-mail. The String value of this attribute should be an e-mail address. Other attributes for the <MailDefinition> element include the following:
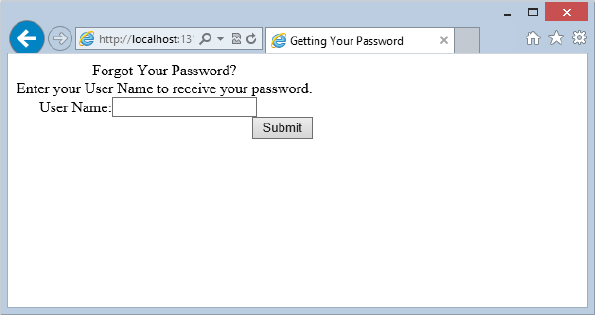
When you run this page, the PasswordRecovery control asks for the user’s username, as shown in Figure 19-17.
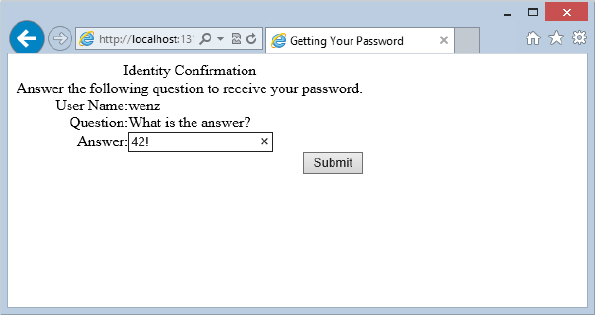
When it has the username, the membership service retrieves the question and answer that was earlier entered by the end user and generates the view shown in Figure 19-18.
If the question is answered correctly (notice that the answer is case sensitive), an e-mail containing the password is generated and mailed to the end user. If the question is answered incorrectly, an error message is displayed. Of course, a question will not be used if you have the question/answer feature of the membership system disabled.
By default, the membership service data store is not storing the actual password — just a hashed version of it. Therefore you do not get the original password, but a new one that was generated by ASP.NET for you.
For you to be able to send back an actual password to the user, you must change how the passwords are stored in the membership service data store. You do this (as stated earlier in the chapter) by changing the PasswordFormat attribute of your membership data provider. The other possible values (besides Hashed) are Clear and Encrypted. Changing the value to either Clear or Encrypted makes it possible for the passwords to be sent back to the end user in a readable format.
Certain applications must generate a random password when you create a user. ASP.NET includes a helper method that enables you to retrieve random passwords. Listing 19-24 shows an example of creating a helper method to pull a random password.
LISTING 19-24: Generating a random password
VB
Protected Function GeneratePassword() As String
  Dim returnPassword As String
  returnPassword = Membership.GeneratePassword(10, 3)
  Return returnPassword
End Function
C#
protected string GeneratePassword()
{
  string returnPassword;
  returnPassword = Membership.GeneratePassword(10, 3);
  return returnPassword;
}
To generate a password randomly in ASP.NET, you can use the GeneratePassword() helper method. This method enables you to generate a random password of a specified length, and you can specify how many non-alphanumeric characters the password should contain (at minimum). This example utilizes this method five times to produce the results shown here (of course, your results will be different):
With your helper method in place, you can create users with random passwords, as shown in Listing 19-25.
LISTING 19-25: Creating users with a random password
VB
Membership.CreateUser(TextBox1.Text, GeneratePassword())C#
Membership.CreateUser(TextBox1.Text, GeneratePassword());Now that you can deal with the registration and authentication of users who want to access your web applications, the next step is authorization. What are they allowed to see and what roles do they take? These questions are important for any web application. The following section explains how to show only certain items to authenticated users while you show different items to unauthenticated users.
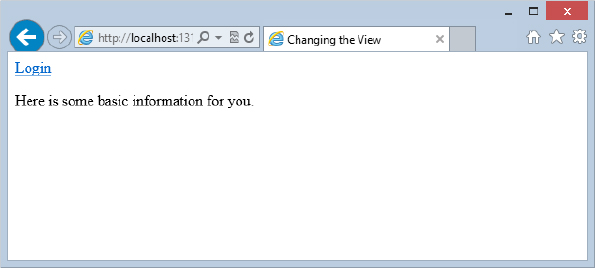
The LoginView server control enables you to control who views what information on a particular part of a page. Using the LoginView control, you can dictate which parts of the pages are for authenticated users and which parts of the pages are for unauthenticated users. Listing 19-26 shows an example of this control.
LISTING 19-26: Controlling information viewed via the LoginView control
<%@ Page Language="C#" %>
<html xmlns="http://www.w3.org/1999/xhtml">
<head runat="server">
<title>Changing the View</title>
</head>
<body>
<form id="form1" runat="server">
<asp:LoginStatus ID="LoginStatus1" Runat="server" />
<p>
<asp:LoginView ID="LoginView1" Runat="server">
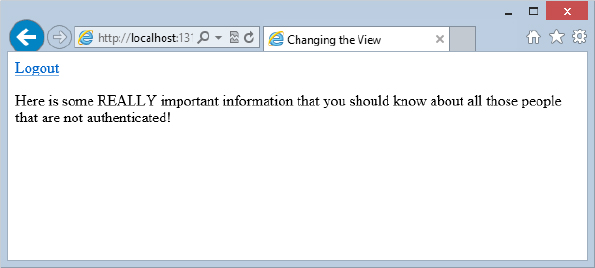
<LoggedInTemplate>
Here is some REALLY important information that you should know
about all those people that are not authenticated!
</LoggedInTemplate>
<AnonymousTemplate>
Here is some basic information for you.
</AnonymousTemplate>
</asp:LoginView></p>
</form>
</body>
</html>The <asp:LoginView> control is a templated control that takes two possible subelements — the <LoggedInTemplate> and <AnonymousTemplate> elements. In this case, the information defined in the <AnonymousTemplate> section (see Figure 19-19) is for unauthenticated users.
It is quite different from what authenticated users see defined in the <LoggedInTemplate> section (see Figure 19-20).
Only simple ASCII text is placed inside both of these templates, but you can actually place anything else within the template including additional server controls. This means that you can show entire sections of pages, including forms, from within the templated sections.
Besides using just the <LoggedInTemplate> and the <AnonymousTemplate> of the LoginView control, you can also enable sections of a page or specific content for entities that are part of a particular role — such as someone who is part of the Admin group. You can accomplish this by using the <RoleGroups> section of the LoginView control, as shown in Listing 19-27.
LISTING 19-27: Providing a view for a particular group
<%@ Page Language="C#" %>
<html xmlns="http://www.w3.org/1999/xhtml">
<head runat="server">
  <title>Changing the View</title>
</head>
<body>
  <form id="form1" runat="server">
    <asp:LoginStatus ID="LoginStatus1" Runat="server" />
    <p>
    <asp:LoginView ID="LoginView1" Runat="server">
      <LoggedInTemplate>
        Here is some REALLY important information that you should know
        about all those people that are not authenticated!
      </LoggedInTemplate>
      <AnonymousTemplate>
        Here is some basic information for you.
      </AnonymousTemplate>
       <RoleGroups>
        <asp:RoleGroup Roles="Admins">
          <ContentTemplate>
            You are an Admin!
          </ContentTemplate>
        </asp:RoleGroup>
        <asp:RoleGroup Roles="CoolPeople">
          <ContentTemplate>
            You are cool!
          </ContentTemplate>
        </asp:RoleGroup>
      </RoleGroups>
    </asp:LoginView><p>
  </form>
</body>
</html>
To show content for a particular group of users, you add a <RoleGroups> element to the LoginView control. The <RoleGroups> section can take one or more RoleGroup controls (you will not find this control in Visual Studio’s Toolbox). To provide content to display using the RoleGroup control, you provide a <ContentTemplate> element, which enables you to define the content to be displayed for an entity that belongs to the specified role. What is placed in the <ContentTemplate> section completely depends on you. You can place raw text (as shown in the example) or even other ASP.NET controls.
Be cautious of the order in which you place the defined roles in the <RoleGroups> section. When users log in to a site, they are first checked to see whether they match one of the defined roles. The first (uppermost) role matched is the view used for the LoginView control — even if they match more than one role. You can also place more than one role in the Roles attribute of the <asp:RoleGroups> control, like this:
 <asp:RoleGroup Roles="CoolPeople, HappyPeople">
  <ContentTemplate>
   You are cool or happy (or both)!
  </ContentTemplate>
</asp:RoleGroup>
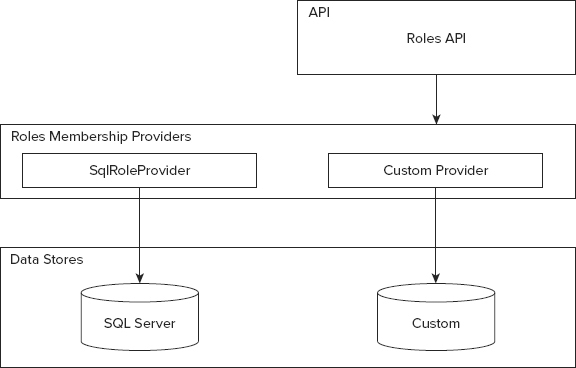
In addition to the membership service just reviewed, ASP.NET provides you with the other side of the end-user management service — the ASP.NET role management service. The membership service covers all the details of authentication for your applications, whereas the role management service covers authorization. Just as the membership service can use any of the data providers listed earlier, the role management service can also use a provider that is focused on SQL Server (SqlRoleProvider) or any custom providers. In fact, this service is comparable to the membership service in many ways. Figure 19-21 shows you a simple diagram that details some particulars of the role management service.
The first step in working with the role management service is to change any of the role management provider’s behaviors either in the machine.config or from the web.config files. If you look in the machine.config.comments file, you will see an entire section that deals with the role management service (see Listing 19-28).
LISTING 19-28: Role management provider settings in the machine.config.comments file
<roleManager
 enabled="false"
 cacheRolesInCookie="false"
 cookieName=".ASPXROLES"
 cookieTimeout="30"
 cookiePath="/"
 cookieRequireSSL="false"
 cookieSlidingExpiration="true"
 cookieProtection="All"
 defaultProvider="AspNetSqlRoleProvider"
 createPersistentCookie="false"
 maxCachedResults="25">
  <providers>
   <clear />
   <add connectionStringName="LocalSqlServer" applicationName="/"
    name="AspNetSqlRoleProvider" type="System.Web.Security.SqlRoleProvider,
    System.Web, Version=4.0.0.0, Culture=neutral,
    PublicKeyToken=b03f5f7f11d50a3a" />
   <add applicationName="/" name="AspNetWindowsTokenRoleProvider"
    type="System.Web.Security.WindowsTokenRoleProvider, System.Web,
    Version=4.0.0.0, Culture=neutral, PublicKeyToken=b03f5f7f11d50a3a" />
  </providers>
</roleManager>
The role management service documents its settings from within the machine.config.comments file, as shown in the previous code listing. You can make changes to these settings either directly in the machine.config file or by overriding any of the higher-level settings you might have by making changes in the web.config file itself (thereby making changes only to the application at hand).
The main settings are defined in the <roleManager> element. Table 19-2 defines some of the attributes of the <roleManager> element.
| ATTRIBUTE | DESCRIPTION |
| enabled | Defines whether the role management service is enabled for the application. This attribute takes a Boolean value and is set to False by default. This means that the role management service is disabled by default. This is done to avoid breaking changes that would occur for users migrating from ASP.NET 1.0/1.1 to ASP.NET 2.0, 3.5, 4, or 4.5. Therefore, you must first change this value to True in either the machine.config or the web.config file. |
| cacheRolesInCookie | Defines whether the roles of the user can be stored within a cookie on the client machine. This attribute takes a Boolean value and is set to True by default. This situation is ideal because retrieving the roles from the cookie prevents ASP.NET from looking up the roles of the user via the role management provider. Set it to False if you want the roles to be retrieved via the provider for all instances. |
| cookieName | Defines the name used for the cookie sent to the end user for role management information storage. By default, this cookie is named .ASPXROLES, and you probably will not change this. |
| cookieTimeout | Defines the amount of time (in minutes) after which the cookie expires. The default value is 30 minutes. |
| cookieRequireSSL | Defines whether you require that the role management information be sent over an encrypted wire (SSL) instead of being sent as clear text. The default value is False. |
| cookieSlidingExpiration | Specifies whether the timeout of the cookie is on a sliding scale. The default value is True. This means that the end user’s cookie does not expire until 30 minutes (or the time specified in the cookieTimeout attribute) after the last request to the application has been made. If the value of the cookieSlidingExpiration attribute is set to False, the cookie expires 30 minutes from the first request. |
| createPersistentCookie | Specifies whether a cookie expires or whether it remains alive indefinitely. The default setting is False because a persistent cookie is not always advisable for security reasons. |
| cookieProtection | Specifies the amount of protection you want to apply to the cookie stored on the end user’s machine for management information. The possible settings include All, None, Encryption, and Validation. You should always attempt to use All. |
| defaultProvider | Defines the provider used for the role management service. By default, it is set to AspNetSqlRoleProvider up to ASP.NET 4.0, and to DefaultRoleProvider starting with ASP.NET 4.5. |
The next step is to configure your web.config file so that it can work with the role management service. Certain pages or subsections of your application may be accessible only to people with specific roles. To manage this access, you define the access rights in the web.config file. Listing 19-29 shows the necessary changes.
LISTING 19-29: Changing the web.config file
<?xml version="1.0" encoding="utf-8"?>
<configuration>
  <system.web>
    <compilation targetFramework="4.5" />
    <roleManager enabled="true"/>
    <authentication mode="Forms" />
    <authorization>
      <deny users="?" />
    </authorization>
  </system.web>
  <location path="AdminPage.aspx">
    <system.web>
      <authorization>
       <allow roles="AdminPageRights" />
       <deny users="*" />
      </authorization>
    </system.web>
  </location>
</configuration>
This web.config file is doing a couple of things. First, the function of the first <system.web> section is no different from that of the membership service shown earlier in the chapter. The <deny> element is denying all unauthenticated users across the board.
The second section of this web.config file is rather interesting. The <location> element is used to define the access rights of a particular page in the application (AdminPage.aspx). In this case, only users contained in the AdminPageRights role are allowed to view the page, but all other users — regardless of whether they are authenticated — are not allowed to view the page. When using the asterisk (*) as a value of the users attribute of the <deny> element, you are saying that all users (regardless of whether they are authenticated) are not allowed to access the resource being defined. This overriding denial of access, however, is broken open a bit via the use of the <allow> element, which allows users contained within a specific role.
Now that the machine.config or the web.config file is in place, you can add roles to the role management service. The role management service, just like the membership service, uses data stores to store information about the users. These examples focus primarily on using Microsoft SQL Server Express Edition as the provider because it is the default provider.
One big difference between the role management service and the membership service is that no server controls are used for the role management service. You manage the application’s roles and the user’s role details through a Roles API or through the Web Site Administration Tool provided with ASP.NET 4.5. Listing 19-30 shows how to use some of the new methods to add roles to the service.
LISTING 19-30: Adding roles to the application
VB
<%@ Page Language="VB" %>
<script runat="server">
  Protected Sub Page_Load(ByVal sender As Object, ByVal e As System.EventArgs)
    If Not Page.IsPostBack Then
     ListBoxDataBind()
    End If
  End Sub
  Protected Sub Button1_Click(ByVal sender As Object, _
    ByVal e As System.EventArgs)
    Roles.CreateRole(TextBox1.Text)
    ListBoxDataBind()
  End Sub
  Protected Sub ListBoxDataBind()
    ListBox1.DataSource = Roles.GetAllRoles()
    ListBox1.DataBind()
  End Sub
</script>
<html xmlns="http://www.w3.org/1999/xhtml">
<head runat="server">
  <title>Role Manager</title>
</head>
<body>
  <form id="form1" runat="server">
    <h1>Role Manager</h1>
    Add Role:<br />
    <asp:TextBox ID="TextBox1" Runat="server"></asp:TextBox>
    <p><asp:Button ID="Button1" Runat="server" Text="Add Role to Application"
      OnClick="Button1_Click" /></p>
    Roles Defined:<br />
    <asp:ListBox ID="ListBox1" Runat="server">
    </asp:ListBox>
  </form>
</body>
</html>
C#
<%@ Page Language="C#" %>
<script runat="server">
protected void Page_Load(object sender, EventArgs e)
{
if (!Page.IsPostBack)
{
ListBoxDataBind();
}
}
protected void Button1_Click(object sender, EventArgs e)
{
Roles.CreateRole(TextBox1.Text);
ListBoxDataBind();
}
protected void ListBoxDataBind()
{
ListBox1.DataSource = Roles.GetAllRoles();
ListBox1.DataBind();
}
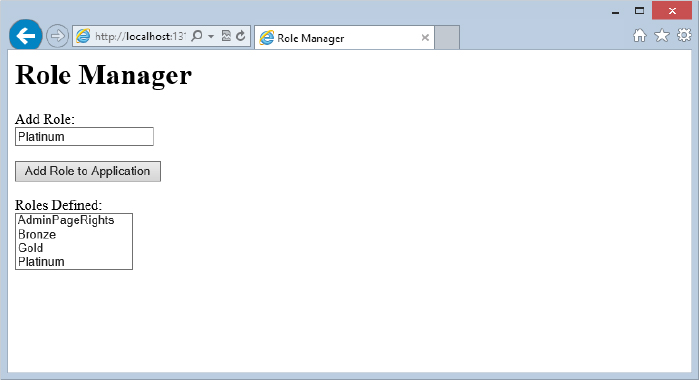
</script>This example enables you to enter roles into the textbox and then to submit them to the role management service. The roles contained in the role management service then appear in the list box, as illustrated in Figure 19-22.
To enter the roles into the management service, you use the CreateRole() method of the Roles class. As with the Membership class, you do not instantiate the Roles class. To add roles to the role management service, use the CreateRole() method that takes only a single parameter — the name of the role as a String value:
Roles.CreateRole(rolename As String)With this method, you can create as many roles as you want, but each role must be unique; otherwise, an exception is thrown.
To retrieve the roles that are in the application’s role management service (such as the list of roles displayed in the list box from the earlier example), you use the GetAllRoles() method of the Roles class. This method returns a String collection of all the available roles in the service:
Roles.GetAllRoles()It would be just great to sit and add roles to the service all day long. Every now and then, however, you might want to delete roles from the service as well. Deleting roles is just as easy as adding roles to the role management service. To delete a role, you use one of the DeleteRole() method signatures. The first option of the DeleteRole() method takes a single parameter — the name of the role as a String value. The second option takes the name of the role plus a Boolean value that determines whether to throw an exception when one or more members are contained within that particular role (so that you don’t accidentally delete a role with users in it when you don’t mean to):
Roles.DeleteRole(rolename As String)
Roles.DeleteRole(rolename As String, throwOnPopulatedRole As Boolean)
Listing 19-31 is a partial code example that builds on Listing 19-30. For this example, you add an additional button that initiates a second button-click event that deletes the role from the service.
LISTING 19-31: Deleting roles from the application
VB
Protected Sub DeleteButton_Click(ByVal sender As Object,
  ByVal e As System.EventArgs)
  For Each li As ListItem In ListBox1.Items
   If li.Selected = True Then
     Roles.DeleteRole(li.ToString())
   End If
  Next
  ListBoxDataBind()
End Sub
C#
protected void DeleteButton_Click(object sender, EventArgs e)
{
  foreach (ListItem li in ListBox1.Items) {
   if (li.Selected == true) {
     Roles.DeleteRole(li.ToString());
   }
  }
  ListBoxDataBind();
}
This example deletes the selected items from the ListBox control. If more than one selection is made (meaning that you have placed the attribute SelectionMode="Multiple" in the ListBox control), each of the roles is deleted from the service, in turn, in the For Each loop. Although Roles.DeleteRole(li.ToString()) is used to delete the role, Roles.DeleteRole(li.ToString(), True) could also be used to make sure that no roles are deleted if that role contains any members.
Now that the roles are in place and it is possible to delete these roles if required, the next step is adding users to the roles created. A role does not do much good if no users are associated with it. To add a single user to a single role, you use the following construct:
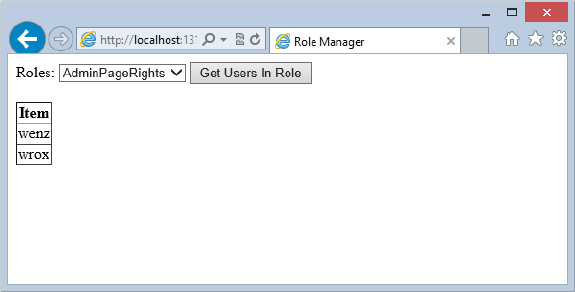
Roles.AddUserToRole(username As String, rolename As String)To add a single user to multiple roles at the same time, you use this construct:
Roles.AddUserToRoles(username As String, rolenames() As String)To add multiple users to a single role, you use the following construct:
Roles.AddUsersToRole(usernames() As String, rolename As String)Finally, to add multiple users to multiple roles, you use the following construct:
Roles.AddUsersToRoles(usernames() As String, rolenames() As String)The parameters that can take collections, whether they are usernames() or rolenames(), are presented to the method as String arrays.
Looking up information is easy in the role management service, whether you are determining which users are contained within a particular role or whether you want to know the roles to which a particular user belongs.
Methods are available for either of these scenarios. First, look at how to determine all the users contained in a particular role, as illustrated in Listing 19-32.
LISTING 19-32: Looking up users in a particular role
VB
<%@ Page Language="VB" %>
<script runat="server">
  Protected Sub Page_Load(ByVal sender As Object, ByVal e As System.EventArgs)
    If Not Page.IsPostBack Then
     DropDownDataBind()
    End If
  End Sub

  Protected Sub Button1_Click(ByVal sender As Object, _
    ByVal e As System.EventArgs)
    GridView1.DataSource = Roles.GetUsersInRole(DropDownList1.SelectedValue)
    GridView1.DataBind()
    DropDownDataBind()
  End Sub

  Protected Sub DropDownDataBind()
   DropDownList1.DataSource = Roles.GetAllRoles()
   DropDownList1.DataBind()
  End Sub
</script>
<html xmlns="http://www.w3.org/1999/xhtml">
<head runat="server">
  <title>Role Manager</title>
</head>
<body>
  <form id="form1" runat="server">
    Roles:
    <asp:DropDownList ID="DropDownList1" Runat="server">
    </asp:DropDownList>
    <asp:Button ID="Button1" Runat="server" Text="Get Users In Role"
     OnClick="Button1_Click" />
    <br />
    <br />
    <asp:GridView ID="GridView1" Runat="server">
    </asp:GridView>
  </form>
</body>
</html>
C#
<%@ Page Language="C#" %>
<script runat="server">
  protected void Page_Load(object sender, EventArgs e)
  {
   if (!Page.IsPostBack)
   {
     DropDownDataBind();
   }
  }

  protected void Button1_Click(object sender, EventArgs e)
  {
   GridView1.DataSource = Roles.GetUsersInRole(DropDownList1.SelectedValue);
   GridView1.DataBind();
   DropDownDataBind();
  }

  protected void DropDownDataBind()
  {
   DropDownList1.DataSource = Roles.GetAllRoles();
   DropDownList1.DataBind();
  }
</script>
This page creates a drop-down list that contains all the roles for the application. Clicking the button displays all the users for the selected role. Users of a particular role are determined using the GetUsersInRole() method. This method takes a single parameter — a String value representing the name of the role:
Roles.GetUsersInRole(rolename As String)When run, the page looks similar to the page shown in Figure 19-23.
To determine all the roles for a particular user, create a page with a single textbox and a button. In the textbox, you type the name of the user; a button click initiates the retrieval and populates a GridView control. Listing 19-33 presents the button-click event (where all the action is).
LISTING 19-33: Getting all the roles of a specific user
VB
<%@ Page Language="VB" %>
<script runat="server">
  Protected Sub Button1_Click(ByVal sender As Object, _
    ByVal e As System.EventArgs)
    GridView1.DataSource = Roles.GetRolesForUser(TextBox1.Text)
    GridView1.DataBind()
  End Sub
</script>

<html xmlns="http://www.w3.org/1999/xhtml">
<head id="Head1" runat="server">
    <title>Role Manager</title>
</head>
<body>
    <form id="form1" runat="server">
        User:
        <asp:TextBox ID="TextBox1" runat="server" />
        <asp:Button ID="Button1" runat="server" Text="Get Roles of User"
            OnClick="Button1_Click" />
        <br />
        <br />
        <asp:GridView ID="GridView1" runat="server">
        </asp:GridView>
    </form>
</body>
</html>
C#
<%@ Page Language="C#" %>

<script runat="server">
  protected void Button1_Click(object sender, EventArgs e)
  {
    GridView1.DataSource = Roles.GetRolesForUser(TextBox1.Text);
    GridView1.DataBind();
  }
</script>
The preceding code produces something similar to what is shown in Figure 19-24.
To get the roles of a particular user, you use the GetRolesForUser() method. This method has two possible signatures. The first is shown in the preceding example — a String value that represents the name of the user. The other option is an invocation of the method without any parameters listed. This returns the roles of the user who has logged in to the membership service.
In addition to adding users to roles, you can also easily remove users from roles. To delete or remove a single user from a single role, you use the following construct:
Roles.RemoveUserFromRole(username As String, rolename As String)To remove a single user from multiple roles at the same time, you use this construct:
Roles.RemoveUserFromRoles(username As String, rolenames() As String)To remove multiple users from a single role, you use the following construct:
Roles.RemoveUsersFromRole(usernames() As String, rolename As String)Finally, to remove multiple users from multiple roles, you use the following construct:
Roles.RemoveUsersFromRoles(usernames() As String, rolenames() As String)The parameters shown as collections, whether they are usernames() or rolenames(), are presented to the method as String arrays.
One final action you can take is checking whether a particular user is in a role. You can go about this in a couple of ways. The first is using the IsUserInRole() method.
The IsUserInRole() method takes two parameters — the username and the name of the role:
Roles.IsUserInRole(username As String, rolename As String)This method returns a Boolean value on the status of the user, and you can use it as shown in Listing 19-34.
LISTING 19-34: Checking a user’s role status
VB
If (Roles.IsUserInRole(TextBox1.Text, "AdminPageRights")) Then
 ' perform action here
End If
C#
if (Roles.IsUserInRole(TextBox1.Text, "AdminPageRights"))
{
  // perform action here
}
The other option, in addition to the IsUserInRole() method, is to use FindUsersInRole(). This method enables you make a name search against all the users in a particular role. The FindUsersInRole() method takes two parameters — the name of the role and the username, both as String values:
Roles.FindUsersInRole(rolename As String, username As String)Listing 19-35 shows an example of this method.
LISTING 19-35: Checking for a specific user in a particular role
VB
<%@ Page Language="VB" %>
<script runat="server">
  Protected Sub Button1_Click(ByVal sender As Object, _
    ByVal e As System.EventArgs)
    GridView1.DataSource = _
     Roles.FindUsersInRole("AdminPageRights", TextBox1.Text)
    GridView1.DataBind()
  End Sub
</script>
<html xmlns="http://www.w3.org/1999/xhtml" >
<head runat="server">
  <title>Role Manager</title>
</head>
<body>
  <form id="form1" runat="server">
    <asp:TextBox ID="TextBox1" Runat="server"></asp:TextBox>
    <asp:Button ID="Button1" Runat="server" Text="Button"
     OnClick="Button1_Click" />
    <p><asp:GridView ID="GridView1" Runat="server">
    </asp:GridView></p>
  </form>
</body>
</html>
C#
<%@ Page Language="C#" %>
<script runat="server">
  protected void Button1_Click(object sender, EventArgs e)
  {
    GridView1.DataSource =
      Roles.FindUsersInRole("AdminPageRights", TextBox1.Text);
    GridView1.DataBind();
  }
</script>By default, after you retrieve a user’s roles from the data store underlying the role management service, you can store these roles as a cookie on the client machine. You do this so you do not have to access the data store each and every time the application needs a user’s role status. A bit of risk always exists when working with cookies because the end user can manipulate the cookie and thereby gain access to information or parts of an application that normally would be forbidden to that particular user.
Although roles are cached in a cookie, the default is that they are cached for only 30 minutes at a time. You can deal with this role cookie in several ways — some of which might help to protect your application better.
One protection for your application is to delete this role cookie, using the DeleteCookie() method of the Roles API, when the end user logs on to the site, as illustrated in Listing 19-36.
LISTING 19-36: Deleting the end user’s role cookie upon authentication
VB
If Membership.ValidateUser(TextBox1.Text, TextBox2.Text) Then
  Roles.DeleteCookie()
  FormsAuthentication.RedirectFromLoginPage(TextBox1.Text, False)
Else
  Label1.Text = "You are not registered with the site."
End If
C#
if (Membership.ValidateUser(TextBox1.Text, TextBox2.Text)
{
  Roles.DeleteCookie();
  FormsAuthentication.RedirectFromLoginPage(TextBox1.Text, false);
}
else {
  Label1.Text = "You are not registered with the site.";
}
Using Roles.DeleteCookie() does exactly what you would think — it deletes from the client machine any cookie that is used to define the user’s roles. If the end user is re-logging in to the site, no problem should arise with re-authenticating his exact roles within the application. There is no need to rely on the contents of the cookie. This step provides a little more protection for your site.
To be honest, the Membership API is liked by few, loathed by many. It was conceived more than ten years ago, but is too complicated for simple tasks and not prepared for some of the authentication mechanisms that are common in today’s web. You look at modern authentication mechanisms shortly, but first, you learn a simpler way of doing authentication in ASP.NET.
With WebMatrix, Microsoft provides a quite powerful IDE for “beginners and students,” as the official PR calls it. What that supposedly means is that you probably should not work on commercial projects with WebMatrix (although you are allowed to), but can get fast results for simpler kinds of applications.
The membership and roles part that ships with the ASP.NET Web Pages technology is an integral part of WebMatrix. Chapter 35 goes into much more detail on the features available there, but this chapter briefly discusses one specific bit of API that is also available for ASP.NET Web Forms applications.
The SimpleMembership and SimpleRoles APIs give you programmatic access to membership and roles information, however with a much simpler interface than the “regular” Membership and Roles APIs. Here is a list of some of the methods in SimpleMembership:
The basic functionality is nothing new in comparison to what you have worked with until now, but the wording alone is simpler and much more to the point — RequireAuthenticatedUser() automatically redirects to the login page if the user is not authenticated, for instance.
Matthew M. Osborn wrote one of the first blog posts on this subject (http://blog.osbornm.com/archive/2010/07/21/using-simplemembership-with-asp.net-webpages.aspx), and Jon Galloway provides more details and a technical background at http://weblogs.asp.net/jgalloway/archive/2012/08/29/simplemembership-membership-providers-universal-providers-and-the-new-asp-net-4-5-web-forms-and-asp-net-mvc-4-templates.aspx.
In the corporate projects we are working with we have very rarely seen the simpler APIs yet, but they are still interesting to look at and might be well suited for your specific project, so we didn’t want to miss the opportunity to mention them here.
You can also perform many of the actions shown in this chapter through the Web Site Administration Tool shown in Figure 19-25. You can get at the ASP.NET Web Site Administration Tool by selecting Website ⇒ ASP.NET Configuration from the Visual Studio 2012 menu.
Although you can easily use this tool to perform all the actions for you, often you perform these actions through your own applications as well. Knowing all the possibilities when programming an ASP.NET application is important.
Appendix D provides details on the Web Site Administration Tool.
Table 19-3 presents the public methods of the Membership API. You would use this API when working with the authentication process of your application.
| MEMBERSHIP METHODS | DESCRIPTION |
| CreateUser | Adds a new user to the appointed data store. |
| DeleteUser | Deletes a specified user from the data store. |
| FindUsersByEmail | Returns a collection of users who have an e-mail address to match the one provided. |
| FindUsersByName | Returns a collection of users who have a username to match the one provided. |
| GeneratePassword | Generates a random password of a length that you specify. |
| GetAllUsers | Returns a collection of all the users contained in the data store. |
| GetNumberOfUsersOnline | Returns an Integer that specifies the number of users who have logged in to the application. The time window during which users are counted is specified in the machine.config or the web.config files. |
| GetUser | Returns information about a particular user from the data store. |
| GetUserNameByEmail | Retrieves a username of a specific record from the data store based on an e-mail address search. |
| UpdateUser | Updates a particular user’s information in the data store. |
| ValidateUser | Returns a Boolean value indicating whether a specified set of credentials is valid. |
Table 19-4 provides the public methods of the Roles API. You would use this API when working with the authorization process of your application.
| ROLES METHODS | DESCRIPTION |
| AddUsersToRole | Adds a collection of users to a specific role. |
| AddUsersToRoles | Adds a collection of users to a collection of roles. |
| AddUserToRole | Adds a specific user to a specific role. |
| AddUserToRoles | Adds a specific user to a collection of roles. |
| CreateRole | Adds a new role to the appointed data store. |
| DeleteCookie | Deletes the cookie on the client used to store the roles to which the user belongs. |
| DeleteRole | Deletes a specific role in the data store. Using the proper parameters for this method, you can also control whether roles are deleted or kept intact whether or not that particular role contains users. |
| FindUsersInRole | Returns a collection of users who have a username to match the one provided. |
| GetAllRoles | Returns a collection of all the roles stored in the data store. |
| GetRolesForUser | Returns a collection of roles for a specific user. |
| IsUserInRole | Returns a Boolean value that specifies whether a user is contained in a particular role. |
| RemoveUserFromRole | Removes a specific user from a specific role. |
| RemoveUserFromRoles | Removes a specific user from a collection of roles. |
| RemoveUsersFromRole | Removes a collection of users from a specific role. |
| RemoveUsersFromRoles | Removes a collection of users from a collection of roles. |
| RoleExists | Returns a Boolean value indicating whether a role exists in the data store. |
So far you have seen that the authentication system of ASP.NET is very powerful and — thanks to the provider model and approaches like Universal Providers (which was mentioned in Chapter 18) — very flexible. However, it gets even better. Many websites are resorting to open standards when it comes to authentication. For this purpose, two approaches are most commonly used:
Luckily, the details of the standards are not of much concern, because you will discover a very convenient way of plugging these standards into your trusted and true ASP.NET authentication system.
The bad news first: There is no built-in OpenID or OAuth support in ASP.NET. However, external packages coming from Microsoft make implementing these standards very easy. This section discusses OpenID, not that it is (from an ASP.NET API point of view) that much different from OpenAuth. Google’s OpenID service is simple to implement. The most convenient way to use OpenID and OAuth is to use the ASP.NET Web Forms Application template that ships with Visual Studio 2012 and is shown in Figure 19-26.
Create a new web application with that template and have a look at the App_Start/AuthConfig.cs or App_Start/AuthConfig.vb file. You will find there several commented lines of code that hint at what is possible with the template. Uncomment the line with the call to OpenAuth.AuthenticationClients.AddGoogle(). Listing 19-37 shows the relevant parts.
LISTING 19-37: Activating OpenID and OAuth in AuthConfig.cs/.vb
VB
'OpenAuth.AuthenticationClients.AddTwitter(
'    consumerKey:= "your Twitter consumer key",
'    consumerSecret:= "your Twitter consumer secret")

'OpenAuth.AuthenticationClients.AddFacebook(
'    appId:= "your Facebook app id",
'    appSecret:= "your Facebook app secret")

'OpenAuth.AuthenticationClients.AddMicrosoft(
'    clientId:= "your Microsoft account client id",
'    clientSecret:= "your Microsoft account client secret")

OpenAuth.AuthenticationClients.AddGoogle()
C#
//OpenAuth.AuthenticationClients.AddTwitter(
//    consumerKey: "your Twitter consumer key",
//    consumerSecret: "your Twitter consumer secret");

//OpenAuth.AuthenticationClients.AddFacebook(
//    appId: "your Facebook app id",
//    appSecret: "your Facebook app secret");

//OpenAuth.AuthenticationClients.AddMicrosoft(
//    clientId: "your Microsoft account client id",
//    clientSecret: "your Microsoft account client secret");

OpenAuth.AuthenticationClients.AddGoogle();
Then, run the application and click the login link in the top-right corner. You will see a login screen similar to the one in Figure 19-27. In this figure, several login mechanisms are made available in the form of buttons (Facebook, Twitter, Microsoft, Google), whereas on your system only Google is available (which is fine, because it is the only provider that works without further configuration).
Click the Google button, and you are redirected to a Google site (have a look at the URL in Figure 19-28!) where you are asked for your Google credentials.
After logging in to Google, the Google site — not the ASP.NET site! — asks you if it is really okay whether the “Localhost” application may access your data, especially your Google e-mail address (see Figure 19-29). After agreeing with this, you are redirected back to the ASP.NET application where your Google address is shown, and you are asked to pick a username (see Figure 19-30).
Choose a username, and then have a look at the database the application uses by default. You will see two new tables, UsersOpenAuthAccounts and UsersOpenAuthData. The former is used to store which OpenID or OAuth provider was used for which user, and the latter links the OpenID/OAuth data to ASP.NET’s membership system. In Figure 19-31 you see the result after one user has logged in using Google’s OpenID service.
If you are basing an application on the template shipping with Visual Studio, you have Google OpenID support already baked in. The API working in the background is actually quite simple, so you look at it next, but this time using an OpenAuth provider (not that it would make that much difference in terms of the ASP.NET API).
You want to use Facebook to log in to the ASP.NET website you have been working with throughout this chapter. In order to do so, you first need to create an application with Facebook and then configure your ASP.NET site to communicate with this application. So if you are one of the very few brave people who do not have a Facebook account yet, do create one. Then go to the Facebook developers site (https://developers.facebook.com/), see if you need to go through additional registration steps before you can access it, and create a new Facebook application at https://developers.facebook.com/apps. Pick a unique name (Facebook will tell you if it is not available) such as shown in Figure 19-32 — note. though, that the application name used in this chapter is obviously already taken.
On top of the resulting page you will receive two important pieces of information, which you should now share with others (the code downloads for this chapter do not contain these pieces of information): the application ID and the application secret. Write them down for later.
Now look for the “Select how your app integrates with Facebook” section and choose the Website with Facebook Login option. You need to provide the URL of the page that is loaded after the user authenticates with Facebook. In this chapter this will be Listing 19-41.aspx in the code download, but of course your mileage may vary. Also note that the port number used by ASP.NET is random, so if the port changes, you need to change the Facebook application’s settings, too. Figure 19-33 shows the settings screen.
But now back to ASP.NET: If you want to use OpenID or OAuth in a website or web application that does not originate from Visual Studio’s fully fledged template, you have to add the authentication features first. When an ASP.NET website (or application) is loaded, fire up the Packet Manager Console and install two packages:
Listing 19-38 shows the required commands.
LISTING 19-38: Installing NuGet packages for OpenID/OAuth support
Install-Package DotNetOpenAuth.AspNet
Install-Package Microsoft.AspNet.Membership.OpenAuth
After installation, you need to set up the application or website so that one or more OpenID or OAuth providers are activated. The best way to do this is when the application starts. Create a Global.asax file and include the code shown in Listing 19-39. Make sure that you are entering the application ID and application secret of the Facebook app you just set up.
LISTING 19-39: Activating Facebook OAuth in Global.asax
VB
<%@ Application Language="VB" %>
<%@ Import Namespace="Microsoft.AspNet.Membership.OpenAuth"  %>

<script runat="server">
    Sub Application_Start(ByVal sender As Object, ByVal e As EventArgs)
        OpenAuth.AuthenticationClients.AddFacebook( _
            appId:= "* use your own *", _
            appSecret:= "* use your own *")
    End Sub
</script>
C#
<%@ Application Language="C#" %>
<%@ Import Namespace="Microsoft.AspNet.Membership.OpenAuth"  %>

<script runat="server">
    void Application_Start(object sender, EventArgs e)
    {
       OpenAuth.AuthenticationClients.AddFacebook(
            appId: "* use your own *",
            appSecret: "* use your own *");
    }

</script>
Before continuing, it is important to briefly discuss the process that follows. If you want to be able to log in with Facebook, you first have to redirect the user to a Facebook authentication page, which will then redirect you to the URL provided in the Facebook application settings (in this case Listing 19-41.aspx on the server). Of course, you do not have to find out the Facebook URL all by yourself; the NuGet packages you installed do most of the work. Listing 19-40 shows the new login page (which must eventually replace Login.aspx in your project, because Login.aspx is your site’s only page that an unauthenticated user can access). Note that you add a button, which, when clicked, calls the OpenAuth.RequestAuthentication() method, asking for Facebook authentication with redirection to Listing 19-41.aspx.
LISTING 19-40: Adding a Facebook login to your site
VB
<%@ Page Language="VB" %>
<%@ Import Namespace="Microsoft.AspNet.Membership.OpenAuth" %>

<script runat="server">

    Protected Sub Button1_Click(sender As Object, e As EventArgs)
        OpenAuth.RequestAuthentication("facebook", "~/Listing 19-41.aspx")
    End Sub
</script>

<html xmlns="http://www.w3.org/1999/xhtml" >
<head id="Head1" runat="server">
    <title>Login Page</title>
</head>
<body>
    <form id="form1" runat="server">
        <asp:Login ID="Login1" Runat="server">
        </asp:Login>
        <asp:Button ID="Button1" Text="Login with Facebook"
            runat="server" OnClick="Button1_Click" />
    </form>
</body>
</html>
C#
<%@ Page Language="C#" %>
<%@ Import Namespace="Microsoft.AspNet.Membership.OpenAuth" %>

<script runat="server">

    protected void Button1_Click(object sender, EventArgs e)
    {
        OpenAuth.RequestAuthentication("facebook", "~/Listing 19-41.aspx");
    }
</script>
Figure 19-34 shows the new login screen, and Figure 19-35 displays what happens after clicking the new button: The browser is redirected to Facebook where the user needs to approve that your application can access his or her e-mail address.
All that is left to do is to implement that page that is called when the user returns from the Facebook OAuth authentication site. The Microsoft.AspNet.Membership.OpenAuth package you installed provides a number of interesting features, but probably the most suitable API call now is OpenAuth.VerifyAuthentication(), where you need to provide the URL of the (current) callback page as an argument. The return value of that call is of type AuthenticationResult. Its IsSuccessful property tells you whether the authentication succeeded, and if so, the UserName property contains the username from the OAuth provider, in this case the e-mail address your Facebook account runs under.
Listing 19-41 puts these pieces together and displays the user’s name if authentication worked, or redirects back to the login page if not. Figure 19-36 shows the result in the former case.
LISTING 19-41: Processing the authentication result
VB
<%@ Page Language="VB" %>
<%@ Import Namespace="Microsoft.AspNet.Membership.OpenAuth" %>

<script runat="server">
    Protected Sub Page_Load()
        Dim result = OpenAuth.VerifyAuthentication("~/Listing%2019-41.aspx")
        If result.IsSuccessful Then
            Label1.Text = HttpUtility.HtmlEncode(result.UserName)
        Else
            FormsAuthentication.RedirectToLoginPage()
        End If
    End Sub
</script>

<!DOCTYPE html>

<html xmlns="http://www.w3.org/1999/xhtml">
<head runat="server">
    <title></title>
</head>
<body>
    <form id="form1" runat="server">
    <div>
        Welcome, <asp:Label ID="Label1" runat="server" />
    </div>
    </form>
</body>
</html>
C#
<%@ Page Language="C#" %>
<%@ Import Namespace="Microsoft.AspNet.Membership.OpenAuth" %>

<script runat="server">
    void Page_Load()
    {
        var result = OpenAuth.VerifyAuthentication("~/Listing%2019-41.aspx");
        if (result.IsSuccessful)
        {
            Label1.Text = HttpUtility.HtmlEncode(result.UserName);
        }
        else
        {
            FormsAuthentication.RedirectToLoginPage();
        }
    }
</script>This chapter covered two outstanding features available to ASP.NET 4.5. The membership and role management services that are a part of ASP.NET make managing users and their roles almost trivial.
This chapter reviewed both the Membership and Roles APIs and the controls that also utilize these APIs. These controls and APIs follow the same data provider models as the rest of ASP.NET. The examples were presented using Microsoft SQL Server Express Edition for the backend storage, but you can easily configure these systems to work with another type of data store.
Using standards like OAuth and OpenID it is also possible to connect to external authentication services like those offered by Facebook, Twitter, and Google.