PROJECT 2
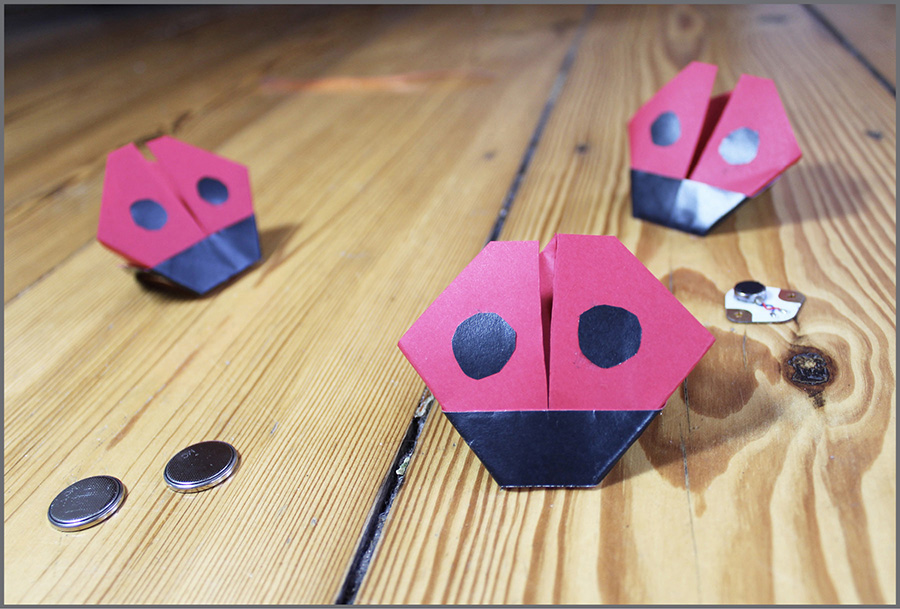
Dancing Origami Ladybird
Explore the art of origami and get a wiggle on with vibration motors
 Tools
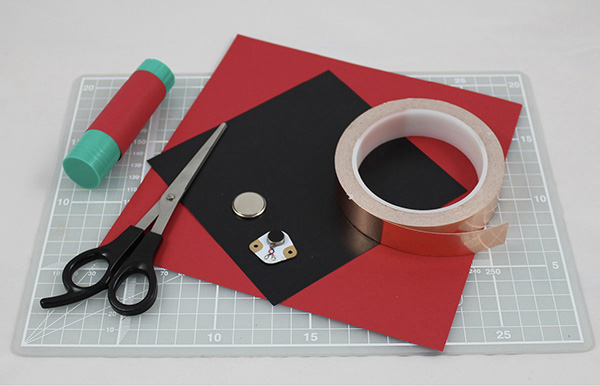
Tools
 Sharp scissors
 Ruler, ideally metal
Materials
 Paper, ideally 8-inch square origami paper, red on both sides
 Black paper for decoration
 Regular and double-sided sticky tape
 Glue stick
 Copper tape
 One sewable/stickable vibration motor
 One 3V battery
Origami is the Japanese word for “paper folding.” Ori means “to fold,” and kami means “paper.” Origami is the creation of paper shapes made entirely by folding. By learning some simple origami techniques, you can transform a simple square of paper into an animal, a fish, a puppet, a toy, or a beautiful geometric shape.
This simple origami-inspired ladybird will show you some of the basic paper crafting skills involved in this ancient art. This make isn’t pure origami because we are not just folding the paper; we are adding in a couple of decorations, snipping off a few bits of paper, and of course, making our circuit. I’ve modified a classic design of an origami ladybird so that it can wiggle and dance without falling over.
Preparing Your Materials
Make sure that you’ve got all your tools and materials ready. Then prepare your paper. If you are using ordinary red and black paper instead of origami paper, you’ll need to fold and trim it into a square first.
To make a square, lay your paper out in landscape mode so that the long edges are at the top and bottom. Fold the top right-hand corner of your page down toward you so that the right-hand short edge of the paper lines up with the long edge at the bottom. Cut off the rectangular bit of paper sticking out from the edge of the folded triangles. Then unfold your paper to reveal your square.
Once you have a piece of square paper, fold it diagonally in half so that the paper makes two triangles; then unfold. Using the crease as a guideline, cut your paper in half. Each of these triangles will make one ladybird. You can make both and give one to a friend, or you could keep it to give your first ladybird some company.
 How to Make Your First Origami Folds
Before you start making origami, you should make sure that you are folding on a clean, dry, flat surface. For the neatest folds, align your sides and corners before folding. Then fold firmly. Origami artists use a folding tool called a bone folder, but you can crease your folds with your finger, a ruler, or the blunt edge of a butter knife.
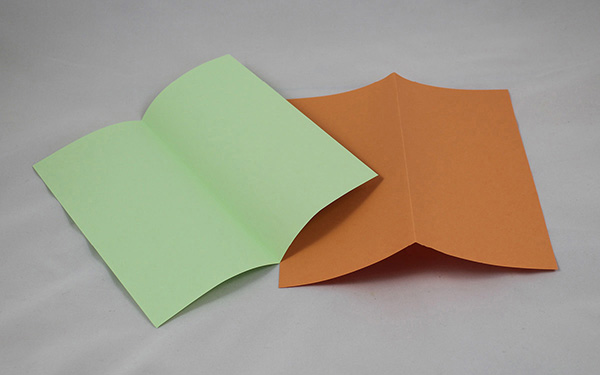
The two most basic folds in origami are the valley fold and the mountain fold. Every origami design starts with one of these two folds. Take two pieces of paper, and try both folds now.
With your first piece of paper, fold it in half by bringing the edge of the paper furthest away from you to meet the edge of the paper closest to you and then creasing. When you open the paper back up again, this fold should look like a valley, sinking down to the crease and back up again.
With your second piece of paper, fold it in half by bringing two edges together underneath the paper and then creasing. When you open it again, this fold should look like a mountain, rising up to the crease and back down again. You can make either fold in any way on your paper—diagonally, on a corner, or in the middle. You may have already noticed that if you flip over a valley fold, you will get a mountain fold, and vice versa.
Making Your First Folds
Take one of your red triangles, and place it on a flat surface in front of you, with the long edge of the triangle facing toward you. Fold your triangle in half by pulling the left and right corners together. Align the corners and edges carefully, and then firmly crease the paper along the fold.
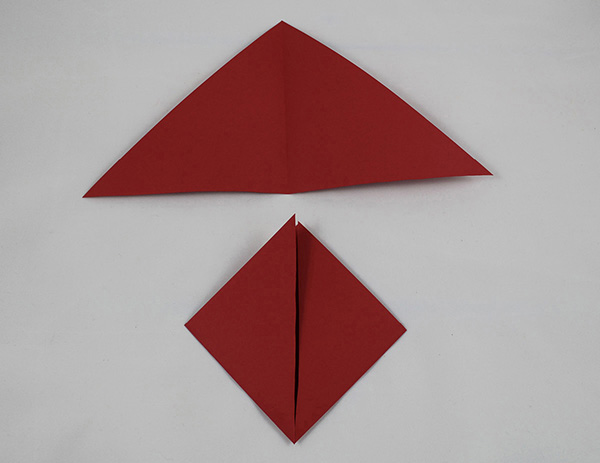
Unfold the paper, and you should have a valley fold in the center of your triangle.
Next, fold up the bottom two corners so that the tips meet at the top of the triangle. Once the edges and corners are aligned, firmly crease the paper.
This time, do not unfold the paper. You should now have a diamond shape, just like in the picture.
Folding Your Ladybird’s Shell and Head
You now have a closed edge facing you and two flaps at the top of the diamond shape. One at a time, fold down the two flaps from the top until the tips of the flaps are at the bottom of the diamond. Fold the tips down at a slight angle so that they are apart from one another, just as in the picture. These two flaps are going to be your ladybird’s shell.
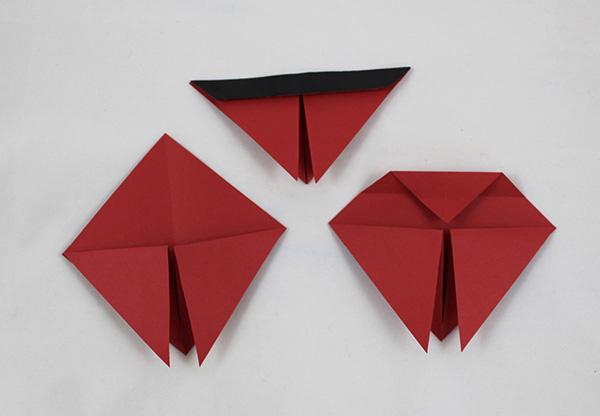
Next, take the back layer of paper that forms the tip of the diamond and fold it toward the center of the paper. Don’t fold this bit of paper exactly in half. You need to leave about a quarter-inch gap. Now fold that back layer of paper in half again so that you have a narrow strip of paper with a quarter-inch gap above the central crease.
Flip the whole paper over, and add a strip of thin black paper to the narrow band of folded paper, as in the picture. When folded, this will be your ladybird’s head. If you don’t have black paper, you can color the strip in with a black felt-tip pen.
Flip the whole paper back over, and get ready to start folding again.
Making Your Final Folds
Fold over the narrow strip along the central crease so that the black part is showing.
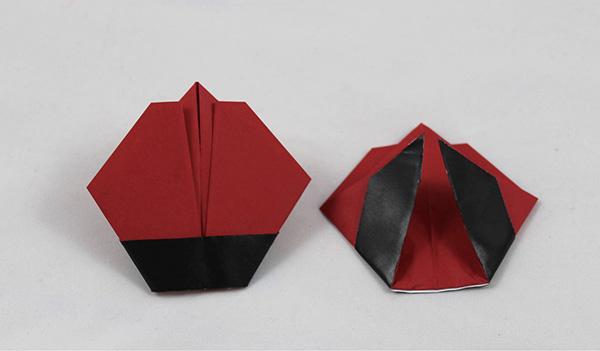
Now make a mountain fold on the left and right corners of your ladybird. Fold each of the corners underneath the body of the ladybird until you have a shape that resembles the round body of a ladybird.
Once you have a shape you’re happy with, crease the paper firmly. At this point, you are creasing several layers of paper, so you may want to use the blunt edge of a butter knife to help you get a clean, firm fold.
Finally, snip a little of the pointy wingtips off so that they look more like the rounded shell of a ladybird.
Adding the Final Touches
Use your finger to gently poke between the shell and the body of your ladybird, encouraging the wings to come up and the body to fold down a bit. This makes the ladybird a bit more three dimensional but also gives us room to add the electronics that will make this origami ladybird dance!
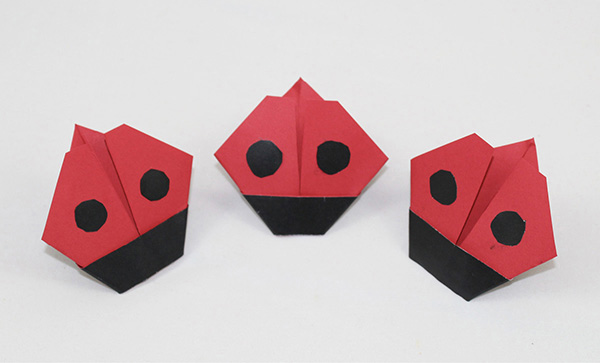
Now you have to choose how many spots to give your ladybird. There are lots of species of ladybird with different numbers of spots, different markings, and different colors. You can get red ladybirds with two, seven, twenty, or even more black spots. You can get black ladybirds with red spots, yellow ladybirds with black spots, and even striped ladybirds.
I’ve chosen to make a two-spot ladybird. Whichever type of ladybird you choose to make, you can cut out your spots from another bit of paper and stick them on with glue or simply draw them on with a felt pen.
Preparing Your Circuit
To add in our circuit, we need to unfold our ladybird a little bit. Unfold the left and right corners that are tucked under the bottom of your creature. Then lift up the wingflaps.
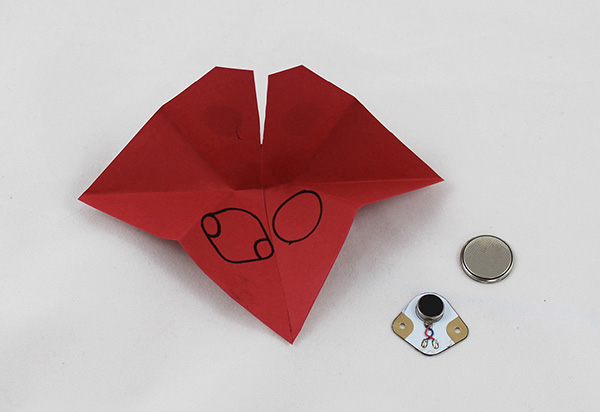
We’re going to place our components on opposite sides of the body near the head of the ladybird so that it balances nicely and doesn’t fall over when it’s wiggling.
Put the sewable/stickable vibration motor on the left-hand side of the body and the 3V battery on the right-hand side of the body. Then draw around the components. They should sit on either side of the main bit of the body, underneath the wings when the ladybird is folded back up again.
Once you’ve drawn around them, take your sewable/stickable vibration motor and your battery off the ladybird and start making your copper tape circuit.
Starting Your Circuit
Take a small piece of copper tape, and make a path between the right-hand tab of the vibration motor and the middle of the battery circle, just as in the picture.
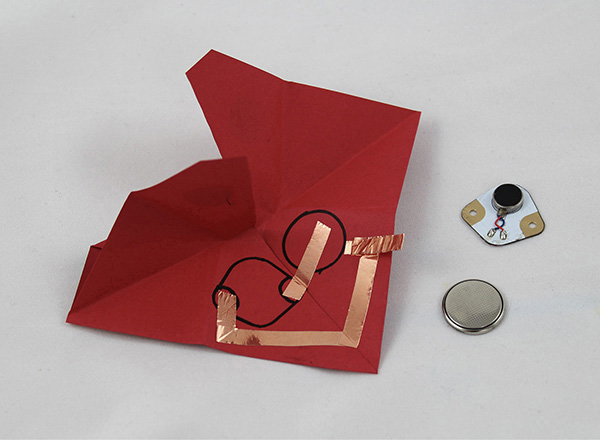
Take a length of copper tape, and make a path from the left-hand tab of the vibration motor. Take the copper tape path around the top of the body and then bring it down toward the battery circle. When you are about ¼ inch away from the battery circle, pause and trim off the tape until you have about 1½ inches of tape left. Pull the backing off, and fold the remaining tape in on itself so that the two sticky sides stick together. This should leave you with a flap of double-sided copper tape over the battery circle.
Use double-sided sticky tape to place your vibration motor on top of the copper traces, making sure that your sticky tape doesn’t get in the way of the connections. The vibration motor not connecting properly to the copper tape circuit is the most common reason that this make doesn’t work the first time. To make a more secure connection, you can put ½ inch of upside-down copper tape on sticky tape (sticky side to sticky side), and then tape it on top of each of the vibration motor tabs.
Finishing Your Origami Ladybird
Put your battery on top of the circle, underneath the flap. Stick the flap to the top of the battery with a bit of sticky tape. You might want to use a little extra tape to secure the whole thing to the body of your ladybird. The bottom bit of tape connects with one side of the battery, and the top flap connects with the other. It doesn’t matter which way around you put your battery because the motor doesn’t care which direction it gets its power from.
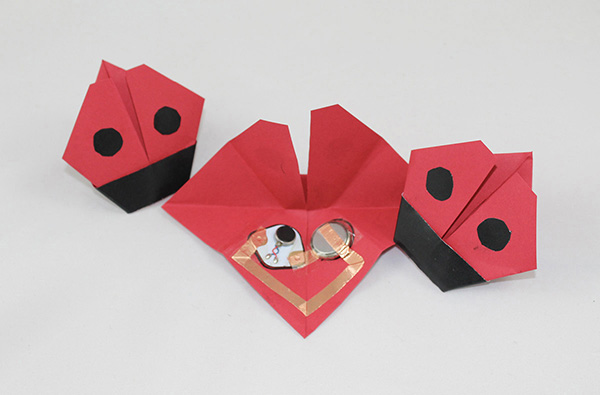
Once your battery is in, your ladybird should start wiggling. Tuck the corners back under the body of the ladybird, and put it on the floor or a table to watch it dance. To stop your ladybird dancing, carefully lift up the battery flap and remove the battery.
 Fix It
Not working? Don’t worry! Follow these steps to figure out why, and fix it.
1. Check your power.
 Has your battery run out of juice? Try another battery.
 Is your battery connecting into your circuit? Make sure that both sides of the battery are connected securely and that the flap on top of the battery is not touching the bottom or sides of the battery. Make sure that your sticky tape isn’t interfering with your connections.
2. Check your components.
 Is your vibration motor securely stuck in place? Loose connections mean that your circuit won’t work. The dancing of your ladybird sometimes means that your connections can wiggle loose. Try sticking your motor down with tape or using a bit of upside-down copper tape on sticky tape on top of your vibration motor tabs to make an extra secure connection.
 Is your vibration motor on top of an unbroken bit of copper tape? Electricity likes to take the easiest route possible, so if you put a component on top of an unbroken bit of copper tape, the electricity will go through the copper tape instead of the component.
3. Check your wiring.
 Do your positive and negative paths touch? If they are touching, no matter how slightly, your circuit won’t work.
 Are all your paths complete? If your copper tape path has rips or tears in it, the electricity may not be able to get through.
 Have you made your path by sticking one bit of copper tape on top of another? Even if your glue is conductive, this can lead to a faulty circuit.