ACTIVE TRICKS
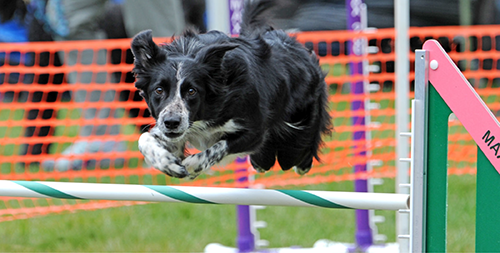
Fever’s success in the agility ring is largely due to her foundation training. Photo by Barry Rosen
Not all tricks have to be low-key. While Chapter 5 aimed to give you techniques to help your dog relax, this chapter has tricks that encourage him to jump, run, and spin. Active tricks are an effective way to channel a dog’s physical energy toward a focused activity. His body and mind will be working together, which in turn teaches him that, yes, it is possible to burn off steam and listen to his human at the same time. Win-win!
As with the tricks in Chapter 5, many of the tricks in this chapter can be applied to a freestyle routine.
BASIC TRICKS

JUMP OVER
Basic • Sports
Used in: Agility, parkour, rally, freestyle
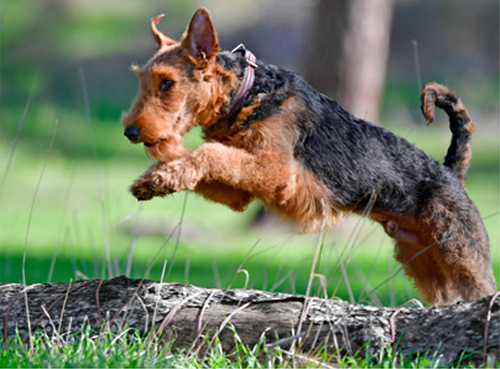
This is an essential agility exercise that teaches dogs to jump over obstacles in a safe, controlled manner. It also turns up in parkour, rally, and freestyle. The jump could be a DIY jump set up in your home (see Chapter 7), or you can utilize the natural or urban landscape. When used outside, Jump Over is a super-fun way to get your dog to focus on you, all the while building his trust in you and reinforcing the bond you’ve developed. This activity can be done on a leash or long line or, if in a safe area, off leash. Remember that dogs whose growth plates haven’t yet closed (roughly less than eighteen months old) should jump no higher than hock height and should avoid repeated jumping. Most older dogs can jump as high as 2 inches (5 cm) below the withers.
Jump Over is useful for dogs who:
 are healthy and active
need to learn how to channel their energy
need to build trust in their owners
like to play, either with their owners or with environmental elements
Note that in the instructions that follow, you will toss a treat on the ground as is done in agility training. By placing the reward on the ground, your dog will learn to look where he’s jumping. This is critical for safety and will come in handy when your dog is jumping on uneven surfaces. Conversely, if you reward from your hand, the dog learns to jump while looking up at your hand, and he is much more likely to injure himself this way.
HOW TO DO JUMP OVER
1. Find or create a very low, stable object for your dog to jump over. You can add height later; for now, start easy to build his confidence.
2. Approach the low jump with your dog. Before you reach it, toss a treat to the other side of the jump, onto the ground.
3. Allow your dog to jump over the obstacle and get the treat.
TIP: If your dog is going around rather than over the jump, move your body to the landing side of the jump (while your dog stays on the takeoff side). Put the treat right in front of his nose and lure him over the jump and to the ground. It is still important that the treat is delivered on the ground. Alternatively, you can put his leash on to prevent him from swerving around the jump. Avoid pulling him over the jump, as that is a sure way to make your dog afraid of this exercise. It has to be his choice.
4. Once your dog is happily clearing the jump, you can add the verbal cue. Say “jump” right before you toss the reward to the other side of the obstacle.
Many dogs are natural jumpers and will enjoy using these skills.
From There
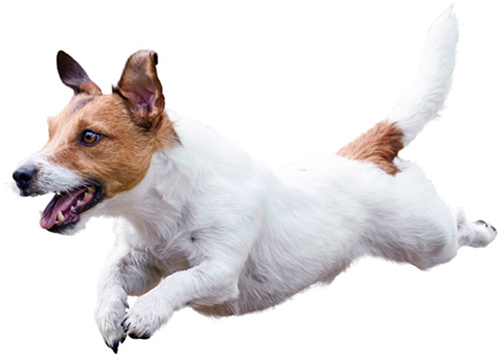
You can increase the jump height gradually as your dog builds confidence in his abilities and trust in your handling skills. (Remember, pushing him to jump too high will have the opposite effect!) While your Jack Russell can probably scale a stone wall, there is no reason to put his physical or emotional health at risk by asking him to do so. Agility organizations such as the United States Dog Agility Association (USDAA) and American Kennel Club (AKC) have set limits for jump height, which you can find online.
TURNING WHILE JUMPING
In agility, the course is full of twists and turns. In many cases, the dog will sometimes make a turn while jumping over an obstacle. The agility handler’s position is one of the cues that tells the dog to turn while taking a jump. When Sarah sends Hank to a jump but does not run past the jump herself, Hank should know to turn toward her while taking the jump. By the time he lands, he has already completed a large part of the turn.
To start teaching this, Sarah did her dogs’ foundation jump training by teaching them to go around traffic cones, as in Go Around (in Chapter 3). She didn’t use a jump bar at all in the beginning, partly because her dogs were not old enough to do any real jumping. When Sarah practiced Go Around, she always stepped with the foot closest to the dog and extended the hand on the same side, aiming toward the outside of the cone. (See the photos for Go Around.) She continued to practice, cuing the behavior from farther and farther away. By the time Fever was old enough to take jumps, Sarah could already send her to jumps from up to 10 feet (3 m) away.
Basic • Sports
Used in: Freestyle
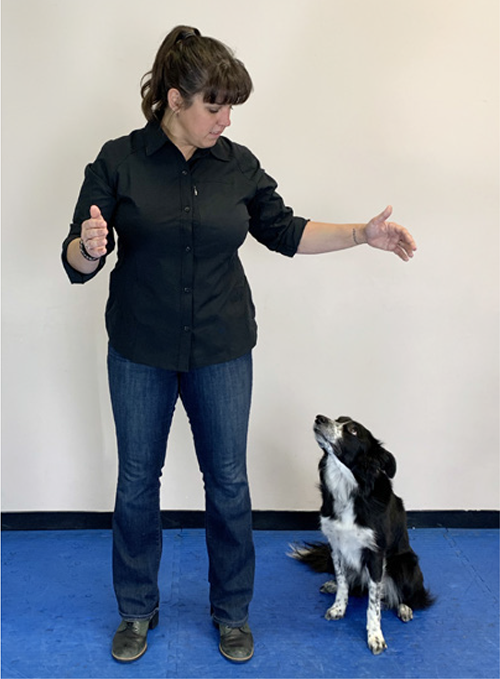
Active dogs sometimes just need a channel for their energy. Does your dog get underfoot or jump on people when you’re trying to have a conversation? You don’t need a yard full of agility jumps to keep him engaged while you chat. Instead, while you’re talking to a neighbor on the sidewalk, or while you and your guests are hanging out on the sofa, your dog can jump back and forth over your outstretched leg. Not only does this entertain everyone, it also burns enough of your dog’s energy that he won’t be nearly as motivated to jump on your guests or behave inappropriately afterward. This is a common exercise in freestyle routines, too!
Jump over Your Leg is useful for dogs who:
are healthy and active
need to learn how to channel their energy
need to build trust in their owners
like to play, especially when there’s an audience
HOW TO DO JUMP OVER YOUR LEG
1. Sit on the floor with one leg stretched out in front of you. Your other leg should be out of the way—either bent at the knee and held close to your chest, or curled up under your rear.
2. With the dog on one side of your leg, show him a treat. Toss the treat or lure him to the other side, as in Jump Over. Be sure to allow enough room for the dog to land all four paws on the opposite side of your leg.
TIP: If your dog keeps going around your leg, do this exercise in a hallway or with your foot against a piece of furniture so that he has no choice but to cross over your leg.
3. Reward him at ground level when he gets to the opposite side, even if there was no actual “jump.”
4. Repeat until your dog is confidently crossing over your leg.
5. Add the verbal cue “jump.” Get four-for-four.
6. Begin to lift your leg. Put your outstretched foot on a book or box to add a little height. Repeat until your dog is enthusiastically and confidently jumping.
From There
High school: Vary your position. Sit on the couch and place your outstretched foot against the coffee-table leg (but not too high!). Stand and hold out your leg in front of you or even out to the side or behind you. The possibilities are only limited by your imagination.
College and beyond: Practice during times of distraction, such as when guests are visiting or while waiting at a crosswalk.

SPIN
Basic • Tricks
Used in: Freestyle, agility
If your dog is active, Spin is a simple trick to teach. It doesn’t involve jumping, running, or physical contact, so it’s safe to use around kids, too. This is one trick that Kate taught Batman in her building’s elevator, as it only requires a few seconds and a few feet of space. Spin, along with variations of it, makes its way into many freestyle routines. It may be used in agility training, too; for example, handlers might teach their dogs to turn 180 or 360 degrees on a 12-inch (30-cm)-wide board to build their confidence for the teeter or dog walk. If a dog knows he can maneuver all four paws in a tight space, he’ll be more comfortable when the obstacle is 4 feet (1.2 m) high.
Spin involves your dog rotating 360 degrees in a tight circle. (He is not circling around an object; that is Go Around.) He can spin in front of you or to your side in a Heel position. Note that some dogs prefer spinning in one direction over the other; this is fine, and it simply means that you’ll need to take it slowly when teaching the more difficult direction.
Spin is useful for dogs who:
just can’t contain themselves around people
are active or bouncy by nature
are better off not touching people
HOW TO DO SPIN
1. Face your dog. Have at least four treats in one hand.
2. Start luring your dog’s nose in a wide circle. Pop a treat into his mouth when he completes each quarter turn. When he’s almost completed his spin, mark it with “yes” or click before he gets that final treat. Practice until your dog is moving smoothly, which may take several sessions of four-for-four.
TIP: Move your lure hand slowly enough for your dog to follow the scent. If his nose becomes detached from your hand, you’re moving it too fast.
TIP: Be aware of your dog’s comfort level as your arm moves above his head. Some dogs may find this intimidating and will need a slow introduction to this trick.
3. Continue to lure, but now you’ll mark and reward with only one treat when the Spin is fully completed. Gradually turn your hand into a recognizable visual cue, like a pointing finger, as this will help your dog ease into the next step. Get four-for-four or practice until smooth.
TIP: As your dog gets better at this, you can move the lure more quickly for a faster Spin.
4. Once your dog can make a relatively small, quick Spin, remove the lure. You will draw the circle with an empty hand. Mark and reward at the end from a pocket or other hand. Get four-for-four.
5. Add a verbal cue, such as “spin,” before starting the sequence.

Step 1: Batman starts by facing Kate, ready for his treat lure.
Step 2: Kate slowly lures, treating when the turn is 25 percent, 50 percent (as shown here), 75 percent, and 100 percent complete.
High school: Repeat the steps in the other direction. Choose a different cue for this direction, such as “twist.”
College: Teach him to spin from a Heel position on your left or right. Since you’re changing the context, start from Step 1 and work your way up. (You will likely find that it goes much faster than the first time.)
Grad school and beyond: Indoors, use this as a trick to show off to your guests. Outside, practice Spin as a fun way to burn some energy while waiting at a crosswalk.
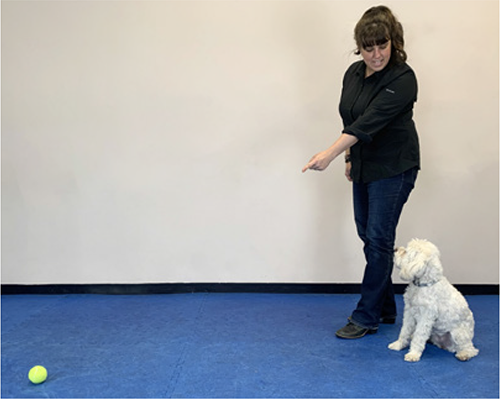
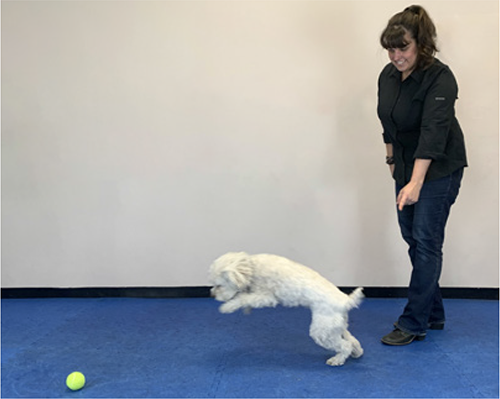
CATCH A COOKIE
Basic • Tricks
Used in: Agility
The beauty of this trick is that it can be done at a considerable distance. If your guests or their kids aren’t comfortable around dogs, you can encourage them to toss a treat in the air for your dog to catch. On the flip side, if your dog is too excitable or shy to calmly interact with new people, this trick is likely a great fit. You can hold your dog on leash if you have any concerns about him getting too close to your guests. Catch a Cookie has a practical purpose in sports such as agility, where the handler needs to reward the dog from a distance.
Prior to teaching your dog, you might need to practice your throws. Aim your throws just above your dog’s nose. Sarah finds it easier to throw underhand, but you should experiment to see what works for you. Additionally, choose your treats wisely. Your dog should be able to easily see the treat, so be sure to choose a goodie that is large and colorful. When you’re ready to practice with your dog, have a partner who can help.
Catch a Cookie is useful for dogs who:
love treats
have any type of energy level
need to be given extra space between them and your guests
HOW TO DO CATCH A COOKIE
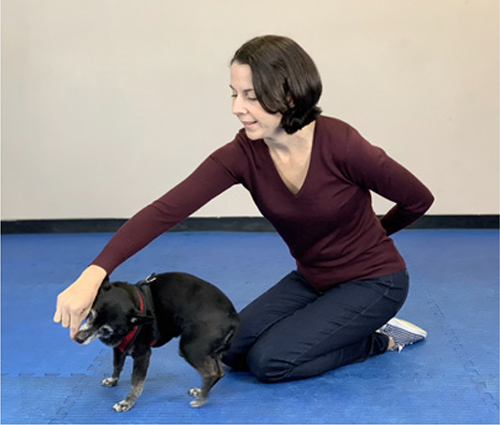
1. Start with your dog on leash, being held by your training partner. At first, your dog is allowed to go anywhere within the radius of his leash. Your partner should stand still, as though your dog’s leash is tied to a post.
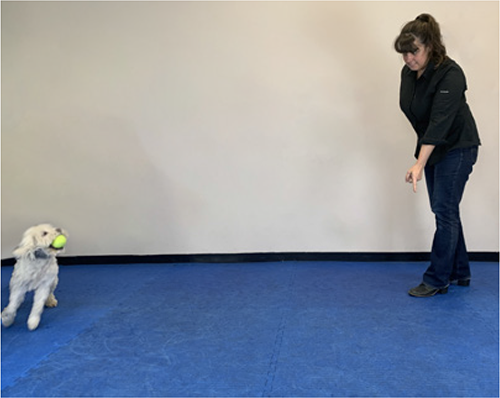
2. Toss a treat to your dog. Whether he catches it or not, allow your dog to eat the treat for the first six tosses.

3. On the seventh toss, your training partner will prevent your dog from getting the treat unless he catches it mid-air. If the treat hits the floor, your dog can’t have it. Your partner can use the leash to restrain the dog, put her foot over the treat, or block with her body. This will build your dog’s desire to catch the treat.
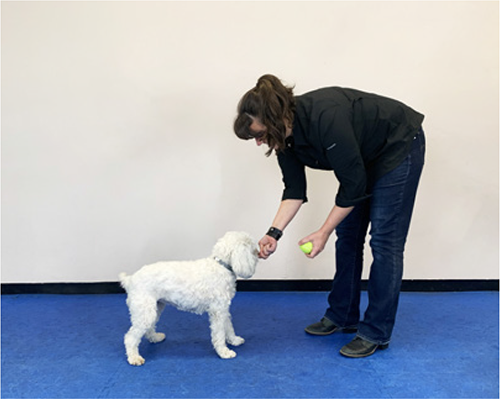
4. As soon as your dog catches a treat for the first time, celebrate! Throw him a party and cheer.
TIP: Be patient. It might take a while to get a successful catch. If you see your dog opening his mouth while the treat is in the air, he’s starting to get the idea!
5. Once your dog is reliably catching, say “catch” right before you throw the treat.
From There
High school and beyond: Begin to practice without the leash. Invite others to throw a treat as well, provided they can throw accurately! You can also play “catch” with other items, such as balls.
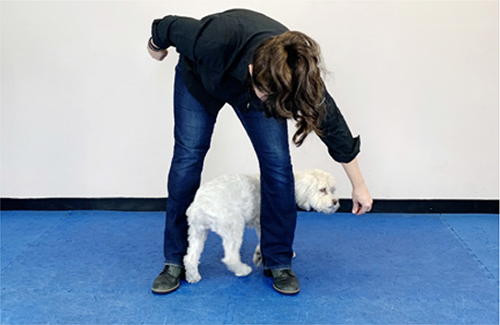
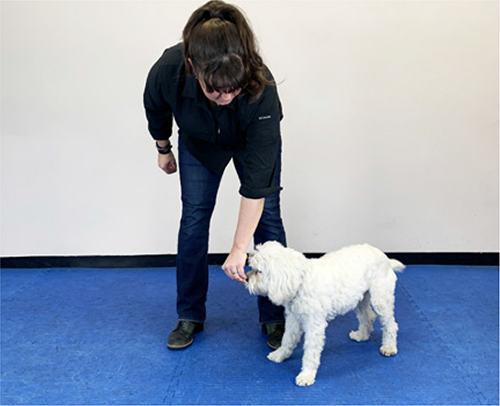
RUN THROUGH YOUR LEGS
Basic • Sports
Used in: Freestyle
Here, you will stand still with your legs spread far enough for your dog to fit through. Your dog, facing you, will run between your legs from front to back. This can easily be applied to a freestyle routine, and it also teaches your dog to trust you as he moves close to your body.
Run through Your Legs is useful for dogs who:
are high energy
prefer active tricks to stationary ones
need a fun recall refresher
struggle with more complex behaviors involving their owners’ legs
are short enough to fit under people’s legs
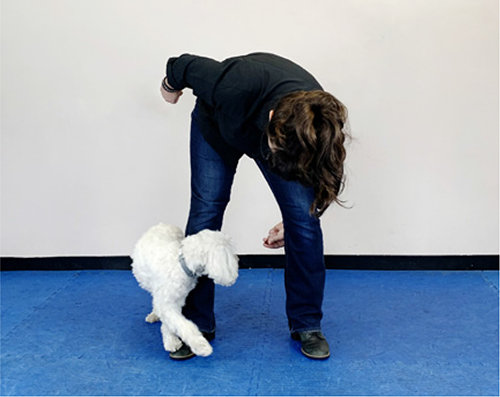
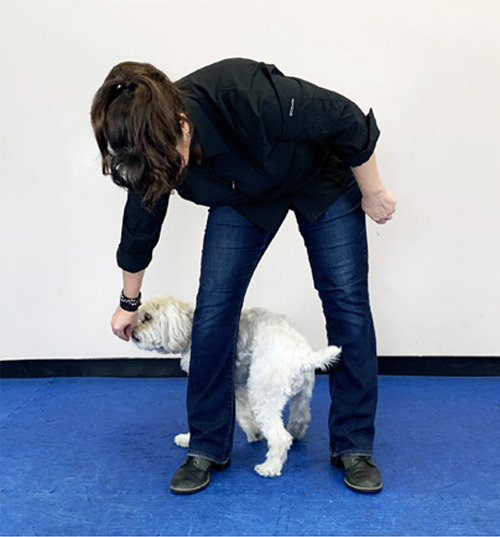
Run through Your Legs is a good bonding activity for smaller dogs and their owners.
HOW TO DO RUN THROUGH YOUR LEGS
1. Face your dog with only a little space between you.
2. With your legs spread wide enough for him to fit through, reach down and toss a treat between your legs, aiming for just a little behind you.
TIP: If your dog is uncomfortable running through your legs, start with a less intimidating position. Sit in a chair with your legs propped up on another chair and drop treats directly below you. Shape the behavior so, with time, he has to walk a little farther under you to get the treat. Eventually, he will trust you enough to walk under your legs to get the treat.
TIP: If your dog is darting around you to get the treat (but is otherwise comfortable), do this exercise with barriers, such as two chairs, at your sides, or put your dog on leash, using the leash to restrict him only if he tries to swerve around you.
3. Continue tossing the treat farther each time until he is able to get his whole body through your legs without backtracking after eating the treat. Get four-for-four over several sessions.
4. Practice the same sequence, but with your dog a little farther in front of you. Now he will have to make a more conscious decision to go through your legs and not around you. Get four-for-four over several sessions.
5. Fade the treat by making the pointing gesture through your legs, but no treat. As soon as your dog runs through your legs, give him a jackpot of several treats from your hand.
6. Add a verbal cue, such as “through.”
From There
You can increase both distance and distraction, as well as combine Run through Your Legs with other behaviors, as in a freestyle routine.
High school: Work on increasing the distance your dog has to run to you before doing Run through Your Legs. This is great for building recall skills.
College and beyond: Increase distraction gradually, both indoors and out. Also consider combining this behavior with other tricks and behaviors.
CLOSE THE DOOR
Basic • Tricks
Prerequisite: Nose Target or Paw Target
Sometimes you just need a little privacy. This trick will teach your dog to approach an open door and close it with his nose (or paw). While a cute trick, it is also the kind of daily task a service dog might do for his owner.
Close the Door is useful for dogs who:
need extra engagement in the house
like to do targeting activities
HOW TO DO CLOSE THE DOOR
The instructions here use a Nose Target. (Don’t know what that is? Check out the What’s a Nose Target? sidebar.) However, you could just as easily do this with a Paw Target, as outlined in Chapter 7.
WHAT’S A NOSE TARGET?
Any behavior that teaches your dog to touch an object with his nose is a form of nose targeting. This includes Hand Target in Chapter 3, Close the Door in this chapter, and Kiss Me in Chapter 5. Start with these steps, which can then be applied to any object you’d like your dog to target.
1. Rub a treat on a sticky note. With one hand, hold out the sticky note, right in front of your dog’s nose.
2. Your dog will reach his nose over to sniff it. Mark and reward the moment he touches the note. After he touches it, remove the note. Get four-for-four nose touches.
3. Add the verbal cue “target” right before you present the note. Get four-for-four.
4. Gradually increase the difficulty by moving the note in different directions and heights. Then, stick the note to other objects (like a door) and cue “target.”
5. If you plan on using Nose Target to teach a new behavior, such as Close the Door, you’ll be changing the cue and fading out the sticky note. The steps for this are listed for each behavior.
1. Choose a door that your dog can comfortably close. Start with the door ajar.
2. Place a sticky note on the edge of the door at the dog’s nose height.
3. Cue “target,” and mark and reward when your dog makes contact with the target.
4. Repeat until the dog is offering to target before you can even ask.
5. Now, only mark and reward if the door moves, even a tiny bit, when he targets it. Repeat until he is comfortable with (and not startled by) the door moving in this way.
6. Shape the behavior. Only reward for progressively stronger pushes until he closes the door all the way. When he closes it, jackpot!
7. Start rewarding him only when he fully closes the door.
8. With each repetition, open the door a bit wider. It will require more effort to close it.
TIP: If your dog struggles at any point, go back to an easier step and get four-for-four.
9. Add the verbal cue “close the door” right before he starts pushing it.
10. Remove the sticky note.
TIP: If your dog has become reliant on the sticky note, you can fade it gradually. With each successful rep, shave off the edges of the paper to make it smaller.
From There
High school: Continue working on longer closes, meaning that the door ultimately starts from a fully open position.
College and beyond: Apply this to other doors and low-level cabinets.
RING A BELL
Basic • Tricks
Prerequisite: Paw or Nose Target
Has your dog ever had an accident simply because you forgot to take him out on time? Teach your pup to get your attention by ringing a bell! That unmistakable jingle is sure to prevent future accidents.
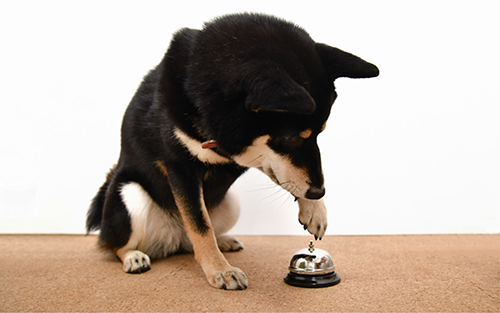
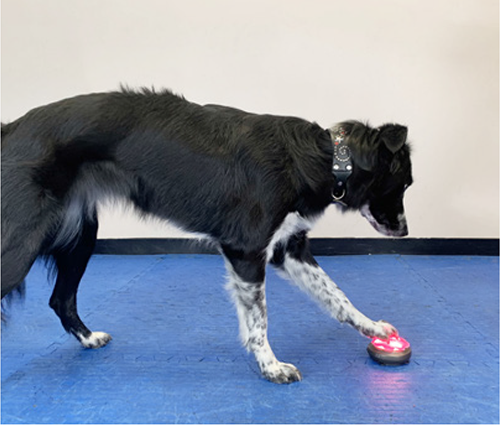
Step 2: Fever does a Paw Target on the sticky note attached to the bell.
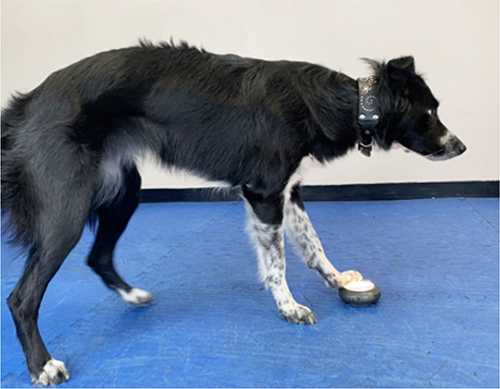
Step 3: Now, she doesn’t need the sticky note.
There are numerous kinds of bells that you can make or purchase: hanging jingle bells, a hotel-style call bell, an electronic bell designed specifically for potty training a dog, and so on. Consider what your dog would be the most comfortable with, and whether he would prefer to touch the bell with his nose or paw. In the photos we’re using a push light, so you can see it illuminate when Fever has performed the correct behavior. Therefore, our steps will use a Paw Target (see Chapter 7).
While ringing a bell is typically used for going potty, you could teach your dog to ring it to request any other event, too. Keep in mind, though, that if you teach your dog to ring a bell when he’s hungry, he might be ringing it from morning until night.
Ring a Bell is useful for dogs who:
don’t give clear signals when they need to go out to potty
have forgetful owners
have urinary or bowel issues
HOW TO DO RING A BELL
1. Use the sticky note with which you taught Paw Target (or Nose Target). Adhere it to the bell.
2. Ask your dog to target the bell until you get four-for-four.
3. From there, make the sticky note smaller and smaller until your dog will touch the bell without the sticky note at all.
4. Add a verbal cue, such as “bell” or “ring it,” right before you present the bell. Practice several sessions of this, aiming to get four-for-four touches.
5. If you haven’t already done so, put the bell in the spot where you will keep it long-term. Practice “bell” from a very short distance at first, with your dog standing next to it. After each successful repetition of “bell,” you and your dog should take one step away before beginning the next rep. Repeat “bell” from a slightly longer distance each time. This teaches your dog to both approach and touch the bell.
TIP: If your dog struggles with distance, go back to a shorter distance and get four-for-four solid reps before proceeding.
6. Once your dog is a “bell” expert, ask him to touch the bell right before you take him out to go potty. The sequence is: do “bell” and reward/immediately snap on the leash (if needed)/go outside.
High school: Fade the food reward. Going outside is rewarding in itself, so ultimately you will not need the treats. As an intermediate step, for several reps you can do the following sequence: do“bell”/leash up and walk out the door/reward.
College: Your dog will take it to college level, when he’s ready, by thinking to ring the bell on his own when he needs to go out. (At this point, you won’t need the verbal cue “bell” anymore.) The tricky part is ensuring that your dog connects “bell” to potty breaks, not to general playing or walking outside. You will have to make an effort to teach him this point. First, make sure he goes potty right away before he gets his walk or playtime. If he doesn’t go potty right away, he goes back in the house. Also, be ready for false alarms. If he rings the bell, and you’re certain he’s doesn’t have to go potty, have a consistent expression such as “not now” to tell him that you won’t take him out.
ADVANCED TRICKS

INFINITY WEAVE THROUGH YOUR LEGS
Advanced • Sports
Prerequisite: Run through Your Legs
Used in: Freestyle
With your legs spread, you will teach your dog to weave in and out in an infinity-shaped pattern. It is similar to Weave through Your Legs, except you will remain stationary. It’s a great trick for times when you would like to stand still but your dog is itching to move around: while chatting with a friend, waiting at a crosswalk, or even in the vet’s waiting room. It’s also a simple way to expend your dog’s energy in a small space, without working up a sweat yourself.
Infinity Weave through Your Legs is useful for dogs who:
have extra energy to burn
get frustrated when standing still for too long
benefit from doing exercises close to their owners’ bodies

In Weave through Your Legs, pictured here, the handler walks forward; in Infinity Weave, the handler stands still.
HOW TO DO INFINITY WEAVE THROUGH YOUR LEGS
1. Have a few treats in both hands. Your dog can start by facing you.
2. Take your right hand (holding a treat) and tuck it behind your right knee.
3. Let your dog bring his head between your legs to get a nibble of the treat. Then, slowly lure him between your legs from front to back and then all the way around your right leg.
TIP: If your dog is hesitant to walk through your legs, shape it. First, mark and reward when his head is behind your right knee, then when his shoulder is behind your right knee, and so on. Go at your dog’s pace.
4. When he has finished wrapping around your right leg and is in front of you again, reward with the treat from your right hand, as in the photo.
5. Quickly tuck your left hand behind your left leg and lure your dog in between your legs, from front to back. Continue to lure him around your left leg until he is in front of you.
TIP: If your dog appears confused at any point, help him by looking at your treat hand. This will focus his eyes in the correct direction.
6. Mark and reward from your left hand. Quickly bring your right hand behind you as in Step 2. Continue this pattern for a few weaves.
7. Get four-for-four repetitions of smooth weaves.
8. Add the verbal cue “weave” right before luring the dog in between your legs. Repeat the cue for each weave.
9. Ditch the food lure. You will simply sweep your empty hand outward after you say “weave.” Reward from your pocket or treat pouch.

Step 1: Sarah has treats in both hands. Ready, Schoffie?
Step 3: She slowly lures Schoffie around her right leg.
Step 5: Sarah has rewarded from her right hand and then quickly tucks her left hand behind her left leg.
She lures Schoffie around her left leg.
Step 6: Sarah rewards Schoffie when she’s finished the figure eight.
From There
High school: Extend the behavior so that you ask for two (and eventually more) Infinity Weaves in a row for a single reward. Also, if you’re still leaning down to “pull” your dog through your legs, slowly fade how far down your torso bends.
College and beyond: Ask for the behavior in increasingly distracting areas. At first, ask for only one full sequence during a distraction. You can increase the duration of the weaves with time.

JUMP THROUGH YOUR ARMS
Advanced • Tricks
Prerequisite: Hula Hoop Jump
Used in: Freestyle
This trick has lot of circus-dog appeal, and it can be a great workout for your pup. Jump through Your Arms is when the handler makes a hoop-shaped jump with her arms, and the dog jumps through. It incorporates some skills from agility and, when used in freestyle routines, gets a big reaction from the crowd.
Jump through Your Arms is useful for dogs who:
have a surplus of energy to burn
need extra engagement in the house
prefer active tricks
HOW TO DO JUMP THROUGH YOUR ARMS
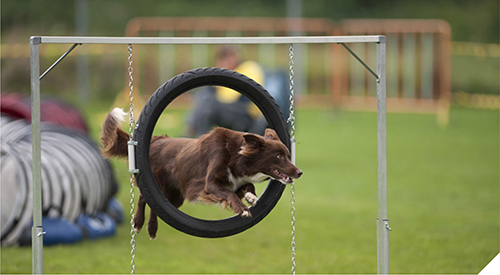
1. Warm up with several reps of Hula Hoop Jump (Chapter 7) at a low height.
2. Wrap your arms around the hula hoop, ensuring that your head is not in the way. Cue “jump” as before and get four-for-four jumps.
3. Remove the hula hoop so that only your arms will be creating the hoop. Your hands do not need to connect at this point.
Jump through Your Arms develops skills that you and your dog may use later in agility.
TIP: If your dog is large, for safety, your hands might never connect. In fact, you can practice this using only one arm as the jump bar and do away with the second arm hovering above.
From There
High school: Gradually increase the height of your arms, keeping safety in mind. You can also change the shape of your outstretched arms, for instance, one arm as a horizontal bar.
College: Try using your legs as jump bars, too, as in Jump over Your Leg.
JUMP INTO YOUR ARMS
Advanced • Tricks
Used in: Freestyle
How would you like it if, on cue, your dog could jump into your arms? This trick provides a classic ending to a freestyle performance. Not only is it a huge crowd-pleaser, but it can serve a practical purpose, too. One day while Sarah was walking Fever, a neighbor’s passing dog started barking furiously at them. Seeing that Fever was becoming increasingly stressed, Sarah cued “fly,” and Fever jumped into her arms. This handy trick allowed Sarah to avert a canine crisis by getting her dog out of harm’s way in less than a second.
Jump into Your Arms is useful for dogs who:
are active
might need to be picked up quickly
Before starting, decide how you can most comfortably catch your dog. It could be with your right arm holding most of the weight at the torso and your left arm supporting the dog from below, or the reverse. The following steps assume that your right arm will take the weight.
HOW TO DO JUMP INTO YOUR ARMS
1. Start by sitting on the floor with your legs outstretched and with your dog on your left.
2. With a treat in your right hand, lure your dog across your lap.
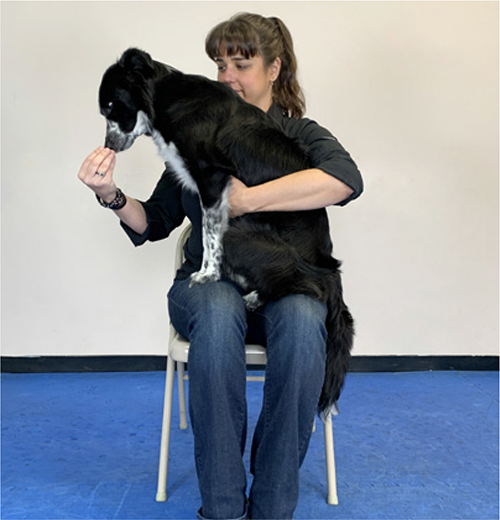
3. When your dog is centered, lift him slightly with your left arm. While holding him with your left arm, feed him with your right hand.
4. Release your dog toward your right. Get four-for-four or practice until your dog is comfortable being suddenly held.
5. Sit on increasingly higher objects as you repeat Steps 2–4. Start with items like a thick book, then a stepstool, then a plastic storage container, then a chair, and so on.
TIP: If you don’t have something to sit on, use a wall as support while you position yourself in higher and higher squats. It’s a great workout!
6. Add the verbal cue “fly” when your dog is reliably hopping up rather than just climbing. Get four-for-four.
7. At a certain point, you’ll stop luring because the dog won’t be able to follow the lure all the way up. You can gesture with an empty hand and reward once the dog is in your arms.
TIP: If you ask your dog to jump, it’s imperative that you catch him. If you let him fall, your dog might begin to distrust you and become reluctant to jump.

Step 2: Sarah lures Fever across her lap.
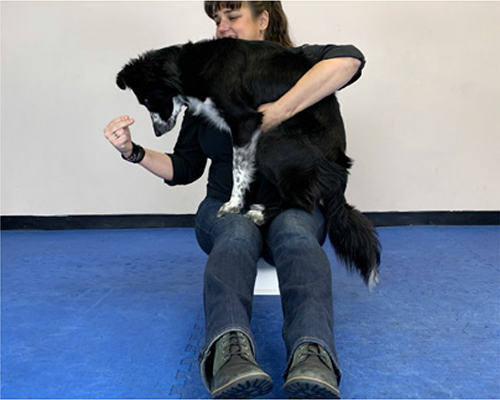
Step 3: Sarah is supporting Fever with one arm while feeding with the other.

Step 5: Sarah increases the height gradually, over several practice sessions.
You can see Fever isn’t anxious or stressed.
Step 7: “Fly!”

Success!
From There
High school: Work your way up until you’re in a standing position (or the highest level at which your dog can safely jump). Remember to reward the dog as you are holding him.
College and beyond: Practice in distracting environments.
OPEN A DRAWER
Advanced • Tricks
Prerequisite: Tug for Polite Play
This trick could prove very useful, especially if you combine it with the following trick (Go Get Your…). You could have your dog open up a drawer and then bring you an item from it! To do Open a Drawer, you’ll have to tie one of your dog’s longer rope or tug toys to a drawer so he will be able to open it by pulling on the toy.
Open a Drawer is useful for dogs who:
need extra engagement in the house
like to use their mouths
are curious about their surroundings
enjoy Tug
HOW TO DO OPEN A DRAWER
1. Show your dog the tug toy hanging from the drawer. Encourage him to “take it,” meaning that he should put the tug toy in his mouth, as if playing. Revisit Tug for Polite Play in Chapter 1 if necessary.
TIP: He may be uncomfortable taking the toy in this context, so hold the toy to make it move, and encourage him to take it. Be patient and keep the energy fun.
2. Once he’s comfortable tugging on the toy, open the drawer slightly with one hand. Continue holding the toy with the other hand.
3. While he’s tugging, let go of the toy. This will cause him to pull the drawer open a little more. When the drawer opens, even a tiny bit, mark and reward with a treat. (The treat will make him release the toy, so he won’t continue tugging.) Get four-for-four.
4. As your dog gets the hang of it, fade out how much you play with the toy in Step 1.
5. Eventually, you will offer the toy and then release it the moment your dog takes it. If your dog moves the drawer as this happens, mark and reward with a jackpot!
TIP: If he doesn’t move the drawer, go back to playing Tug.
6. Once your dog is reliably opening the drawer, add the verbal cue“open” and then offer the toy to your dog.
From There
High school: Practice the same sequence but with the drawer fully closed. It might take a little more force for your dog to open it now. You’ll say “open,” offer the tug toy, and wait until he’s cracked the drawer open to mark and reward.
College and beyond: With practice, you can fade out your presence. Eventually, you will be able to just say “open,” and your dog will grab the tug toy on his own.
GO GET YOUR…
Advanced • Tricks
Prerequisite: Fetch
Used in: Freestyle
You may have noticed that your dog has learned the name of several things on his own. Most dogs learn what “treat” means pretty quickly, and they may respond to questions like “Where’s your teddy?” by running and grabbing their favorite teddy bear toys.
You can formalize this natural behavior by teaching your dog the names of different toys and objects and then asking him to find or even retrieve them. Can’t find your leash? If you’ve taught your dog what “leash” is, let him do the searching for you. First, you’ll teach your dog the names of different items, and, after that, he can learn to find or fetch them. This is an ongoing process that takes time and practice, so enjoy the journey.
This practical trick also has sports applications. Since props are used in some Freestyle routines, the handler can cue the dog to retrieve a specific item.
Go Get Your… is useful for dogs who:
like toys
like putting things in their mouths (though this is not a requirement)
misplace things
need extra engagement in the house
HOW TO TEACH OBJECT NAMES
1. Choose an item with which your dog will interact. A favorite toy is a good starting point.
2. Place the item right in front of your dog. When he reaches his nose to sniff it and touches (or nearly touches) the object, mark and reward. If you have done the free-shaping exercises, using a clicker is advised.
3. Practice targeting the item until your dog gets four-for-four legitimate nose touches.
4. Name the object. So, if it’s a rope toy, say “rope” as you place the object on the ground. Mark and reward for touching it. Practice several sessions with four-for-four before proceeding to the next step.

5. Introduce a second novel object, for instance, a candle in a jar. Place both the candle and rope in front of the dog. If he investigates the candle, ignore it. Then say “rope” and mark and reward when he touches the rope toy. Get four-for-four.
6. Change the position of the two objects so that when you say “rope,” your dog has to take a few steps to touch it. We’re priming him for the next part.
7. Add a third item, such as an empty takeout container, and repeat Steps 5 and 6.
8. Teach the names of other items using the same steps.
HOW TO DO GO GET YOUR…
1. Warm up with a few repetitions of Fetch, using a toy that you have already named.
2. Now, before you throw the toy, add the cue “go get your [rope, ball, teddy]!”
3. If your dog picks it up and brings it to you, mark and reward. You can play with the toy or reward with a treat.
From There
High school: Practice this with several named items, toys at first.
College and beyond: Gradually introduce named items that resemble toys less and less, starting with soft or floppy items. A leash or articles of clothing are good intermediate steps, rather than going straight to something like a set of keys.
Step 2: “Schoffie, go get your ball!”
Schoffie takes her fetching very seriously.
She brings the ball back to Sarah.
Step 3: Sarah rewards her with a treat. It’s also fine to play with the toy.
PUT YOUR TOYS AWAY
Advanced • Tricks
Prerequisites: Drop It, Go Get Your…
This is one of the most requested tricks. Who wouldn’t want a dog who can clean up his own toys at the end of the day? Put Your Toys Away will teach your pup to tidy up by putting his toys into a designated toy box. If it were only this fun to teach human family members the same thing!
Put Your Toys Away is useful for dogs who:
like toys
make a mess with their toys
like putting things in their mouths (though this is not a requirement)
need extra engagement in the house
HOW TO DO PUT YOUR TOYS AWAY
1. Stand next to your dog’s toy box. Place a named toy on the floor nearby.
2. Ask your dog to fetch an item, as in Go Get Your….
3. When he returns to you, hold your hand over the toy box. Then cue “drop it.”
4. Reward with a treat (not the toy).
TIP: Once he’s dropped it, your dog might try to grab the toy out of the box. Be ready with a few treat rewards and, if necessary, reward him with one treat, and then another, as you lure him away from the box.
5. Repeat with the next toy.
From There
High school and beyond: With time, your dog will learn the game and require less explicit cuing for each toy. When he sees you approaching the toy box, he’ll know it’s time to put all his toys away, one after the other. As you walk to the box, you can also add a verbal cue, such as “time to clean up!”
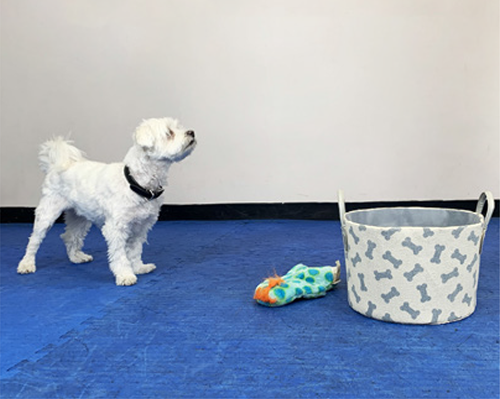
Step 2: “Trevor, go get your monster.”
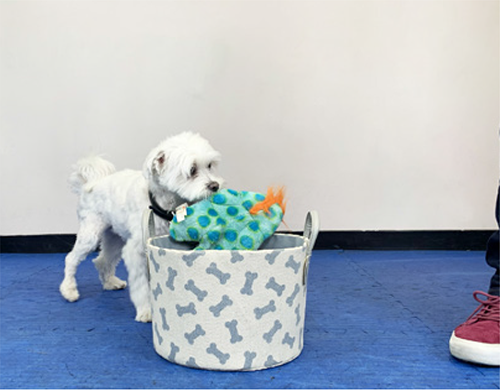
Step 3: Trevor brings it to the toy basket. For your dog, hold your hand over the basket and ask for Drop It.
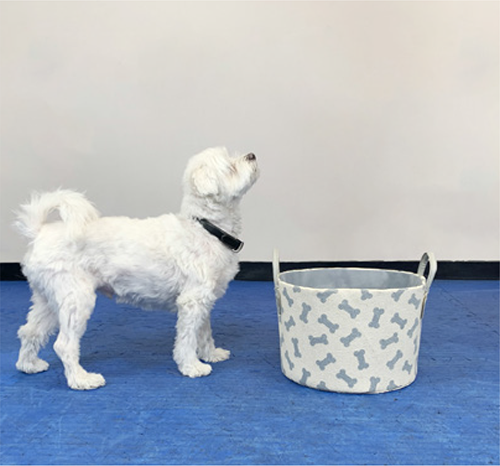
Step 4: “Where’s my treat?”