Pull-chain light fixtures are easy to replace when the switch wears out or breaks. We show you how to replace it safely and quickly. It’ll only take about 15 minutes.
Pull-chain fixtures are made from either plastic or porcelain, but we recommend the porcelain because it withstands heat better and lasts longer.
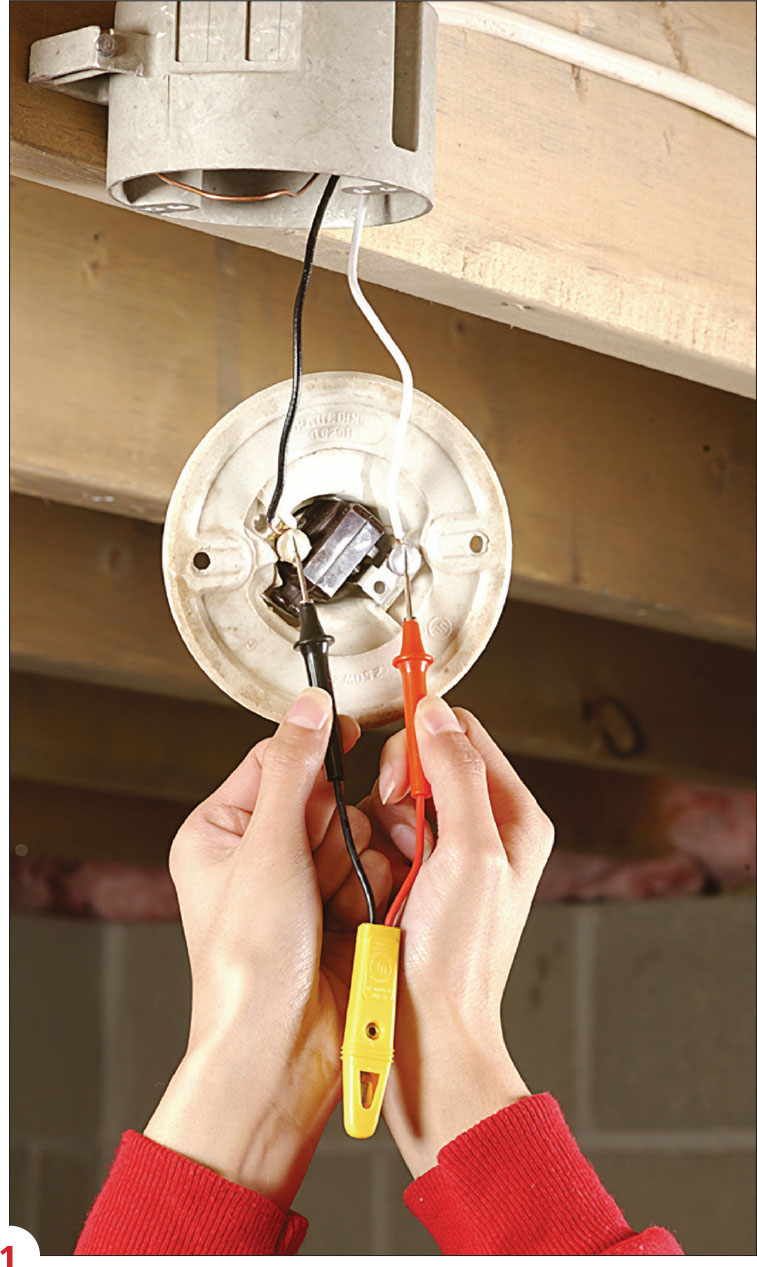
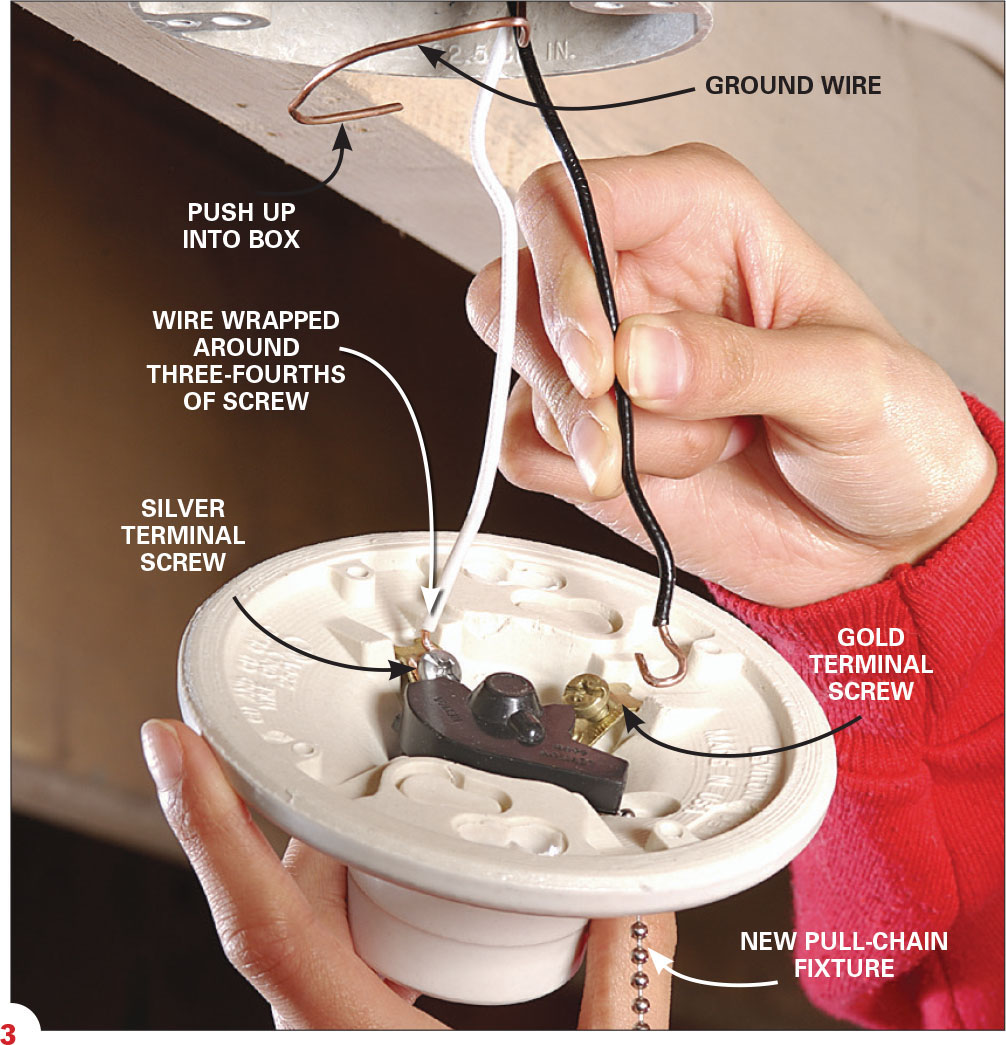
Caution: Before starting, flip the circuit breaker off or pull the fuse to disconnect the power to the light, then test to make sure the power is off (Photo 1). There may be an unused bare ground wire inside the electrical box (Photo 3). If it falls down while you’re replacing the fixture, wrap it in a circle and push it up as far into the electrical box as possible.

1. Test for hot wires. Turn off the power, remove the light bulb and unscrew the fixture from the electrical box. Pull the fixture down, but keep your hands away from the wires. Touch one voltage tester probe to the black wire, and the other to the white wire. If the voltage indicator doesn’t light up, the power is off.

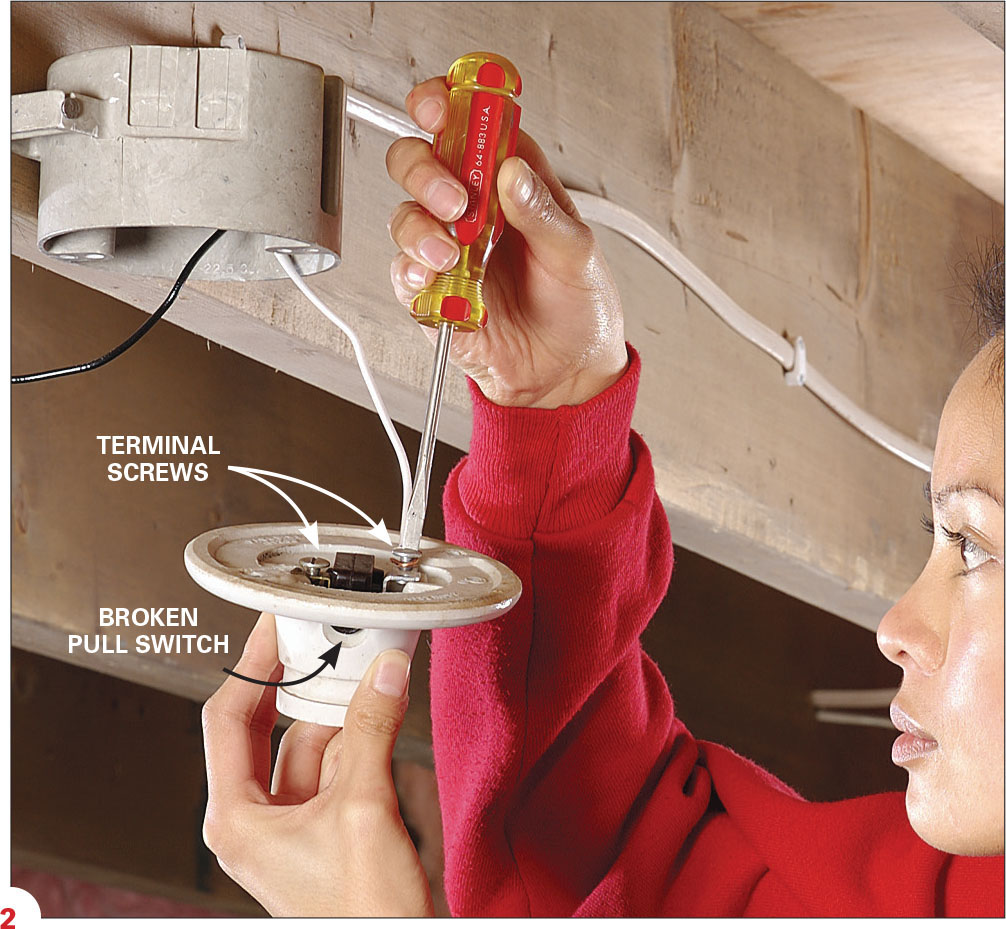
2. Disconnect the wires. Loosen the terminal screws and unhook the wiring from the old fixture. If the wire ends are broken or corroded, strip off 3/4 in. of sheathing and bend the bare wire end into a hook.

3. Connect the new fixture. Attach the black wire to the gold terminal screw on the new fixture and the white wire to the silver terminal screw. Wrap the wires clockwise so they cover at least three-quarters of the terminal screws. Firmly tighten the screws so the copper wire compresses slightly. Twist the fixture to spiral the wires into the electrical box. Screw the new fixture to the box snugly, but don’t overtighten it or the porcelain might crack.