If your range has a burner that’s not working, chances are you can fix it without any special tools. To diagnose a burner problem, go through the steps in order. If the burners still don’t work, call a service professional for help. Our list should take care of 95 percent of the problems that could occur with a burner. If you see burned wires, have a pro look at the range. It could indicate a bigger problem.

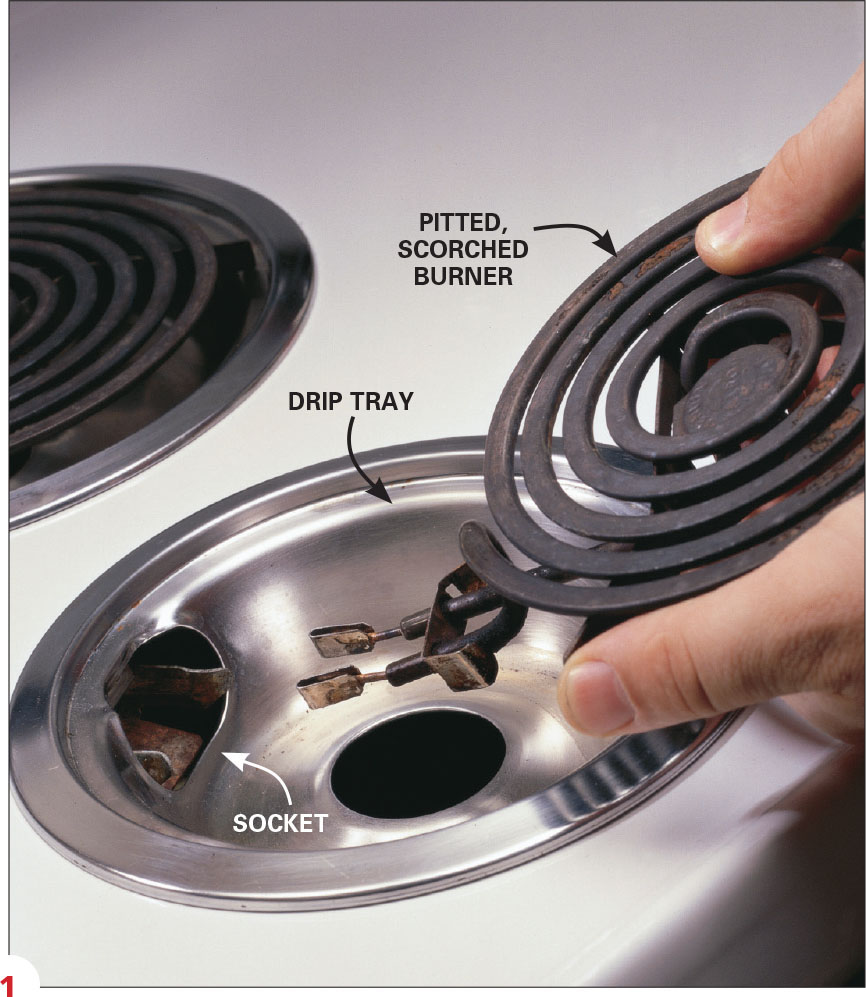
1. Unplug the range. Remove the bad burner. Compare the nonfunctioning burner with the other burners. If it looks pitted and scorched, slip the burner out of its socket and replace it. To remove a burner, simply lift it slightly and pull the prongs from the socket. You may have to wiggle it slightly to get the prongs to release. Some burners are held by a screw that you must remove.

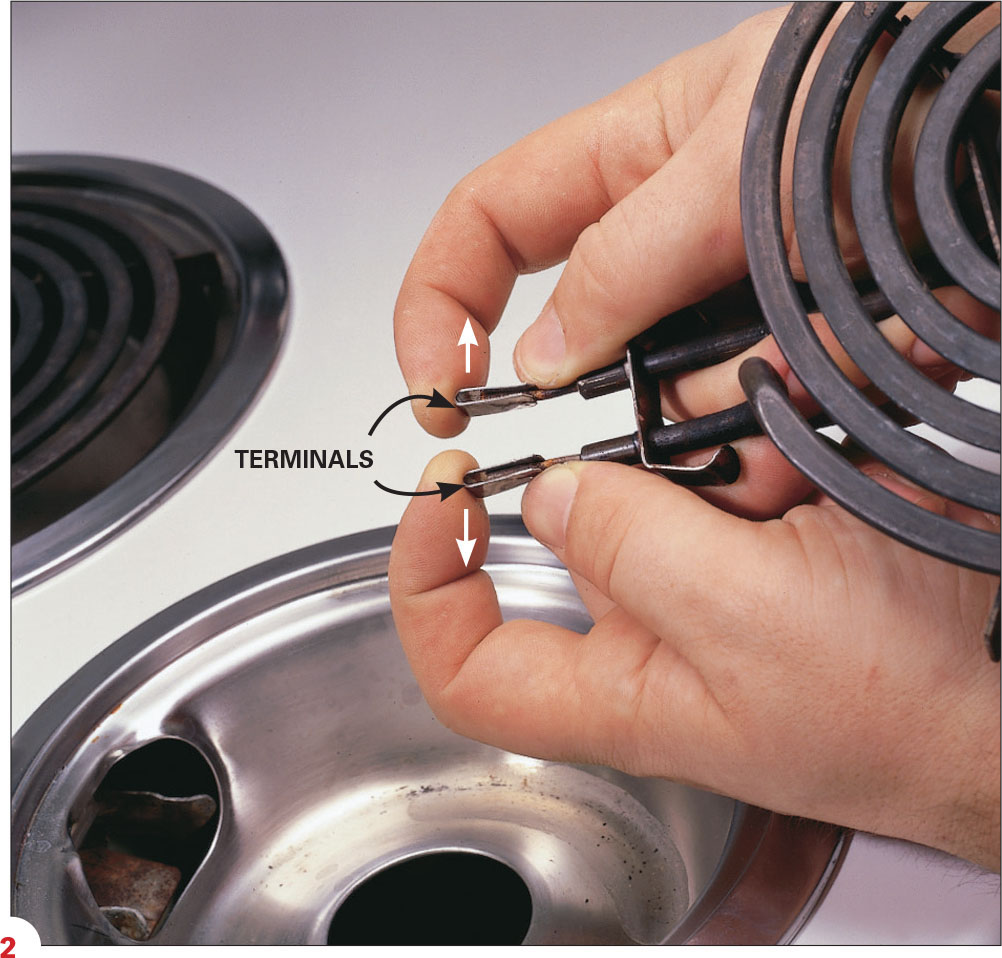
2. Tighten a burner connection. Wiggle the burner in the socket. If it’s loose in the socket, pull it out and spread the burner terminals slightly for a tighter connection. Do this gently—the metal is fragile and you don’t want to crack the heating element! Then clean the socket with a wire brush. Reinstall the burner, plug the stove back in and test the results.
3. Remove a functioning burner of the same size and try it in the socket that’s not working. If that burner works, replace the bad burner with a new one.

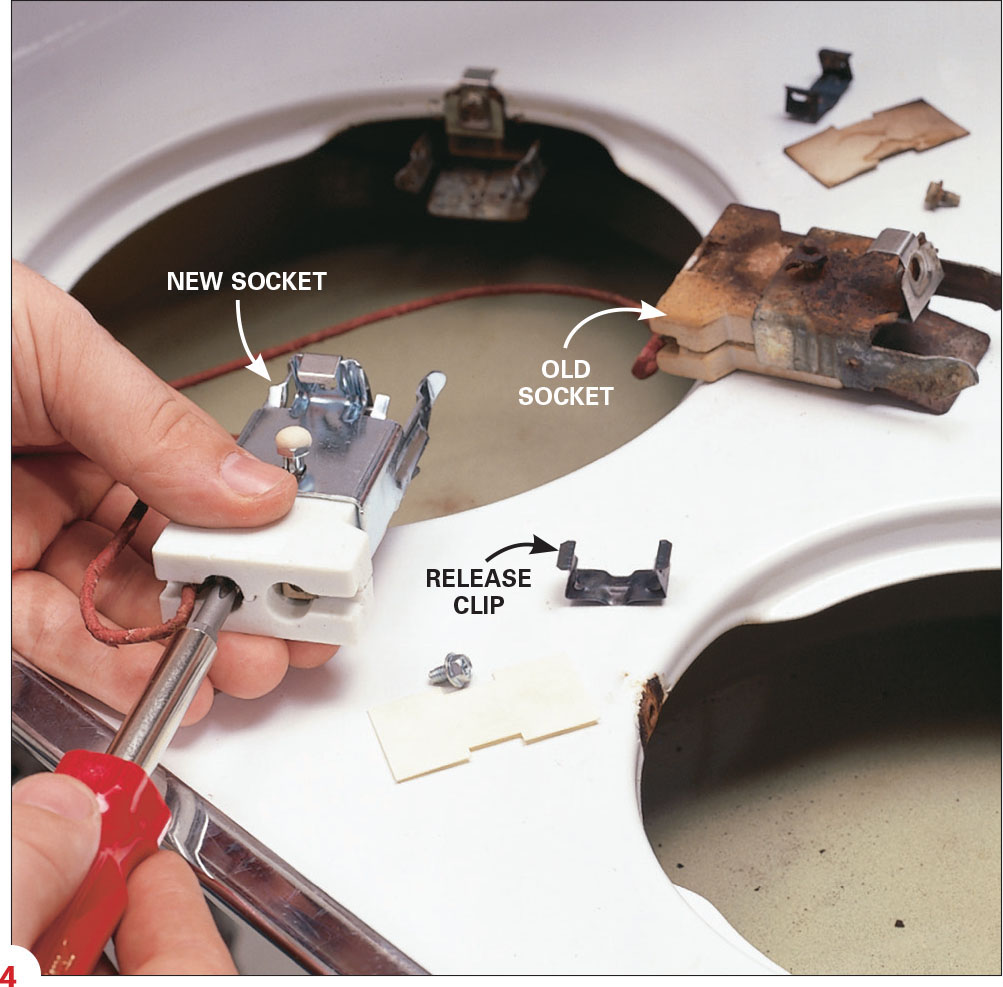
4. Inspect the burner socket. If it’s charred or scorched, replace it by removing the screws that secure it to the range top. Then unscrew the range wires and screw them to the terminals on the new socket. There are two main types of wire connections. Sockets have either screw connections or wire leads that you attach to the range wiring with the supplied ceramic wire connectors.