These DIY painting tips will help you roll your walls quickly and smoothly—without leaving roller marks. We’ll show you the tricks and techniques that painting pros use to get a perfectly painted room. All you need are some basic tools to paint fast, get great results and make clean-up a breeze. Painting is one of the least expensive ways to make over a room, so grab a roller and let’s get to work.
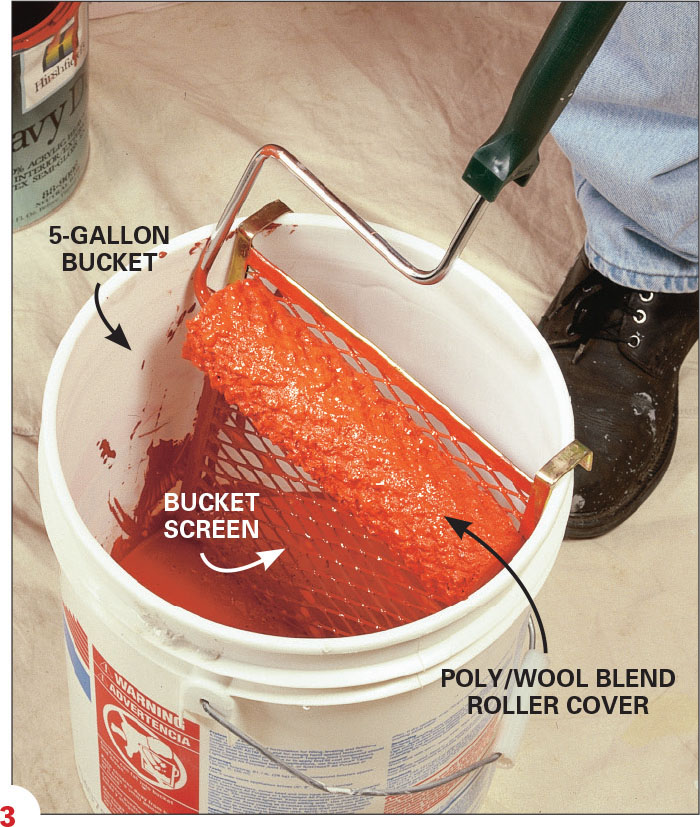
However, even the best technique won’t work with poor-quality equipment. Don’t waste your money on those all-in-one throwaway roller setups when you can buy a pro setup that will last a lifetime for under $20. Start with a good roller frame, sturdy and designed to keep the roller cover from slipping off while you paint. To extend your reach and give you better control, screw a 48-in. wood handle ($3) onto the end of the roller. You could also use a threaded broom handle. You’ll need a container for the paint. While most homeowners use paint trays, you’ll rarely see a pro using one. That’s because a 5-gallon bucket with a special bucket screen hung over the edge works a lot better.
1. Since rollers can’t get tight to edges, the first painting step is to brush along the ceiling, inside corners and moldings. This “cutting in” process leaves brush marks that won’t match the roller texture on the rest of the wall.
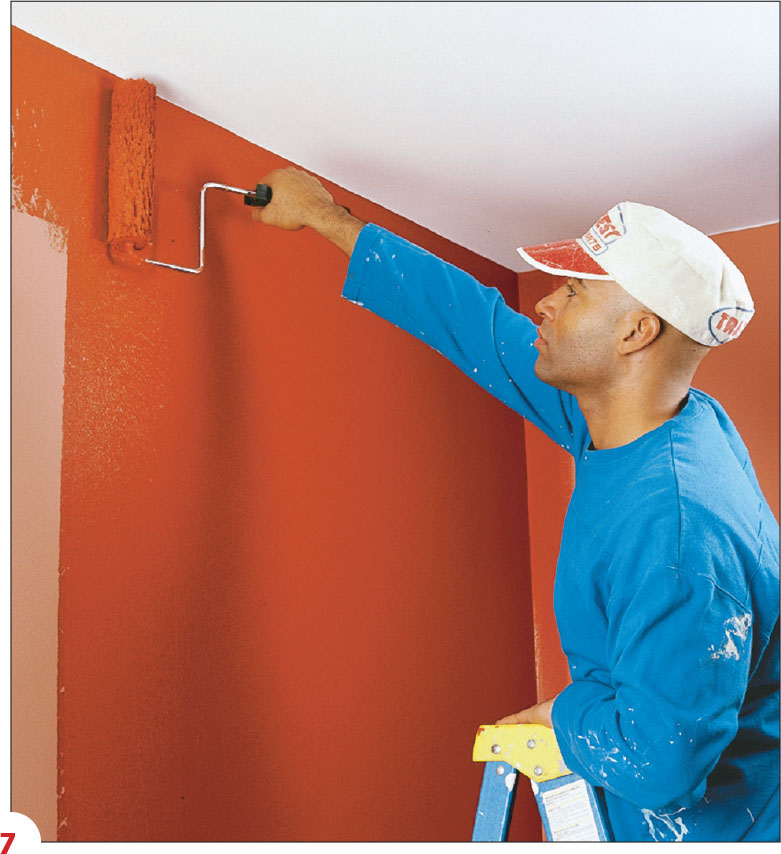
For the best-looking job, you’ll want to cover as many brush marks as possible with the roller. Do this by carefully rolling up close to inside corners, moldings and the ceiling. Face the open end of the roller toward the edge and remember not to use a roller that’s fully loaded with paint. With practice, you’ll be able to get within an inch of the ceiling rolling vertically, and can avoid crawling up on a ladder to paint horizontally.
2. A good roller cover is the most important part of your rolling setup. Buy a 1/2-in. nap wool blend roller cover and give it a try. With proper care, this may be the last roller cover you’ll ever buy.
Wool covers do have a few drawbacks, though. They tend to shed fibers when they’re first used. To minimize shedding, wrap the new roller cover with masking tape and peel it off to remove loose fibers. Repeat this a few times. Wool covers also tend to become matted down if you apply too much pressure while painting. Rolling demands a light touch. No matter what roller cover you’re using, always let the paint do the work. Keep the roller cover loaded with paint and use only enough pressure to release and spread the paint. Pushing on the roller to squeeze out the last drop of paint will only cause problems.

3. Load the roller cover with paint by dipping into the paint about 1/2 in. and then rolling it against the screen. Filling a dry roller cover with paint will require five or six repetitions. After that, two or three dips are all you need. Leave the roller almost dripping with paint.
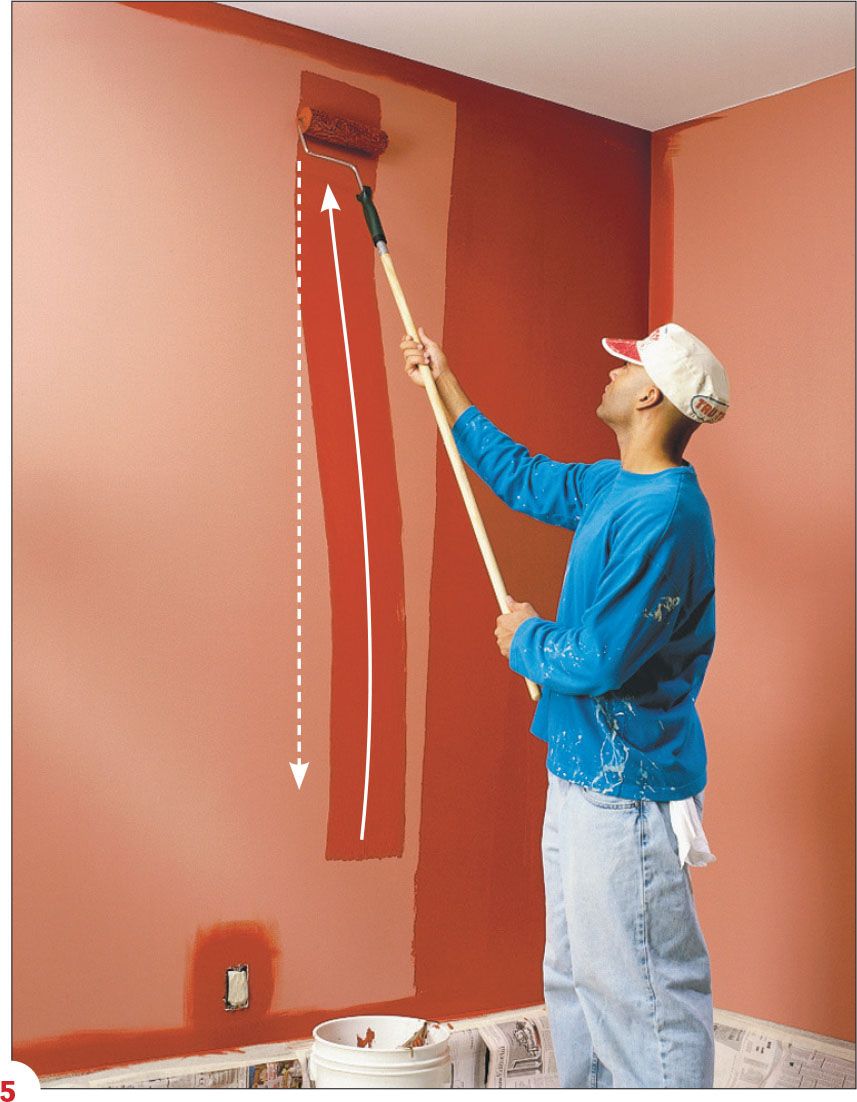
4. Roll paint on the wall. Lay the paint on the wall with a sweeping stroke. Start about a foot from the bottom and 6 in. from the corner and roll upward at a slight angle using light pressure. Stop a few inches from the ceiling. Now roll up and down back toward the corner to quickly spread the paint.

5. Repeat step 3. Reload the roller and repeat the process in the adjacent space, working back toward the painted area. Don’t worry about uneven coverage or ridges at this point—just get the wall covered quickly. Water-based paints dry fast. If you move too slow, some areas will become sticky before you can smooth them and you’ll end up with texture differences on the paint’s surface.
6. Smooth it out. Steps 1 and 2 will give you a covered section about 4 ft. wide, but it won’t look good. So go back to the beginning—without reloading the roller—and make long up-and-down strokes to even out the paint. Press lightly and overlap your strokes by 3 to 4 in. Repeat this process to cover the entire wall.

7. Smooth the paint along the ceiling using a long horizontal stroke without reloading the roller with paint. If you are skilled enough to roll within an inch of the ceiling while rolling vertically, you can skip this step.

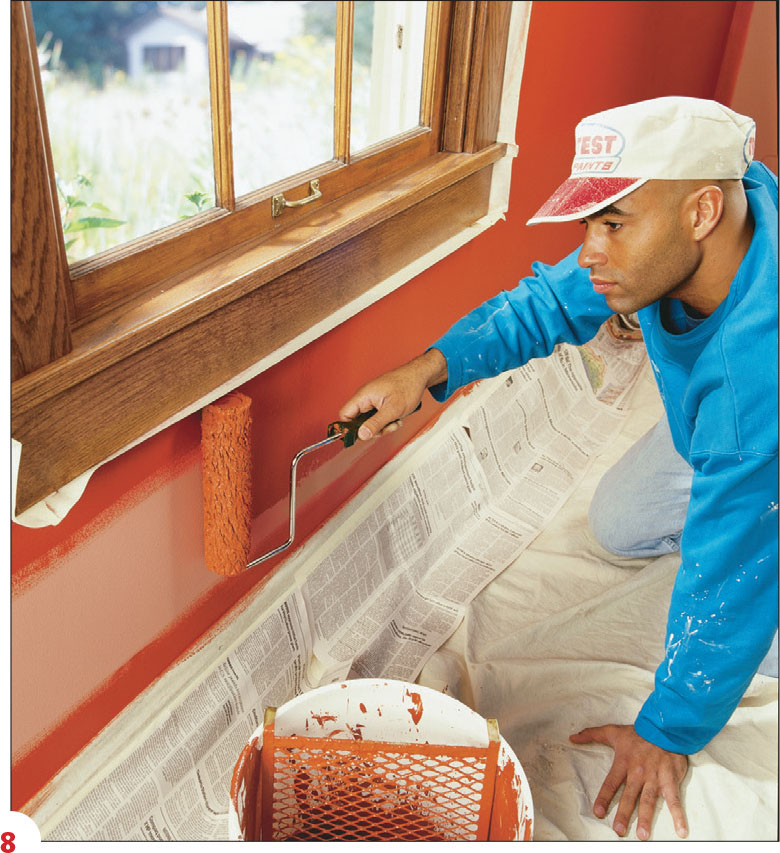
8. Lay paint on wall areas above and below windows and doors with a long horizontal stroke. Then smooth it off with short vertical strokes so the texture will match the rest of the wall.