CHAPTER 1
ALL-PURPOSE, NO-REDSTONE MOB FARM
YOU CAN MAKE THIS CLASSIC MOB-GRINDING farm soon after you start your world. You’ll just need plenty of cobble, wood, and enough iron for a couple of buckets and four hoppers. It’s not a pretty farm, but it will get you bones, zombie flesh, gunpowder, arrows, and other loot from skeletons, zombies, and creepers.
Planning Mob Grinders
This farm takes advantage of several key features of mobs and mob spawning rules.
• Hostile mobs treat open trapdoors as if they are solid blocks to walk on.
• Hostile mobs can be easily pushed by water flows.
• Overworld hostile mobs spawn at light level 7 and below.
• Hostile mobs spawn 24 blocks to 240 blocks away from a player but despawn instantly if they are more than 128 blocks away from a player. This means the mob-spawning area around a player is a doughnut shape from 24 to 128 blocks away. In addition, mobs despawn gradually if they are farther than 32 blocks away from a player.
• Fall damage is 1 heart of damage for each block fallen after 3 blocks. That means a fall of 23 blocks causes 20 hearts of damage, and will kill skeletons, zombies, and creepers.
• The mob cap is the maximum number of mobs allowed in a world. In a single-player world, the default mob cap for hostile mobs is 70. That means it is very important when you build a mob farm that doesn’t use a spawner to ensure mobs are spawning only in your farm, and not in nearby caves or forests. Around any mob farm that is limited by the mob cap, you will want to prevent other spawns within a radius of 128 blocks from where you, the player, are located.
This mob farm is made efficient by placing it about 150 blocks above ground. It places the location you stand in to activate spawning too far away from any other surfaces that mobs could spawn in, so they’ll only be spawning in your farm. If you place the farm over a Deep Ocean biome, in which the water is at least 20 blocks deep, you can build it 20 blocks closer to water level.
We’ll build this farm on land. If you are building over Deep Ocean, make the funnel leading up to the spawning platforms 20 blocks shorter. To build on ocean, use a lily pad directly on the water surface. Then you can place your first block above the lily pad.
Step by Step
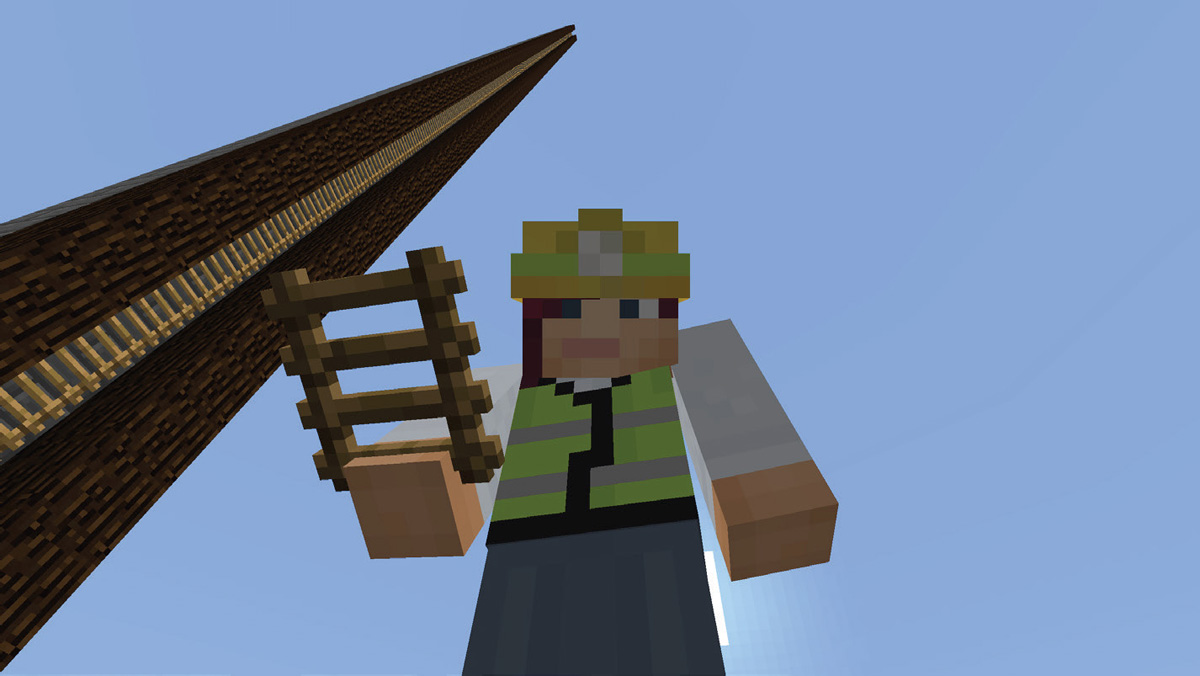
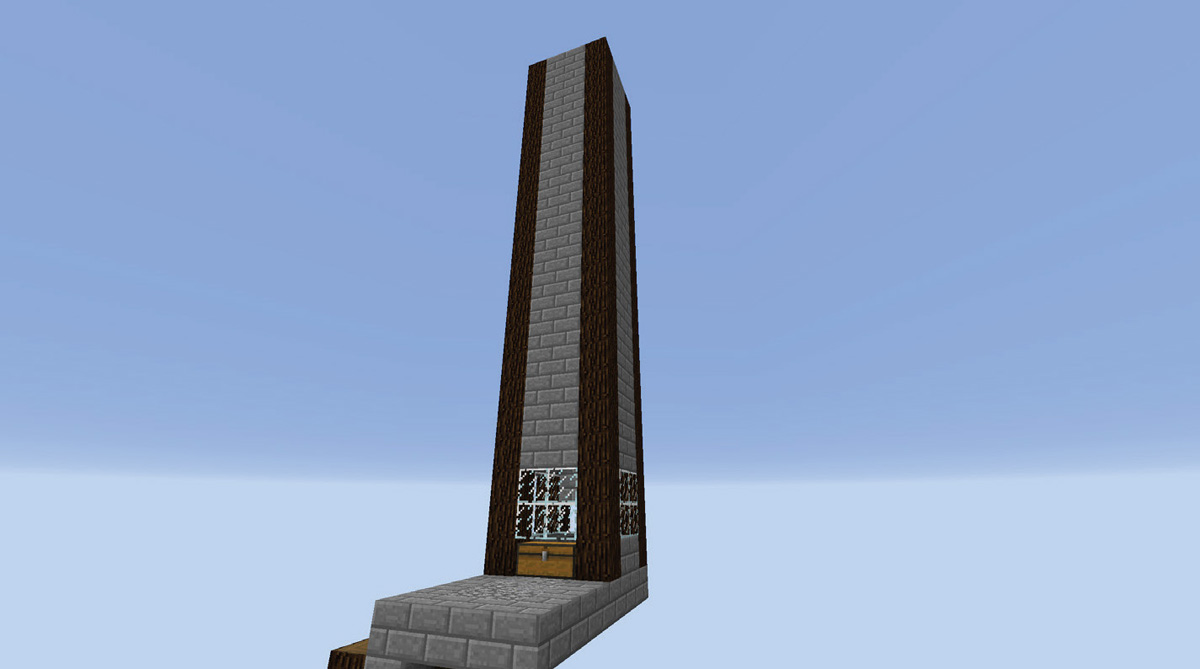
1. Build any type of a pillar 127 blocks tall, along with ladders to climb up. I am using several different types of block, but you can use cobblestone for this entire farm.
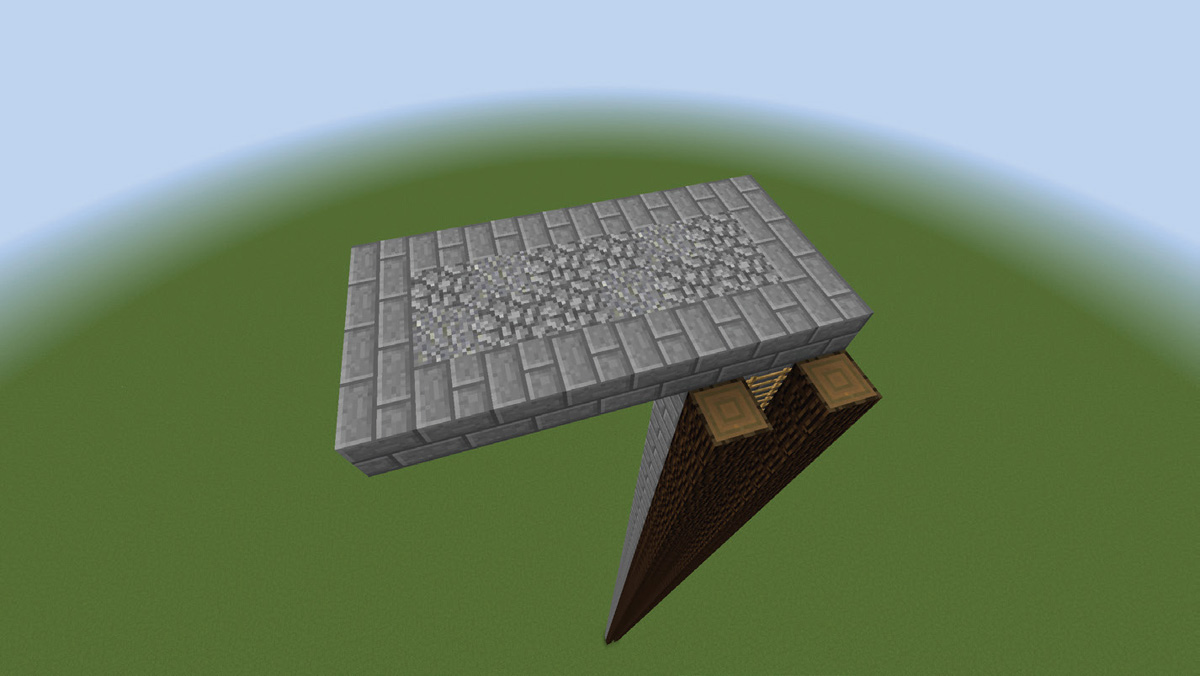
2. At the top of the pillar, build a platform 8 blocks long and 4 wide, extending away from the pillar. This is the platform that you will stand on when activating the farm above.

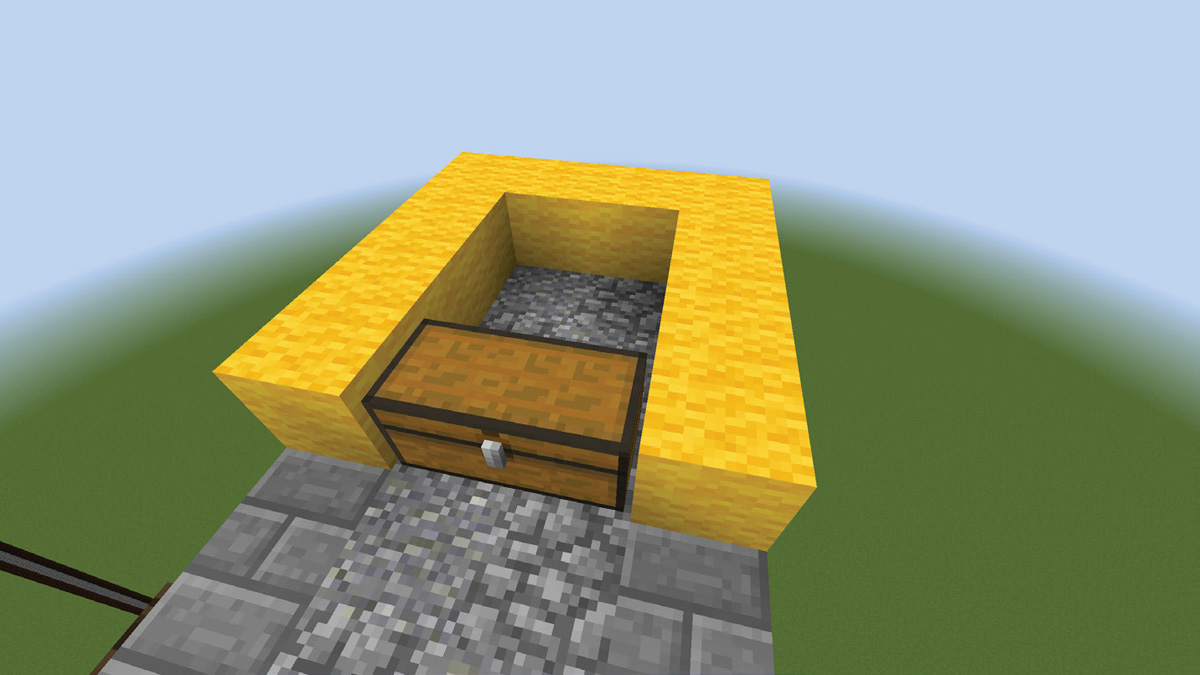
3. At the end of the platform is where we’ll put the funnel or tower that mobs drop down. I’ve outlined where the walls go with temporary yellow wool blocks.

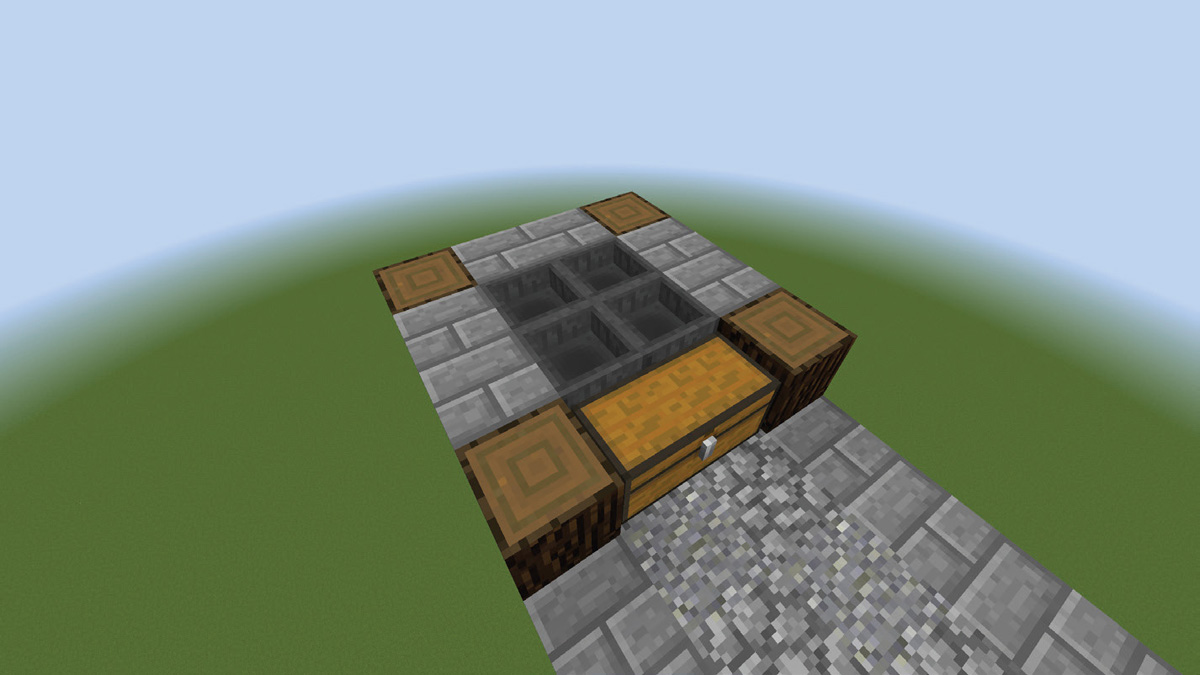
4. Place a double chest to store drops, as shown.
IF YOU WANT TO MODIFY THIS BUILD INTO AN XP FARM, MAKE THE FUNNEL 3 BLOCKS SHORTER AND OPEN UP SPACE TO HIT THE MOBS THROUGH AT THE BOTTOM PLATFORM. PLACE CARPET OVER THE HOPPER TO HELP XP TO FLOW TO YOU. PLACE CARPET OVER THE BOTTOM OF ANY FULL BLOCK SPACES TO PREVENT BABY ZOMBIES FROM GETTING OUT. ALSO, IF YOU HAVE MORE THAN 1 SPAWNING LAYER, PLACE 4 VINES INSIDE THE FUNNEL AT THE BOTTOM LAYER OF THE FARM. THE VINES MOMENTARILY SLOW THE FALLING MOBS AND SET THEIR FALL DISTANCES (AND DAMAGE) TO JUST THE LENGTH OF THE FUNNEL MINUS 1 BLOCK. MOST MOBS THAT FALL NOW SHOULD BE KILLABLE WITH 1, SOMETIMES 2 HITS, DEPENDING ON WHETHER THEY SPAWN WITH ARMOR OR ARE THE WITCHES, WHO HAVE HIGHER HEALTH.
5. Behind the chest, place 4 hoppers pointing toward the chest.
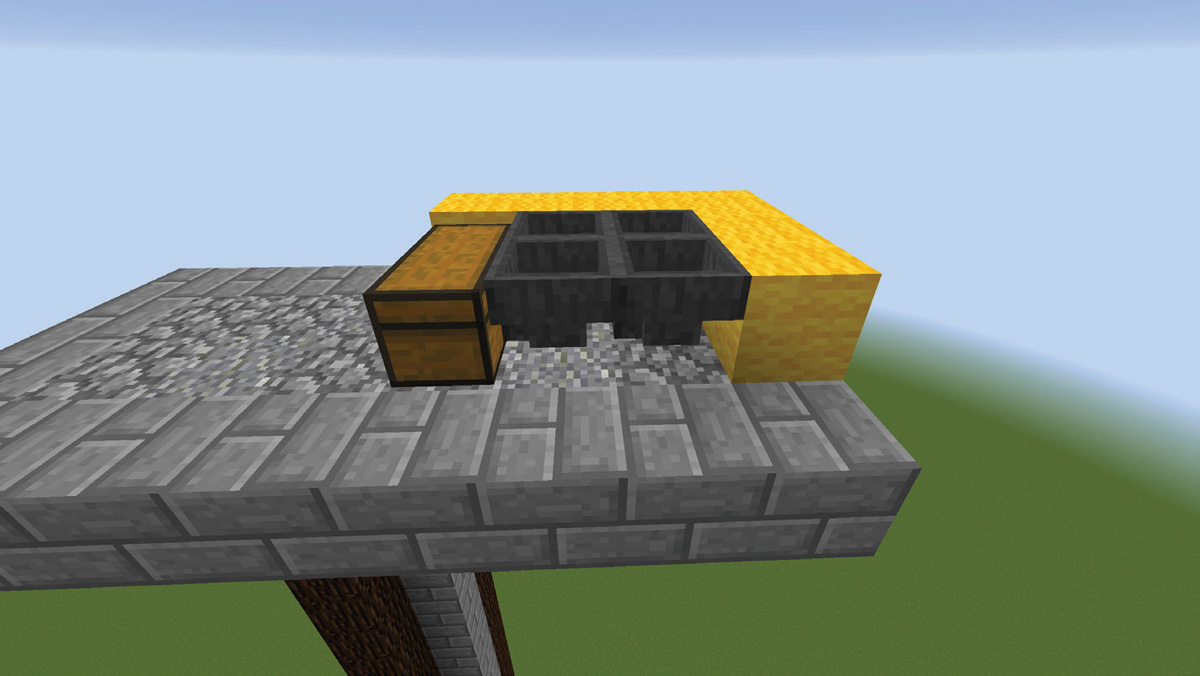
6. Around the chest and hoppers, build the first layer of the funnel’s walls, as shown.
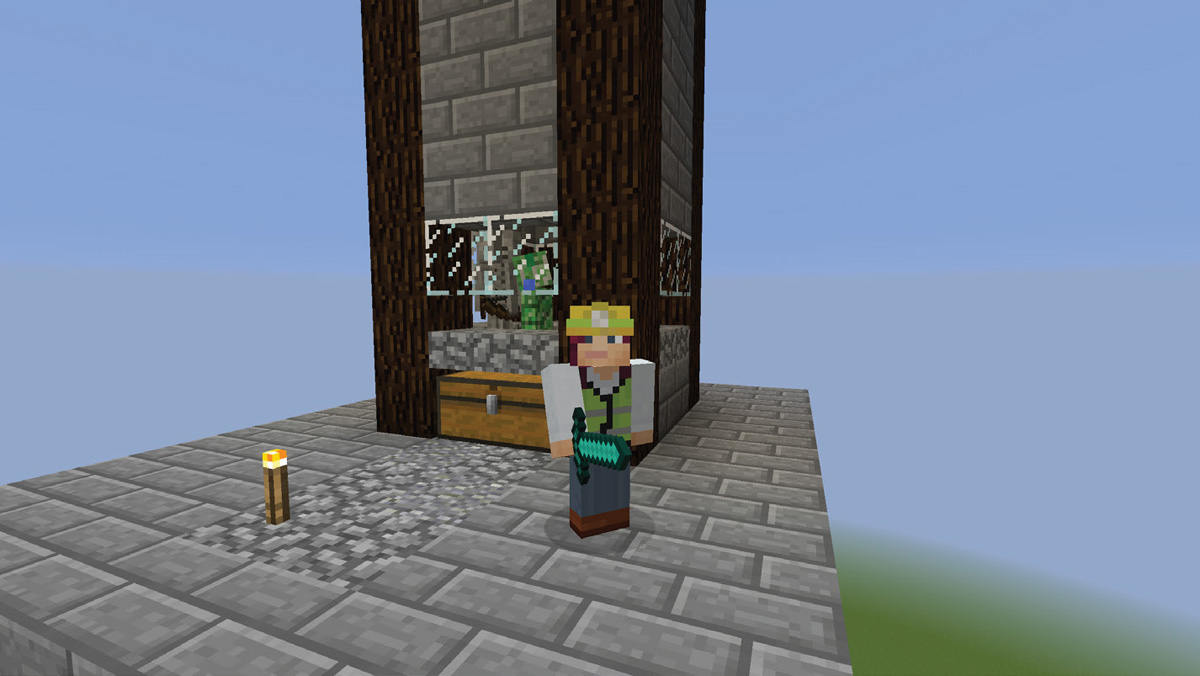
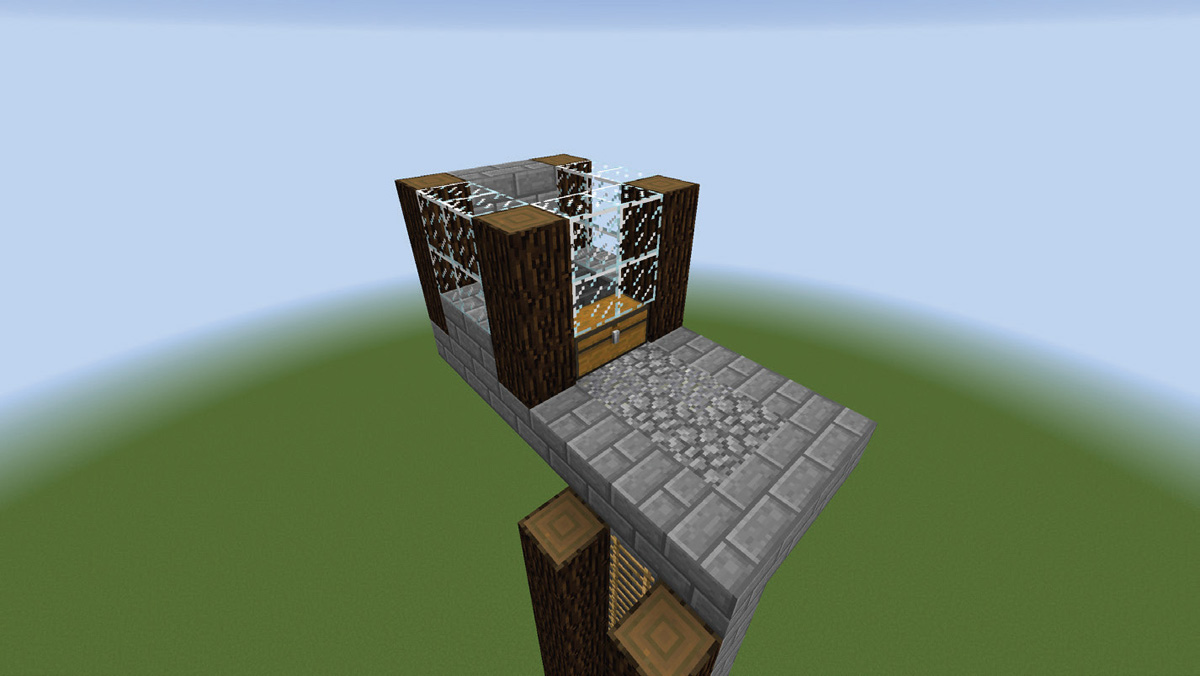
7. Build the second and third layer of the funnels walls, using at least 2 glass blocks above the chest. Glass blocks will let you see the mobs in their final moments of crashing down; also, a chest can still open with glass blocks right above it.
8. We want the funnel to be 24 blocks tall (not including the floor of the platform we are building in the next step), so build another 21 levels to the funnel.
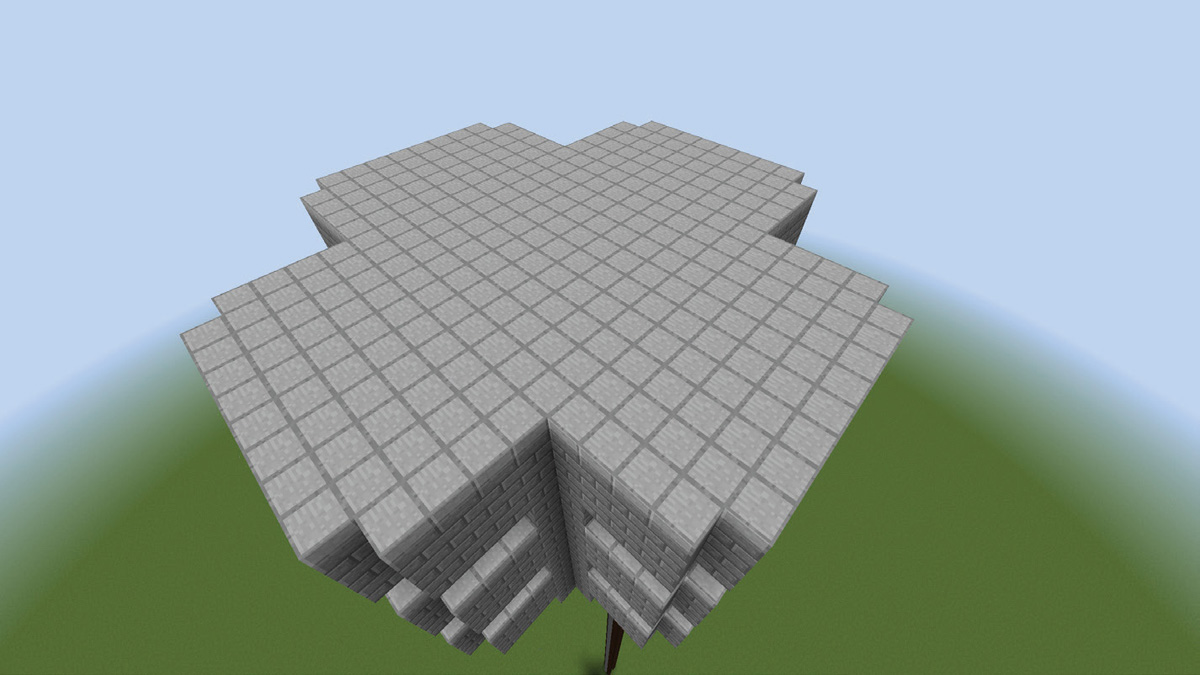
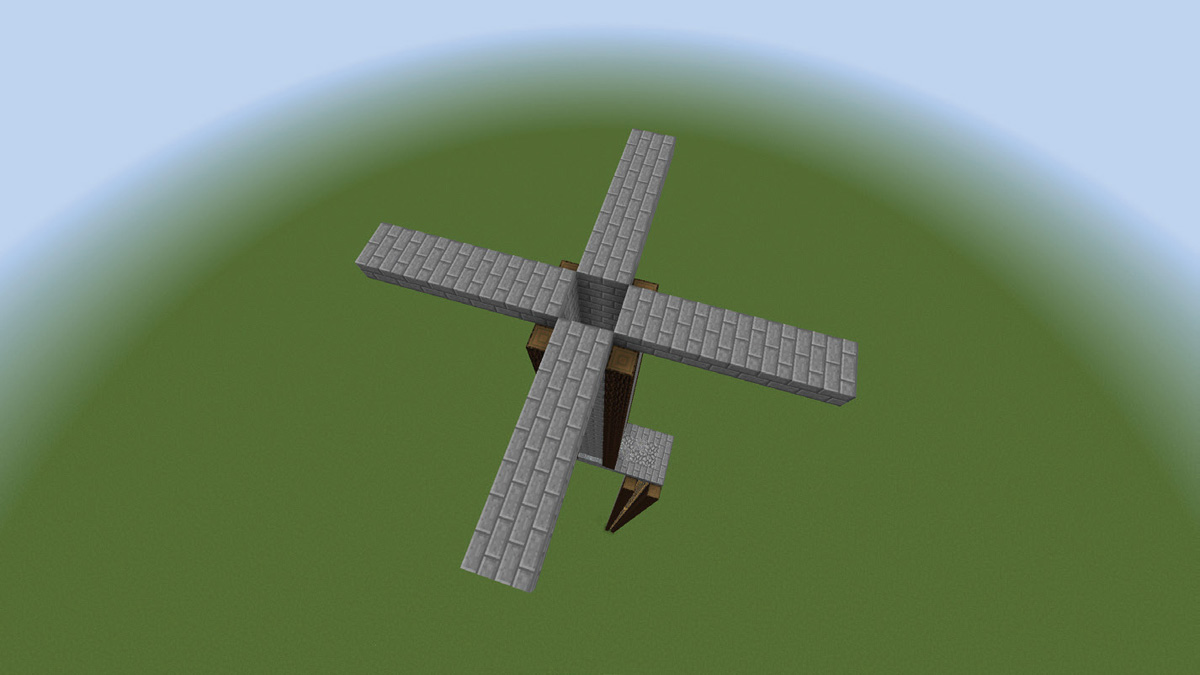
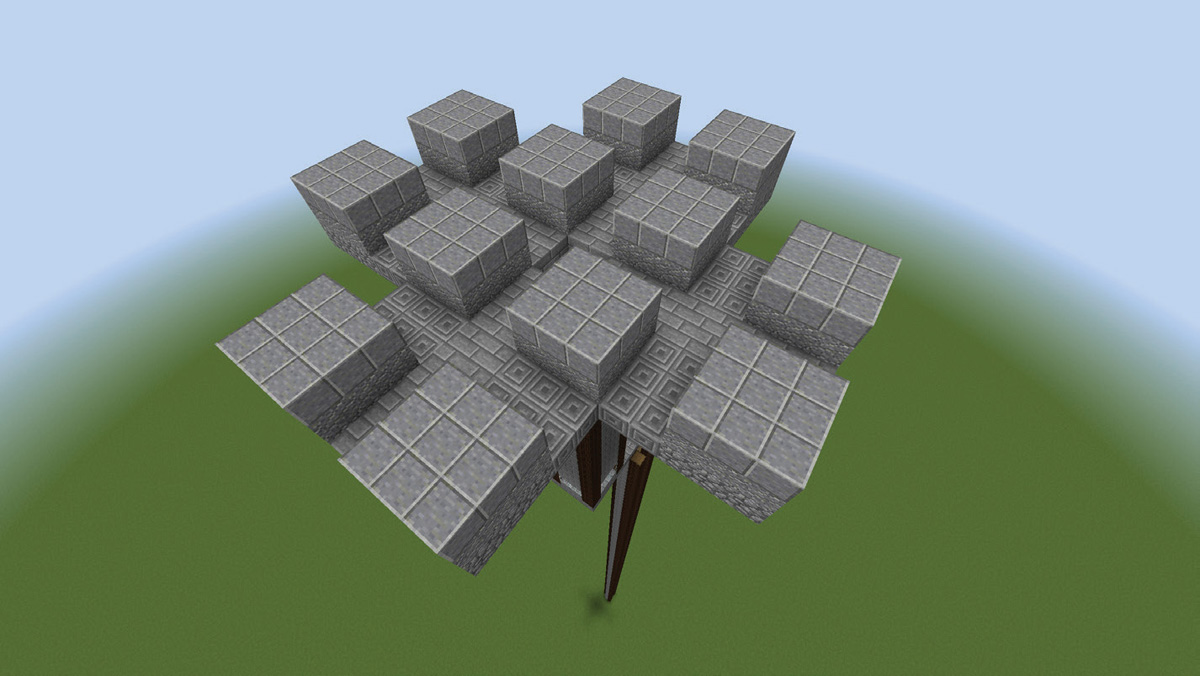
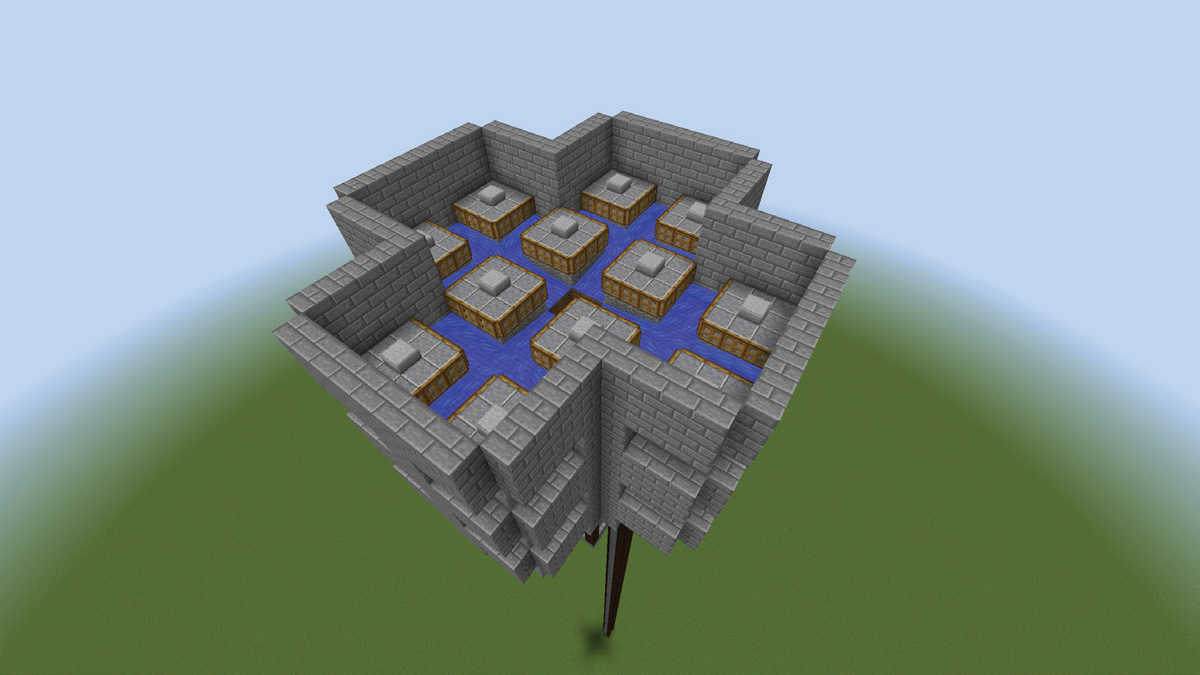
9. At the top of the funnel, build out 4 arms that are 8 blocks long total and 2 blocks wide, as shown, leaving clear the center of the funnel where mobs will drop.
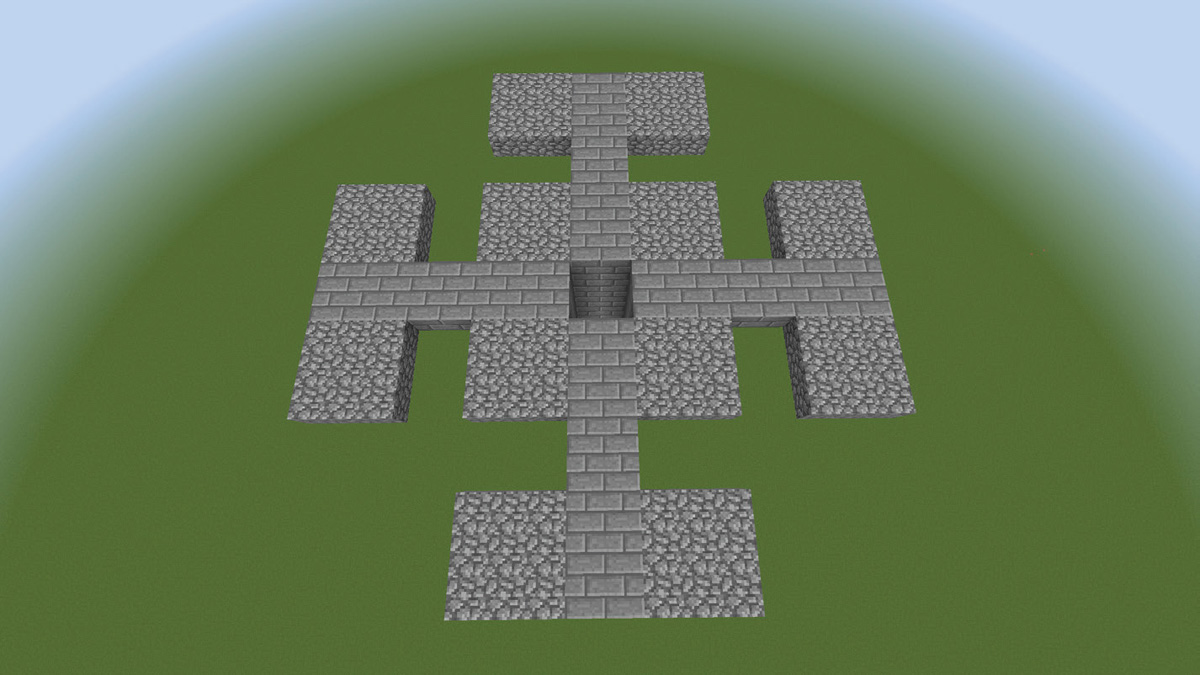
10. Build 16 3x3 squares at the beginning and ending of the arms, as shown. These show where the mob spawning pads will go.
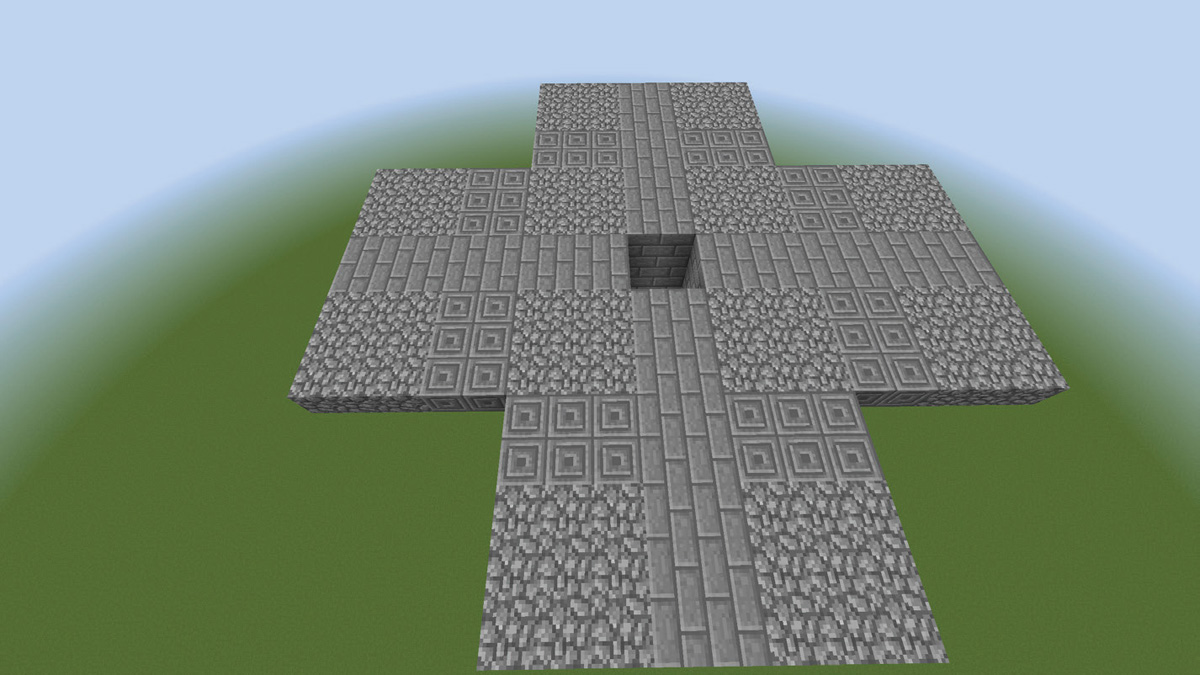
11. Finish building out the bottom of the farm by filling in the 3x2 gaps between the spawning pad areas. (I’ve used chiseled stone here.)
12. Build each of the 12 spawning pad areas to be 2 blocks high.
13. Build walls around this entire platform that are 3 blocks higher than the spawning pads (5 blocks taller than the floor between the pads).

14. If you want to prevent spiders from spawning, place a slab in the middle of each spawning pad. (Spiders can occasionally clog the funnel.)

15. At the end of one of the arms built in Step 9, place 2 buckets of water against the 2 blocks of the back wall. The water will flow directly to the central funnel without flowing into the funnel.
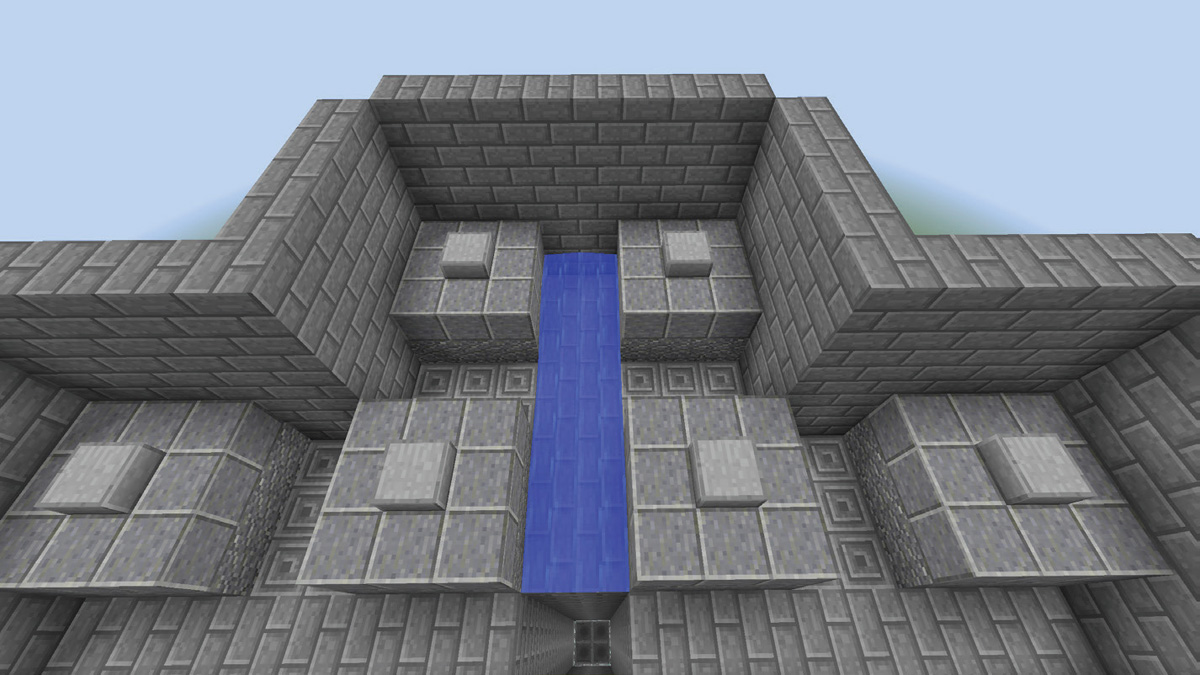
16. Do the same for the other 3 arms. These are the main channels of water pushing the mobs.
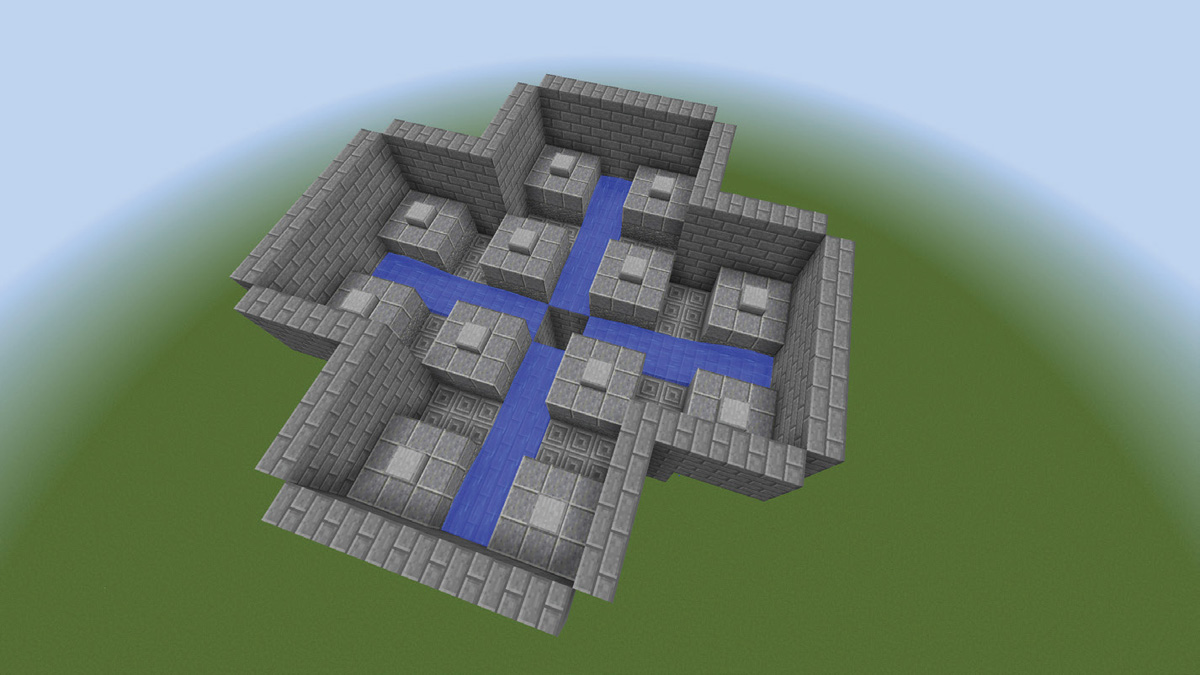
17. Along one of the main channels, at the front of the right back spawn pad, place a single bucket of water at the outer wall.
18. Do the same on the pad that is across the main channel. These two side channels now flow into the main channel.
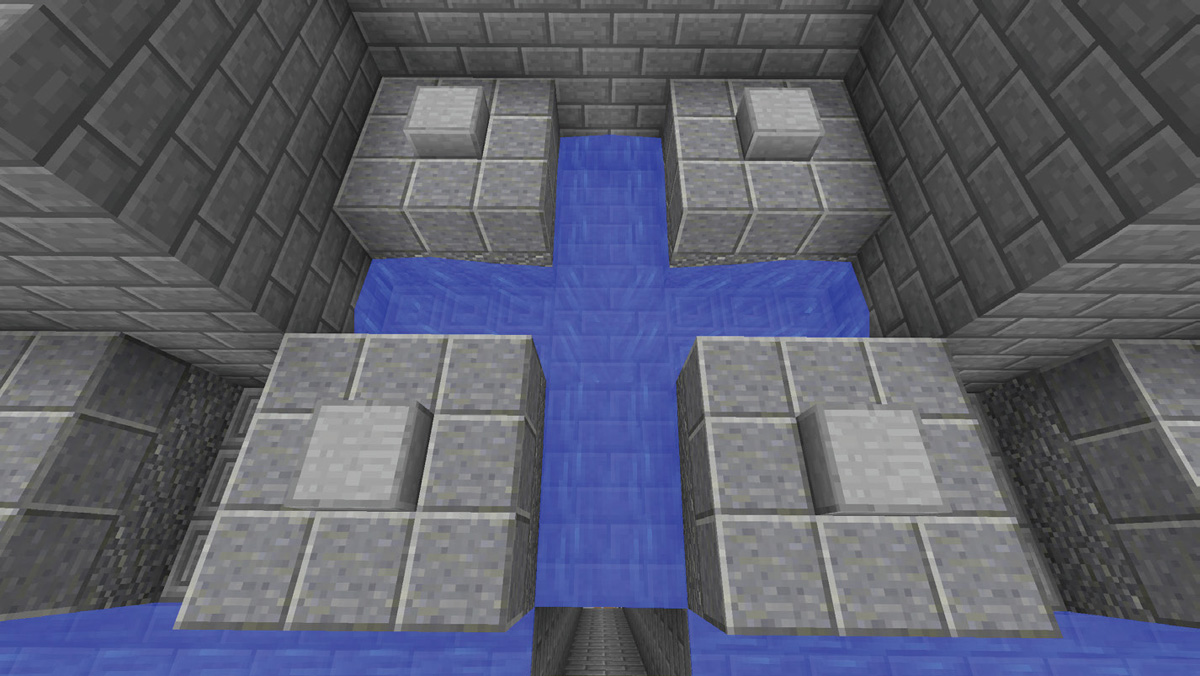
19. Now repeat Steps 17 and 18 for the other 3 main channels of the farm.
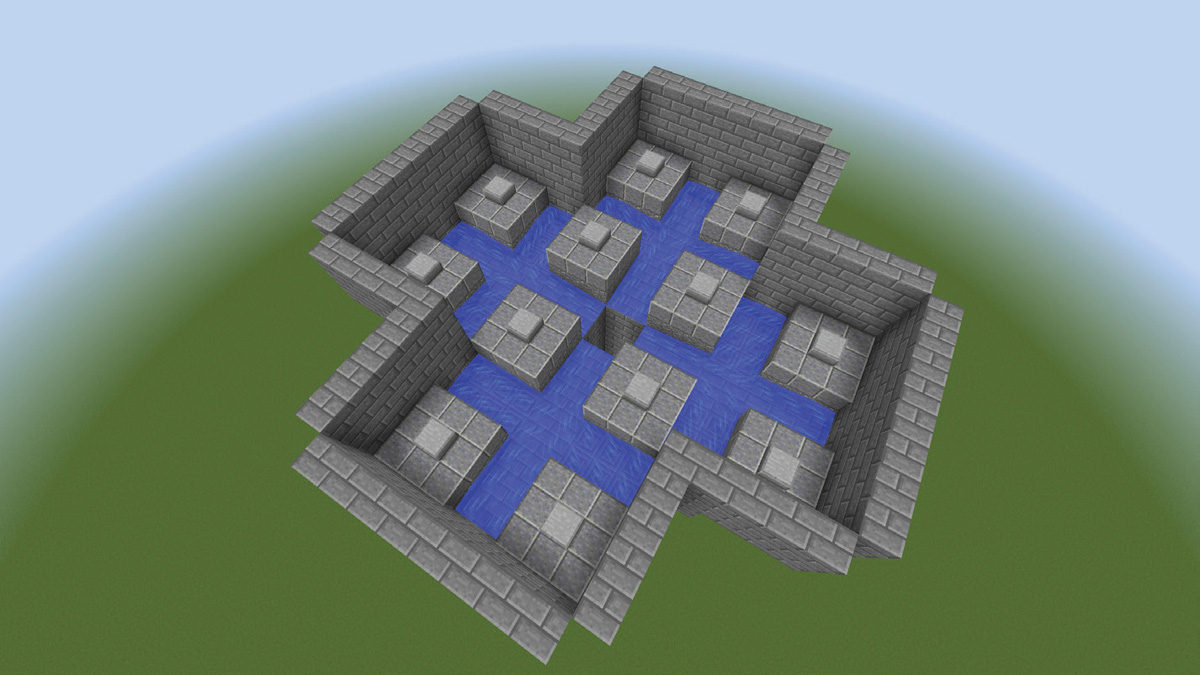
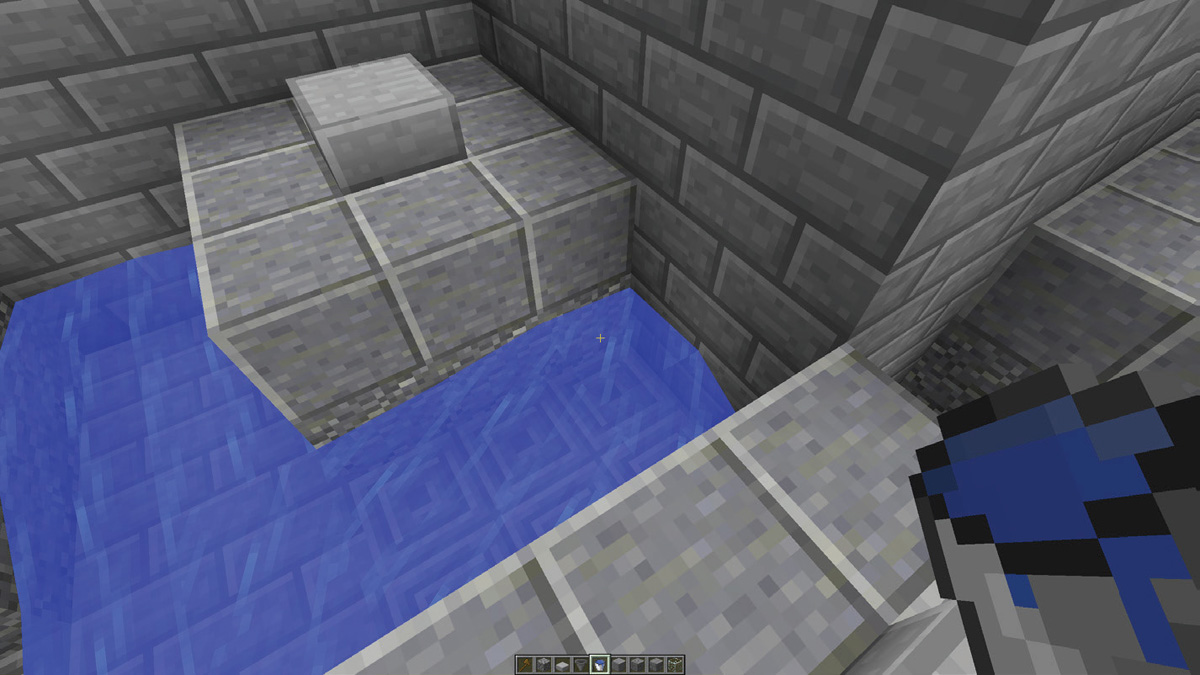
20. To make the mobs think they are walking onto solid blocks instead of into the water channels, place wooden trapdoors along each exposed edge of the 16 spawn pads.

21. Now fill in between the tops of the walls to make the spawning platform ceiling. You’ve completed 1 layer of the mob farm. If you want to stop here, slab over the ceiling to prevent mobs spawning on it.
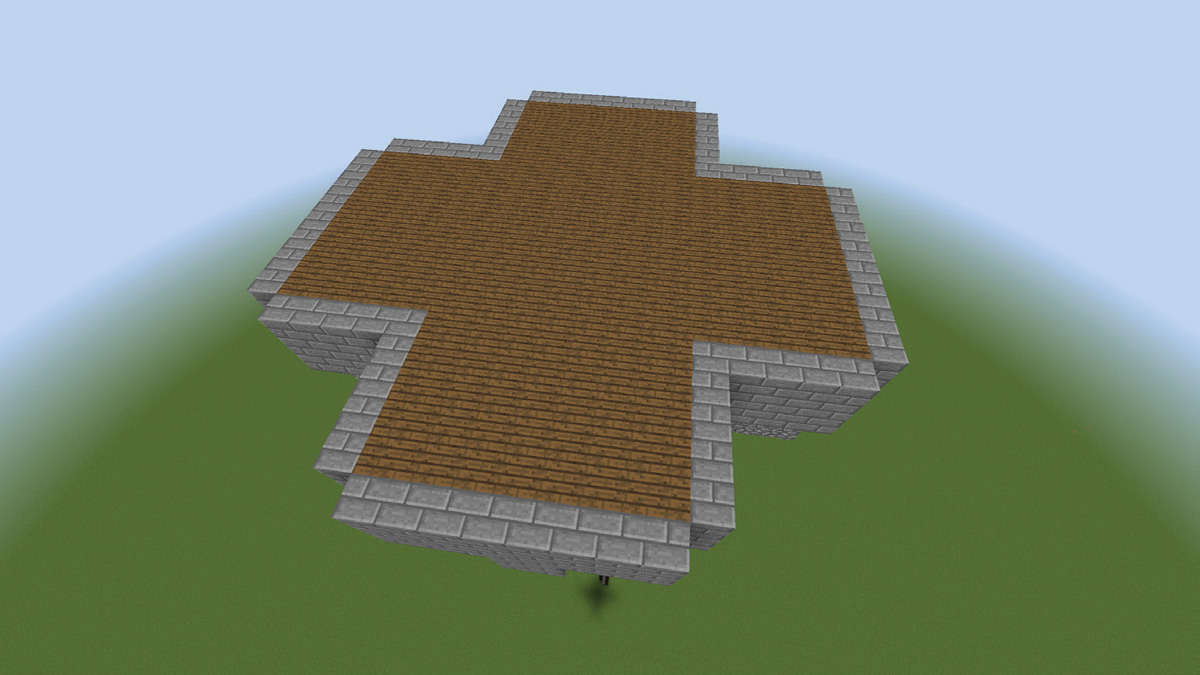
22. If you want to reap even more loot, add 1 or more additional layers, using the ceiling as the floor of the next layer. Don’t forget to break open a hole into the main funnel!
23. When you are done adding layers, fill in the ceiling as you did in Step 21 and then slab over this. It’s time to loiter around the bottom platform and chest and start collecting your rewards. Note: Sometimes witches will spawn. As they have higher HP than the other mobs, they’ll survive the drop and be able to regenerate health. You may want to add a way to kill these witches off. For example, a trapdoor opening into the funnel through which you can shoot arrows.