CHAPTER 6
WITCH FARM
WITCHES ARE ANOTHER SOURCE BESIDES CREEPERS to get gunpowder for rockets that will fuel your flying. They’ll also supply you with glass bottles, glowstone, redstone, sugar, spider eyes, sticks, water bottles, and the occasional potion! This build uses the spawning area of witch huts.
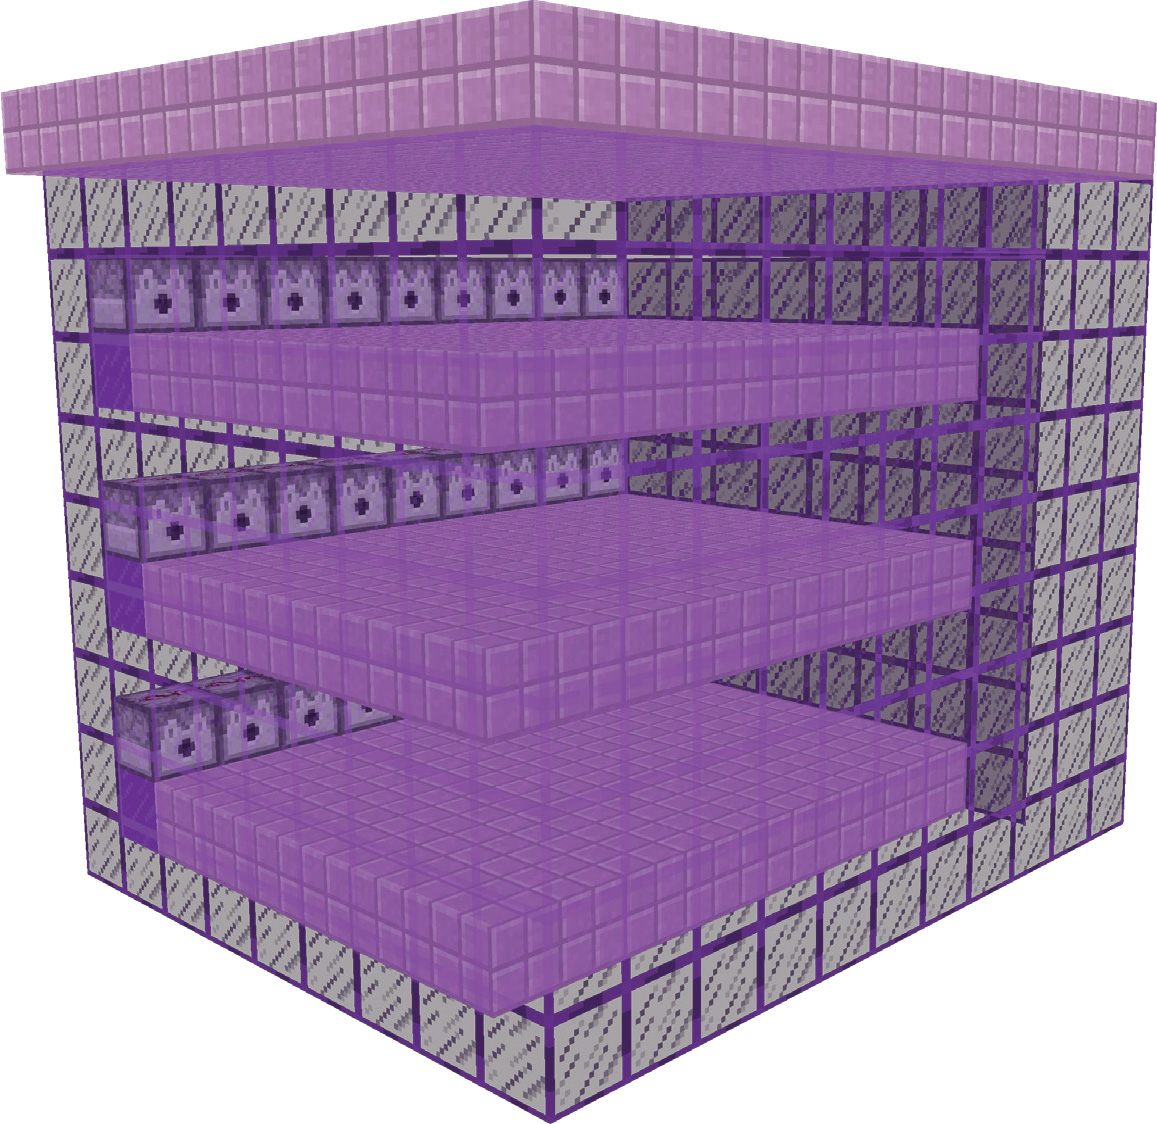
In this farm, witches spawn on three platforms. Dispensers activate regularly to create a water flow that pushes the witches over the platform edges. From here they are pushed into a contraption that will cause them to die from the entity-cramming rule. The entity-cramming rule in Minecraft specifies that only 24 entities can occupy the same block space. The 25th entity to enter that space will automatically die. Within the three-dimensional area that the hut takes up, only witches can spawn—you’ll never find a skeleton in a witch hut!
As you look for the right witch hut to use, know that the more water that surrounds it, the better. Rarely, witch huts may spawn closely together, or even on top of another witch hut—these are great to use to expand on the witch farm shown in this chapter. Also, before you begin construction, you will need to dispose of any witches inside!
Step by Step
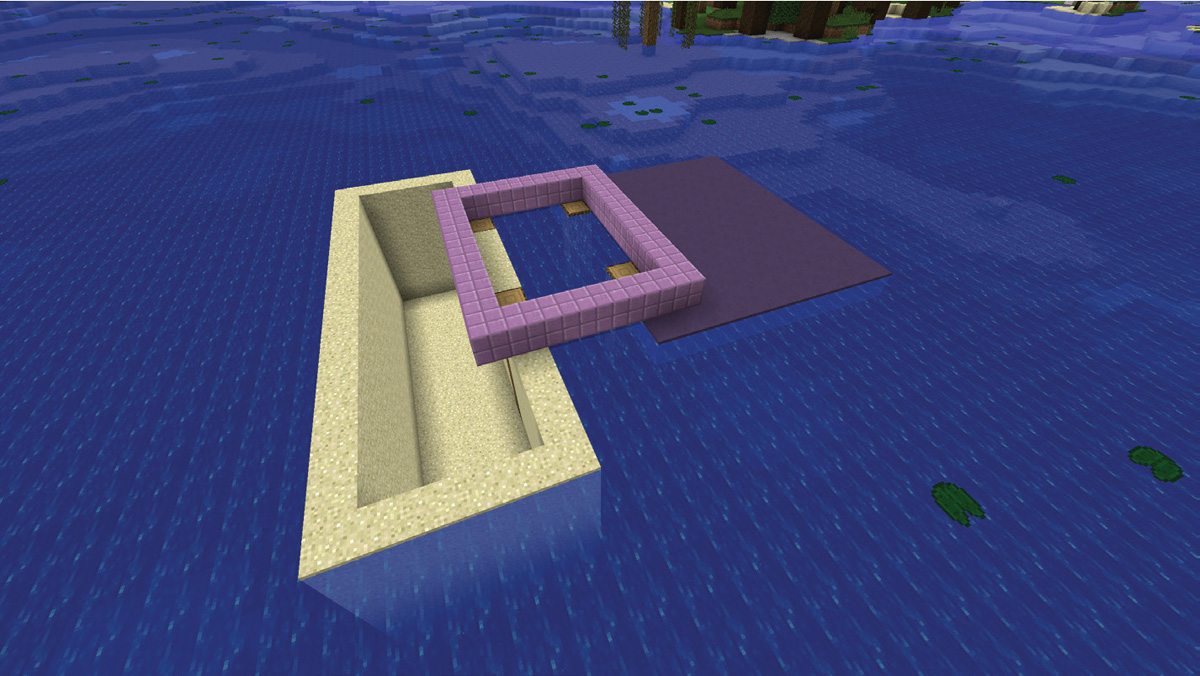
1. Begin by marking the border of your first spawning platform. It is 9 blocks by 7 blocks at 1 block above water level. The spawning distance length runs from the edge of the front porch to the edge of the back roof overhang. The width runs between the edges of the overhangs on the sides of the roof.

2. Once the platform is marked, you can remove the witch hut. Choose one of the 9-block-long sides to be the front of the farm, where the witches drop. The other long side will be the back, where the redstone is placed.

3. If you are surrounded by water, you will ultimately want to remove the water around the front of the farm, and make sure you have a level platform at the back of the farm. You can remove water by dropping sand or gravel. This way, you can easily dig out in the center of the sand as you need to.
4. Because this farm is fully surrounded by water, and to make these instructions and images clearer, I’ve filled in a much bigger area than necessary around the farm.
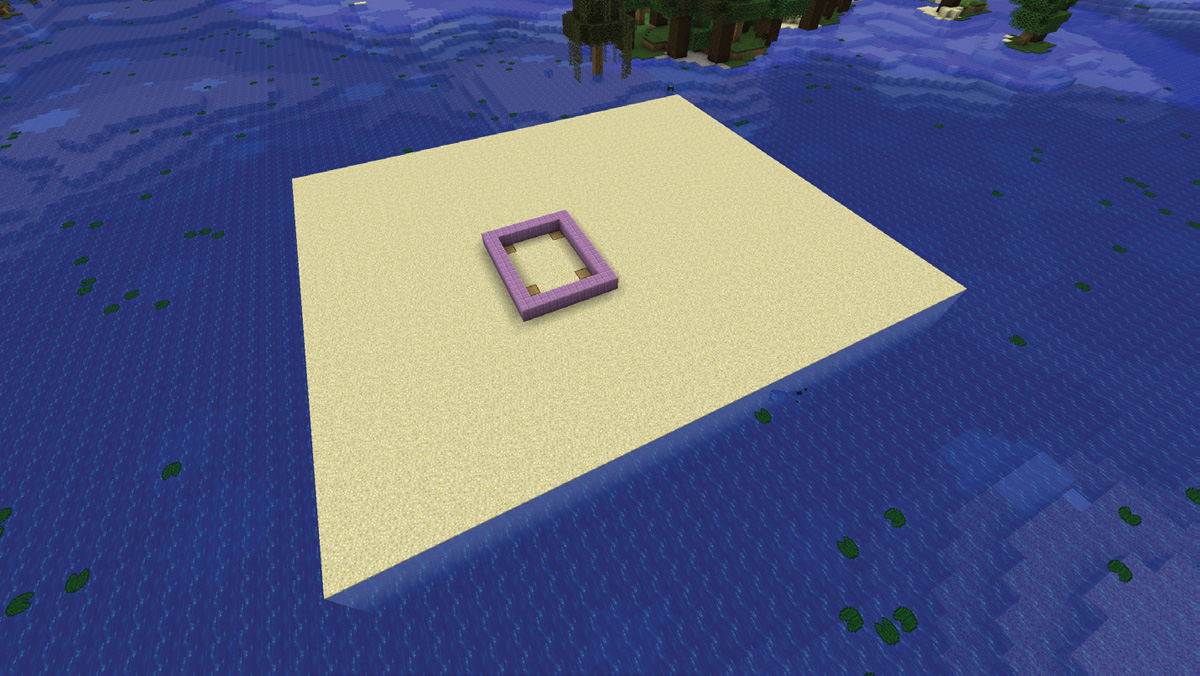
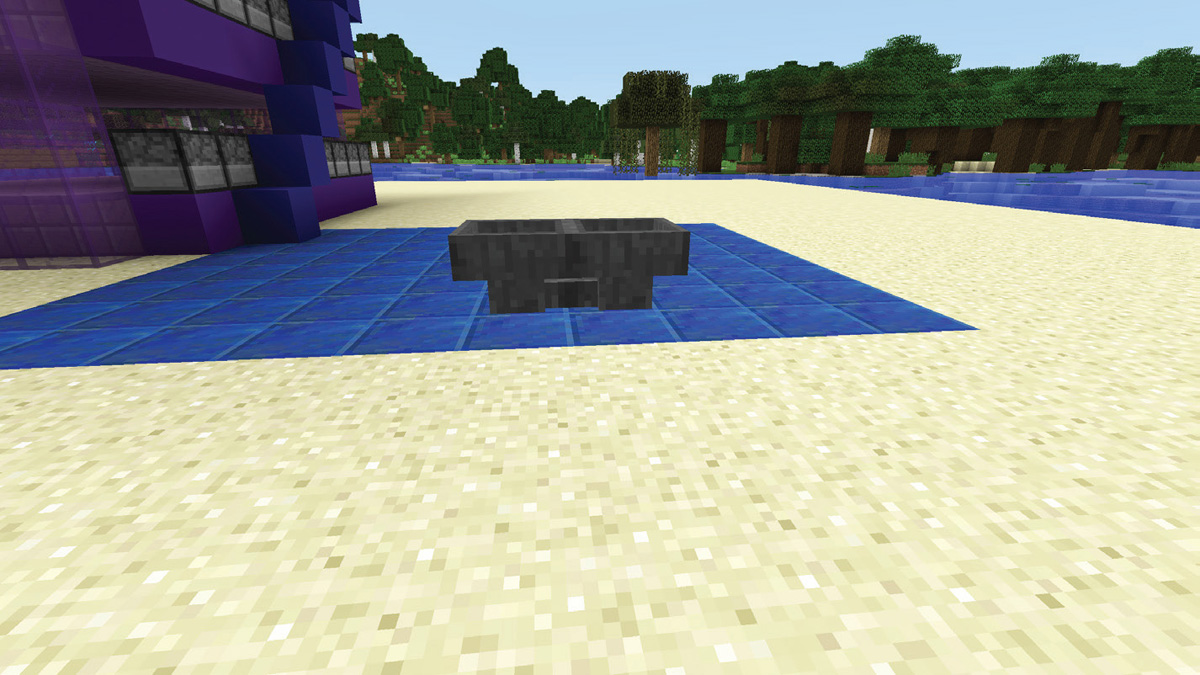
5. Once you’ve cleared the area, fill in the bottom platform.

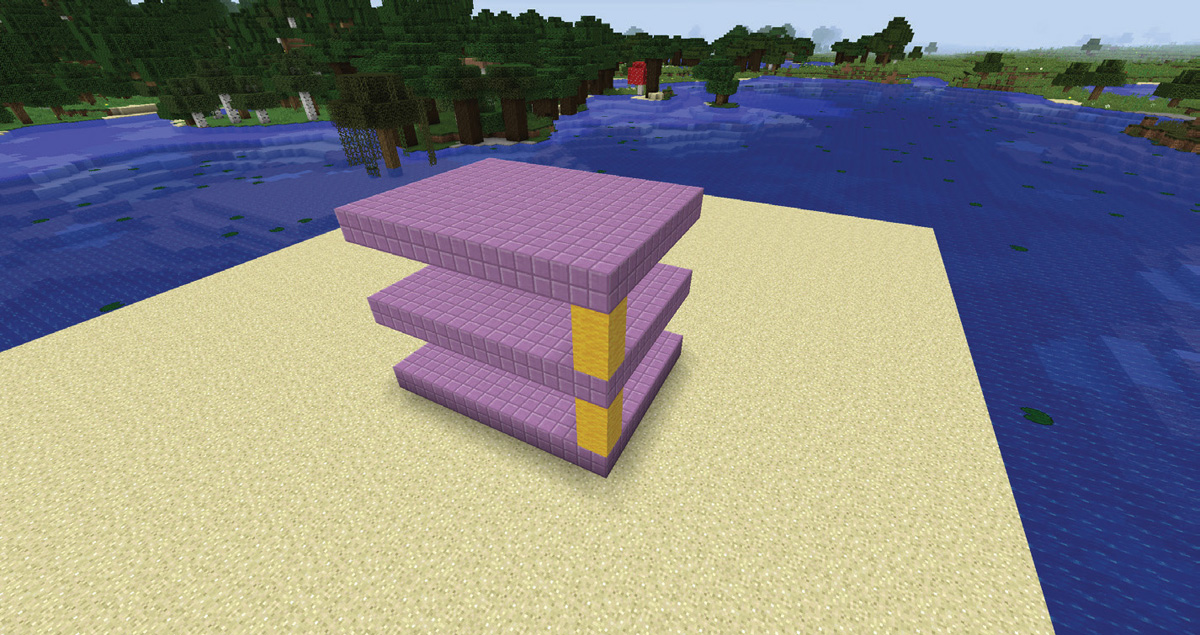
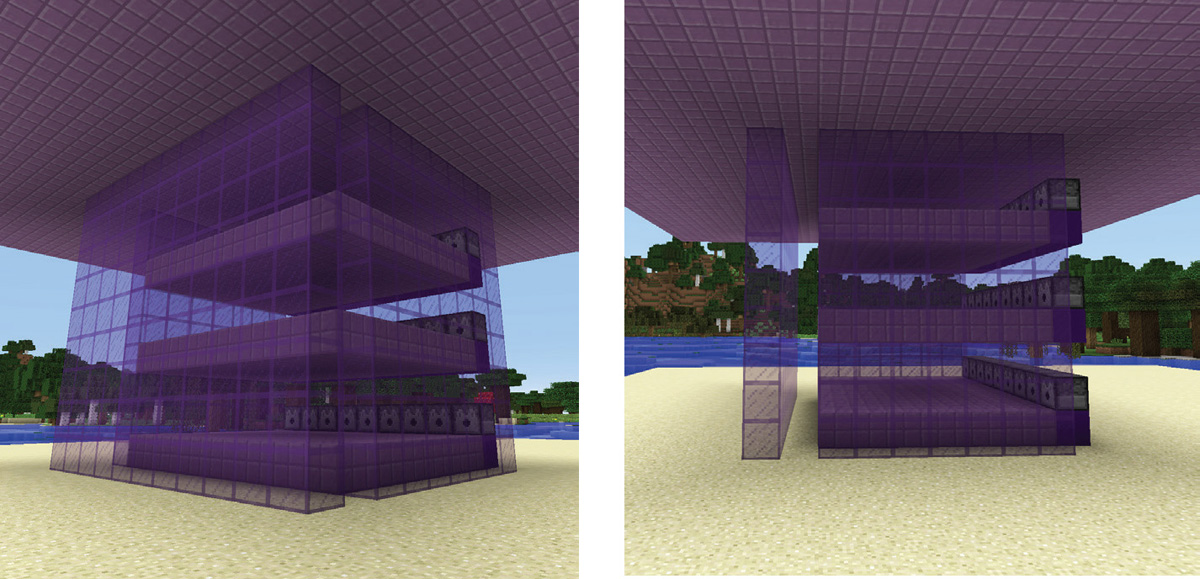
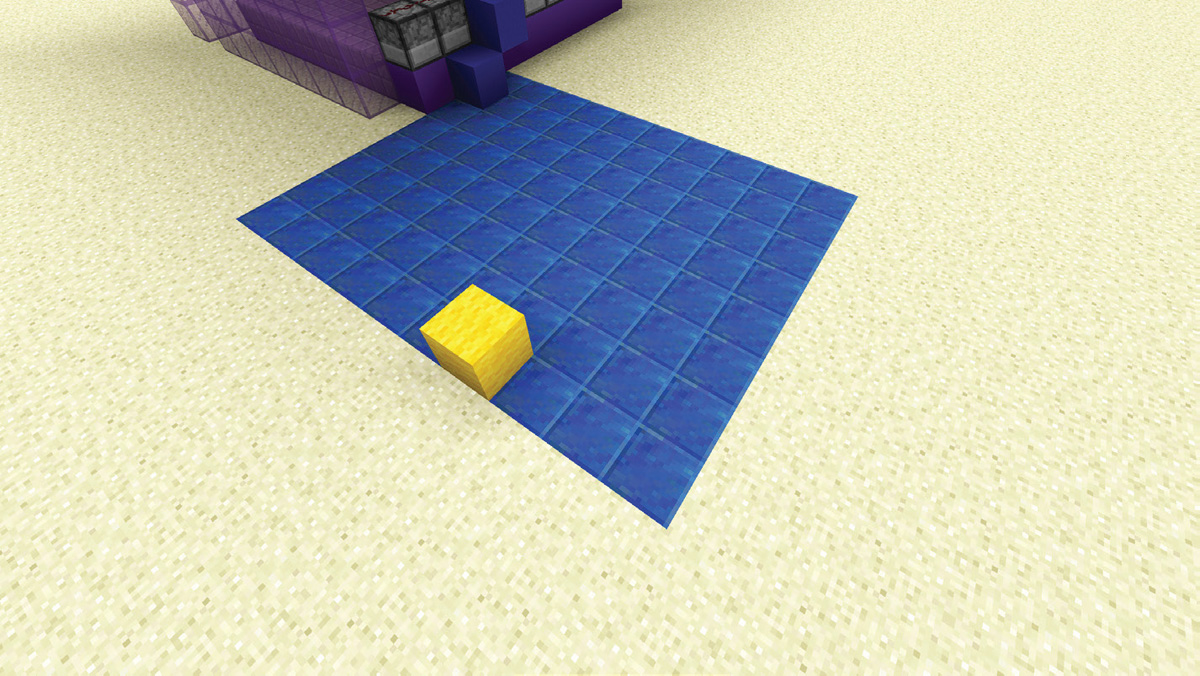
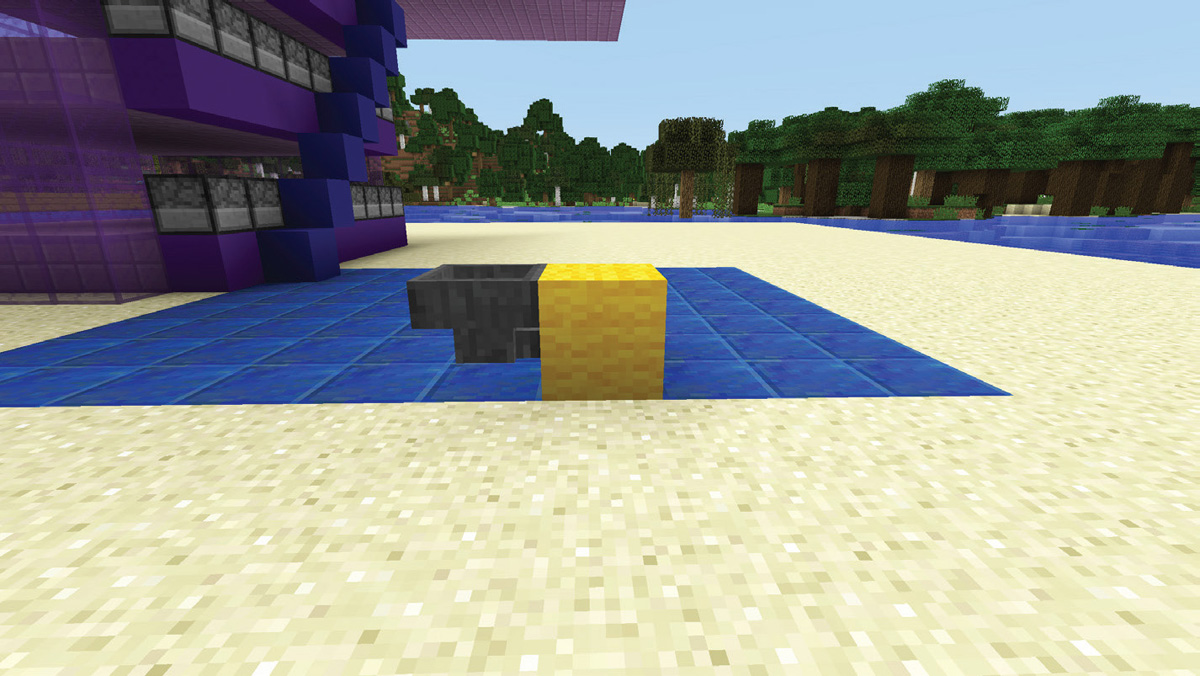
6. Build 2 additional, identical platforms above the bottom platform. Each platform is 3 blocks above the lower, leaving 2 blocks of space. Here, I’ve used temporary yellow wool blocks to show the spacing. It’s important to use this exact size of platform, because increasing the size will allow other mobs to spawn in the non-witch-hut areas.
7. Create a ceiling over the top platform leaving 2 blocks of space for witches to spawn. The ceiling needs to be large enough so that the light level on each block of each platform is 7 or less. This ceiling extends 9 blocks out from each side of the platforms, bringing the daylight levels down from 15 outside to 5 inside. (The light level drops 1 level per block.)

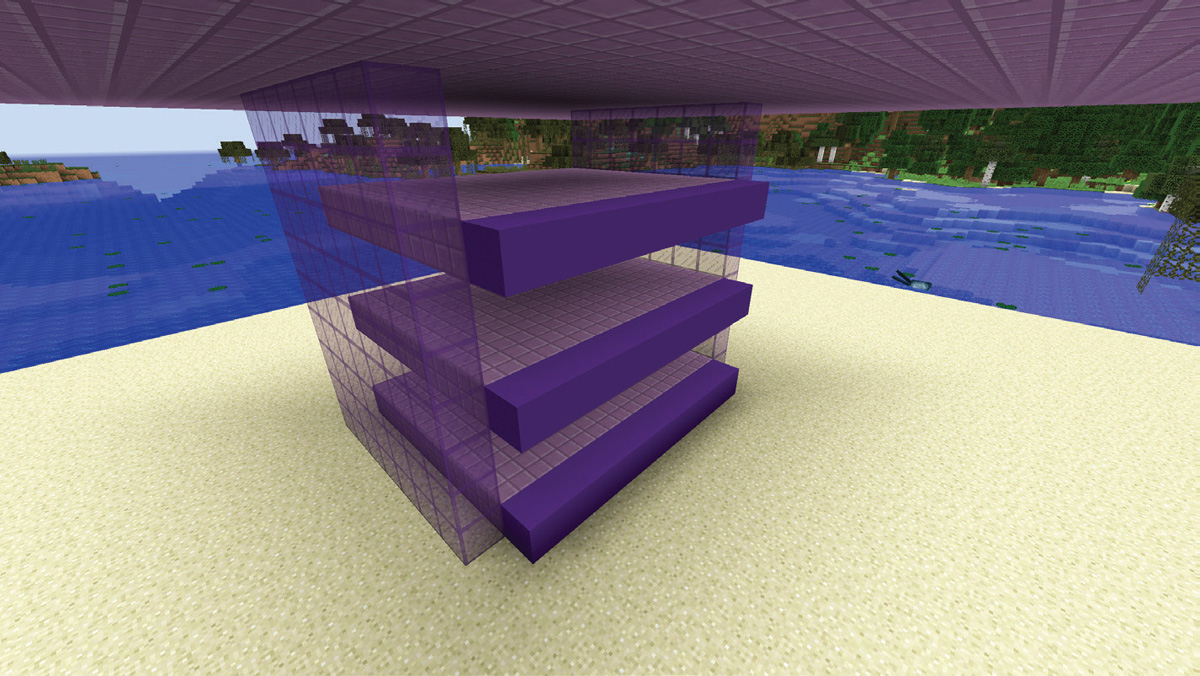
8. Build a 7-block-wide, 9-block-tall wall of glass blocks on one of the short sides of the platforms.
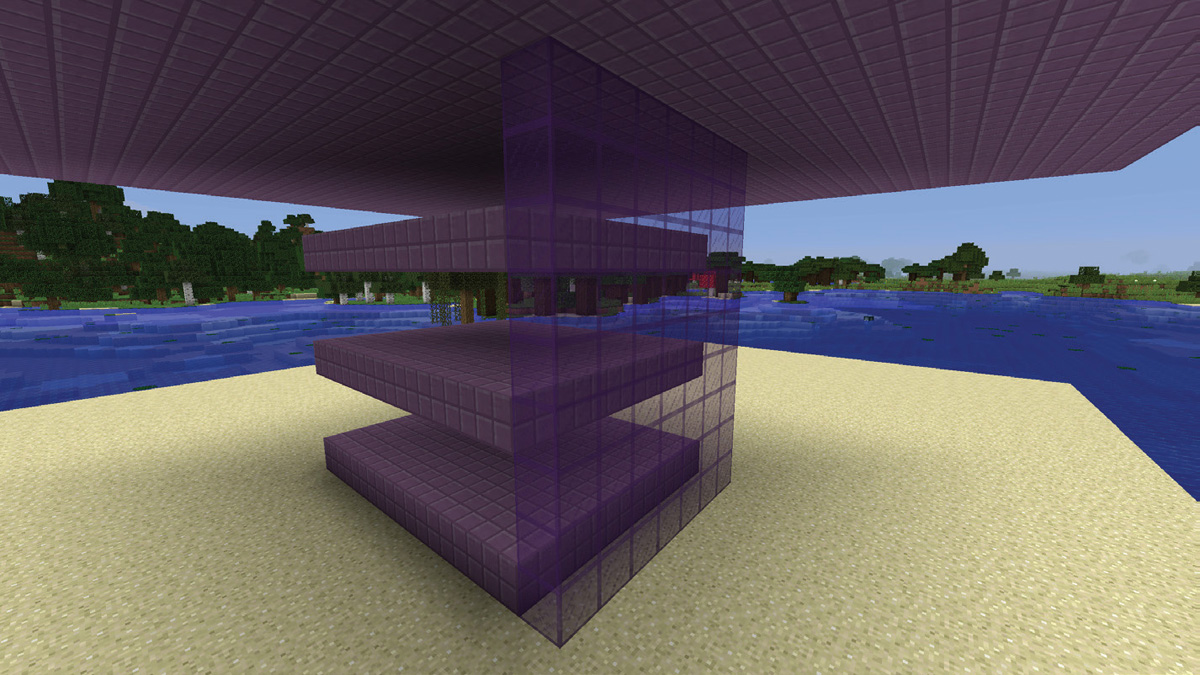
9. Repeat Step 8 on the opposite side.

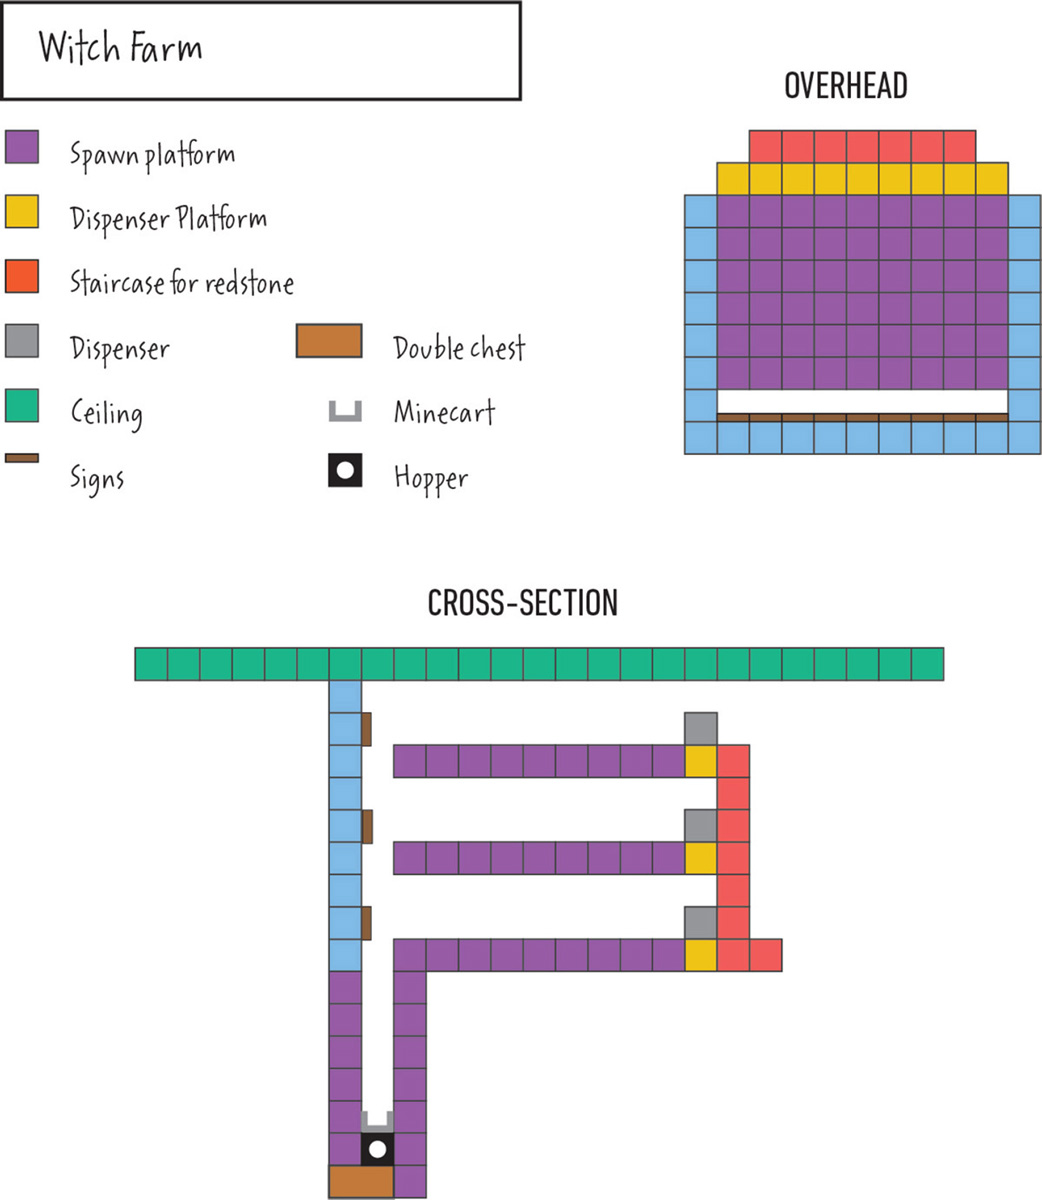
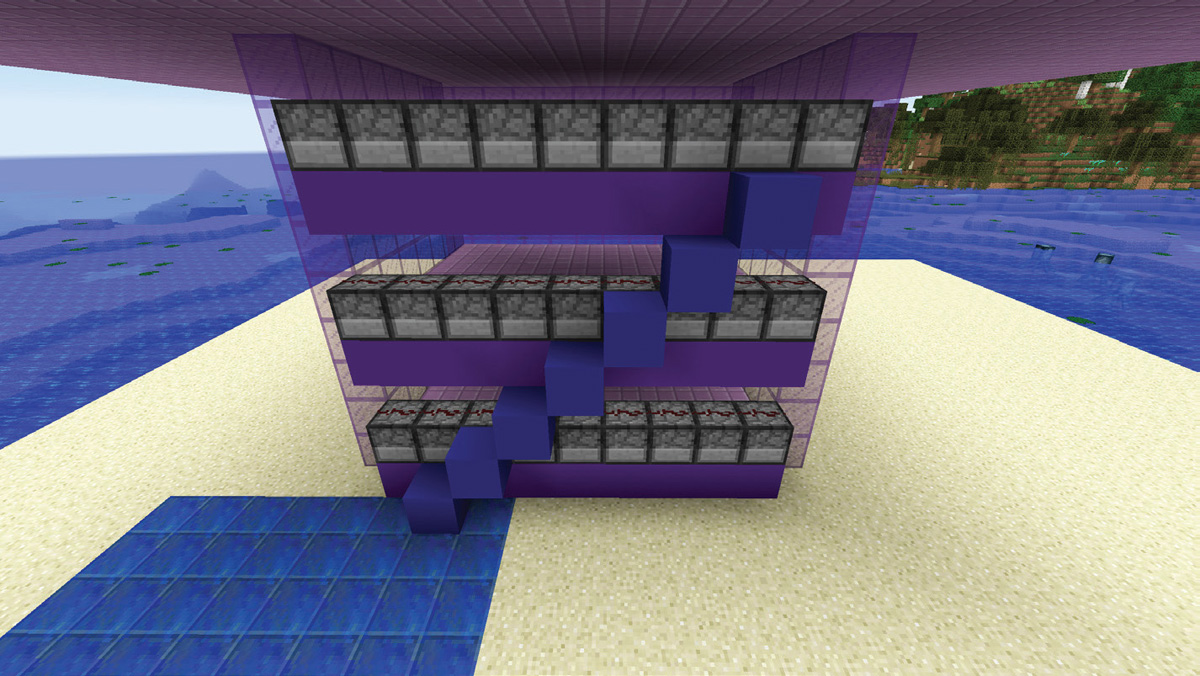
10. At the back of the farm, add another 9-block-long row of blocks at the back of each platform, as shown. These are used to place the dispensers.
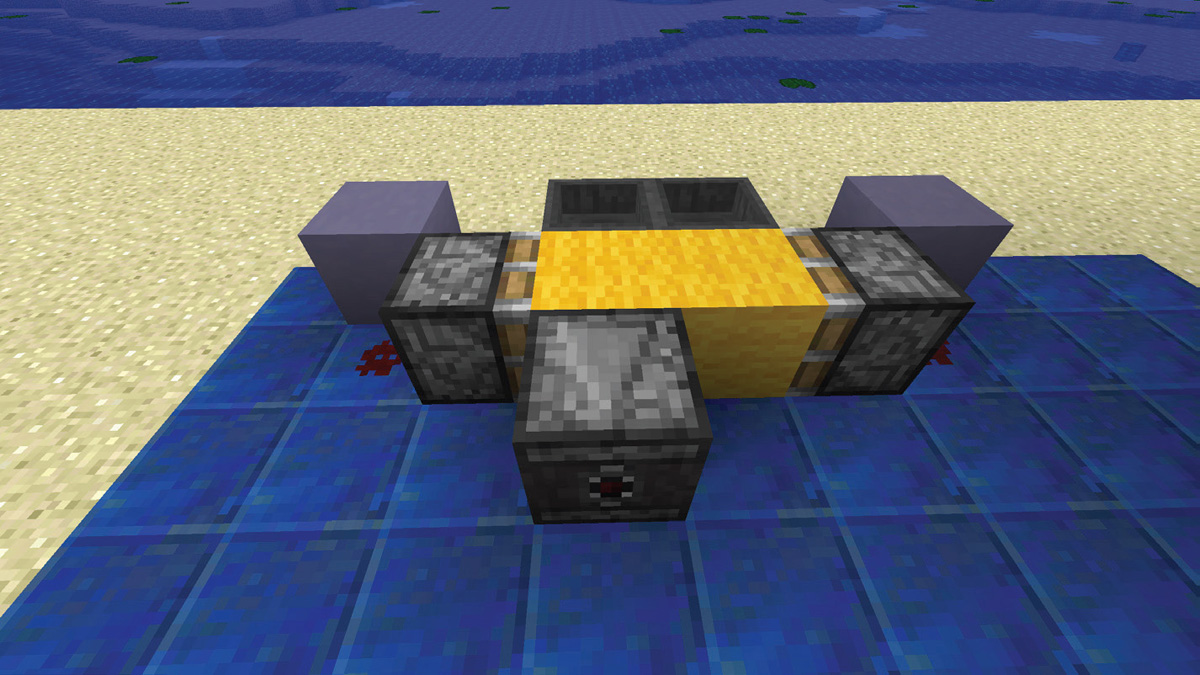
11. At the back of a platform, on the row you placed in Step 10, place a row of dispensers facing in, as shown.
12. Place a bucket of water in each dispenser. (The bucket can be in any slot of the dispenser’s inventory.)
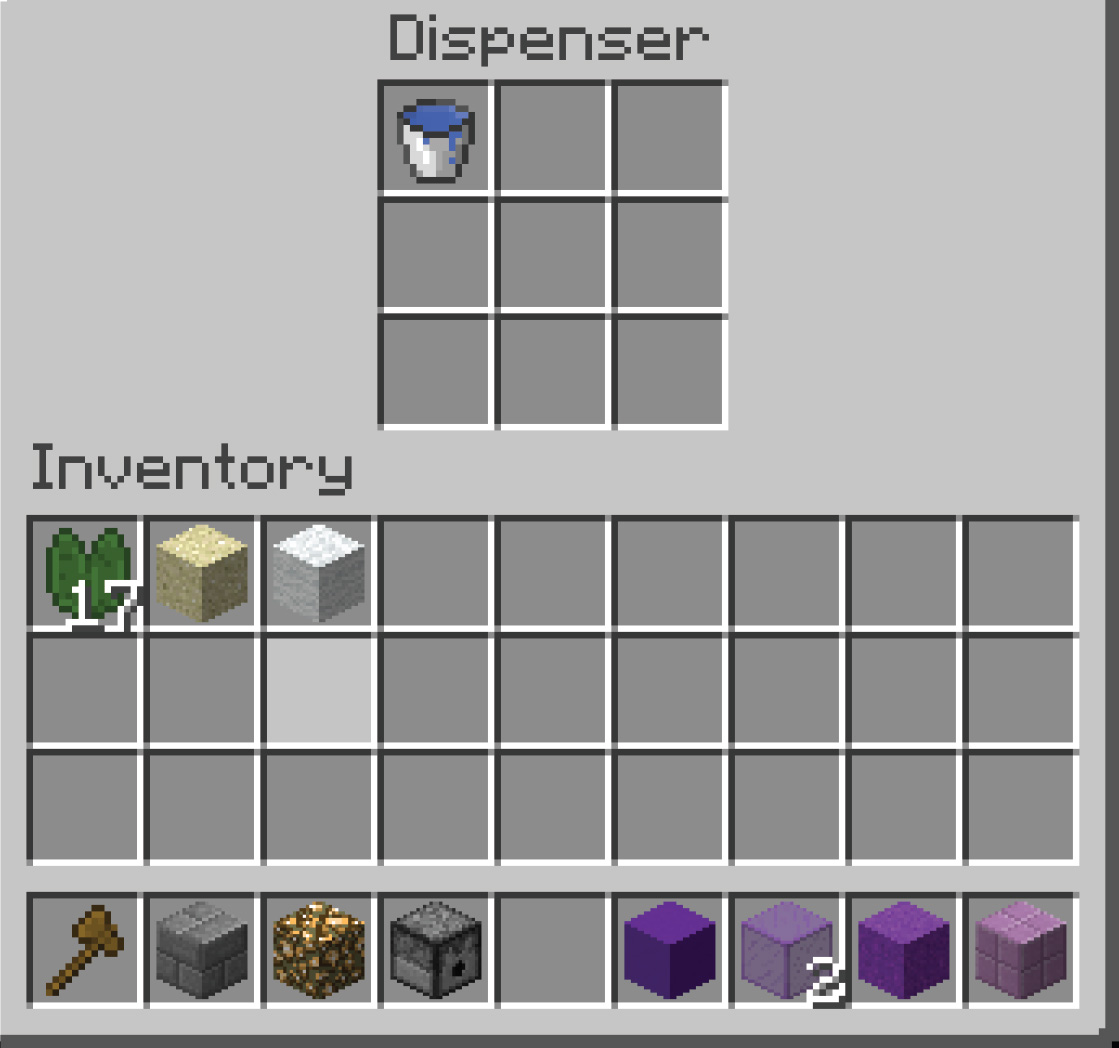
13. Repeat Step 12 for the other 2 platforms: Add rows of dispensers each with a water bucket inside.

14. At the front of the farm, build an 11-block-wide, 9-block-tall wall of glass blocks, 2 blocks out from the front edge of the platforms (leaving 2 blocks of space).
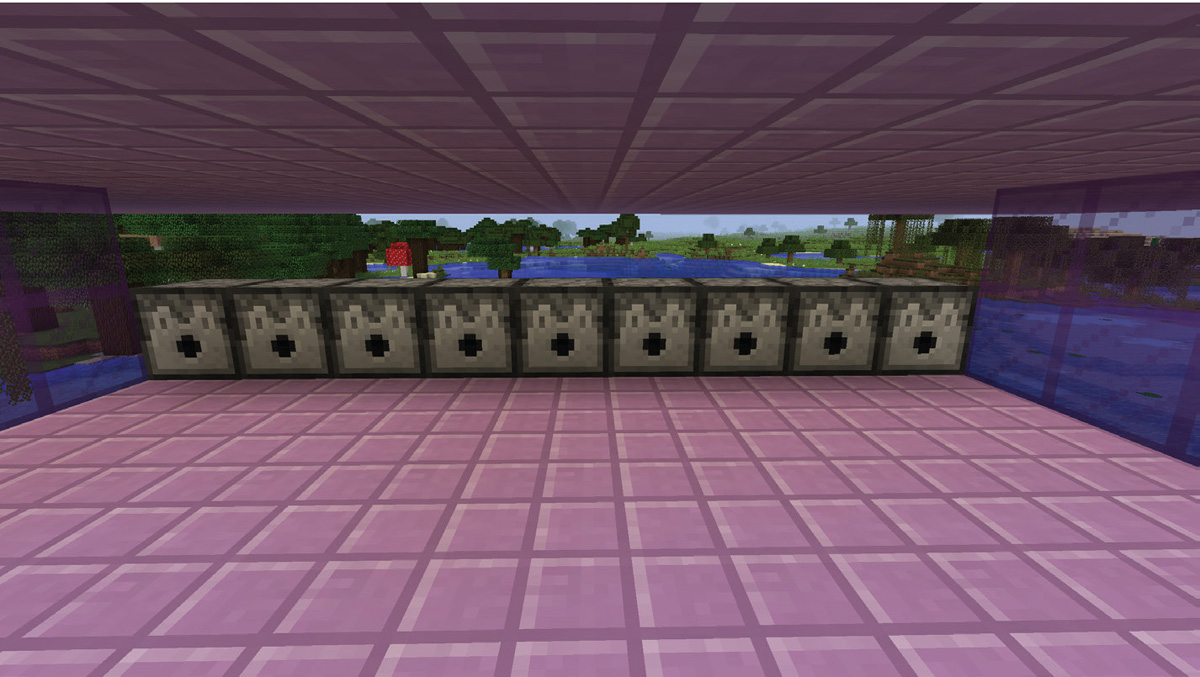
15. Across from one of the platforms on the new wall, place a row of 9 signs as shown. These signs will prevent the water flow from the dispenser from flowing over the edge.

16. Repeat Step 15 for the other 2 platforms.

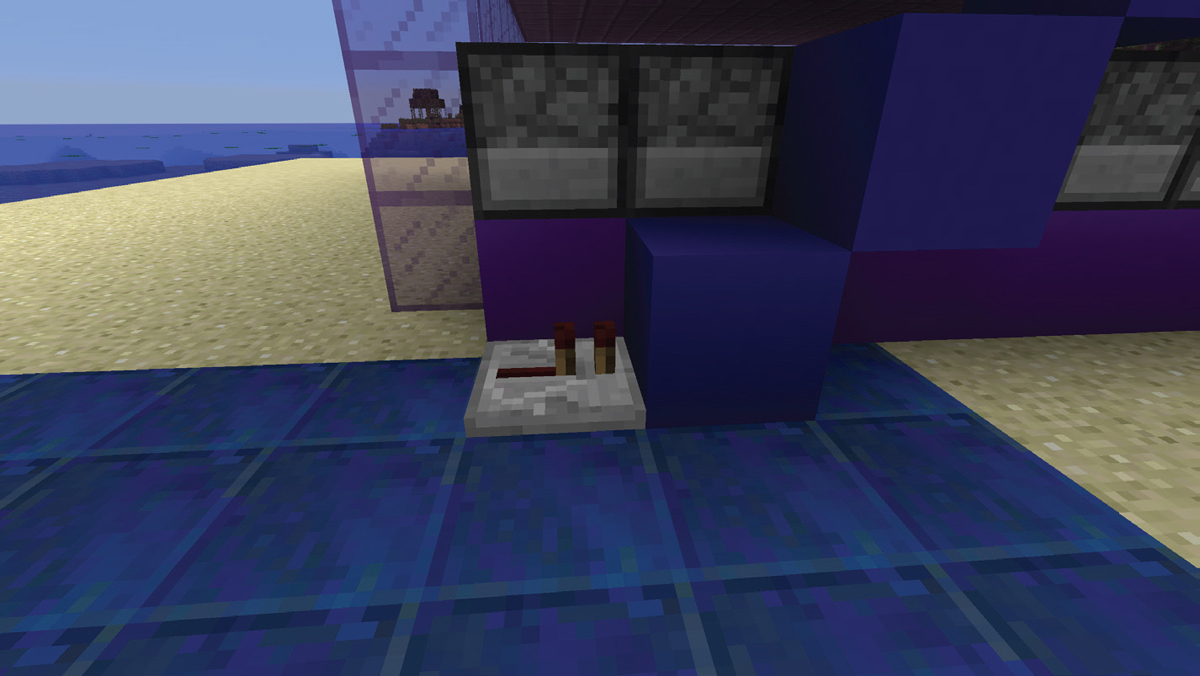
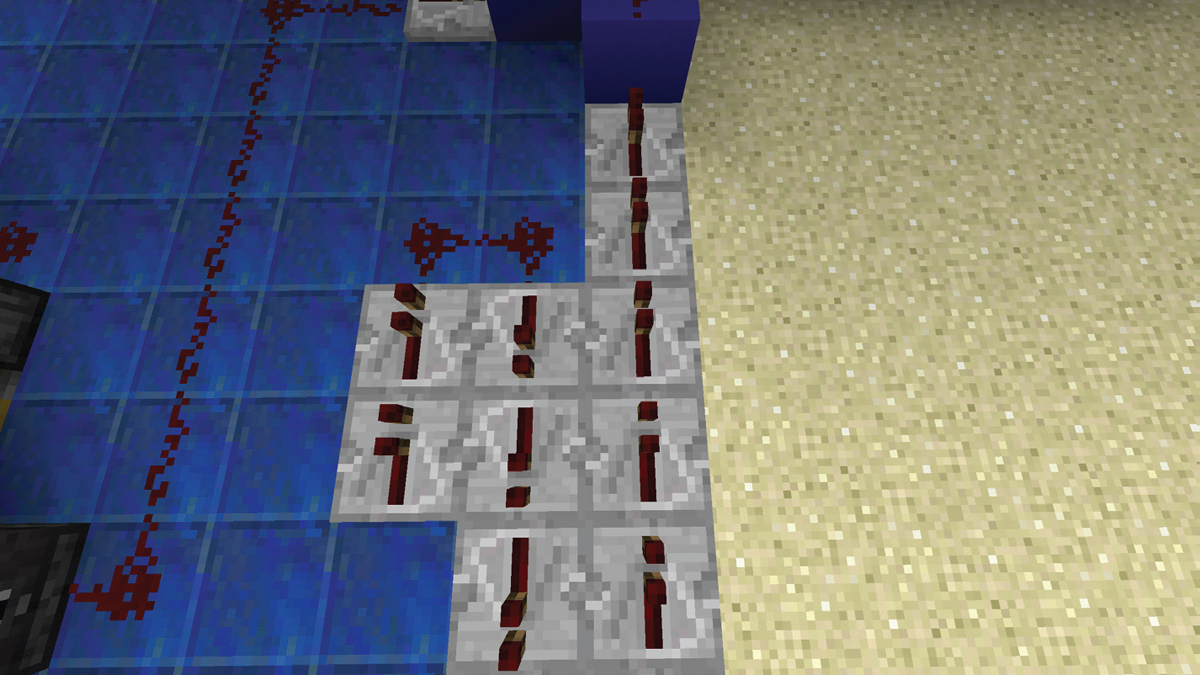
17. Now, we’ll add the redstone that will activate the dispensers. First, place redstone on top of all of the dispensers.

18. Use any building block to create an 8-block-wide by 10-block-long floor that the redstone circuits will be on. Locate the floor as shown, up against the bottom platform, with its top right corner placed 3 blocks in from the side of the platform.

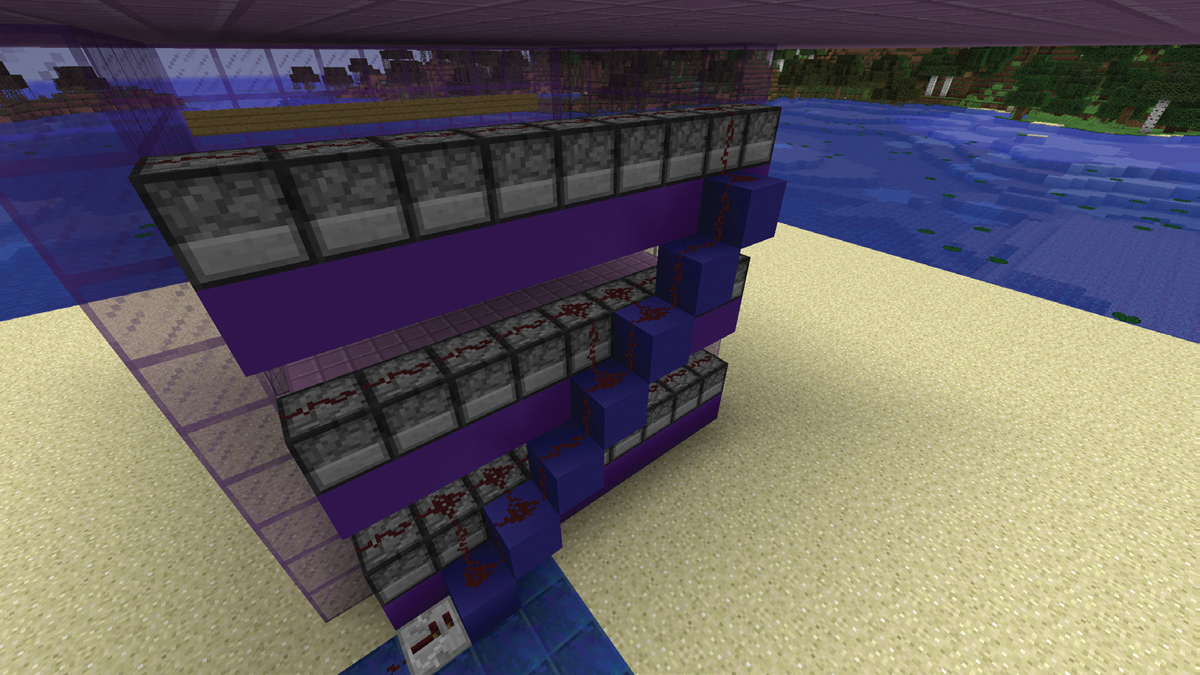
19. Use 7 blocks to build a staircase from ground level to just below the top row of dispensers as shown. This staircase will carry the redstone signal from the source to each dispenser.
20. Now to the redstone circuits: First, we will build an Etho hopper clock that will time when the water is placed to flush the witches out from the platforms. Start by placing a temporary block 4 blocks in from the outer edge of the floor on the left side, as shown.
21. On the side nearer the farm, place a hopper pointing into the temporary block.
22. Break the temporary block. In its place, put a hopper pointed into the first hopper.
23. Place a comparator facing out from the back of 1 hopper.

24. Place a second comparator facing out from the back of the other hopper.

25. Add a block on each side for the comparators to face into, as shown.

26. Add 2 redstone dust, each beside 1 of the 2 blocks just placed.

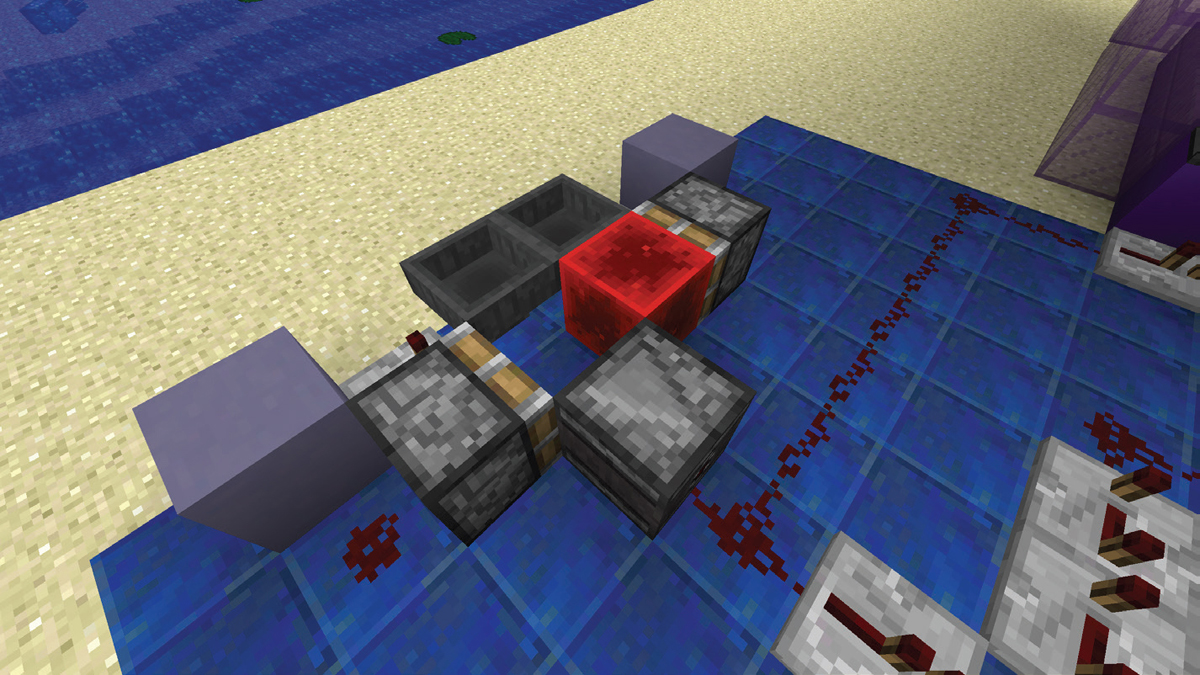
27. Place a sticky piston with its back to 1 of the redstone dust, as shown.

28. Place a second sticky piston with its back to the other redstone dust and facing the first sticky piston.
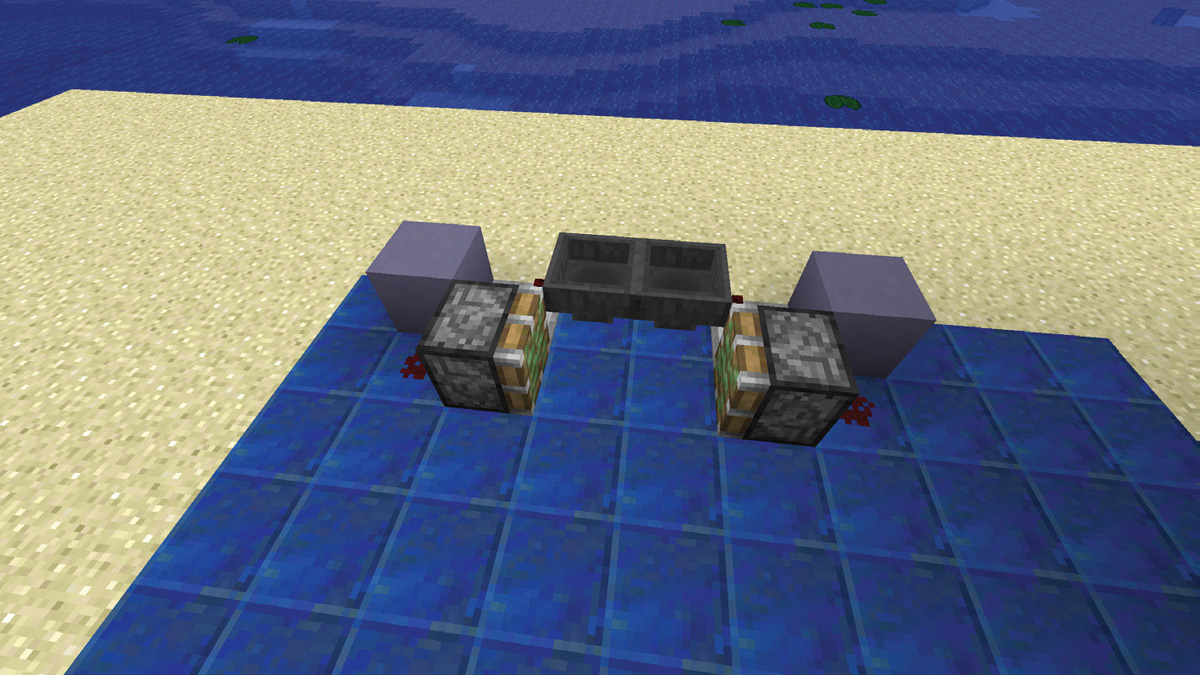
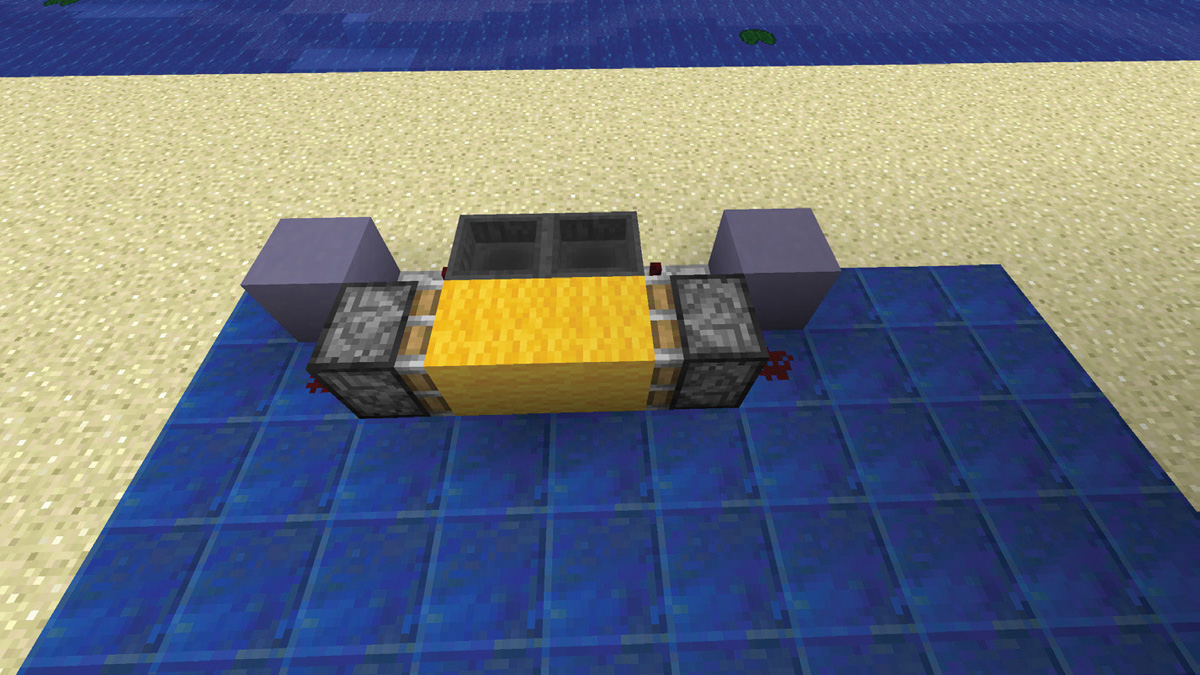
29. Place 2 temporary blocks between the 2 pistons. This is where we will place a redstone block that will be pushed from 1 piston to the other. The redstone block will be the source of the redstone power that will turn on and off the waterworks.
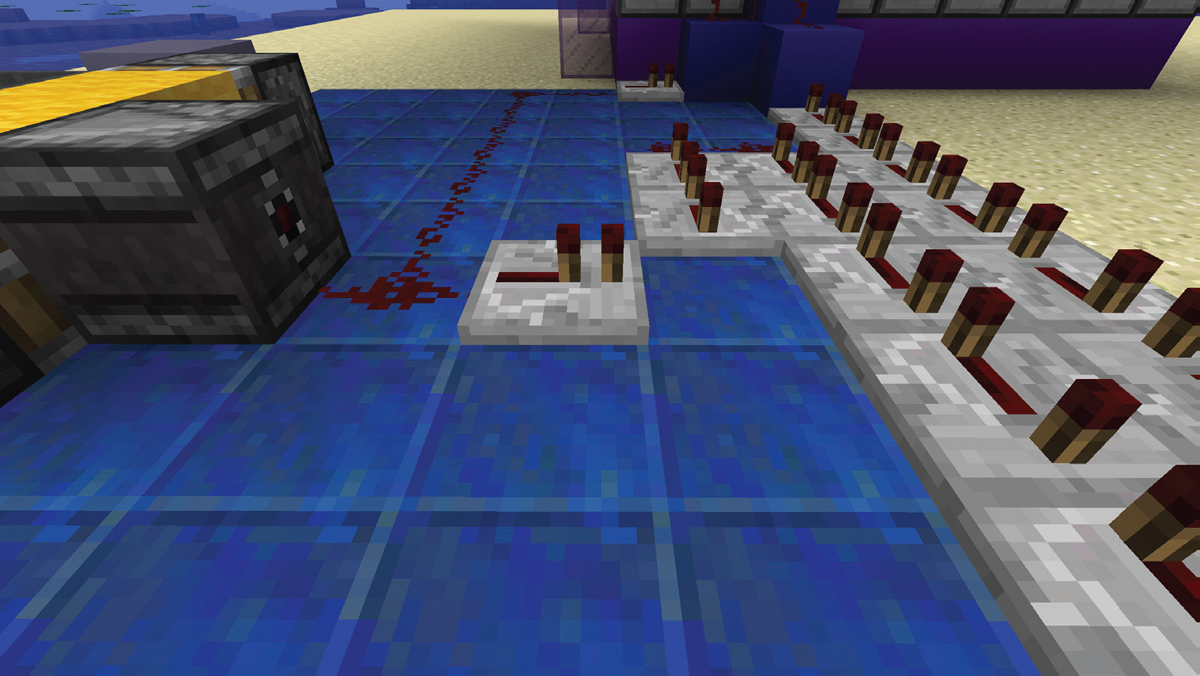
30. We will be taking the signal from where the left temporary block is. In front of this block, place an observer block, with its face pointing in to the temporary block and output side facing outward.
31. We’re going to run the future signal from the observer block to the stairs. First, place a repeater facing in to the bottom step, as shown. This will make sure the signal is strong enough to reach all the dispensers.
32. Now use 8 redstone dust to run a line between the output side of the observer block to the back of the repeater.

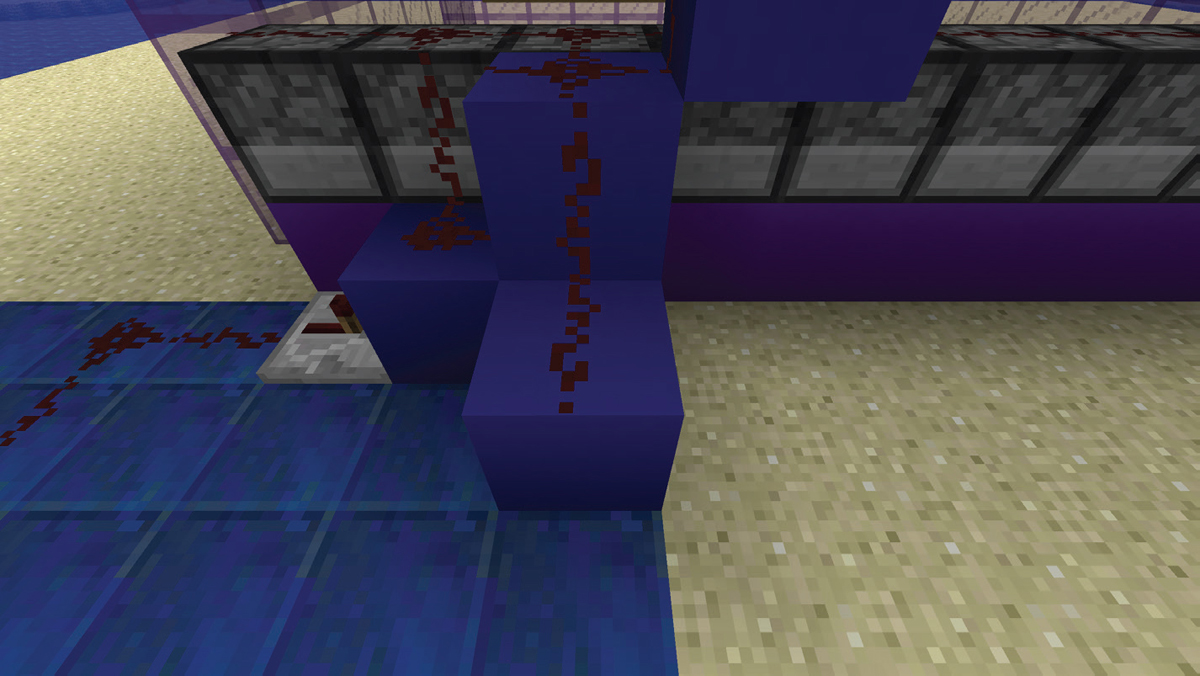
33. Place a line of redstone dust between the front of the repeater, up the stairs, and to the top block of the stairs. This finishes the power line that will place the water to flush out the witches.
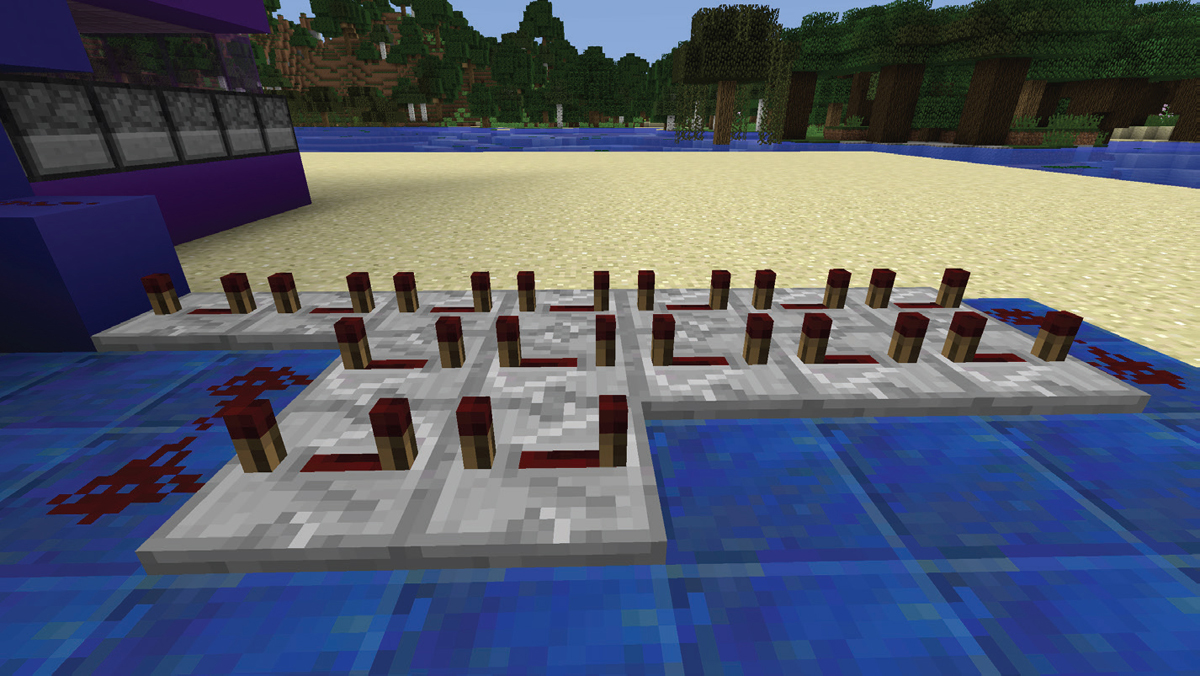
34. Now we will need a second signal that will activate the dispensers a second time so that they will pick up the water they placed. We need to give enough time for the water to move all witches off the platform. We’ll use repeaters to delay the signal. First, add a block to the staircase, as shown. This is where the second signal will connect to the dispensers.

35. Place a redstone dust on top of the block you just added.
36. Place a repeater facing into the block.

37. Place 6 more repeaters in a line, also facing toward the stairs.

38. Place a second line of 5 repeaters, facing away from the stairs, next to the first line, as shown.

39. Place a third line of just 2 repeaters, facing toward the farm, as shown.

40. Place 2 redstone dust to link the last line of repeaters with the middle line.
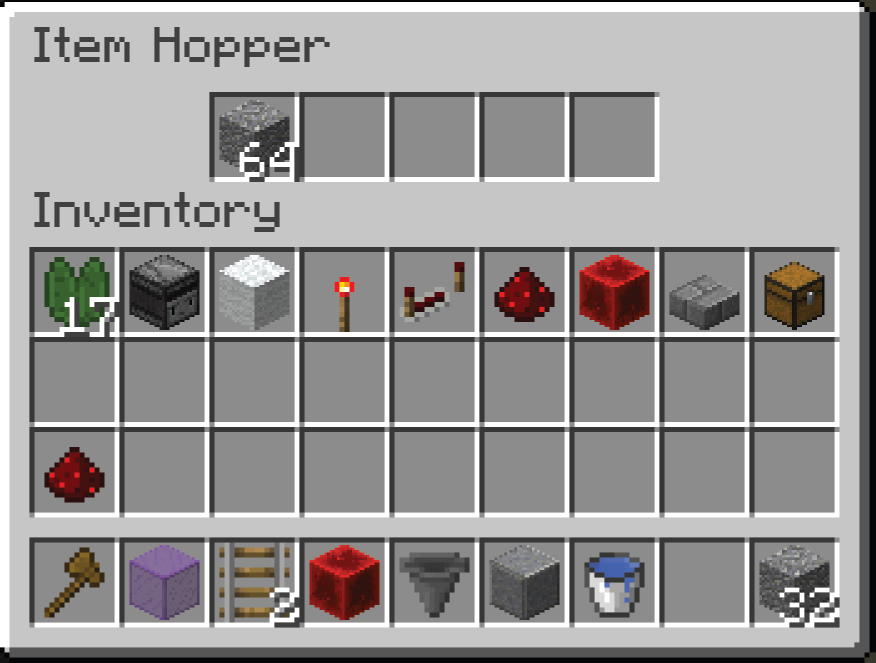
41. Place 2 more redstone dust to link the middle line of repeaters with the line of repeaters leading to the stairs.

42. Click each repeater 3 times to set it to the longest delay. When this is done, the 2 tiny redstone lamps on the repeater will be at opposite ends of the repeater’s base.
43. Place 1 last repeater leading away from the redstone dust in front of the observer block.
44. Add 1 redstone dust to connect this last repeater to the chain of repeaters going to the stairs.

45. Remove the temporary blocks between the pistons. This will alert the observer block, and the 2 signals—one to start the water and the second to remove it—will be sent. Place a redstone block on the right block between the hoppers.
46. To start the clock, place 64 blocks of any type, such as cobblestone, into 1 of the hoppers. The hoppers will start transferring the blocks to each other, moving the redstone block between them. When the observer block senses the update in front of it, it will send a signal out its back. The signal is split into two, one that activates the dispensers to place water and the second to pick the water back up again.
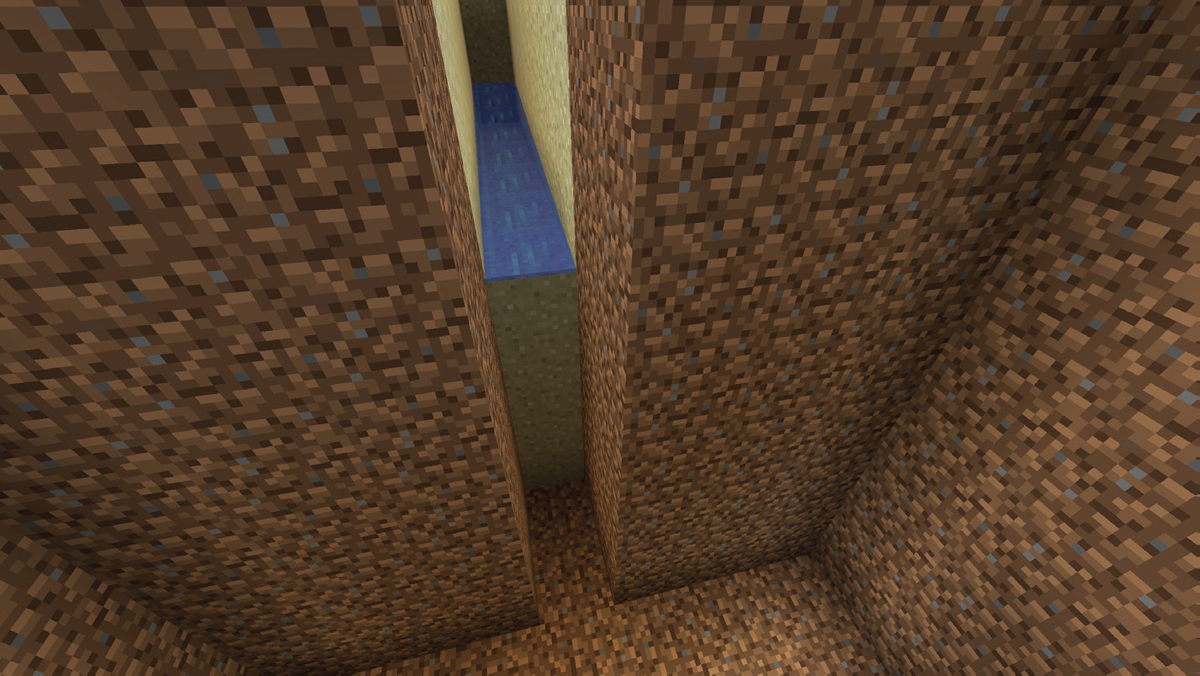
47. Now it is time to tackle the collection and killing area. First, dig a trench that is 3 blocks deep between the front of the platforms and the glass wall with signs on it. The trench should run from the edge of 1 side of the platforms to the glass wall on the other, 10 blocks long in total, as shown.

48. Dig out a workspace that will hold the killing area and chest storage: I’ve dug out an area. You will want to dig a space that is 4 blocks deeper than the trench.

49. Place a water source at the opposite end of the trench. This will show how far the witches will be pushed.

50. Enclose the opposite end of the trench with glass blocks, as shown.

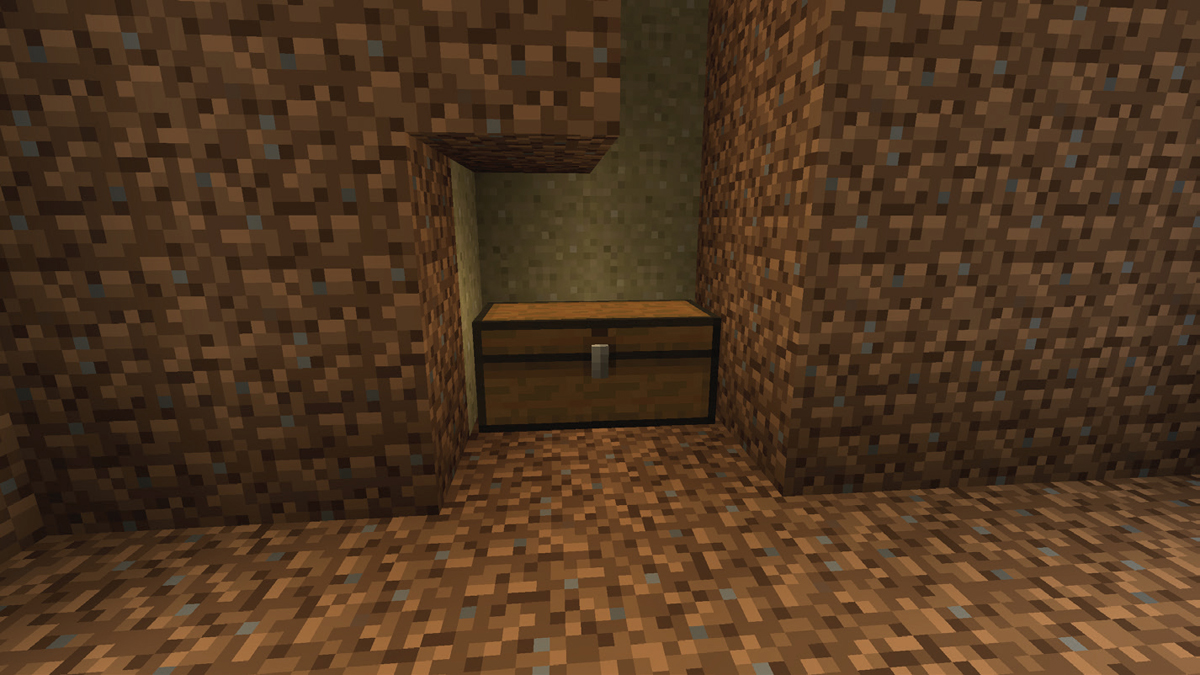
51. At the place where the trench’s water stream ends, dig 4 blocks down.
52. At the bottom of this hole, place a double chest.
53. Add a hopper facing down into the chest.
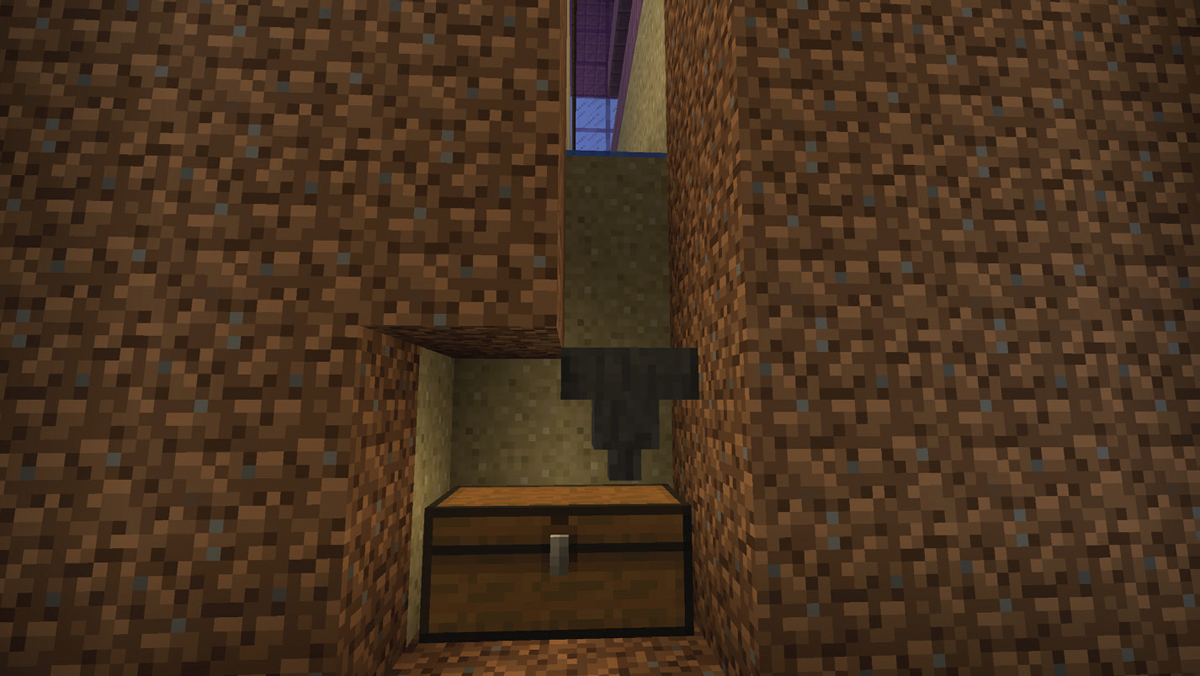
54. Place a single rail on top of the hopper.

55. Place a minecart with hopper on top of the hopper. With your cursor highlighting the rail, place 23 more minecarts. These will join invisibly to the minecart with hopper. (These 24 minecarts are entities, and when a single witch drops into the space, they will die.)

56. Once this is complete, click very carefully on the rail to break and remove it. The carts will move down slightly to rest on the hopper.
57. Enclose the minecarts and the drop above the carts with glass.

58. Fill in the space between the glass block walls above the drop with more glass blocks. Make sure the spawning area is enclosed, and protect your redstone area from accidents and creepers. Place slabs around the farm to prevent mobs from spawning.

59. To get really good rates for drops, you will have to light up all the caves and surfaces in the area, within approximately 150 blocks. It is a chore, but it will be well worth it. It is important to try to light up all the caves, because even 5% of the caves left dark will hurt your spawning rate at the witch farm. (Mobs won’t spawn on water, so that helps!)
