
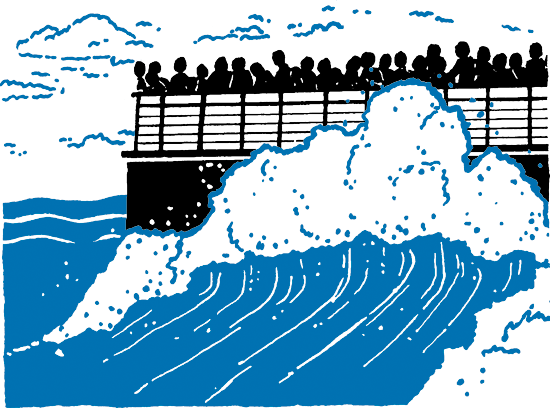
Milky Seas
Milky seas are not really life-threatening, but they are a really cool and very rare natural phenomena that any intrepid explorer would be bursting to experience. Milky seas have long been recorded and described in maritime or oceangoing folklore. In the 18th century, these weird phenomena were written about in the Jules Verne classic novel, 20,000 Leagues Under the Sea , but until recently there was no real scientific proof to back up the crazy claims of seafarers.
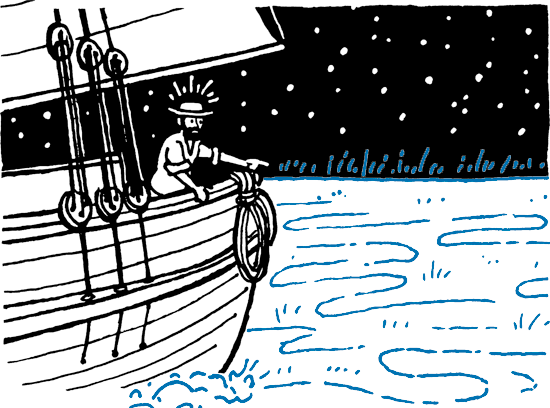
Many sailors would describe what they were experiencing as though they were “sailing upon a field of snow” or “gliding over a giant sea of milk,” all of which was experienced in absolute darkness with not so much as the light of the moon.
The glowing waters appear to extend right out to the horizon in all directions and can last from several hours to several days.
More recently, it has been possible to gather clearer scientific evidence about milky seas. On the night of January 25, 1995, a British merchant vessel, the S.S. Lima , was sailing through the northwestern Indian Ocean off the coast of the African nation of Somalia, when it sailed into a milky sea. The ship’s captain wanted the event recorded and so contacted the Naval Research Laboratory (or NRL for short). It was able to track the milky sea from space using a special satellite that can detect extremely low levels of visible light.

The satellite detected images of an enormous area of glowing water spanning over 6,000 mi2, or approximately 15,000 km2 (that’s the same surface area as the entire State of Connecticut in the United States). The glowing continued for three whole nights. The cause of these strange nighttime events is still being discussed, but scientists believe they are linked to strong bioluminescence (which is science-speak for natural biological light). The light is thought to be produced by huge colonies of bacteria in surface waters. In other words, this is the ocean’s own version of billions upon billions of tiny fireflies grouping and glowing together. Those guys are a real bunch of bright sparks!
If You Are Planning an Expedition To Discover a Milky Sea, You Will Need the Following:
-
A seaworthy oceangoing vessel, aka, a boat
-
A reliable and experienced crew (easily recruited with a palm of silver)
-
Sufficient food and fuel for a long expedition
-
An awful lot of luck! (Remember, these events are extremely rare and only the most daring and fortunate explorers have encountered them.)
Young Scientist Activity How to Make Water Glow
This experiment will allow you to make glowing water.
Equipment Needed:
| A bottle of tonic water |
| A fluorescent highlighter |
| A very dark room |
| An ultraviolet black light (which can be picked up cheaply at most stores) |

Instructions:
-
Take a fluorescent highlighter pen. Be careful to break it open and remove the felt tip inside. Now soak the felt in a glass of water for several minutes.
-
Take the glass of water and UV black light into a very dark room.
-
Turn on the UV black light near your water and get ready, set, glow!
Science Factoid
The fluorescent highlighter and the tonic water both contain phosphors, which are special substances that give out light and have the ability to make ultraviolet light that is usually invisible to the human eye, visible. The UV black light and the phosphors combine to make the water glow. Tonic water also works because the UV light reacts with phosphors in a chemical within the tonic water called quinine.

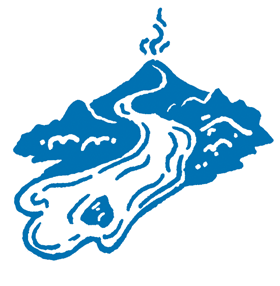
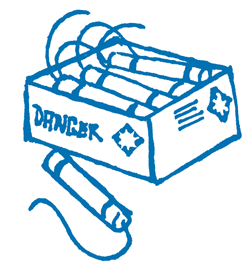
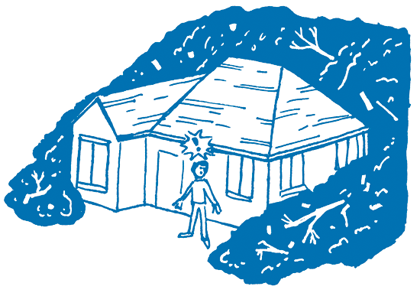
Limnic Eruptions
(aka, exploding lakes)
Now don’t get scared, limnic eruptions are very, very rare natural disasters and it is highly unlikely that you will ever encounter such an event, but it is best to be prepared.
These extraordinary occurrences happen when large amounts of carbon dioxide (CO2) and other gases suddenly erupt from deep lakes and can result in the suffocation of wildlife, livestock, and even humans. Lakes in which such activity occurs may be known as limnically active lakes or “exploding” lakes—BOOM!!!
What You Should Know:
-
For a lake to explode it must be almost completely saturated with a gas. In the two recorded cases that have been observed, the major component was carbon dioxide. The CO2 may come from volcanic gases emitted under the lake or from decomposition of organic material.
-
Before a lake is saturated, it behaves just like a fizzy drink: the CO2 is dissolved in the water. In both the lake and the soft drink, CO2 dissolves much more easily when it is at a higher pressure. This is why bubbles in a can of soda only form after the drink is opened; the pressure is released and the gas comes out of the drink.
-
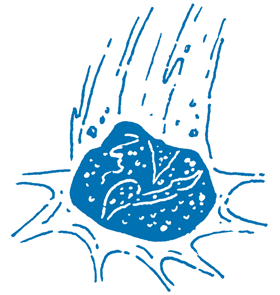
Meanwhile, back at the lake, once saturated all you need is a trigger for all this pressurized gas to be released. Scientists say any natural event will do the trick, such as a volcanic eruption or landslide; however, something as minor as wind or rain can trigger it.
-
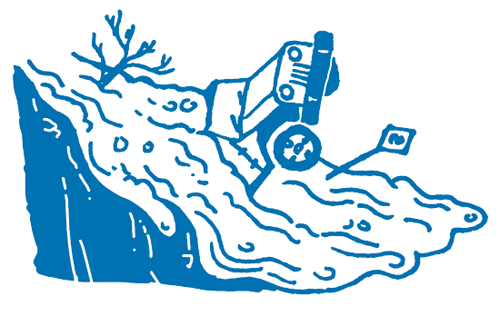
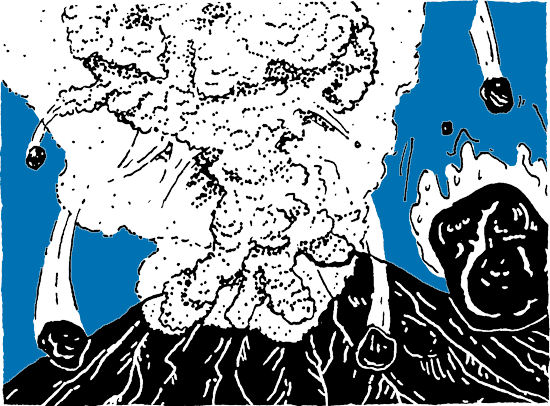
Once an eruption occurs, a large CO2 cloud forms above the lake and begins to expand into the surrounding region. As CO2 is denser or “heavier” than air, it has a tendency to sink to the ground while pushing up any breathable air. As a result, any life forms that need to breathe oxygen suffocate once the CO2 cloud reaches them, as there is no breathable air (this is not good news if you are present at an eruption!). Furthermore, the CO2 can make human bodily fluids very acidic, potentially causing CO2 poisoning. As victims gasp for air, they actually hurt themselves more by sucking in even more CO2.
Survival Tips
Fortunately, these events are exceedingly rare and have only been knowingly observed twice. So, you are fairly safe, but just in case—you should do the following:
-
When visiting an area that has a limnically active lake, you should check if there is a de-gassing procedure in place. Some, but not all, explosive lakes actually have the CO2 removed. This is carried out using a very simple siphoning technique: A pipe is positioned vertically in the lake with its upper end above the water’s surface. Water saturated with CO2 enters the bottom of the pipe and rises to the top. The lower pressure at the surface allows the gas to come out of the solution. (It’s a bit like putting a giant straw at the bottom of the lake and sucking out the gas.) This technique will keep the CO2 at safe levels.
-
If you are unfortunate enough to be close to an exploding lake at the time of an eruption, you should make your way to higher ground as soon as possible. The CO2 released is heavier than the surrounding oxygen and therefore “hugs” the ground and forces the oxygen above it. Find the nearest hill or tree and climb—you should be safe at any height above 10 ft./3 m.
-
Get an early warning system! CO2 detection equipment can be expensive. A more cost-effective and fun technique is to invest in a pet mouse. Mice have the ability to detect CO2 and it makes them crazy! Excess CO2 in the air signals danger for mice, whether it’s because too many animals are breathing in too cramped a space or a hungry predator is about to exhale down its furry neck. Either way, your little furry friend could save your skin.

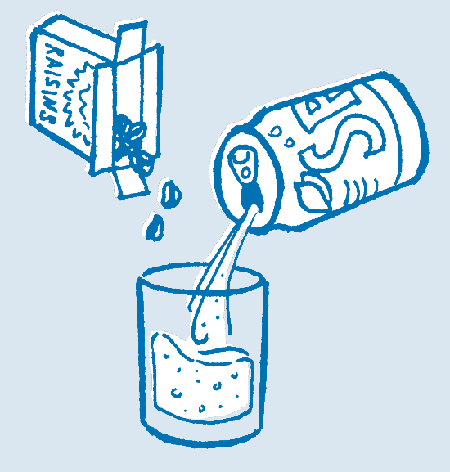
Young Scientist Activity Raisin’ Raisins
In this activity, you’re not actually growing raisins from scratch but you are “raising” the raisins up using some very clever science.
Equipment Needed:
| A can of clear soda such as Sprite or 7up |
| A box of raisins |
| A large glass |
Instructions:
-
Pour the can of soda into the glass until it’s almost full.
-
Take a handful of raisins and drop them into the glass.
-
They should immediately sink, but wait a few seconds and see what happens.
Science Factoid
The fizz you see in a soda is a gas called CO2. It’s jam-packed with so much CO2 that it does not take much to cause it to come back out again. The surface of the raisins traps tiny bubbles of air when they are dropped into the glass. These tiny bubbles collect CO2 from the soda and begin to grow. When the bubbles grow large enough, they begin to lift the raisins to the top of the glass. This is similar to the gaseous release that happens in the lake.

Tsunamis
You pronounce tsunami, “soo-nahm-ee.” It is a Japanese word that means “harbor wave.”
A tsunami is a series of huge waves that are caused by movements under the sea, such as an earthquake or an underwater volcano eruption. The waves travel like ripples on a pond in exactly the same way they would if you had just thrown a rock into it, and they can travel at great speeds to hit the shore. Anyone who is in the path of a tsunami is in great danger. Here’s how to recognize the signs of a tsunami and how to protect yourself.
Things Not To Do
Don’t try to outrun the waves. They travel very much faster than you and much faster than your car can! They can travel at speeds of up to 450 mi./800 km an hour. (That’s pretty fast!)
Don’t be fooled that the waves in a tsunami are not that big. Waves from a tsunami can be as high as 80 ft./25 m. They only grow bigger as they get to the shore. This means that they can start off as just a ripple of water in the middle of the ocean and become bigger and bigger until they become a gigantic wave when they hit the shore.
Whatever you do, don’t climb a tree unless you have absolutely no other choice. Trees often snap under the pressure of the water and a tsunami can generate a huge volume of water. If you have to climb a tree, find a very strong and tall one and climb as high as you can.
Don’t get confused—often in movies, tsunamis are commonly mixed-up with tidal waves. Tsunamis are caused by eruptions or earthquakes and have nothing to do with tides.
Things To Do
Keep away from the beach! Do not go anywhere near the beach or into buildings near the beach. Even if you see just a small tsunami, leave immediately. Tsunami waves grow bigger and continue to hit, so the next giant wave may be on the way. The series of waves are also called “the wave train.”
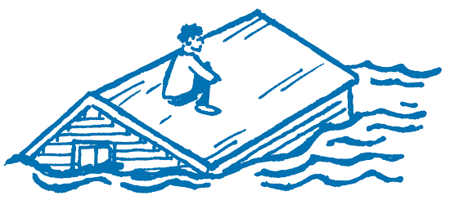
Find higher ground. Go up a hill or to a higher area of the town or city. If you are trapped, find a tall, strong building and climb to the top of it, maybe even sit on its roof.
Leave your possessions. Your survival is more important than toys, books and other things. Leave them behind and get to safety.
Stay away for several hours. A tsunami can continue to hit the shore for many hours, so the danger may not be over for a while. Do not return to the area until you get an “all-clear” message from emergency services. If you do not get this message, wait patiently.
Find a radio and keep tuned in for updates.
If you get caught in the water, the most important thing is to keep afloat. Grab onto anything that floats, such as a tree trunk, a piece of a building that is floating, etc. Use the floating object to get you near something you can climb up onto and get out of the water if possible.
Nature’s Early Warning System
If you live near the sea or are on holiday there, nature will give you some very clear warning signs:
-
There may be an earthquake or the ground rumbles.
-
The sea itself suddenly pulls back and leaves bare sand, making the beach seem like it has grown a lot larger.
-
Local animals begin to behave in a strange manner. They suddenly leave, gather in large groups, or try to get to higher ground. (Follow that elephant!)
Maelstroms
This is a tough one, and unless you are fully equipped, it is going to be extremely difficult to defy one of these. Even when fully prepared, the odds are against you. However, preparation is key and if you do run into one of these babies, you want to give yourself the best possible chance of survival.
What Are Maelstroms?
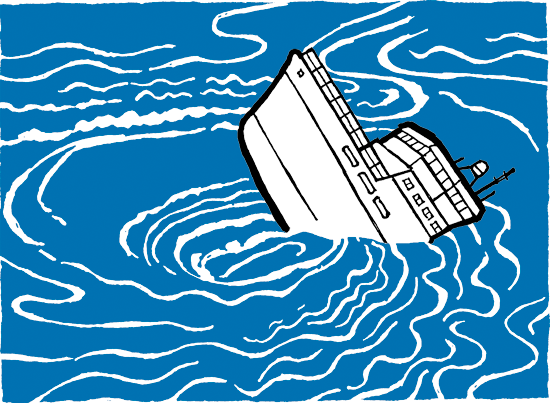
The word “maelstrom” is a Scandinavian word meaning “grinding current.” Maelstroms are very powerful whirlpools or swirling bodies of water with incredibly powerful downdrafts. Imagine a stormy, raging sea and add in the twisting vortex of a tornado. Only then can you begin to understand why sailors of old feared them so much and why their reputation grew to mythical status. The fear of getting trapped in a maelstrom before being sucked down to impending doom is still strong today.
Cynics argue that stories of sailors losing their lives and boats being destroyed are greatly exaggerated and even completely fictional; however, more recent scientific and documentary research seems to support the fearsome reputation of the mighty maelstrom.
Mighty Maelstroms
Here are just a few of Earth’s meanest maelstroms:
The Saltstraumen maelstrom is found about 48 mi./30 km off the coast of Norway. Near the Arctic Circle, it is the mightiest maelstrom on the planet and creates the strongest tidal currents on the globe. The turbulent waters can reach speeds of 25 mi./40 km per hour as hundreds of thousands of gallons of seawater are “funneled” through a very narrow strait. So dangerous is this area of water that there is only a small window of time each day when larger ships can sail through.
Although, Saltstraumen is the world’s strongest maelstrom, the Moskstraumen is the most famous one, mentioned in many books and movies. Located off the Lofoten Islands, in Norway, Moskstraumen is the second-strongest whirlpool in the world with powerful currents that reach speeds of nearly 20 mi./32 km per hour.
Noisy Nature
Some maelstroms not only create some of the most dangerous waters on Earth but also some of the loudest. The third-largest maelstrom in the world is located in the relatively narrow strait of Corryvreckan on the western coast of Scotland. It can generate wave swells of up to 30 ft./9 m, but, more interestingly, the noise generated by these waters is so loud it can be heard up to 10 mi./16 km away. At one time, the British navy classed the waters as “unsailable” before downgrading them to “extremely dangerous.”
Similarly, the Old Sow maelstrom situated between New Brunswick and Maine earned its name from the “pig-like” screeching sounds that occur when the full fury of this vortex is heard. Smaller whirlpools on all sides of Old Sow are nicknamed “the piglets.” OINK! OINK!
TRIVIA Researchers in Scotland once tossed a mannequin equipped with a life jacket into the Corryvreckan maelstrom. They wanted to test the tall tales of seafarers that maelstroms would suck humans down into the sea’s depths to their eventual doom. The mannequin entered the vortex and disappeared. When it was later recovered, the dive meter showed that it had been sucked down to more than 600 ft./183 m deep and the life jacket was full of gravel. This was clear evidence that the dummy had been scraped along the sea floor.
Survival Tips
I think it’s very apparent that maelstroms shouldn’t be messed with. They are extremely powerful, noisy and very unpredictable. If you are unlucky enough to encounter one, here are a few survival tips:
-
Only travel out to a maelstrom with experienced local sailors and divers. They will know the waters better than anyone else and will be your best chance of getting through one.
-
If you are sailing through a maelstrom, it is best to do it when the waters are calmest. Most have what experts call a “time window” when it’s safest to do so.
-
If you are going to dive near a maelstrom (which is not a very wise idea), you need to be fully equipped with a proper diving suit and a sufficient supply of air in case you run into difficulties. You will most likely need a gas mixture instead of traditional compressed air. This will allow you to swim deeper for longer. Beware, though, the normal limit of recreational diving is around 150–160 ft./46–49 m. If you get caught up in the depths of a maelstrom’s vortex, you could be swept down to much greater depths. Here, increased nitrogen levels will knock you unconscious, and the oxygen you are breathing will become toxic and the air you breathe will kill you.
Young Scientist Activity Make Your Own Maelstrom
With just a few items, it is fairly straightforward to make a manageable maelstrom that works on pretty much the same principle as the real thing.
Equipment Needed:
| A see-through plastic bottle |
| A tube of glitter |
| Dishwashing soap |
Instructions:
-
Add water to your see-through bottle until it’s about three-quarters full.
-
Drop in one or two squirts of dish soap.
-
Drop in some glitter.
-
Screw a cap onto your bottle.
-
Hold your bottle upside down and shake it round and round in a circular movement. What do you see?

Science Factoid
The circular motion of you shaking the bottle sets up a spinning force or vortex. It is these types of forces that create the real-life maelstroms. The glitter you added simply makes it easier to see the motion of the water.
Tidal Bores
Despite the name, tidal bores are anything but boring. They can be very dangerous and also very confusing, so the untrained explorer can be forgiven for being disorientated by one of nature’s clever tricks. Remain focused as you prepare yourself for another of Earth’s surprises.
What Is a Tidal Bore and What Causes It?
Tidal bores are very large waves that can surge up a river from the sea. Crazy as it sounds, these beauties appear to work against gravity and basically reverse the natural flow of the river.
There are roughly sixty rivers across the planet that experience fairly regular tidal bores. They only occur at certain times of the year and are linked to flood tides, which are the highest tides caused when the sun and moon are aligned, creating a huge gravitational pull. This “pull” literally throws water inland and forces large waves of water from the sea up through the river channel.
Survival Tips
-
Get a good spot—not only can bores be dangerous, they are also hugely popular to view. When a tidal bore is due, it is best to get a safe vantage point that is close enough to give you a good view but not close enough that you get swept up in the wave.
-
Listen up! The very nature of a tidal bore means they have their own “roar.” Some can be heard from miles away. As the wave moves upstream and gets “funneled” inland, the water gets churned up violently, creating a lot of noise and acting as an early warning system.
-
Surf’s up! Some tidal bores are smoother and less violent than others. These often attract “bore surfers” who arrive with kayaks, surfboards or boogie boards to ride the bore inland. So, if you want to surf a bore, it’s time to kit up!
TRIVIA For more than 2,000 years, people have gathered at rivers with tidal bores to “bore watch.” Be careful though! Many people have died from drowning while watching bores.
World’s Largest Bore
The Qiantang River in China has the world’s largest tidal bore. It can generate a wave that’s 30 ft./9 m high.
Some Really Bore-ing Names (Not)
Tidal bores are such spectacular events that some have generated their own legendary nicknames. These include “The Seven Ghosts” in Indonesia, “The Great Roar” in South America and “The Black Dragon” in China.
Young Scientist Activity Magic Finger Experiment
This clever but simple experiment is very easy to follow and a cool way to play with science.
Equipment Needed:
| A bowl |
| Some Water |
| Dish detergent |
| Black pepper |
Instructions:

-
Fill the bowl with water.
-
Shake the black pepper across the top of the water.
-
Place your finger in the water. What happens? (Nothing much, eh?)
-
Now, put a little detergent on your finger and dip it into the pepper and water. Notice how the pepper moves away from you and toward the edges of the bowl.
Science Factoid
Water has a surface tension that makes it rise up and bulge at the top. When the detergent comes in contact with the water, it lowers the surface tension a little and the water begins to spread out. As the water “flattens,” it carries the pepper with it toward the outer edges of the bowl. Tidal bores are caused by a similar phenomena—high spring tides and gravity create a bulge in the ocean, which “flattens” when it enters a river, carrying a wave with it.

Violent Volcanoes
The word “volcano” is taken from the name of Vulcan, the god of fire in Roman mythology. The Romans and many other civilizations witnessed the deadly power of volcanoes. They also discovered that volcanoes could destroy, burn and submerge both people and places in a much greater variety of ways than other natural hazards, and even today we are still drawn to live in these danger zones. First we need to look at how and where they form.
How a Volcano Is Made
Most volcanoes are found along tectonic plate margins, which are long lines that divide the Earth’s surface, which is a little bit like the outside of a hardboiled egg after it has been cracked with a spoon. A volcano is formed when liquid rock or magma shoots out or erupts through the ground. Once above the ground, the liquid is then called lava, but the type of lava erupted varies greatly and can have very different effects. The viscosity of the lava (scientist-speak for how thick or runny it is) depends on the type of rock that is melted and the pressure within the volcano. Some lava is thick like jam while others are runny like thin, watery custard. As the lava cools, it hardens, forming new rock and eventually a whole mountain or volcano.
There are two main groups of eruptions. First are those that are dominated by lava and tend to be found at “constructive” plates, which allow basalt to rise freely to the surface. The second group are those dominated by ash and smoke, which is normally found at what experts call “destructive” plate margins where the material erupted is typically pyroclastic (I will brief you on this later). These differing eruptions, and other factors, result in very different-shaped volcanoes.

Which Type of Cone Would You Like?
Many volcano varieties exist and can be grouped by cone shape. The table below shows the main types:
| Cone Shape | Features |
|---|---|
| Fissure volcano | Gentle slopes; they are found at constructive ocean plates. The lava is runny and can flow over large distances. |
| Shield volcano | Gentle slopes but steeper than fissure because of repeated explosions and the continuous build up of lava layers. |
| Composite volcano | These are large and old volcanoes made up of both ash and lava. |
| Crater, aka Caldera, volcano | These are formed during very violent eruptions normally after there has been a large buildup of gas beneath the volcano. Often these volcanoes have large, blown-out craters caused by explosive eruptions. |
| Cone volcano | These volcanoes have symmetrical sides but the types vary depending on whether ash was erupted or viscous lava. |
Very Violent Volcanoes
Between the 10th and 12th of April 1815, the Tambora volcano in Indonesia erupted, killing around 92,000 people. This is believed to be the most deadly eruption in history and produced ash fall, a tsunami and, later, widespread disease and starvation.
Between the 26th and 28th of August 1883, the Krakatoa volcano in Indonesia erupted. This was the second most deadly volcano ever recorded, and it killed an estimated 36,000 people. This eruption also generated a huge tsunami and the ash cloud blanked out the sun.
Mauna Loa in Hawaii is the largest live volcano on Earth. One of its eruptions lasted one and a half years, and it is actually the tallest mountain on Earth but is not classed as such because most of it is underwater.
TRIVIA HOTTER! COLDER! HOTTER AGAIN! In Pucón, Chile, crazy bungee jumpers will launch themselves from a helicopter down into the crater of an active volcano. They are flown directly overhead before diving some 460 ft./ 140 m toward the volcano’s molten lava.
Hotspots
Some volcanoes form well away from plate margins, which confused “volcanologists” (the scientific word for people who study volcanoes) for a very long time.
These volcanoes, mostly in the chain of the Hawaiian Islands, were nowhere near the places where volcanoes usually form. Later scientists discovered hotspots beneath the Earth’s crust that are superheated and cause magma to melt through the crust and gradually start building a volcano.
The Ways in Which a Volcano Can Get You!
Volcanic events can produce many different effects, so much so that they are grouped into primary and secondary.
Primary Effects

Tephra (pronounced “Tef-Raa”)—This is volcanic ash that is bigger than 2 mm in size. Anything smaller is classed as ash. It is normally erupted when magma breaks up due to explosions. It causes breathing difficulties and even suffocation, and can ground airplanes when their engines clog up with the ash.

Volcanic Gases—The gases released from volcanoes include water vapor, carbon dioxide, sulphur dioxide, hydrogen sulfide and carbon monoxide. They often kill off trees and plants and bring acid rain, so watch out!
Lava Flows—These destroy pretty much everything in their path. Fortunately, you can walk or drive away from them. These are actually the least life threatening.
Secondary Effects
If you think that having defied the above you will be okay, you must think again—these are only the beginning. You’ve also got lahars, volcanic landslides, tsunamis and jökulhlaups.
“Jökulhlaup” (pronounced “yoke-uhl-howp”) is the Icelandic word for dangerous floods. “Jökul” is the Icelandic word for glacier and the “hlaup” part means a flood. In other words, this is a really dangerous flood that happens when volcanoes erupt beneath glaciers. The sudden release of heat quickly melts the glacier and releases huge amounts of fast-flowing water.
Almost 60 percent of volcanic eruptions in Iceland occur beneath glacial ice. When they do, magma as hot as 2,192° F/1,200° C meets ice and boiling water. This creates an initial explosion of ice and fragmented rocks and then creates a sky full of electricity, toxic chemicals and ash! On the ground, the flowing river of water and debris can wipe out towns, bridges and power lines. In 1996, an eruption of the Grímsvötn volcano in Iceland caused a piece of glacier 4 mi. long, 328 ft. deep/6 km long, 100 m deep to melt. (That’s a lot of melting ice cubes!)
Back in 1918, an eruption at the Katla volcano caused steam to combine with tiny particles that poured out of the eruption, creating high static charges. This in turn caused lightning strikes several times a second. This phenomenon is reported to have caused the electrocution and death of hundreds of livestock grazing nearby.
A similar event to a jökulhlaups is a lahar. These are volcanic mudflows of ash and debris that have mixed with water. Basically, they are giant volcanic mudflows and occur when a volcanic eruption coincides with heavy rain or mixes with river water. This hot mixture can travel at great speeds. On steep slopes, speeds can reach up to 63 mi./101 km per hour! I know . . . this is not good! The truth is, you most likely won’t be able to outrun one of these. Lahars actually grow as they flow by picking up more rocks, vegetation and debris as they move. If a lahar gets you, it will sweep you away, suffocate you and then entomb you as the mud starts to solidify.
In 1985, the eruption of the Nevado del Ruiz volcano in Colombia caused a lahar that ripped through the town of Armero, killing more than 23,000 people in one night.
Survival Tips
In truth, these are very fast moving and often provide little warning but here are some steps to take for survival:
-
Listen for local reports of imminent volcanic eruptions. Volcanoes are one of the hazards that give out a number of warning signs, including releasing gas and making local water more acidic. They also begin to release smoke and ash, the temperatures rise near the volcano, and scientists can even monitor the swelling or “bulging” in a volcano when it is due to erupt.
-
In the case of a lahar, one ingredient in the mix is heavy rain. Check local forecasts to ensure your expedition doesn’t coincide with a report for rain.
-
If you can plan your base while exploring a jökulhlaup or lahar-prone region, set up camp high on valley sides or away from the natural flow of water. This will ensure that the water and mud are diverted away from you.
-
If all else fails and you only have a short time to escape, don’t try to outrun it because you won’t be able to. Jump in any kind of vehicle and drive.
Young Scientist Activity Build a Lava Lamp
Many people wonder how the blobs and shapes in a lava lamp work. The answer is due to very basic scientific principles. This activity will show you how to make your very own lava lamp.
Equipment Needed:
| One bottle of vegetable oil |
| One large clear soda bottle |
| Alka-Seltzer tablets |
| One cup of water |
| Food coloring |
| One funnel |
Instructions:
-
Pour the cup of water into the bottle.
-
Now pour the bottle of vegetable oil into the bottle until it’s almost full.
-
Drop in a lot of drops of food coloring.
-
Take half an Alka-Seltzer and drop it into the bottle and watch things start to move!

Science Factoid
The oil and colored water do not mix, and this keeps the blobs of color and oil separated. The Alka-Seltzer tablet falls to the bottom of the bottle and begins fizzing. This breathes life into your bottle by creating air bubbles that rise to the top of the bottle, taking colored water with them. At the top of the bottle, the gas escapes and the water falls back to the bottom. You can keep the movement going by adding new tablets to your bottle.
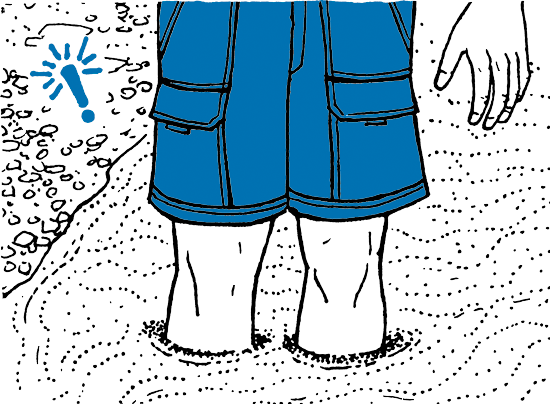
Quicksand
Any explorer worth his or her salt needs to be equipped to deal with unforeseen circumstances, and quicksand is a classic example of the hidden hazards adventurers have had to contend with since the times of cavemen. Moviemakers have long made us believe that quicksand is an undefeatable force of nature, while others have made out that it’s a living organism in itself. Neither of these myths is true, but you do need to know more about this strange substance and how it acts to defy it.
What Is Quicksand?
Quicksand can be found pretty much anywhere on the planet where the right conditions exist. You obviously need sand, but also a sufficient water supply to make the sand “super-saturated.” This normally happens where sand is held in a “pocket” made out of clay or any other material that does not allow water to drain away easily. This pocket of sand and water will appear like a solid material at first glance, but will act like a liquid when stepped on, and that’s one of its key dangers. If you do find yourself sinking into your worst nightmare, here are a few survival tips to help you out.
Survival Tips
-
Pressure is critical to surviving quicksand. Light pressure allows the quicksand to move like a liquid, whereas, heavy pressure causes the sand-water mixture to act as a solid. When an explorer steps on it lightly, the quicksand liquefies and the feet of the explorer begin to sink into it.
-
Don’t worry about getting sucked down into quicksand. Although you will sink when you first enter it, you will not sink over your head. At worst, you will end up chest deep. This is because humans are less dense than quicksand.
-
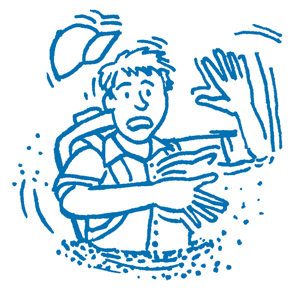
Don’t panic! An untrained explorer will begin to thrash around quickly, hoping to break free, only to find that now the quicksand is acting like a solid, encasing him or her even more firmly in the unpredictable substance. The more you struggle in it, the faster you will sink. If you just relax, your body will float.
-
Remove your backpack. Try to remove your backpack as soon as you enter the quicksand. This can add to your total weight and pull you farther down.
-
Just add water. Keep a container of water with you. Adding water around your waist or a trapped limb helps the quicksand to act more like water and will speed your release.
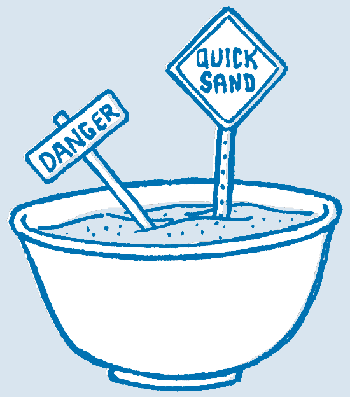
Young Scientist Activity Make Your Own Quicksand
Equipment Needed:
| A large mixing bowl |
| One packet of cornstarch |
| A large spoon or wooden spoon |
| Some water |
| Two cups (equal sized) |
Instructions:
-
The key to making the perfect quicksand is getting the thickness or consistency just right. First, take your large mixing bowl and pour in small amounts of water and cornstarch to form a mixture. You will use roughly 1/4 more cornstarch than water. For every cup of water you mix in, add 1-1/4 cups of cornstarch.
-
Now use your spoon to stir the mixture, starting slowly and then faster.
-
Stirring the mixture quickly will make it hard and allow you to punch or poke it quickly. This makes it act like a solid material. Stirring slowly will make your mixture more like a liquid. Presto! You’ve made your very own quicksand.
Science Factoid
Speed of movement is crucial in this experiment—if you move your hand slowly through your mixture, it will behave like a liquid. But if you try to move your hand through it quickly, it acts like a solid substance, which is just how real quicksand acts. This happens because the cornstarch grains are mixed up and can’t slide over each other due to the lack of water between them. Stirring slowly allows more water to get in between the cornstarch grains, letting them slide over each other much more easily and behave just like real quicksand.
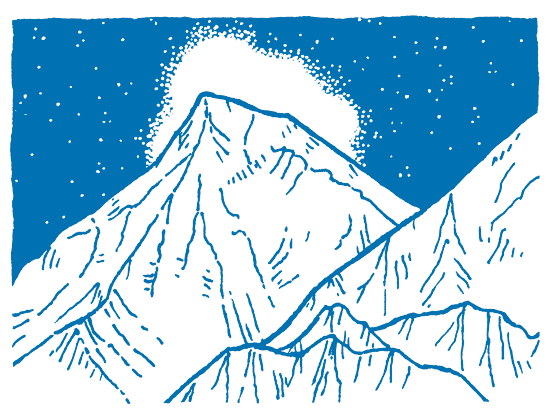
Massive Mountains
If freezing temperatures, complete isolation from everyone and the very strong possibility of your fingers and toes falling off sounds like fun, then mountains are the place for you! Earth’s mountain ranges are jagged towers of rock that can stretch into the skies for miles. For centuries, man has tried to scale these hostile giants—some have succeeded but many have failed.
The World’s Highest Mountain Peaks
Check out how big our biggest mountains really are and where you’ll find them, if you think you’re tough enough!
| Mountain | Continent | Height |
|---|---|---|
| Everest | Asia | 29,015 ft. (8,840 m) |
| Aconcagua | South America | 22,841 ft. (6,962 m) |
| McKinley | North America | 20,310 ft. (6,190 m) |
| Kilimanjaro | Africa | 19,341 ft. (5,895 m) |
| Elbrus | Europe | 18,510 ft. (5,642 m) |
| Vinson Massif | Antarctica | 16,470 ft. (4,890 m) |
| Puncak Jaya | Australasia | 16,024 ft. (4,884 m) |
What Are Mountains Made of?
Mountains are created by the following:
Eruptions—At plate margins, repeated volcanic eruptions can create and build new mountains.
Folds—This is the most common type of “mountain-building” process and occurs when two continental plates crash into one another and cause the Earth’s crust to buckle and fold upward.
Domes—These are rounded or dome-shaped mountains that have been forced up by large amounts of magma coming from the Earth’s mantle.
Faults—Occurs where cracks or “faults” in the Earth’s crust exist. The land near a fault will either rise or fall. If it rises, it creates what geographers call a “block mountain.”
Do Mountains Still Grow?
Yes! Some of the mountains on Earth are still growing and evidence has been found to show that they actually started out life at or below sea level. The Himalayas, the Alps and the Andes ranges have all been found to contain seashells dating back more than 18,000 years. The world’s highest mountain, Everest, is believed to be growing at a rate of .5 cm a year (the length of your baby fingernail). Currently measured at 29,035 ft./8,848 m, it is quite possible that future conquerors of Everest will have to climb slightly farther than those who reached its peak in the past.
Erosion—The Tool That Shapes, Scrapes and Smooths a Mountain
Once uplift, or growth, of a mountain ends, the erosive power of wind, water and ice set to work to create the wide variety of shapes we see in the mountains around the world. Mountain experts can tell the difference between a cirque, an arête and a pyramidal peak but can you? Here’s a quick guide:
Cirque—Meaning “circus” in French, is a hollow in the side of a mountain caused by a glacier tearing into it. It is said to be like a huge arena or a giant’s armchair, which explains the circus link.
Arête—Meaning “fishbone” in French, is a thin, knife-like ridge of rock that can form when two glaciers erode side by side. The arête is a thin ridge of rock that is left separating the two valleys. Arêtes can also form when two glacial cirques erode toward one another.
Pyramidal peaks—Also known as “glacial horns,” these are the jagged peaks and are formed when three or more cirques form on the sides of mountains. This makes them very steep and very dangerous.
Climbers Beware!
If what you’ve heard so far hasn’t put you off mountain climbing, then there’s always altitude sickness, snow blindness, oh, and the one we mentioned earlier, frostbite!
Altitude Sickness
The percentage of oxygen in the atmosphere at sea level is about 21 percent, and, as the altitude increases, the percentage remains the same but the number of oxygen molecules per breath is greatly reduced. At 12,000 ft./3,600 m there are roughly 40 percent fewer oxygen molecules per breath so the body must adjust to having less oxygen available.

The most common cause of altitude sickness is going too high too fast. If you take your time, your body will adapt to the decrease in oxygen. This is called “acclimatizing” and roughly takes one to three days at specific altitudes. For example, if you climb to 12,000 ft./3,600 m and spend several days at that altitude, your body will acclimatize to that elevation. If you then climb to 13,000 ft./3,962 m, you must acclimatize again, and so on. If you don’t take your time, then you’ve got trouble. Worst-case scenario, you’re looking at SAMS or HAPE. (These might sound like the names given to lovable clowns, but they can be fatal!)
SAMS (Severe Acute Mountain Sickness) and HAPE (High Altitude Pulmonary Edema) both can cause tiredness and confusion but the latter can result in death.
Snow Blindness
This can be a nasty one! It is caused by UV (ultraviolet) radiation exposure, which is high in mountainous areas. The UV rays are reflected off sheets of snow or ice, but the higher you climb on a mountain the bigger your risk. Specialists say that at every thousand feet above sea level, the intensity of UV rays increases by 4 percent. This is because there is less atmospheric filtering at high altitudes.
You may not experience the symptoms right away. Your eyes may appear bloodshot and there may be a gradual increase in tears. Pain will gradually worsen and it may feel like there is grit in your eyes. Eyes may swell to such an extent that they shut, but eventually you will be able to see again as the symptoms subside—just be sure not to touch or rub your eyes!
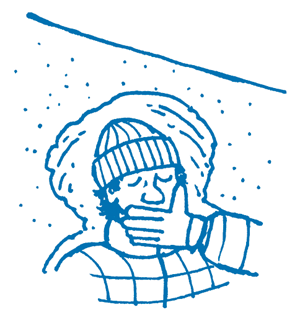
Frostbite
Frostbite is the freezing of skin and other tissues. It can happen if you are exposed to temperatures below freezing without proper protection. Prevention of frostbite is straightforward by the use of appropriate clothing, keeping the extremities warm and dry, and by eating high-energy foods and warm drinks—good luck, explorer!
The Presidents’ Rock
Mount Rushmore in South Dakota in the United States is a safer type of mountain in many ways, but it is truly unique because the huge rock face has the heads of four past presidents carved into it. Each of the massive monuments measures over 60 ft./18 m in height. That’s just like having your photograph blown up and plastered onto an image as tall as four London double-decker buses stacked on top of one another!

A nice and easy way to remember the place and names of the presidents is with a clever mnemonic—a mnemonic (pronounced “new-mon-ic”) is a cunning trick used by English teachers to help people remember lists or things. It works when you create a sentence using the same letters in the same order of the things you need to remember.
For example: My Really Heavy Wellies Just Love Rain, which stands for: Mount Rushmore Houses Washington Jefferson Lincoln Roosevelt.

Basic Kit You’ll Need in the Mountains
-
Never leave planning and packing to the last minute; pack a few days before your expedition. This will give you time to check for everything.
-
Dryness is critical. Pack your emergency survival gear into a separate, waterproof bag to ensure everything is together and not exposed to the elements. This is particularly important when packing the essentials for fire such as matches and straw.
-
Have the basics. All good explorers should carry a map of the area they are visiting and a compass (most cell phones now have one as standard).
-
Prioritize. The simplest way to remember all the things you need is to prioritize from the most essential items and work down. Food, fluids, warm clothing, hiking boots, etc., should be first on your agenda, and also include a first-aid kit.
-
Prepare for sun hazard. As mentioned earlier, snow blindness is common on mountaintops, but aside from sunglasses, you’ll also need sunblock and lip balm.
-
Remember tools and emergency items. A Swiss Army Knife contains many items including a corkscrew and bottle opener. Pack other items as necessary such as ropes, harnesses and zip lines. Remember to pack mirrors and whistles in case you need to signal for help.
See you at the top!

Iceberg Assaults
Some people don’t really understand just how dangerous icebergs can be and many ignore them as uninteresting chunks of floating ice—giant ice cubes basically. But there is so much to learn about icebergs, and they can be deceptively dangerous.
Science Factoid
Did you know that icebergs can quite literally explode and shatter? In doing so, they fire extremely sharp shards of ice into the air around them in what can be huge natural explosions.
Icebergs for Beginners
Here a few facts about icebergs:
-
Icebergs start out life as part of a glacier. Glaciers are enormous bodies of ice and snow. They can be hundreds of miles long and thousands of feet deep.
-
An iceberg occurs when an individual piece of ice separates from the glacier. This is what scientists call “calving”—a process that can also be dangerous to those nearby, since huge ice blocks crash into the ocean and generate enormous waves.
-
Icebergs can float because they are less dense than water.
-
Icebergs are classified into six different categories, with “growlers” being the smallest; then “bergy bits,” which are about the size of an average house; and then the remaining four groups, which are simply small, medium, large and very large.
-
The largest iceberg recorded in recent years broke off the Antarctica ice shelf in March 2000. Named by scientist as B-15, it was approximately 4,500 mi2/11,655 km2, which is almost the size of Connecticut.
Is Your Iceberg All White?
Believe it or not, icebergs come in different colors. Yes, this is not a joke! Although the majority of icebergs on the planet end up being white, they also come in blue and green.
Almost all icebergs on the planet start out blue, which is the color of glacial ice that has been greatly compressed. They begin to turn white after going through a couple of periods of repeated freezing and thawing.
A rarer sight are green bergs, which originate from Antarctica and get their strange color from coming into contact with dissolved minerals over hundreds of years.
Survival Tips
Most of us know the story of the Titanic, which was described as being “unsinkable” when first built in Belfast, Ireland, only to be struck down by an iceberg on its first voyage in 1912. The ship brushed the side of an iceberg, ripping it open, sinking the ship and killing 1,500 people. Since then, huge strides have been made to ensure human survival against iceberg events:
-
The International Ice Patrol is a force that monitors waters deemed to be at threat from icebergs. It provides information and warning to vessels sailing in dangerous regions to ensure survival.
-
“Iceberg alley” off the coast of Newfoundland, Canada, is now identified as an area of major iceberg activity.
-
New technologies have reduced iceberg casualties in recent years. Ships now have radar systems that can detect icebergs even in thick fog.
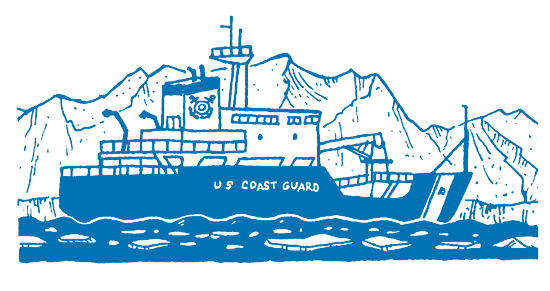
-
Tracking and destroying—The U.S. Coast Guard has even put sensors on icebergs or spray painted them in order to track their movements. If an iceberg is thought to be too big or problematic, fighter planes can be deployed to drop bombs on them and blow them up.
-
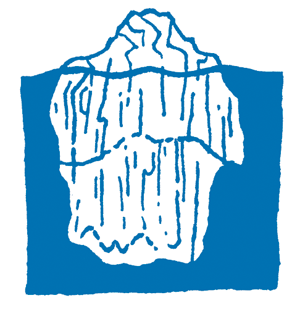
The main dangers with icebergs are their odd shapes and the fact that most of their mass is below the water line, unseen to intrepid explorers and sailors. You may have heard the old saying: “It’s just the tip of the iceberg.” This refers to the fact that the tip you can see is actually only a small piece of the total berg. Most icebergs vary between this simple math equation: 1/6 and 1/9. In other words, the actual total size of an iceberg can be estimated from the visible piece above the water mark and then multiplying this by 6 or 9 times. This will give you a good gauge of what you are dealing with.
-

Exploding icebergs—even without the use of bombs, icebergs can explode naturally. As they continue to melt, the internal structure can become too weak to support its own weight. This can result in very dramatic explosions of ice shards in all directions, so watch out!
-
If you do manage to overcome the dangers posed by icebergs and happen to secure one for yourself, don’t count on hanging onto it for too long. Most icebergs will melt completely within three to six years.

Dastardly Deserts
Most people are downright daft about deserts. If you are one of these people, it’s probably not your fault. Most likely it’s due to a combination of terrible teachers, aimless authors and misguided moviemakers. You see, when someone says “desert,” most of us automatically think of heat, sand, camels and cacti. The reality is slightly different.
Deserts are not named so because of their hot temperatures. They are called deserts because of a lack of water or moisture, and planet Earth has many cold deserts as well as hot ones. For example, the Atacama Desert in Chile is considered the driest place on Earth and is rather cold for a desert, with daily temperatures ranging from 32 to 77° F/0 to 25° C. Deserts are defined as areas with an average annual precipitation of less than 10 in./25 cm per year, or as areas where more water is lost by evaporation and transpiration (science-speak for the moisture given off by plants) than falls as rain.
Largest Deserts
Below are the top ten largest deserts on Earth:
| Desert | Continent | Size |
|---|---|---|
| Antarctic | Antarctica | 5,400,000 mi2 (14,000,000 km2) |
| Arctic | Arctic | 5,427,000 mi2 (14,056,000 km2) |
| Sahara | Africa | 3,320,000 mi2 (9,100,000 km2) |
| Arabian | Asia | 900,000 mi2 (2,330,000 km2) |
| Gobi | Asia | 500,000 mi2 (1,300,000 km2) |
| Kalahari | Africa | 361,000 mi2 (900,000 km2) |
| Patagonian | South America | 253,000 mi2 (650,000 km2) |
| Great Victoria | Australia | 250,000 mi2 (647,000 km2) |
| Syrian | Asia | 200,000 mi2 (520,000 km2) |
| Great Basin | North America | 190,000 mi2 (492,000 km2) |
The deserts of the world occur on every continent including Antarctica, but most are found in the center or to the west of continents between 15 and 30 degrees north and south of the equator. The largest hot desert is the Sahara in northern Africa, covering more than 3 million mi2/4 million km2 and crossing twelve countries.
Desert Types
Deserts are named and created in different ways, normally by where they are located and the main pattern of weather that occurs at that location. There are trade-wind deserts, mid-latitude deserts, deserts formed behind mountains, coastal deserts, high-altitude deserts and, of course, polar deserts.
Let’s have a look at how they form.
Trade-Wind Deserts—The trade winds are found north and south of the equator. They pick up heat as they move back toward the equator. These dry winds remove moisture and cloud cover, which allows even more sunlight to heat the land. Most of the major deserts of the world lie in these areas. The world’s largest desert, the Sahara of North Africa, has experienced seriously hot temperatures as high as 135° F/57° C. It is a trade-wind desert.
Rain Shadow Deserts—Rain shadow deserts are formed because tall mountain ranges prevent clouds filled with moisture from reaching areas on the far or protected side of mountain ranges. As hot air rises over the mountains, it condenses and produces rain, thus losing or using up its moisture content. The desert then forms in the rain “shadow” of the range because no moisture remains.
Coastal Deserts—Found mainly on the western sides of continents near the Tropics of Cancer and Capricorn. Coastal deserts are complex because they are created by interactions between the land, oceans and weather. A coastal desert, the Atacama of South America, is the Earth’s driest desert. In the Atacama, measurable rainfall is less than .01 cm per year, but some places have not had rain for more than 400 years.
Mid-Latitude Deserts—These are found between 30 and 50 degrees north and south of the equator. These deserts are found near the center of continents and far away from oceans. They have a wide range of annual temperatures and can get very hot and also very cold. The Sonoran Desert, which borders the United States and Mexico, is a typical mid-latitude desert.
Montane Deserts—These are dry places with a very high altitude, such as several parts of the Himalayan mountain range. Many deserts within this category are higher than 10,000 ft./3,000 m. These places have an average annual precipitation of less than 1.5 in./4 cm and are normally very cold.
Polar Desert—Areas with annual precipitation less than 9.8 in./25 cm and a mean temperature during the warmest month of less than 50° F/10° C. Sand dunes are not the main features in these types of desert; ice and snow are the common occurrence.
Survival Tips
Deserts are hostile and potentially deadly environments. If you find yourself in any type of desert, you will need to be well prepared.
-
In hot deserts, high temperatures can cause rapid loss of water due to sweating. A lack of sufficient water supplies or sources of water can lead to dehydration and hyperthermia. Hyperthermia can occur when the body cannot cool its core temperature and overheats. Watch out for some of the signs, which include headaches, dizziness, cramps, weakened breathing and a body temperature close to or above 104° F/40° C. If untreated, hyperthermia can result in death. To prevent this, your main priority is to cool down the patient and reduce body temperature. Apply a cool cloth. Never use ice or very cold water as this could result in a thermal shock, which could kill. Keep the patient in a shaded, well-ventilated area and ensure that the cloth remains wet. When the temperature falls below 100° F/38° C, you can remove the cloth, but if the temperature begins to rise again, reapply it.
-
In cold deserts, hypothermia (the opposite of hyperthermia) and frostbite are the main problems, as well as dehydration. A lack of heat to melt the abundant ice means you are without a water supply.
-
Falling through ice layers into freezing water is a particular danger requiring emergency action to prevent rapid hypothermia, where the core body temperature drops rapidly. The patient will begin to shiver and become disorientated. In some cases, the person is so confused he may even begin to remove clothing, which only increases heat loss. To save the patient, you should shelter him away from sources of cold. Remove any wet clothing and begin rewarming the patient by giving additional clothing, hot drinks and additional heating, if possible.
Deadly Desert Dwellers
If you manage to defy all of this, you have done well but are not out of the woods (or desert) yet. Planet Earth has some very well adapted beauties to unleash on you in the desert.
The Death Stalker or Palestinian Yellow Scorpion

This dweller grows to around 4.5 in./11.5 cm and appears very delicate compared to more heavily armored scorpions—but don’t be fooled. The native of North Africa and Middle East deserts has venom that packs a punch. While not powerful enough to kill a healthy human adult, the young, elderly or those with health problems are at greater risk. A single sting can trigger a life-threatening allergic reaction.
The Horned Desert Viper
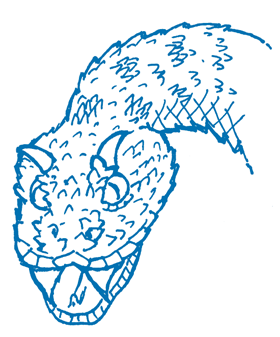
This may appear to be quite cute with its distinctive horns at the front of its head but make no mistake—this guy is very well adapted to the desert environment and is also known as the sidewinder because of its movement across sand in a sideways fashion. Again, the venom of this creature is not deadly but it will set you back with vomiting, nausea, swollen limbs and even internal bleeding.
Inland Taipan

A native of Australia, this snake is actually quite shy but can be very aggressive if threatened. Its color varies depending on the season, and it can change from a rich brown to an olive green. On average, the taipan measures 6 ft./1.8 m in length. The AVRU (Australian Venom Research Unit) has ranked it as the most venomous snake on Earth, and before the development of an anti-venom in 1955, 90 percent of bites were said to be fatal in humans. Once bitten, the venom can potentially kill in forty-five minutes if anti-venom is not given.
Science Factoid
In hot deserts, temperatures can be so high that raindrops can often evaporate before they have the chance to hit the ground.

Massive Mass Movements
Fortunately, you now know that planet Earth is stronger than humans. This critical fact, mixed with your desire to conquer everything on the planet, puts you right in nature’s firing line. So, paying close attention to this chapter could be the difference between you covering yourself in glory or covering yourself in snow, mud or rocks.
Take gravity, for instance. It may appear a very basic force that makes apples fall from trees, but it can generate some truly massive movements of soil, rock, water, ice and snow. Under the weight of gravity, materials can move rapidly downhill, and the deadly effects are greatly increased in high mountain areas so . . . beware!
The three main categories of mass movements are avalanches, landslides and rock falls.
The frequency of these hazards is increasing due to population growth and pressure for space, forcing more people onto slopes and hillsides that could be unstable. This is especially true in poorer countries where huge developments of often illegal and poorly built towns seem to sprout up overnight.
Avalanches
Avalanches are the movement of snow and ice. They can move seriously fast. They are the most rapidly moving of all mass movements and are made up of snow but also rocks, ice and water. Several basic things must occur for an avalanche to happen:
-
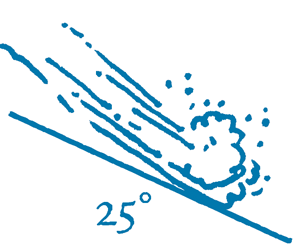
A hill or mountain has a slope of at least 25 degrees. Any less and the snow will not slide downhill.
-
There is an increase in the weight of snow on steep slopes following a heavy snowfall or some spring rainfall.
-
Snow tends to build up in layers just like a cake. A weaker layer can develop due to continuous thawing and re-freezing. This eventually destabilizes the built-up snowfield.
-
All you need now is a trigger, which can be as large as an earthquake or as small as a skier.
Once an avalanche has been triggered, I’m afraid the statistics are not in your favor. Between 55 and 65 percent of people buried in the open during an avalanche are killed. This figure rises to 80 percent once the hour mark is reached.
The snow will start to slide at first but soon builds up enough speed to make the snow tumble. As the wave of snow builds speed, it can travel at speeds in excess of 60 mi./96 km per hour; however, some can travel even faster. “Powder snow” avalanches are the largest and most powerful, reaching speeds of 180 mi./289 km per hour. In large avalanches, the sheer volume of moving snow actually creates hurricane force winds that travel in front of the snow and have the power to rip roofs off houses and tear trees out of the ground.
Survival Tips
-
Check out the forecasts for your area and see if any avalanches are expected there. If a warning is issued, listen to it and go home.
-
Luckily, the management of avalanches is improving all the time and some avalanches do give warnings. If this is the case, the threat can be reduced using snow fences to trap movement, planting trees and even using explosions to remove the threat . . . KABOOM!
-
Groups should spread out as they cross a mountain. This will improve the survival chances and should ensure that there are some people free to search for those trapped.
-
If you find yourself being carried by the snow in an avalanche, use a swimming motion. This may help keep you as close to the surface of the snow as possible, increasing your rescue chances.
-
Ditch as much equipment as possible. It will hold you down and hinder you from “swimming” at or near the surface of the snow.
-
As the avalanche begins to slow and stop, you should move your head from side to side and backward and forward. Then cover your mouth with one hand. This will help create a “breathe space” before the snow fully compacts. Similarly, you should take a deep breath at this point and hold it. This will allow for chest expansion.
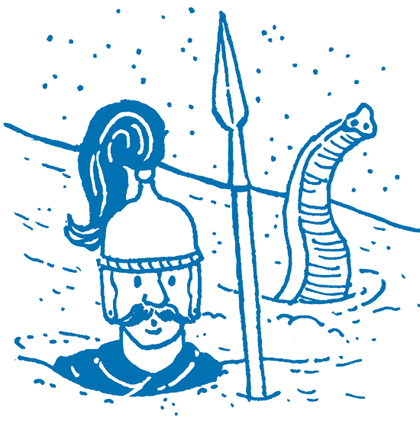
TRIVIA Angry Avalanches
-
Records show that the feared warrior Hannibal lost around 18,000 men to avalanches in 218 BC as he crossed the alps to fight the Romans. It is also reported that he lost 2,000 horses and many elephants.
-
In the Italian Alps between 1915 and 1918, it’s estimated that 60,000 soldiers fighting in World War I lost their lives to avalanches. Troops often bombed snowfields above the enemy to create avalanches to use as weapons against them.
-
In Ranrahirca, Peru, in 1962, a single avalanche killed nearly 4,000 people.
-
On February 23, 1999, an avalanche destroyed the Austrian town of Galtür; 31 people were killed.
-
On February 9, 1999, in the ski resort of Montroc near Chamonix, France, a large avalanche killed 12 people.
Landslides: Super Slow or Super Whoa?
Landslides are the movement of rock and soil.
Believe it or not, some mass movements are very slow affairs and aren’t really that exciting. For example, soil creep does just that—it creeps at a rate of less than 1 cm and as such we are not going to focus on slow movements. Instead, we will concentrate on landslides, but even they can be classed from very slow to extremely rapid. These categories have speeds that vary from a snail’s pace of 0.19 ft./ 0.06 m per year to a whooping 10 ft./3 m per second!
Some of the key ingredients that cause landslides are earthquakes and prolonged rainfall, which saturates (fills it up) soil and makes it heavier and more lubricated. The underlying rock beneath the soil or surface rocks is important because it acts like a slide itself. The rock type is also crucial, since broken rock is more likely to move than solid material.
Human activity doesn’t help either. More houses, buildings and roads add more weight to the slopes. Combine this with digging and drilling for construction and slopes are made even more unstable. In some places, deforestation has left soils and rock exposed to the elements, which often causes dangerous mudflows.
TRIVIA
-
Piave Valley, Italy, 1963. A huge rockslide slid into the reservoir and created a wave 230 ft./70 m high, which rose above the dam and down the valley where it destroyed the town of Longarone and killed around 2,000 people.
-
In May 1970, a large earthquake shook parts of Peru and loosened a chunk of ice and snow near the top of the Huascaran Mountain. Ice and snow fell almost 10,000 ft./3,000 m and triggered an avalanche that was estimated to have hit the village of Yungay at 300 mi./480 km per hour. When rescuers eventually reached the town three days later, the town was buried beneath 100 ft./30 m of rock and debris and there were very few survivors from the town’s 20,000 people.
-
In northern Venezuela in 1999, a combination of very heavy rainfall and the exposed soils caused by deforestation led to a deadly combination of land and mudslides in which almost 30,000 people died and almost half a million people were made homeless.
Survival Tips
-
Some slides have warning signs—look out for bulging walls, bowed fences and loud cracking noises.
-
Get away from low areas—gravity is the key here and rocks and mud slide downhill. If a landslide is on its way, get to the highest point in the area that is farthest away from the landslide.
-
If you are indoors, you are only safe in a structurally sound building. Lower floors can be swamped with debris. It’s best to get as high as you can, as soon as you can.
-
Get a shield—if you are outdoors, you will need a large and strong shield. Your best hope is to position yourself behind a large building or in a structure like a cave.
-
Last options—If there are no buildings or structures in sight, then hide behind a large object to protect you from the flow. Any object that could redirect or obstruct the flow will be better to hide behind, such as a strong fence or large boulder.
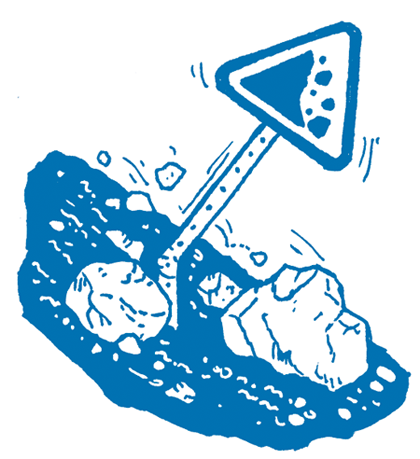
Rock Falls
Rock falls are the movement of a single rock or groups of rocks.
Rock falls are classed as “on-going risks” because a rock or a bunch of them can be dislodged at any time. Thankfully, they are very rare and require very steep slopes with an angle of more than 40 degrees. Once a rock has broken off, it will either fall vertically or bounce to the foot of a slope, which is very difficult to plan for or avoid. Rock on!
Pyroclastic “Bombs”
Pyroclastic flows, which are mentioned earlier in the volcano chapter, are absolutely deadly! They are comprised of hot rock fragments, lava particles, ash and hot gases. Pyroclastic material can often be seen traveling as an ominous nuée ardente, which is French for “glowing cloud.” These are spectacular and potentially lethal clouds traveling at speeds of 450 mi./724 km per hour and containing pyroclastic bombs as big as a house that are heated to 1,472° F/800° C. These have the capacity to blast, scorch and smother everything in their way!
Pyroclastic Perils
-
In 1902, on the Caribbean island of Martinique, the volcano of Mount Pelée erupted violently. The eruption created several nuée ardentes that rapidly swept down the sides of the mountain toward the main port, killing all but two of the town’s 28,000 residents with heat and choking gases. Both survivors had severe burns to their bodies.
-

Centuries after the eruption of Mount Vesuvius in southern Italy, which buried the town of Pompeii, scientists uncovered the town to find buried residents had covered their mouths to shield themselves from the gases and ash.
-
A pyroclastic flow from Mount Unzen, in Japan, in 1991 killed 43 people by engulfing them completely.
-
Volcanic bombs are another hazard common to pyroclastic flows. These are heated rock fragments that are larger than 2.5 in./65 mm in diameter. These can cause severe injuries and death to people near an eruption zone. In 1993, an eruption of “bombs” at the Galeras volcano in Colombia killed six people near the volcano top and seriously injured several others.
TRIVIA Pyroclastic bombs are named by their shape. There are “almond,” “bread crust,” and “cow pie” bombs as well as others.
Survival Tips
As with other volcanic hazards, make sure you’ve done your homework and compile a safety checklist:
-
Do your research—Is the volcano active at the moment? Is it due for an eruption soon? Do its eruptions normally produce pyroclastic flows?
-
Assess the terrain—These hazards flow down volcano sides “hugging” the ground and traveling to lower points. It is best to avoid areas of low sea level and valley floors.
-
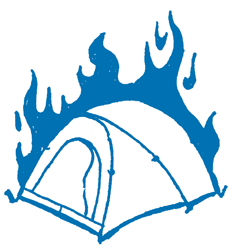
Find safe haven—If you are in a tent, everything will be scorched and burned. Have a back-up plan such as a large cave or building to get deep inside. A wooden building is useless as it will be torched like any other flammable item. This still won’t totally guarantee survival as toxic gases may enter your haven. One survivor of such an event claimed he held his breath while the toxic cloud passed by.
-
After the event—If you are fortunate enough to get through this, be careful. The few survivors of these events have often ventured outside too soon, resulting in badly burned feet as they pass over charred materials. Even your shoes will melt. It’s best to wait a while until temperatures cool.
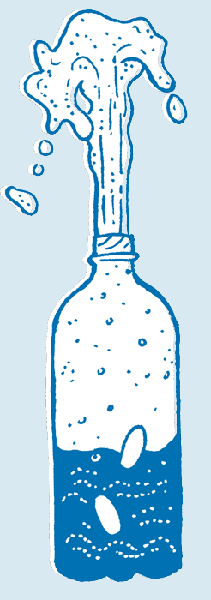
Young Scientist Activity How To Make Your Own Volcanic Eruption
Also known as the “Cola and Mentos” eruption, this experiment is not only popular but massively successful in generating a huge bubbling eruption—so much so that it is best performed outdoors unless, of course, you want to cover mom’s house in cola from ceiling to floor, which is not a good plan.
Equipment Needed:
| A large bottle of cola (some say diet cola produces even better results) |
| Half a pack of Mentos mints |
| A kitchen funnel or tube (not essential but makes transfer of the Mentos into the cola much easier) |
Instructions:
-
Again, it is best to make sure you are doing this experiment in a place where you won’t get in trouble for getting cola everywhere. Outdoors is best.
-
Place your large cola bottle on a flat piece of ground or a stable surface like a board. Place it upright and unscrew the lid. If you have a funnel or tube, place it into the top of the bottle’s neck. (This makes it easier to drop the Mentos into the cola.) Otherwise, this part of the experiment can become difficult and you may not be able to guide all the Mentos into the bottle.
-
Now, drop the Mentos into the cola and get clear! If done correctly, you should have created an enormous eruption of cola flying out of the bottle. It’s a very impressive sight, with some experiments reaching about 30 ft./9 m high!
Science Factoid
Opinions about the exact science behind how this experiment works vary, but most people agree that it is the combination of CO2 in the cola reacting vigorously with the little dimples found on Mentos candy pieces.
The thing that makes soda drinks bubbly is the CO2 that is pumped into them at the factory. This gas doesn’t get released from the liquid until you pour it into a glass and drink it. Some also gets released when you open the lid (more if you shake it up beforehand). This means that there is a whole lot of CO2 gas just waiting to escape the liquid in the form of bubbles.
Dropping something into the diet cola speeds up this process by both breaking the surface tension of the liquid and also allowing bubbles to form on the surface area of the Mentos. Mentos candy pieces are covered in tiny dimples (a bit like a golf ball), which dramatically increases the surface area and allows a huge amount of bubbles to form around them. This combination of features means that when these two products are thrown together, there is an immediate release of a huge number of bubbles and a massive eruption.
Subterranean Surprises
What Do We Mean by Subterranean?
The word “subterranean” comes from two words. “Sub” means below or underneath. “Terrain” means ground. Simply put them together and you’ve got underground. Some of the best exploration is found underground mainly because these areas are dark, secretive and largely undiscovered. Having said that, for thousands of years a good number of humans made their homes in caves. They not only provided shelter from the weather but they were a safe haven from an enemy attack. Where would cavemen have been without caves?
TRIVIA Speleology is the science of exploration and the study of all elements of caves and the environments that surround them.
How Do Caves Form?
Caves form in many ways—some are found in cliffs at the coast and have been chipped away by pounding waves. Others form where a lava tube’s outer surface cools and hardens and the inside of the molten rock drains away. Caves can even form in glaciers where the meltwater carves tunnels at the beginning of its journey to the sea.
Most underground caves, however, form in karst—a type of landscape made of limestone, dolomite and gypsum rocks that slowly dissolves due to water that is slightly acidic.
Rain + CO2 = Dissolved Rock
The rain mixes with CO2 in the atmosphere as it falls to the ground and then picks up more of the gas as it seeps into the soil. The combination is a weak acid that can dissolve calcite, which is the main mineral of karst rocks.
The acidic water percolates down into the Earth through cracks and fractures and creates a network of passages like a giant underground plumbing system. The passages widen as more water seeps down, allowing even more water to flow through them. Eventually, some of the passages become large enough to earn the distinction of becoming a cave, but this doesn’t happen overnight. These features can take more than 100,000 years to widen large enough to hold a single human being.
This process is similar to that of acid rain, which erodes and badly disfigures limestone buildings, monuments and statues.

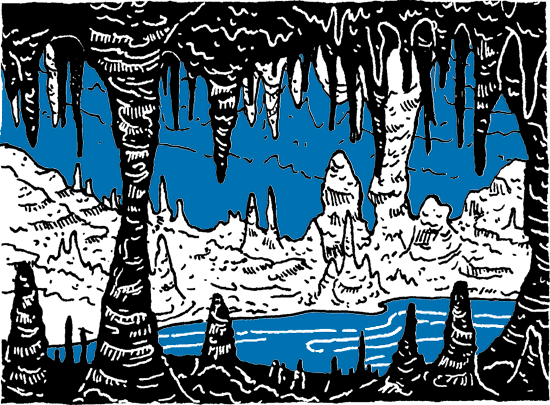
Strange Features
Hidden in the darkness of caves are all manner of rock formations!

The icicle-shaped formations are called stalactites and form as water drips from the cave roof. Stalagmites grow up from the floor, usually from the water that drips off the end of stalactites. Columns form where stalactites and stalagmites join. Sheets of calcite growths on cave walls and floors are called flowstones. Other stalactites take the form of draperies and soda straws. Twisty shapes called helictites warp in all directions from the ceiling, walls and floor.
People often have difficulties remembering the difference between stalagmites and stalactites, but there is an old rhyme that might help you:
“When the tights (tites) go down, the mites go up.”
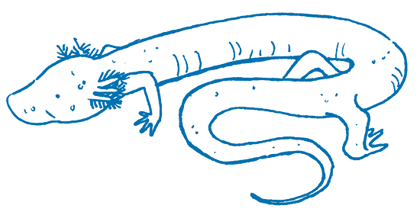
Crazy Cave Dwellers!
Many cave species have evolved very differently to those on the surface. Many are blind because of the lack of light. Most permanent cave dwellers lack any color in their skin because they have no pigment. Recently, many new animal species were discovered in a cave near Israel, including freshwater and saltwater creatures living in the same cave.
You must not confuse your cave-dwelling creatures! Troglobites are species that live in caves all the time, whereas troglophiles are species that can live their entire lives in caves but also occur in other environments. There are also trogloxenes, which are species that use caves but cannot complete their life cycle wholly housed away in a cave.
Watch Your Step, Boy!
If you are even walking on the surface of a karst limestone pavement, you must be very careful. Even if you defy the clints and grikes (the deep gashes and blocks that lie on karst surfaces) without getting a twisted ankle, you need to be wary of much greater risks such as vanishing streams and swallow holes. These are, of course, surface streams that literally disappear through gaps in the rock, and they do so by creating huge openings called swallow holes. These may be in the roof of huge caverns, and you really don’t want to drop down one of these. In Yorkshire, England, there is a swallow hole christened “Gaping Gill” that has a 110-m drop. That’s more than 360 ft. down!
In the past, people have foolishly built on karst limestone. Caverns often form beneath the surface and are not detected until it is too late. In Florida in 1981, a house and six cars fell into an undetected cavern when the roof of the cavern caved in. The hole left was more than 650 ft./198 m wide (about the length of two football fields) and more than 160 ft./48 m deep (that’s almost the height of the Horseshoe Falls at Niagara).
TRIVIA Agartha is a legendary city that is said to reside in the Earth’s core. It is related to the belief in a hollow Earth that is accessible to people. Much has been written about Agartha and the city is a key teaching in Buddhism. There are differing ideas about where this society is located, but many stories place it in central Asia, north of Tibet, and only those who are truly pure in spirit will be granted entrance to it.
Dixia Cheng, the underground city in Beijing, is a relic of the Chinese-Soviet border conflict in 1969—a time when Chairman Mao ordered the construction of subterranean bomb shelters in case of nuclear attack. The tunnels, which were built from 1969 to 1979, cover more than 18 mi./29 km and are found 26–60 ft./8–18 m under the surface. This impressive construction includes nearly a thousand anti-air raid structures.
Subterranean dwellers would not have died of boredom either. Classrooms were constructed for children, who lived in the underground city, and amenities like those found aboveground—like movie theaters, barbershops and restaurants—were found.
Young Scientist Activity The Dissolvable Eggshell
This experiment needs time and a lot of patience but the science behind it is really cool.
Equipment Needed:
| A container or beaker |
| One raw egg |
| Vinegar |
Instructions:
-
Place your egg into the container or beaker.
-
Cover the egg completely with the vinegar.
-
Now comes the hard part—leave the egg for one whole week.
-
Return to your egg and lift it out. What do you notice?

Science Factoid
The vinegar is an acid and it reacts with the eggshell, which is made from calcium carbonate. The vinegar breaks the eggshell into its separate calcium and carbonate parts, literally dissolving the shell.
Petrifying Poles
You may have heard the old saying “We’re poles apart,” meaning two people couldn’t be any farther apart if they tried. The North and South Poles work in exactly the same way. Yes, of course, one is on top of the planet and one is on the bottom, but if you take a closer look there is so much more that sets the North and South Poles apart from each other.
The North Pole, or the Arctic, is a frozen ocean surrounded by continents while the South Pole, or Antarctic, is a frozen continent surrounded by ocean. Even the names of the poles are opposite—the Ancient Greeks knew Antarctica was there despite never having seen it. They simply believed it had to be there to balance the North Pole. They called it “Anti-Arkitos,” or “opposite.”
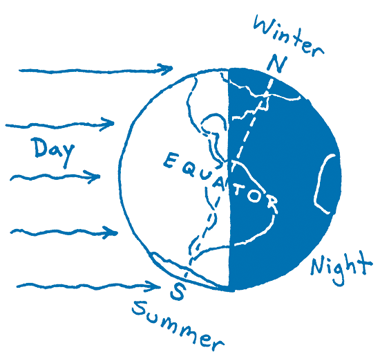
If you needed any further proof of these polar opposites, just look at their reversed seasons—due to tilt of the Earth’s axis, it is summertime in the Arctic and winter in Antarctica, and vice versa.
Honey, I’ve Just Had a Reaaaallllllyyyy Long Day!
At the North and South Poles, a day can last up to six months and a night can be just as long. This happens because the Earth’s axis tilts at an angle of a little under 23.5 degrees. As it spins, the top of the axis points at the sun for six months and then away. That means that at the extreme north and south, the poles may have the sun in the sky for six months without setting, or, in winter, six months without a sunrise. Farther out near the Arctic and Antarctic circles, places are not affected as much and may only experience a single day of complete sunlight or darkness.
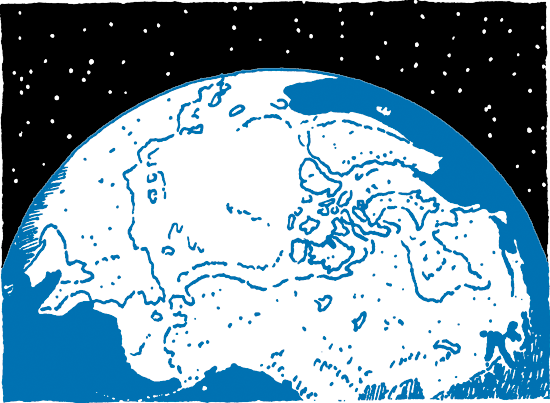
The Ice Caps: Earth’s Very Own Sunglasses
Strange as it may sound, the ice caps at the top and bottom of the planet with their freezing temperatures help keep the human race at just the right temperature to be livable—this is part of nature’s clever cooling system.
At the equator, the sun is directly overhead and that’s why it receives the most sunlight. At the poles, the overhead sun is at a much lower angle and the energy received is low. This is because energy has much more atmosphere to pass through at the poles so more is lost or scattered or reflected.

On top of that, the poles are a design masterpiece—they are colored white for a reason and maximize their albedo. What did you say? The term “albedo” (pronounced “al-bee-doh”) is scientists’ way of describing how reflective the different surfaces on planet Earth are.
Earth’s oceans and dark-colored soils are not good at reflecting the sun and have a very low albedo, only about 10 percent. Fresh snow is quite the opposite and has a high albedo or reflectivity, around 85 percent or more. This means that the North and South Poles act like giant mirrors or sunglasses that reflect most of the sunlight they receive back into the atmosphere and help keep us at just the right temperature.
North Pole Factoids
-
Over half the Arctic Ocean is covered in sea ice that is 10 ft./3 m thick.
-
Many explorers and scientists believed the Arctic was like Antarctica and was a thick layer of ice on a vast continent, but in 1958 submariners (people who use submarines) sailed right under the ice cap and came out the other side.
-
The North Pole has a latitude of 90 degrees and a longitude of 0 degrees.
-
Classed as “the warm pole,” the Arctic summer temperatures can rise well above freezing while winter days can average -86° F/-30° C.
South Pole Factoids
-
Antarctica is roughly one and a half times the size of Europe and around sixty times bigger than the U.K. (Don’t get lost!)
-
The continent of Antarctica is the only continent on Earth with no “indigenous” people—fancy-speak for “locals.” There are a few thousand research scientists who have set up bases to study the continent, but no one really goes there to live.
-
It is the coldest, windiest, highest and driest continent on Earth—Antarctica is technically a frozen desert.
-
If all Antarctic ice were to melt, the sea level would rise almost 200 ft./60 m.
-
The coldest temperature recorded at any place on Earth was the Vostok Station, Antarctica, in July 1983. The temperature fell to -192° F/-89° C.
Polar Tough Guys
You need to be extremely tough and really well adapted to defy the polar regions. Let’s take one contender from each of the icy poles and see who is the toughest. Representing the Arctic is the polar bear. The Antarctic tough cookie is the emperor penguin.
The polar bear is the largest land carnivore on Earth. An adult male can measure 10 ft./3 m and weigh around 770–1,500 lbs./350–680 kg. Polar bears are amazingly adapted to defy cold temperatures as well as move across snow, ice and open water. Their coats appear ivory or snow-white in color, allowing all visible light to be reflected while their outer hairs, or “guard hairs,” are actually clear and hollow. This fabulous design means that a polar bear’s coat releases almost no heat—so much so that the bear can’t even be seen by infrared camera! The polar bear is an accomplished swimmer and can swim up to 50 mi./80 km without resting. This is aided by a 4-in./10-cm layer of fat beneath the skin that not only insulates but gives buoyancy to aid in swimming. In winter, polar bears must endure average temperatures of -86° F/-30° C and also find food to stay alive. They will travel across areas of more than 150 mi./241 km to track seals for survival, which is much farther than any other species of bear.


The emperor is the tallest and heaviest of all penguin species and can grow to 4 ft./1.2 m in height and weigh anything from 48–99 lbs./22–45 kg. They are the only penguin species that breed during the Antarctic winter. Every other animal species leave the continent at this time. The males, who care for the eggs until they hatch, endure the worst winter conditions on Earth. They face temperatures of -158° F/-70° C, fierce winds, and four months with no sunlight, food, or water. Firstly, the penguin treks 31–75 mi./ 50–120 km over the ice to breeding colonies that may include thousands of individuals. The female lays a single egg, which is incubated by the male while the female returns to the sea to feed. The dedicated dads huddle in packs and take turns rotating from the exposed edges of the huddle to the warm center. Now, who do you think is the toughest polar inhabitant?
Attack of the Polar Zombies
Many early explorers to both the Arctic and Antarctica suffered with a terrible disease known as “scurvy,” until 1800 when cures for it started to spread. The deficiency disease is caused by a lack of vitamin C. We can only gain vitamin C from certain foods such as vegetables, fruits and raw meats (cooking starts to breakdown the vitamin C content). Many early sailors and polar explorers suffered from this disease because food supplies on long journeys would lose their vitamin C content after a while. The effects of scurvy can be gross unless you’re into looking and smelling like a foul-breathed, open sore–wearing zombie!
Scurvy makes the small blood vessels in your body weaken and old cuts or wounds can begin to re-open. Bruises start to become widespread across the body, while bleeding gums and loosening teeth are common. After that, bleeding into muscles and joints increases the amount of pain you feel and disorientation makes you feel like you’re going crazy. If untreated, explorers could die from heart or breathing difficulties.
In the worst cases reported, sufferers were described as looking like bloated yellow carcasses with green, red and yellow blotches caused by bleeding at different stages. Ulcers develop and sores on skin open and weep with an awful smell—nice!
Survival Tips
-
Have the right equipment—You will need the following as a bare minimum: lots of loose, warm clothing (loose clothing is essential to help the circulation of body heat and sweat evaporation), backpack, weather-proof jacket, skis or snowshoes, goggles or sunglasses (to avoid snow blindness), sunscreen, polar balaclava, snow gloves, a flare (if in danger), a sleeping bag, a tent, a small shovel, fire-starting equipment, cooking equipment, a compass, a map, a knife and plenty of food.
-
Time your visit accurately—The Arctic in summer can lose most of its ice and can be very hazardous to explore at this time. It is better to wait for sufficient ice cover. Equally, it is not advisable to explore Antarctica during its winter (Northern Hemisphere summer) as temperatures can regularly be below -122°F/-50° C. Research the weather closely to find the best time to visit each pole.
-
Stay dry—Getting wet in polar regions can spell disaster for an explorer and expose you to all sorts of difficulties including frostbite.
-
A place to shelter—All the issues mentioned so far are important, but if temperatures drop too far and winds pick up to hurricane force, then your tent is going to struggle to protect you. Your best option is to dig a snow hole:
-
Use the small shovel—You will need a sheltered area. Ideally, your hideout will back onto a rock face that will give some shelter from wind and snow, but with a deep enough supply of snow for you to burrow into.
-
Check the consistency of the snow—It can’t be too powdery. It must have sufficient moisture to hold its shape.
-
Check the wind—Make sure the wind is not blowing directly into your snow hole. It will be too cold if it is.
-
Make a hole—Dig a hole that is wide enough to allow you through it. Dig for about 8 ft./2 m or so and then start to widen out the hole into a living space that will be large enough for you to lie down in.
-
Build a bed—Once your chamber starts to take shape, you will need to build a “bed” out of the snow. This will be a raised area of snow (a bit like a bench). This is essential for your comfort as cold air sinks to the floor and warm air rises. Your raised “bed” will be warmer.
-
Lock the door—Get all your equipment inside and use your backpack to seal off the door.
-
Stay dry—Place any waterproof materials on top of your “bed” and place your sleeping bag on top of them. (This will keep you and your sleeping bag from getting wet.)
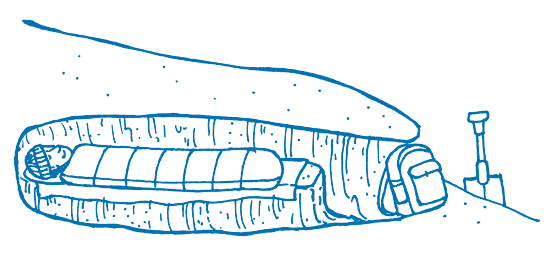
-
-
Energy levels—High energy levels are essential at the poles. Eat and drink regularly, and get plenty of rest at night.
Getting Along with the Locals
The only people you will run into in Antarctica are other explorers or some scientists. However, at the North Pole there are numerous cultures including the Sami and the Inuit peoples. The native groups of the Arctic speak many different languages and many more different dialects, but here are a few Inuit or Inuktitut sayings that should help you if you are in a bit of a fix:
| English | Pronunciation in Inuktitut |
|---|---|
| Welcome | Toong-a-su-GIT |
| How are you? | Ka-nui-PIT? |
| I am cold. | Ik-KIIK-too-nga |
| I am hungry. | KAAK-too-nga |
| What is your name? | Ki-now-VIT? |
| Thank you | Koo-YAAN-na-miik |
| Can I use the bathroom? | a-NAR-vik a-too-roon-NAK-pa-ra? |
| Goodbye | TUG-vow-voo-tiit |
Some “k” sounds are actually pronounced as “q.”
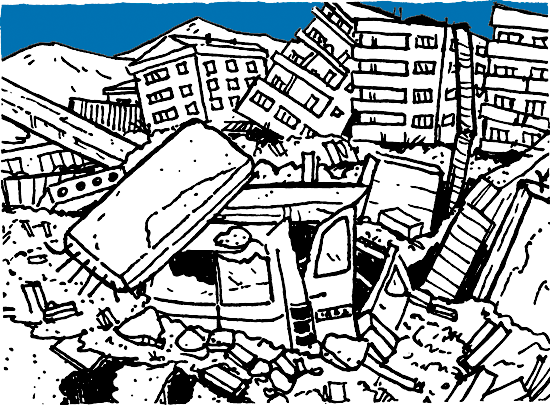
Extraordinary Earthquakes
Earthquakes, like volcanoes, are usually found along plate margins and are caused by a huge buildup of pressure that happens as these mammoth plates are forced into one another. This enormous pressure is only released as rock in the plates gives way. The point at which an earthquake actually begins is deep below the Earth’s surface and is called the focus. A deep focus is good because the effects of the earthquake may be less as the shockwaves have much more rock to move through. The point directly above the focus on the Earth’s surface is called the epicenter. The effects of the earthquake are normally worst here.
How Deep, How Damaging?
-
Shallow focus earthquakes are found at depths between 0 and 43 mi./0 and 70 km. These are the most dangerous and account for 75 percent of all earthquakes worldwide.
-
Intermediate focus earthquakes are found between 44 and 186 mi./ 70–300 km deep.
-
Deep focus earthquakes are found as a deep as 187–435 mi./300–700 km down. These do the least damage.
How Do the Waves Work?
Seismic waves radiate out from the focus beneath the ground, just as the ripples on a pond do when you throw a stone in to it! There are three types of seismic waves, which travel at different speeds:
Primary—or P waves, are speedy seismic waves that travel fastest and vibrate in the direction they travel. You will feel these first. They reach speeds of 3.4 mi./5.5 km per second, which is eight times faster than the Concorde, the fastest airliner ever built.
Secondary—or S waves, are only half as fast as P waves, but they can really make rocks shake. By traveling at right angles to the rock, these guys can make concrete and buildings shake like pieces of ribbon in the wind.
Surface—These waves take a longer route along the Earth’s surface and are the last to arrive, but when they do, they are sure to announce themselves. They cause the Earth to roll like the top of the ocean. These are the guys that make bridges sway to and fro, and cause power cables and gas pipes to snap. Some seismologists (earthquake specialists) describe the slow surface waves as the “sting” in the earthquake’s tail!
Enormous Earthquakes Over the Past 100 Years
| Year | Country | Deaths | Magnitude on Richter Scale | Cost in U.S. Dollars |
|---|---|---|---|---|
| 1908 | Messina, Italy | Approx. 26,000 | 7.5 | 116 million |
| 1920 | Gansu, China | 235,000 | 8.6 | 25 million |
| 1923 | Tokyo, Japan | 143,000 | 8.3 | 2.8 million |
| 1976 | Tangshan, China | Approx. 300,000 | 8.0 | 5.6 million |
| 1990 | Western Iran | Approx. 50,000 | 7.7 | Unknown |
| 2001 | India | Approx. 100,000 | 7.7 | 1.8 million |
Earthquake Effects
The effects of earthquakes, like volcanoes, can be split into the primary and secondary effects. Primary effects are those that occur immediately as the earthquake is happening. These can be deadly and result in buildings collapsing and roads and bridges being destroyed, which are caused by the violent shaking of the ground. Falling buildings or debris kills many people instantly.
Secondary effects are the later effects of the quake, and can be even more devastating than the primary ones. The main secondary effects include:
Fires—Fires can break out anywhere and are usually caused by damaged electrical equipment and burst gas pipes. This was the main cause of death and damage after the San Francisco earthquake of 1906.
Tsunami—A giant wave caused by an earthquake is called a tsunami. They can travel very quickly across entire oceans, before engulfing land thousands of miles away. The 1964 Alaskan earthquake caused considerable damage in several Californian coastal areas. Although Los Angeles has escaped so far, it is still classed as a tsunami-prone area.
Landslides and avalanches—These are often triggered by earthquakes, causing huge amounts of rock, soil, snow, ice or water to be moved very quickly. This is what occurred just before the volcanic eruption of Mount St. Helens. They are most likely to occur where the land is steep and has been weakened in some way.
Diseases—Diseases can spread very quickly due to unsanitary conditions often left behind by massive earthquakes. Waterborne diseases such as typhoid and cholera spread easily. Poorer nations are especially at risk where access to medical services can be badly hampered by the damage caused by the quake.
Measuring an Earthquake
There are two separate scales for measuring earthquakes:
-
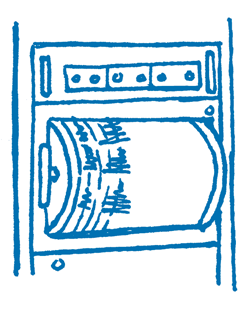
The Richter (pronounced “Rick-ter”) scale measures the magnitude (geography word for strength) of an earthquake using an instrument called a seismograph. The Richter scale is a logarithmic scale. That means that an earthquake measuring 8 produces 10 times more shaking than one measuring 7, and 100 times more shaking than one measuring 6. The energy levels released are also linked, but for each unit increase on the scale, the energy released increases by 30 times. In other words, an earthquake measuring 4 on the Richter scale is 30 times more powerful than one measuring 3 on the scale.
-
The Mercalli scale doesn’t measure the actual size of the earthquake itself but the damage it does. It ranks each earthquake from 1 to 12 (the scale is actually written in Roman numerals, so 1–12 looks like I–XII), depending on how much damage was done. A quake that causes a lightbulb to sway measures III on the Mercalli scale while XII signals total devastation.
Survival Tips
-
Before the earthquake, prepare a survival kit with water, food, blankets, first-aid kit, flashlight and radio.
-
If you are indoors during an earthquake, make sure you are away from any objects that can fall on you and injure you.
-
Crawl beneath a strong piece of furniture like a kitchen table or a desk and stay there until the quake is over.
-
Keep away from items that can shatter, such as windows and mirrors. These can badly injure you.
-
If caught outdoors, stay away from any object that can fall on you. These include trees, buildings and power lines. Try to find an area of open space where you will be safest.
-
After a quake, you still need to be alert. Aftershocks (smaller quakes after the main event) can still cause damage. Rubble can be dangerous to get across and the ground itself could have split. Not to mention the possibility of fires, gas explosions and the other hazards mentioned earlier.
Young Scientist Activity Playing with Pressure
Pressure is an invisible but powerful force that drives our weather, results in earthquakes and makes the bottoms of our oceans such a mystery. Using this cool experiment, you can discover just how pressure works in the world around us.
Equipment Needed:
| An empty aluminum soda can |
| One pair of kitchen tongs |
| One large saucepan |
| Cold water |
Instructions:

-
Fill the saucepan with cold water.
-
Put a tablespoon of water inside the can.
-
Heat the can on the stove to boil the water inside.
-
When the water is boiled, a little cloud of condensation will rise out of the top of the can.
-
Quickly and carefully, use the tongs to lift the very hot can. Turn it completely upside down and place it in the saucepan of cold water.
-
Watch as the can is crushed immediately.
Science Factoid
Heating the can caused the water inside to boil. The water vapor from the boiling water forced the air inside of the can out. Once the can was filled with water vapor and then suddenly cooled, it caused the water vapor in the can to condense and created a vacuum. This vacuum inside the can made it easy for the pressure of the air outside the can to simply crush it.
Liquifying Earth
During some earthquakes, a strange phenomenon can take place where the land beneath your feet acts more like a liquid than a solid. Soil liquefaction happens when a soil containing a lot of water loses its binding qualities when shaken violently and starts to behave like a liquid. It is a similar feeling to standing on wet sand and wiggling your toes so that you begin to sink into it. The ground beneath you can behave like wibbly, wobbly Jell-O.
Survival Tips
As with earthquakes themselves, there are many hazards associated with liquefaction, including fires, gas explosions and building collapse.
-
If you are in a city or any developed area, one of the biggest threats may be building collapse or subsidence. This can happen because the land the buildings are standing on simply starts to act like a liquid and the buildings fall over. If you are inside, try to find a large piece of furniture like a table and sit beneath it until the danger passes.
-
If you are outdoors, it is best to be away from buildings, power lines and trees as these can collapse when the ground liquefies and fall on top of you.
-
Lastly, stay calm. Those who panic usually run into problems that can be deadly. Yes, the ground beneath you will feel really weird but it won’t last for long, and if you have found a safe place, you will most likely be ok. Also, places with high soil water content actually “dampen” the effect of the earthquake itself, thereby, making it less dangerous!
Young Scientist Activity Turn Bone to Rubber
Here you will be able to turn a strong and sturdy chicken bone into a rubberized one, which bends and moves very easily.
Equipment Needed:
| A container or beaker |
| One uncooked chicken bone |
| Vinegar |

Instructions:
-
Clean and dry the chicken bone. It is best to leave it to dry overnight.
-
Place the bone in the container.
-
Take the vinegar and fill the container until the bone is completely covered.
-
Leave the bone in the solution for 6–7 days. What do you find?
Science Factoid
The acid in the vinegar works to dissolve the calcium in the chicken bone. The calcium is what makes bones strong; once this has been dissolved away, all that is left is a soft, flexible material that is bendable.