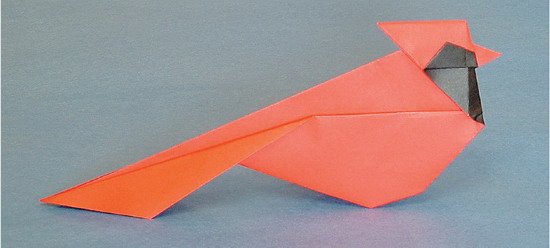
Designed by Michael G. LaFosse
This crested, brightly colored finch is a favorite that every person putting out a backyard bird feeder hopes to attract. No wonder seven states have chosen it as their state bird. This model shows a modern design using the older origami style of creating flat profiles of familiar objects. The beautiful simplicity, harmony of shapes and proportions makes this model elegant, yet deceptively sophisticated. The model also reduces the subject to a minimalist abstraction. The design takes advantage of two-toned, or duo, paper that is all red on one side, all black on the other. The folding process or sequence is direct, economical, interesting and enjoyable.
Even as a youngster, I was smitten with the cardinal. I remember begging my parents for a plastic cardinal model kit that I could assemble and paint by myself. They did not buy it for me, but shortly afterward Santa Claus did. I tried for several years to design a fitting origami rendition of my favorite bird but did not succeed until Richard asked me to determine the land marks on my Mourning Dove so that he could teach it to beginners at the Origamido Studio. Although I never finished land marking the Mourning Dove, during the process I did discover the potential to reshape the bird’s head and to explore the opportunities to accomplish a color change. My vision for the origami cardinal years ago was for a fully three-dimensional bird, just like the plastic model that I had glued together and painted as a child. The resulting flat fold is quite a departure, yet every bit as satisfying to me because it has a pleasing geometry and harmony that gels. Like a wonderful poem that everybody can recite and understand, it has an honest quality in its simplicity, even though it is folded flat.
PAPER SUGGESTIONS
The paper must be red on one side and black on the other. This so-called “duo” origami paper is generally available in standard 5⅞-inch (15-cm) squares (yielding a 5½-inch [14-cm] bird) and 9¾-inch (24.7-cm) squares (yielding a 9-inch [22.8-cm] bird). Some popular packs of assorted duo color origami papers include a couple of sheets of red/black paper. You can also make your own duo paper using the techniques described in this book. For best results, swipe a little moisture along the diagonal before you make the first fold.
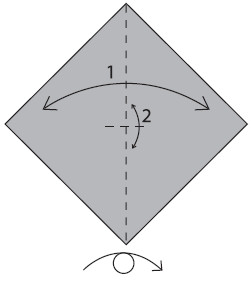
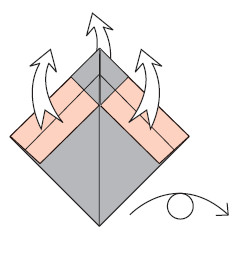
1. Begin with the black side up. Fold in half, corner to corner. Unfold. Make a pinch mark halfway up the crease to mark the center of the paper. Turn over.
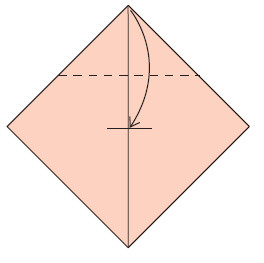
2. Fold one corner to the center. Be sure to use a corner that has a crease line running through it.
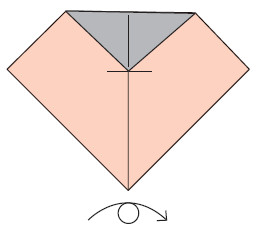
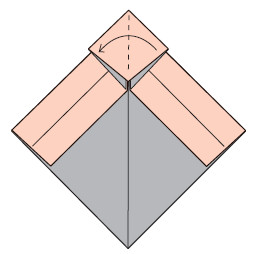
3. Turn over, left to right.

4. Fold each half of the folded edge to meet at the crease.

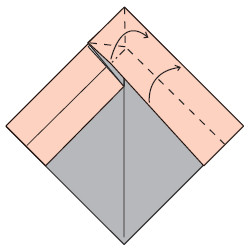
5. Fold the free red edges to the outside folded red edges. Unfold.
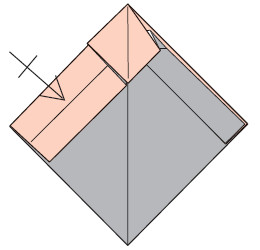
6. Open the paper completely and flip horizontally, red side up.

7. Perform the indicated valley creases. Carefully note their placement. Turn the paper over horizontally, black side up.

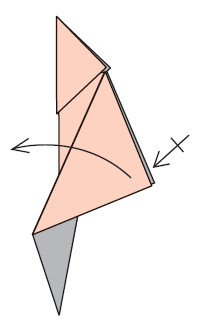
8. Use the existing mountain and valley creases to fold the top corner and edges down.
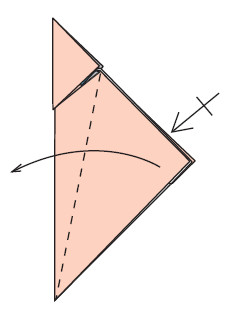
9. Your paper should look like this. Fold the top right corner to the left.
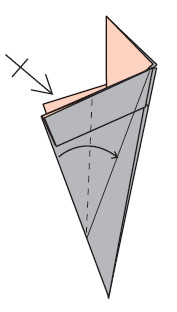
10. Move the long cut red edge to the outside red folded edge. Inside-reverse-fold the upper portion of this layer as you return the corner to the right. The small crease installed in step 7 will aid this maneuver.
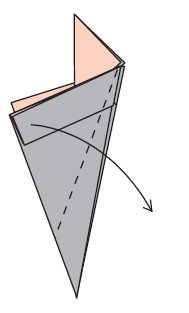
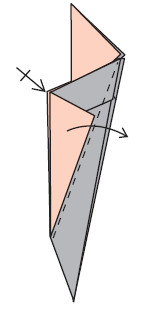
11. Repeat on the other side.
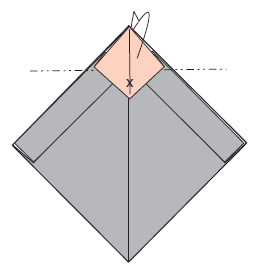
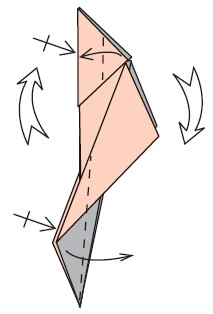
12. Fold the top corner behind. Watch the “X” spot! You are actually toggling the red diamond upside down and over to the other side. This will be the head.

13. Fold in half.
14. Fold the corner to the left. Repeat behind.
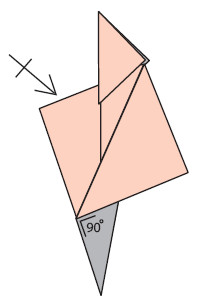
15. Fold to the right. Look ahead at step 16 and notice the 90-degree angle that is formed when the paper is properly placed.
16. Repeat behind.
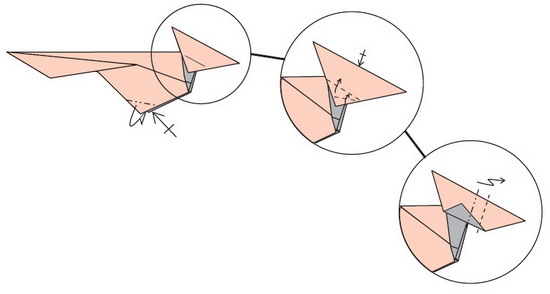
17. Unfold, front and back.
18. Fold the cut edge to the crease. Repeat behind.
19. Using the existing crease, fold over. Repeat behind.
20. Fold the free square corners of the head to the middle of the folded edge. Fold the free red and black corners of the tail over, covering the black paper completely.

21. Pull up on the back corner of the head (crest) and swivel the black paper at the front of the neck, changing the angle and displaying more black paper.
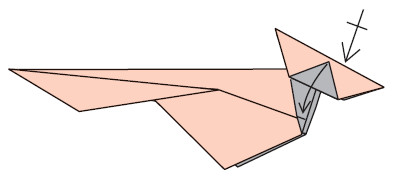
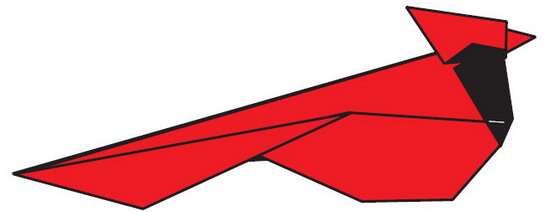
22. Bring down the corners on the head.
23. Mountain-fold the bottom corners inside.
24. Fold up the bottom front edge of the head paper, aligning it to the crease. Repeat behind. Fold up the bottom front edge again along the crease. Repeat behind.
25. Mountain- and valley-fold the front of the head to form the beak.
26. The finished North American Cardinal.