

Pity the pear. It gets no respect. Even our lexicon is against it. A pear a day will not keep the doctor away. You will never travel to the “Big Pear” and make it there. Did you upset the pear cart? Find someone who cares. Sadly, there’s no denying that the pear is the apple of no one’s eye.
So, rather than lumping pears with apples in the cider chapter, let’s give them the dignity of their own chapter—even if it is somewhat brief. In it we will eschew the dismissively derivative “pear cider” in favor of the drink’s rightful name: perry. For a few short pages we will celebrate this sadly slighted fruit and the alcohol derived from it. How do you like them pears?
Perhaps the easiest way to categorize perry is by considering what it’s not: It’s not wine, although pears do make a fine wine. It’s also not hard cider; cider is made primarily of apples and tends to have a more robust, earthier flavor. So, why all the confusion between cider and perry? It’s a matter of marketing. Rather than introduce Americans and young consumers to the unfamiliar (though ancient) moniker “perry,” the architects of euphemism have determined that the beverage would go down smoother as “pear cider.”
Owing to the low acidity of pears, perry tends to be sweeter, smoother, and more delicate than cider. While it’s true that the addition of pear juice can mellow and refine any hard cider, this does not make it perry. Real perry is 100 percent pressed perry pears. A traditional and excellent perry is actually more achievable by you, the homeowner with one good perry tree, than it is for corporations whose drinks are derived primarily from general-purpose pears or a mix of pear and apple. Perry requires a little study and a lot of attention to detail. That said, perry-making isn’t complicated. A bit of effort and you too will understand why wealthy landowners of yesteryear gave cider to the hired help and saved the perry for themselves.
If cider received little attention in the twentieth century, perry practically disappeared. It was never standard fare in the United States, but even in perry-producing England the drink went into decline as orchards were lost to fire blight and changing fortunes. Migrant pickers moved to more lucrative, less strenuous work. In just a few decades, dessert pears had replaced many perry orchards. Left with mostly sweet pears to work with, aspiring perry producers found their fledgling beverages disappointingly insipid. The near extinction of perry has created certain challenges to modern perry production. For one, true perry pears, which make all the difference, are now hard to come by. For another, cider is simply more familiar to consumers. There’s no denying that perry has been sadly neglected. But things are looking up for perry. Thanks to modern fermentation artists, the drink is making a comeback—even if one somewhat open to interpretation and experimentation.
Another challenge for perriers is the nature of pears themselves. There are several important differences between pears and apples. For one, perry pears are less acidic than cider apples. They have higher levels of sugar including unfermentable sorbitol, which gives perry a sweeter finish than cider as well as a slight laxative effect. Pear tannins also differ from those in apples; they dispose fermenting perry to develop an unappetizing haze that must be dealt with, and even then perry is prone to cloudiness. The interference from this tannin haze is one reason homemade perry is generally a flat beverage; although it might be made to sparkle with a bit of added sugar at bottling, if you’re feeling pétillant. Finally, pears have characteristics that can lead to sluggish fermentation. This final failing is often solved by the addition of ammonium sulfate to the juice. If you understand the peculiarities of pears, take a bit of care, and add a few commercially purchased preparations, you can process perfectly passable—even profound—perry.
The home perrier must understand yet another important distinction between the fermenting of pears versus apples: Pears require patience. First, pears need time to mature after harvest. This takes from two days to a full week (sometimes longer), depending on the variety. Second, pear pomace needs a rest between crushing and pressing. After it has been thoroughly mashed, pear pulp should sit for twenty-four hours to allow some resident tannins to dissipate. This step is crucial for reducing cloudiness in the final product.
From harvest to table, a well-made batch of perry can take ten months. Is it worth the wait? Just ask Napoleon, a perry connoisseur who once crowned the beverage “the champagne of Britain.” “Oui, oui!” he would say if he were alive. No doubt Napoleon knew to pick his pears when they snapped neatly at the stem joint when lifted and slightly twisted. Follow his example. Treat your pears with respect: a fruit roughly dropped into a box, an incautious fingernail piercing the skin, and spoilage is imminent.
Pear picking can be done safely—with feet firmly on the ground—via an old fashioned fruit picker on a stick. A fruit picker consists of a circular metal tool with “fingers” used to pry the fruit loose, and a bag hanging beneath to catch the fruit as it falls. The metal picker is fixed atop a pole, such as bamboo, in the length of your choice. Once the pears are harvested, they (and you) are ready for a rest. As previously mentioned, pears will need several days if not a week or two to mellow. Store them in a single layer at room temperature. If pears are used too soon, they will add little of their characteristic flavor to your perry. If they sit too long, you will find they have stealthily rotted from the core outward and are destined for the compost rather than the carboy.
Twenty pounds of pears yield about a gallon of perry. If you plan to go au natural with your fermentation, don’t wash the pears, which will remove wild yeasts. If you’ll be using commercial yeast (which is recommended), go ahead and rinse your pears. They are now ready for pulping. Pears can be pulped in the same way as apples (see p. 142), or, if they’re suitably soft, the fruit can be squished into sauce with anything from a potato masher to a small, barefoot child. For a modest batch of perry, you can crush your pears in a juicer or blender. Better yet, invest in a fruit pulper that attaches to the end of an electric drill and chops the fruit with a blade. After crushing, the pulp—more accurately known as pomace—needs another rest. Cover the pomace with cheesecloth or a towel to thwart fruit flies, and leave it in a cool place overnight to oxidize out excess tannins. This step is important for reducing elements that cloud perry and slow fermentation, risking a microbial bloom. The next morning, the pomace is ready for pressing (see page 137). Beware: mashed pears are slippery and thus trickier to press than apples; unless care is taken, a post-pear-pressing kitchen may look like the scene of a food fight.
In the days of old-fashioned perry-making, the juice was poured into wooden barrels and left to the mercy of wild yeasts. The same process can be used by you, the home perrier, with the substitution of a plastic fermentation bucket or glass carboy. The container is left open to breathe. Fermentation starts in a day or two and ends several weeks later. As the juice ferments, keep the container topped off with more perry. When the initial fermentation is over, rack off into another sterile container. Attach an airlock and leave the perry to mature for about six months in a cool place before bottling.
Although pears can turn into perry with nothing except the yeasts on their skins, your odds of creating a quality product increase with informed intervention, a more hands-on approach. Into every gallon of pear juice add a Campden tablet (sulfite) for sterilization. The amount of sulfite needed for perry exceeds that of cider because pears contain more of the compound acetaldehyde, which neutralizes sulfite. A teaspoon of yeast nutrient will boost fermentation. Also, a teaspoon of pectin enzyme will alleviate the haze that plagues perry. Once these additions have been made, the juice will need to stand for another day for the Campden tablet to do its work and then dissipate so that the yeast you add will not be killed in turn.
Yeast is often “started” before being added to the juice. This involves boiling water into which a small amount of sugar is dissolved. It’s important to allow the solution to cool to 105 to 110 degrees Fahrenheit before proceeding with the yeast: Too hot and the yeast will be killed, too cool and the yeast doesn’t get the jump-start it needs. Consult the packet for the optimal treatment of your particular yeast. Once the water is at the correct temperature, it’s time to add the yeast and the yeast nutrient (if the nutrient was not added earlier) in a fermentation bucket or other appropriate vessel. Cover the concoction and leave it alone to foam for four hours at room temperature.
This is the first of two fermentations that perry, like cider, undergoes. In this initial fermentation, the yeast converts sugars to ethanol alcohol.
The secondary fermentation comes about through a different chemical action. Now malic acid is converted to lactic acid. This happens spontaneously, without any effort on your part. First, however, you must rack off the perry to separate it from its lees (sediment). Siphon the perry into a glass carboy or other container that can be airlocked. Fill to the neck to leave as little air as possible. It’s crucial that the container be sterile to circumvent certain strains of bacteria that will convert the citric acid of pears to acetic acid. We’re not here to make pear vinegar.
BOTANICAL NAME: Pyrus communis (European pear)
PLANT TYPE: Tree
USDA ZONES: 5–9
HEIGHT: 15 feet semi-dwarf; 30–40 feet standard
SOIL: Well-drained, slightly acidic loam is best, but pears tolerate damp, heavy soil.
LIGHT: full Sun
WATER: regular
GROWTH HABIT: strongly vertical
PROPAGATE BY: grafting, seed
SPACING: 15 feet for semi-dwarfs; 25 feet for standards
YEARS TO BEARING: three to eight, depending on variety and rootstock. Fruit is produced on spurs that remain viable for about five years.
PRUNING: Train pears to a central leader. Cut to a modified leader when the tree is 8–10 feet tall. Pears require little annual pruning. Remove damaged, diseased, and rubbing branches. Remove suckers and water sprouts. Pears grow strongly upright. Vertical branches can be trained downward by attaching fishing weights until the branches reach a 45-degree angle. Pear trees can be grown as espaliers.
FRUIT THINNING: Thin when the pears are no bigger than a dime. Leave the best single fruit per cluster and one fruit every 5 inches along the branch.
HARVEST: 1–2 bushels from a semi-dwarf; 50–100 pounds or more from a mature standard. Pears do not ripen on the tree. They should be picked when a gently lifted pear snaps off at the stem joint. Store picked pears in cool, dark place, such as a basement. Within two months, bring them into a warm room three to five days before you plan to begin the fermentation.
NOTES: Pears are very long-lived trees. Two varieties are needed for pollination. Although pear trees need winter chill, their flower buds can be damaged by late frosts. If fire blight is a problem in your area, choose varieties and rootstocks resistant to the disease.
BEST USED IN: perry, pear wine, with apple in hard cider. Pear wine tends to be sweet and buttery.
Asian pears
After airlocking your second-stage perry, the malic acid will continue its conversion for about two weeks. The perry is then allowed to sit and clear in a cool place such as a basement or garage, often through the winter into the following spring or early summer. For centuries, perry was overwintered in outbuildings. Prolonged chilling, or cycles of chilling and warming, is beneficial, allowing excess tannin to clear, but perry should never freeze. If stalled by cool temperatures, fermentation will start up again when the ambient temperature climbs to 60 degrees Fahrenheit. After a long, cold winter, you’ll know your perry is done when the impurities have settled to the bottom and the liquid has lost all or nearly all of its haze.
It’s now time to bottle your perry. First, sterilize the bottles. If you would like to try for a bit of bubble, add a teaspoon of sugar before racking the perry. There should still be enough live yeast to ferment the sugar and release carbon dioxide. If you do elect to effervesce, use bottles that can take the pressure and cap them tightly. If, however, you want traditional perry, skip the sparkle. Don’t even think about trying for a high carbonation level, champagne-style. The generous tannins of pears interfere with effervescence. Even worse, too much carbon dioxide can trigger lactic acid bacteria which—as we have already learned—will turn your lovely perry to vinegar.
True perry is light, complex, and delectable. It is to pear cider what tenderloin is to cube steak. True perry does not come from the branches of a Bartlett or Bosc; it comes from perry pears. There’s just no getting around it: Superior perry derives from fruit that you’d never want to bite into. The reason for this is our old friend tannin. High-tannin pears are the gold standard for perry-making. Low- to medium-tannin pears may be a fine addition to the fruit-and-cheese course, but they also make low-quality perry. Unfortunately for perry’s reputation, these general-purpose pears are easier to come by and require less skill to ferment; thus, they are the basis of many commercial perries.
Perry trees can be purchased through mail-order nurseries. Or, if you’re willing to turn your hand to grafting (see page 137), the National Clonal Germplasm Repository in Corvallis, Oregon, supplies scionwood of hard-to-find heritage fruit trees—including perry pears—to interested individuals. Either way, pay attention to the rootstock of your tree. Choices include standard-sized, OHxF 97 rootstocks or those from pear seedlings, either of which needs a minimum 20-foot spacing and may live more than 200 years to become grand, spreading, heirloom trees. Semi-dwarf and dwarf rootstocks are also available in the OHxF and Pyro series. Rootstocks from quince were traditionally used, but they’re probably best avoided by the home grafter since not all pear varieties are compatible with quince.
The good news about perry is that, unlike apple cider, only a single variety of pear need be used. This means that one prudently picked and productive perry tree will provide what you need for an outstanding beverage. The bad news is that you will need a second pear tree planted within 40 feet for cross-pollination. But there’s more good news; the second tree can be a dessert pear. Perry trees are good pollinizers. All pear varieties bloom around the same time, so your choice of spouse for your perry tree is wide open.
Perry pears tend to be small, hard, gritty, and bitter. For purposes of fermenting, they are classified as sweet, medium sharp, bittersweet, and bittersharp. Sweet pears have low acidity and are fairly low in tannin. Medium sharp pears have moderate to low acidity and fairly low tannin content. Bittersweet pears have moderate acidity and are high in tannin (there are very few pear varieties in this category). Bittersharp pears have high acidity and high tannin content. Bittersharps are considered the superlative perry pear because of their well-rounded astringency. These are your best bet for single-variety perry.
In consequence of their antiquity (many of today’s perry varieties grew in English orchards 300 years ago), some perry pears bear curious names. Consider the Huffcap, which will blow your hat right off your head—due to quality or potency, who knows? We can only hope that Tayton Squash is a testament to how perry is made and not a forewarning of the flavor: certainly, not even the most diehard vegan wants a heady Hubbard nose with undertones of zucchini. Perhaps Green Horse is akin to pink elephants? And Butt—let’s not even speculate.
Several varieties of perry pears are available in the United States. The following cultivars are among the most popular and accessible.
If dessert pears grow in your region, so will perry pears. Pears in general are more obliging plants than apples, although some pear varieties are less hardy than their round, red orchard-mates. Pears will grow on heavy soils in cool climates from USDA Zones 5 to 9, and some can tough it out in Zone 4. Many varieties are hardy to -25 degrees Fahrenheit, although they may resort to biennial bearing in the coldest areas. A good harvest depends on 500 to 800 hours of temperatures below 45 degrees Fahrenheit. Pears also require the right balance of sun and rain. They prefer cool, moist, cloudy weather. Perry pears have a memory: the quality of the summer weather will be the heart of the perry that will follow.
Golden russet pears
Pears bear at a slightly later age than apples. Once they reach puberty, they bloom up to three weeks earlier than apples, making the buds and flowers susceptible to late frosts. On the plus side, pears require less pruning and spraying than apples, and perform better on poorly drained soils and clay. Ideally, plant your pear tree in deep loam, but they will soldier on in fast-draining, sandy, and acidic soils. If, however, your site is downright boggy, abandon all hope of growing a pear tree. Barland, in particular, resents waterlogged soil. Most pears are extremely susceptible to fire blight, a devastating disease that lays waste to almost any part of the tree. If you live in an area plagued by fire blight, plant only resistant varieties and rootstocks.
As the saying goes, pears are planted for heirs. This is a reminder to choose the site for your perry tree wisely, as it may provide crops not just for you, but for your children, grandchildren, great-grandchildren, and generations to come. After 100 to 200 years or more, perry trees become venerable, canopied giants that lavish the neighborhood with a ton of pears each year. No, really—a literal ton.
If you don’t have the room—or ancestral imagination—for a legacy tree, there are also semi-dwarfs. Perry pears on semi-dwarf rootstocks mature to about 15 feet, and can be set 10 to 15 feet apart. They produce fruit about a year earlier than their standard-sized kin. Within a few years, a semi-dwarf should be gifting you with a bushel or two of pears.
Choose a planting site with at least eight hours of sun a day and good airflow. Low areas can be subject to late frosts, which can blast early pear blossoms. Dig a hole the depth of the rootball but wider. Set the rootball in the hole with the top (or top of the roots, in the case of a bareroot sapling) level with the ground surface. Don’t plant too deeply and be sure the graft union is above the soil. Spread out the roots. If the roots have begun to encircle the pot, work them loose as gently as possible and head them away from the rootball.
It’s best to avoid staking a tree, which encourages it to rely on the support rather than its own root growth. However, if it appears your new tree may keel over from insufficient anchoring, this is the time to put in the stake—when you can see where the roots lie. Fill the hole halfway with soil and then add water all the way to the top; this will ensure the soil is thoroughly settled around the roots and no air pockets remain. Once the water has cleared, fill the hole with the remaining soil. Make a bowl-shaped depression from the tree trunk to the perimeter of the rootball to make watering easier. You’ll need to keep the soil somewhat moist through your tree’s first summer, if not several subsequent summers. Give your new pear tree a little extra love in the form of a 2-inch layer of mulch spread evenly over the planting area. Manure or compost are best, but wood chips, shredded leaves, straw, or lawn clippings will do.
For the first few years, train your pear to a central leader. This simply means letting one centrally placed shoot grow upward, while removing or shortening any other shoots that attempt to outgrow the leader. Once your tree is 8 to 10 feet tall, cut the leader back to a strong and highly placed lateral shoot growing from it. You now have a modified-leader pear tree.
Pears require little pruning. Follow the usual rule of removing anything damaged, diseased, or rubbing. Suckers coming from the trunk or the rootball should be rubbed or pulled off as soon as they appear. Pears don’t throw a lot of water sprouts (vigorous, vertical stems growing upward from the center of a branch or the trunk), but when one appears cut it off close to the branch, trim it back to a well-placed bud, or bend it over into a useful, horizontal new branch.
There’s one other thing to know about training your tree. Young pears stand to attention. That’s to say, they grow strongly upright. While you don’t want to dampen their spirit, you must consider their future. The scaffolding you create today will be the structure of your pear for the next 250 years. Talk about pressure. Actually, it’s an easy fix. Fishing weights and Christmas ornament hangers will do the job nicely. Simply weigh down the sky-reaching branches to a 45-degree angle. A 60-degree angle is optimal, but the weights will usually pull the branches down a bit farther as the branch relaxes. Leave the weight on for about a year, by which time the adjustment should be permanent. Once the tree begins to bear, the weight of the fruit will take over the job.
Now that your tree is studded with embryo fruit, it’s time to thin that fruit. Thinning encourages larger, better quality pears and prevents the branches from breaking under heavy loads. It can also stem the tendency of some pear varieties to biennial bearing. Thin early when the pears are no bigger than a dime. Leave the best single fruit per cluster and one fruit every 5 inches along the branch.
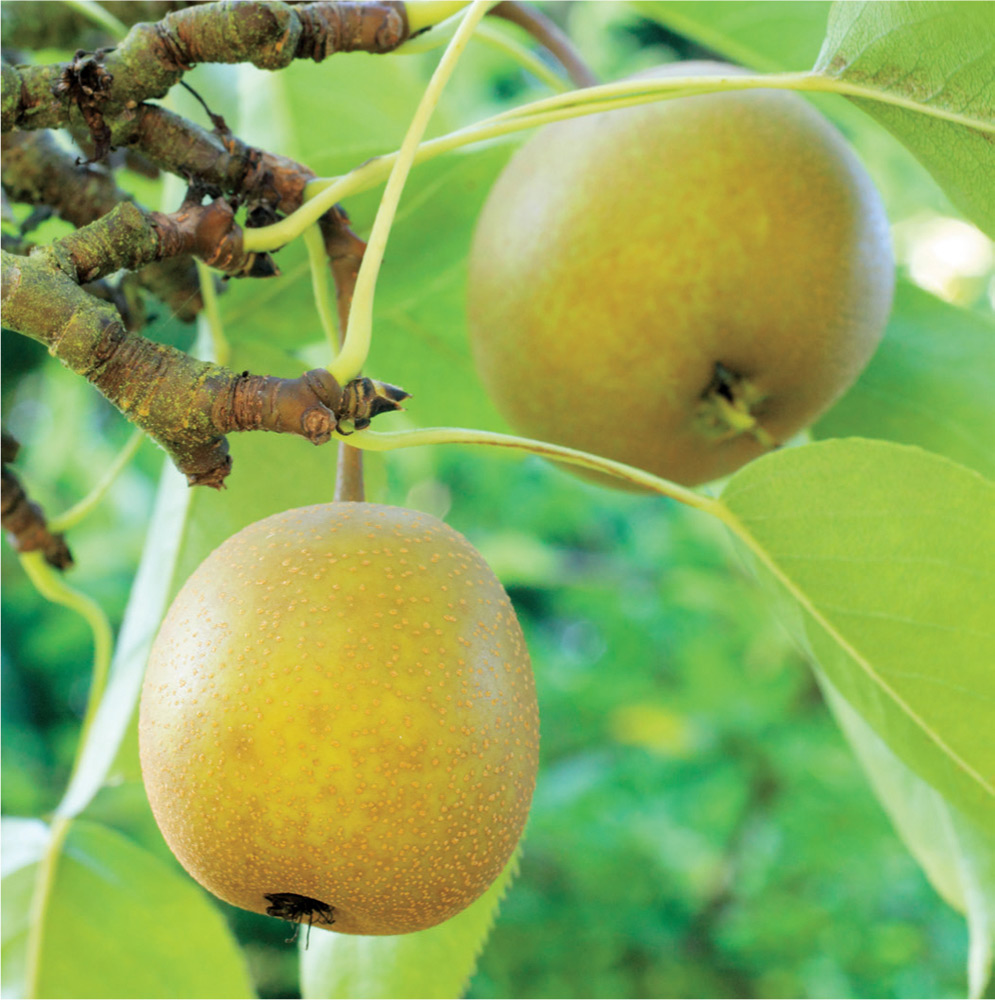
 Pear
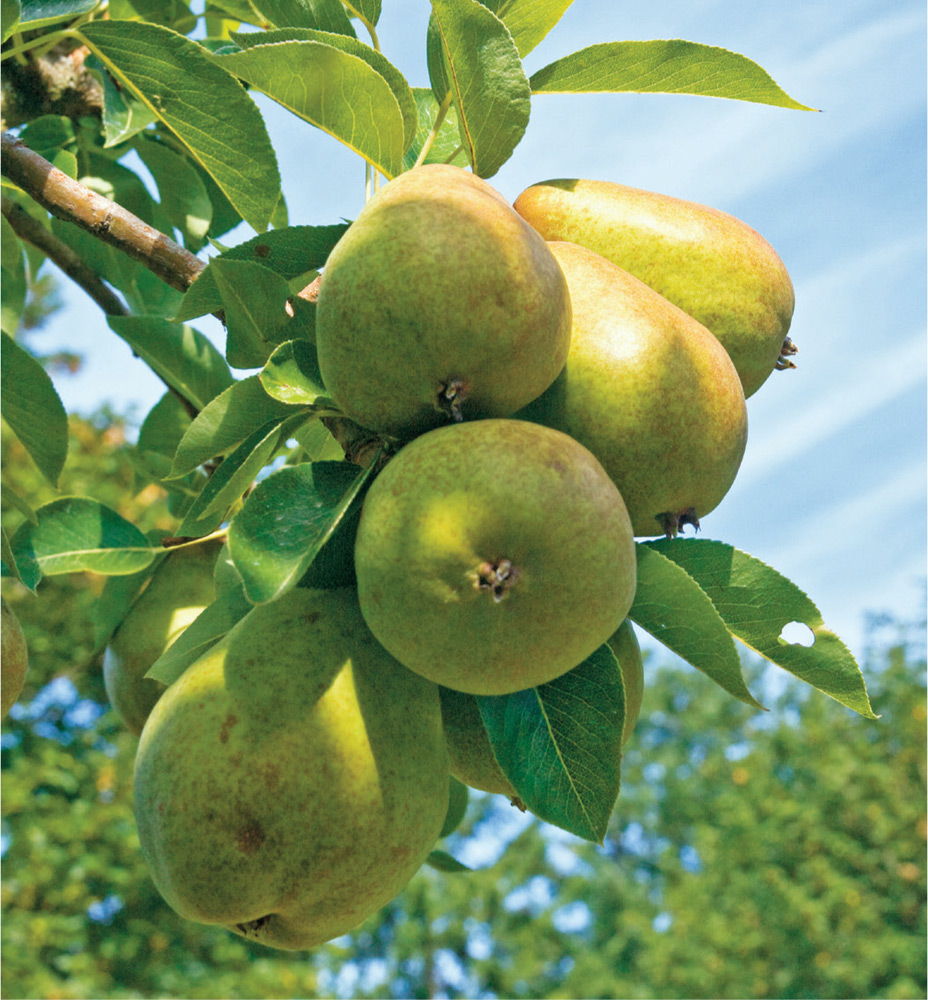
Pear