
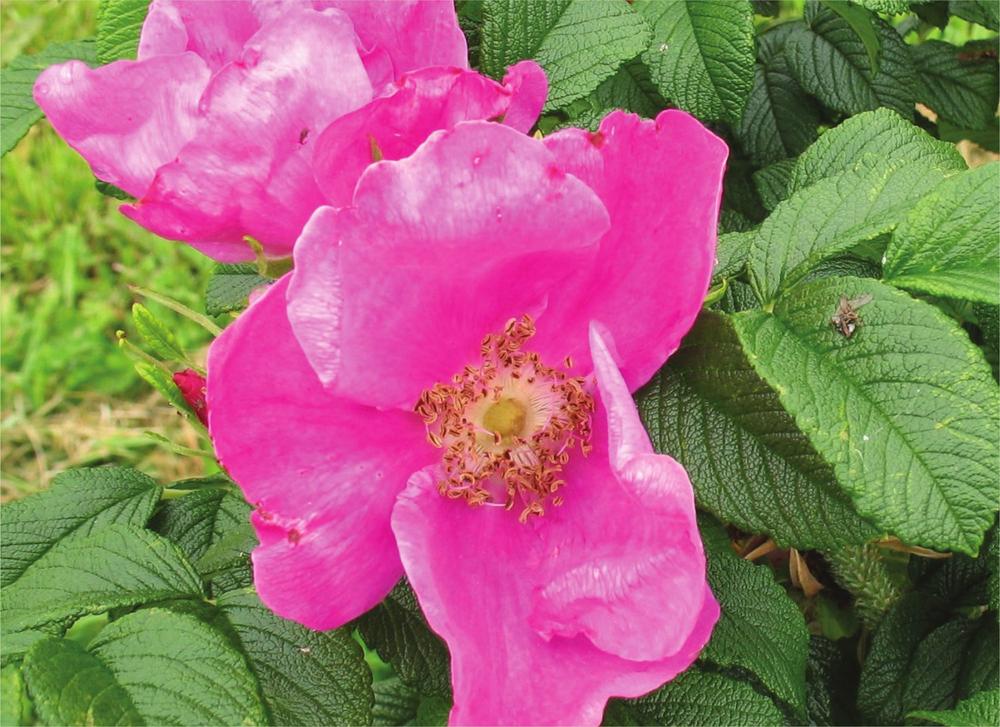
Apple rose (Rosa rugosa)
Also known as rugosa rose
A very common plant in gardens and hedges in the UK, apple rose makes a bushy shrub up to 2m (6'6") high, sometimes gradually suckering and spreading to form larger colonies. It has been long naturalised and some conservationists dislike it; however, it is a valuable bee plant and its rosehips are hard to beat. The large flowers are produced from May onwards.
The rosehips on apple rose are round and very large (25-35mm/1-1⅜"), ripening from September onwards. There is a long tradition in the UK of making rosehip juices and syrups, which are exceptionally high in vitamin C. The form of vitamin C in rosehips is very resistant to breaking down at high temperatures, e.g. during cooking.
Rosehips are also high in vitamins A, E and K, as well as in many minerals.
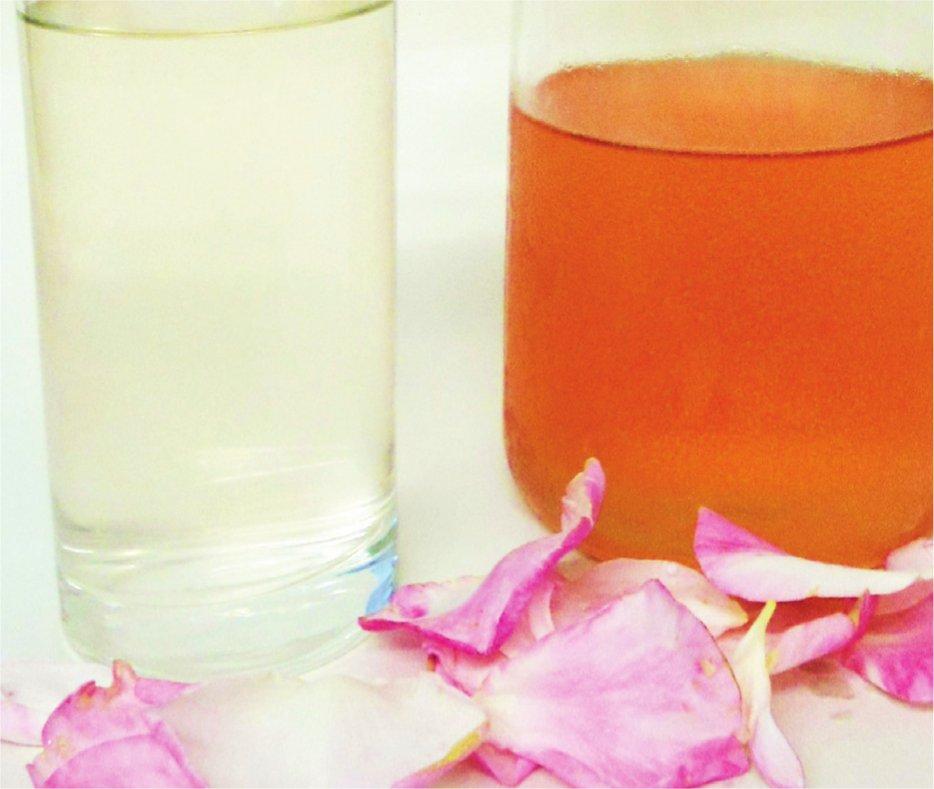
Apple rose petal cordial
Makes approximately 2l (3½ pints)
12 apple rose flowerheads
2l (3½ pints / 70fl oz) water
2 tbsp lemon juice
255g (9oz) white granulated sugar
Glass storage jars, approx. 1.5l (2¾ pint / 55fl oz)
Muslin and sterilised bottles
Remove the petals from the flowerheads, discarding the head and any brown or shrivelled petals. You will notice that the larger petals have thick, white bases – these can have a slightly bitter flavour, so you may want to trim them with a pair of scissors.
Add the rose petals to the water and lemon juice. If you use 1.5l (2¾ pint / 55fl oz) glass storage jars, each with 1l (1¾ pints / 35fl oz) of water and the petals divided between the two, this allows plenty of space for steeping. Allow the petals to steep for 48 hours in a cool, dark place.
Strain the petal water through muslin into a saucepan, squeezing all the water from the petals. Add the sugar to the pan and bring to the boil over a medium heat, stirring occasionally. Just as it comes to the boil, turn off the heat and pour into sterilised bottles. Allow to cool.
Once opened it is best stored in the fridge and will keep for up to 2 months. Dilute to taste, approximately 1 part cordial to 10 parts water.
Try adding this cordial to lemonade or soda, to biscuit or cake mixes, or to fruity jelly. To make a delicious rose lassi (an Indian yogurt drink), add 1 part cordial to 1 part water and 3 parts plain yogurt.
Apple rose flowers are highly fragrant and make a lovely addition to summer salads.
The easiest way to process the fruits for juices, etc., is to use a steam juice extractor. This is a 3-layer pan system which sits on a cooker with boiling water beneath, a juice collector in the middle and fruit in the top layer. With rosehips you can just halve or quarter the fruit and put the whole lot in the top pan – seeds, hairs and all. After about an hour you end up with a concentrated clear juice which can be bottled as it is or sweetened first.
To preserve for herb teas or as a spice, the hips should be halved, the seeds and hairs removed with a teaspoon, and the halved ‘shells’ dried (in a dehydrator if necessary) before grinding to a coarse powder.
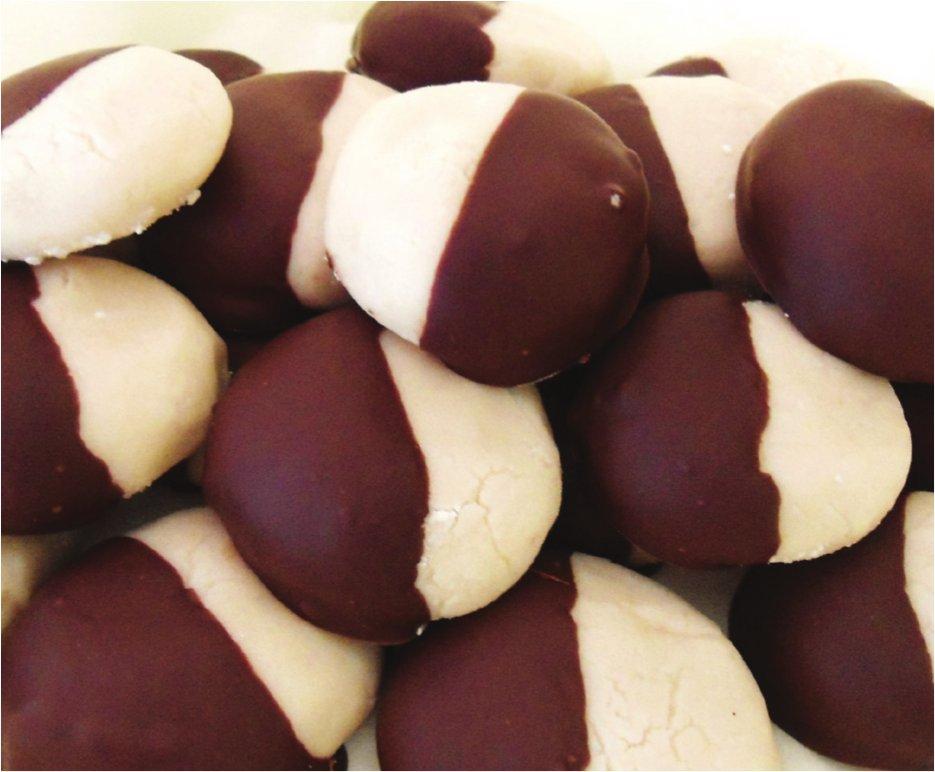
Rose creams
1 tbsp rose petal cordial
2 tbsp rosehip syrup
3 tbsp double cream
400g (14oz) icing sugar
100g (3½oz) dark cooking chocolate
Combine the cordial, cream and syrup in a mixing bowl. Sift in half the icing sugar and stir in thoroughly to form a paste. Gradually sift in the remaining icing sugar until it forms a dough which can be made into a ball. Knead the dough to ensure the ingredients are well mixed and then divide into balls about 3cm (1 ⅛") across. Flatten the balls slightly and place on a plate, then put in the fridge to harden.
Break the dark chocolate into pieces and place in a glass, heat-proof dish. Set the bowl on top of a small saucepan of boiling water to create a bain-marie. Place the pan over a low heat and stir the chocolate until it has completely melted.
Dip the rose creams into the melted chocolate, so that the sweet is half covered.
This is a great recipe to make to keep children entertained, and can be made in other flavours using peppermint syrup, elderflower cordial or rose petal cordial on its own.
Rosehip syrup
Makes approximately 1l (1¾ pints / 35fl oz)
Making a syrup concentrate from the rosehip juice is a perfect way to preserve it. It can then be used in other recipes, such as for rose creams (above).
500g (1lb 1¾oz) rosehips, de-stalked, tailed and halved
500ml (18fl oz) water
180g (6½oz) granulated sugar
Steam juice extractor
Muslin and sterilised bottle
Place the halved hips into a steam juice extractor (as described on page 149) or place the rosehips and water into a heavy-based saucepan and bring to the boil. Reduce the heat and simmer until the hips have turned to pulp. Remove from the heat and allow to cool. Strain the watery pulp through a muslin cloth, discard the seeds and pulp and return the juice to the saucepan. Add the sugar and bring to the boil again. Reduce heat and simmer for 5 minutes.
Transfer the syrup to a sterilised bottle and store in the fridge. The syrup will keep for at least 3 months.
Rosehip ripple ice cream
200g (7oz) rosehips, de-stalked and tailed
100ml (3½fl oz) water
30g (1oz) caster sugar
570ml (1 pint) double or whipping cream
1 tsp vanilla extract
1 tin (400g) condensed milk
Rosehips are full of seeds and fine fibres, which need to be removed before consumption. There are different way to do this, one of which is to halve the hips and scoop out the seeds with a teaspoon. This method is very time-consuming and you may want to sieve the pulp after cooking anyway, to ensure all the fibres are removed. Alternatively you can cook the hips, whole or halved, in water, and then sieve them to remove the seeds and fibres – this tends to leave you with a little less usable pulp per weight, but is much quicker. This is the method used in this recipe. If you choose to de-seed with a spoon you will need slightly fewer rosehips, about 170g (6oz).
Place the rosehips in a heavy-based saucepan with the water and bring to the boil. Reduce the heat and simmer for 5-10 minutes, until the hips have pulped. Remove from the heat and push through a sieve, discarding the seeds and skins, and collecting the fruit pulp in a bowl.
Return the pulp to the saucepan and add the sugar. Bring back to the boil, stirring all the time, and reduce the heat to simmer for 5 minutes. Remove from the heat, and put aside to cool.
Place the cream into a mixing bowl and whisk until stiff. Add the vanilla extract and the condensed milk and whisk again, mixing the ingredients thoroughly and aerating them. The little bubbles trapped in the cream mixture help to make the frozen ice cream soft.
Pour the cream mixture into a freezer-safe tub and divide down the middle with a spatula. Pour half the rosehip mixture into the groove and stir broadly in figure-of-eight motions, then add the other half and stir in around the edges of the tub. Put the lid on the tub and place in the freezer. The ice cream will be ready in a minimum of 3 hours and should be taken out of the freezer 10 minutes before serving.
Try this basic recipe with different fruit purées, such as haw, apple, pear, wineberry or autumn olive. The ice cream is very sweet, so you may not need to add sugar to the fruit – the contrast of sweet, creamy ice cream with a tart fruit ripple is just perfect!

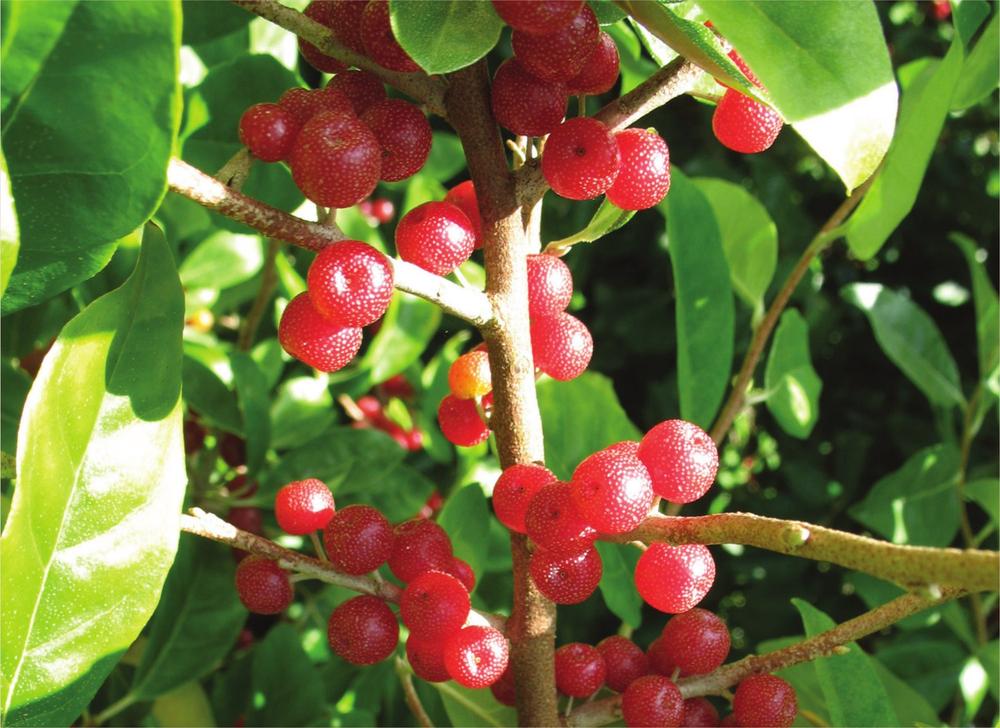
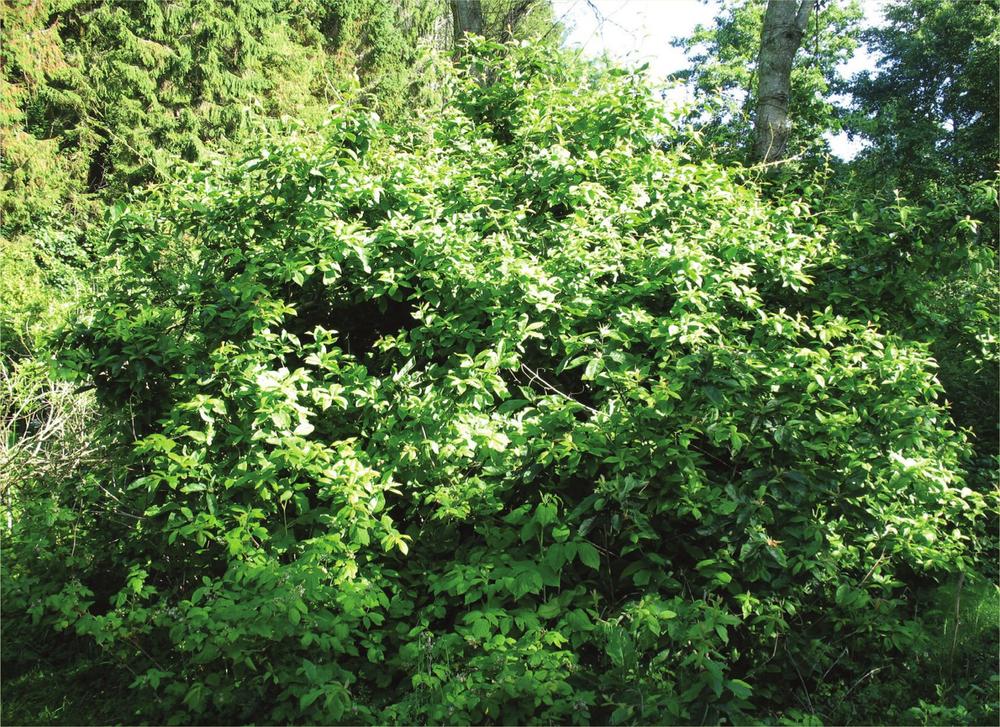
Autumn olive (Elaeagnus umbellata)
A top plant in the forest garden, this deciduous large shrub is an excellent windbreak, bee plant and nitrogen fixer, and also produces a crop of fantastic fruits.
When they first turn red, the fruits will still be slightly astringent, but this disappears on cooking or drying. Autumn olive jam and fruit leathers are always favourites on forest gardening courses.
The fruit contains about 8.3 per cent sugars, 4.5 per cent protein and 12mg per 100g vitamin C. It was recently discovered that they also contain high amounts of lycopene, a carotenoid pigment most commonly associated with tomato and considered an important phytonutrient, thought to prevent or fight cancer of the prostate, mouth, throat and skin, and to reduce the risk of cardiovascular disease. The lycopene content of autumn olive fruit averages about 40-50mg/100g, compared with 3mg/100g for fresh raw tomato and 10mg/100g for canned whole tomato. Because of the high lycopene levels in autumn olive fruit, and the potential health benefits of this phytonutrient, there has been increased interest in commercial fruit production.
Autumn olive leafs out in late winter and retains its leaves late into the autumn, so as a shelter and windbreak plant it is excellent. The reddish speckled fruits ripen in September/October. An individual bush will ripen fruits over 3-4 weeks, and the ripe fruits can hang well on the bushes if birds don’t take them. There are also earlier- and later-ripening selections of autumn olive to make the season longer.
Although individual fruits are small (about 10mm/¼" across), they are borne in profusion, lining the branches thickly, and it is a fast crop to harvest by picking or by shaking the bushes. The fruits store for about 2 weeks in a fridge or can be placed straight into a freezer to use at a later date. In size and texture they are similar to currants and blueberries and can be used in the same way in desserts such as pavlovas and cheesecakes, in stewed fruit mixtures or on top of pastries.
Autumn olive & red onion relish
200g (7oz) autumn olives
2 red onions, finely shredded
2 tbsp vegetable oil
3 garlic cloves, crushed
5cm (2") piece fresh ginger, peeled and finely grated
150ml (5¼fl oz) fruit vinegar
140g (5oz) light muscovado sugar
½ tsp ground nutmeg
½ tsp ground cinnamon
½ tsp ground cardamom
In a heavy-based saucepan, fry the onions in the oil over a medium heat for about 5 minutes, until they are translucent and beginning to brown. Add the garlic and ginger and fry for 1 minute, then add all the remaining ingredients apart from the autumn olives. Bring to the boil then reduce the heat and simmer for 5 minutes.
Add the autumn olives and simmer for a further 5 minutes. Stir occasionally but take care to keep the berries intact, and remove from the heat before they break down.
Transfer to a sterilised storage jar and store in the fridge. The relish will keep for up to 3 weeks.

Autumn olive & blackberry tartlets
Makes about 12 tartlets
200g (7oz) autumn olives
100g (3½oz) blackberries
1 tbsp berry jam
1 tbsp hot water
Pastry:
225g (8oz) plain flour, sifted
100g (3½oz) butter, diced and at room temperature
80g (2¾oz) golden caster sugar
1 egg, whisked
A little milk (if needed)
Crème pâtissière:
250ml (8¾fl oz) whole milk
3 drops vanilla essence
3 eggs, yolks only
60g (2oz) caster sugar
30g (1oz) plain flour
Optional – autumn olive purée topping:
50g (1¾oz) caster sugar
1 tbsp cornflour
Baking beans (dried beans or lentils)
A 12-cup cake tin
9cm (3½") pastry cutter
Preheat the oven to 180°C (350°F / Gas Mark 4)
Autumn olives, like other berries, contain small, hard seeds. They are no more noticeable than those in other berries, but if you would rather avoid them you can choose to make a purée topping from the autumn olives rather than using them whole, as described below.
For the pastry, work the butter into the flour to achieve a crumb texture. Add the caster sugar and stir in. Add the egg and combine all ingredients together into a single ball, adding a little milk if necessary. Wrap the ball of dough in cling film and refrigerate for at least 20 minutes.
Dust a surface with flour and roll the pastry dough out to about 4mm (⅛") thick. Using the pastry cutter, cut out 12 discs of pastry and place them into the depressions of the cake tin. Prick each case with a fork, place a layer of foil or baking parchment over the pastry and fill with dried beans or lentils (baking beans), which will provide weight to prevent the pastry from lifting away from the bottom of the dish as it cooks. Bake for 15-20 minutes, remove from oven, and remove the beans and foil/parchment. Allow to cool in the tin.
For the crème pâtissière, combine the milk and vanilla essence in a saucepan and warm over a low heat until it begins to steam. In a mixing bowl combine the egg, sugar and flour to form a coarse paste. Slowly add the warm milk and whisk into a smooth liquid. Return the mixture to the saucepan and place over a low heat, stirring continuously with a whisk, until the mixture thickens.
While the crème is still hot, spoon it into the pastry cases, leaving enough space to put the berries on top. If using the autumn olives whole, arrange them on top of the crème and top with two or three blackberries. If you would prefer to make a purée, blend the autumn olives and sieve out the seeds and pulp to form a thick juice. Place the juice in a small saucepan with the sugar and cornflour. Over a low heat stir continuously until the purée thickens. Remove from the heat and spoon a little purée on top of the crème in each tartlet. Top with two or three blackberries and allow to cool.
Mix together the jam and hot water and glaze the tartlets with a pastry brush. Leave to cool and serve when ready.

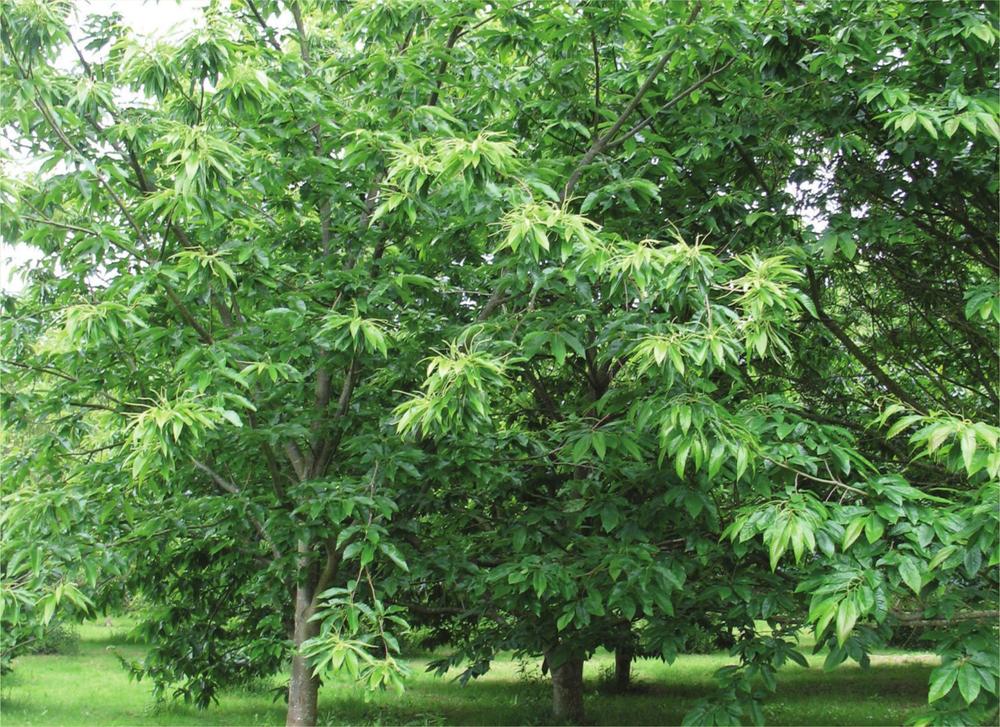
Chestnuts (Castanea spp.)
Sweet chestnut is well known as a commercial crop in some countries, particularly in the Mediterranean, but increasing numbers of people are growing suitable selections in the UK and other cooler regions. It tends to be a more reliable crop than many nuts, because the trees flower in summer, so frosts are never a problem.
Fresh chestnuts are perishable and do not store well for very long – just a few weeks at cool temperatures in an airy place. To use them fresh in cooking, they need shelling/peeling. The easiest way to do this is to cut the nuts in half, then boil them for about 5 minutes, after which the half kernels should separate quite easily from the shell and thin inner shell.
If you dry chestnuts in-shell, they will store for years. The outer shells are brittle, so to shell them, put some in a bag or sack and whack it against the floor a few times; you can then pick out the kernel pieces from the mixture. The dry kernels should be soaked overnight and boiled for 40-50 minutes to cook (less if they are added to other recipes which are cooked further).
Chestnuts, as well as being a high-carbohydrate food, are a good source of vitamin C, and are high in minerals including potassium and manganese.
The nuts can ripen between late September and early November in the UK, depending on the selection. Obviously, further north, early-season varieties are more suitable, as these do not require a long growing season.
As with most nuts, chestnuts are harvested from the ground after they have dropped from the tree. However, they contain much more water (about 60 per cent in total) than other nuts, which makes them more perishable – this means it is more important to harvest daily, as chestnuts on the ground will start to rot more quickly. It is also important to use the nuts quickly, as – apart from drying (see page 40) – long-term storage is not easy. It is also worth sorting through your chestnuts to make sure there are none with holes in them, which indicates a pesky maggot inside.
Chestnut & lentil pâté
This pâté is a favourite on forest gardening courses and is really easy to make.
100g (3½oz) fresh chestnuts or 50g (1¾oz) dried chestnuts
340g (12oz) onions, diced
2 tbsp olive oil
2 garlic cloves, crushed
150g (5¼oz) red split lentils
500ml (18fl oz) vegetable stock
Salt and pepper
Stick blender
With fresh chestnuts, halve and cook for 5-10 minutes, then peel off the outer and inner shells. If starting with dried chestnuts, soak these overnight and boil for 40 minutes.
Fry the onions in the oil over a medium heat until browned. Add the crushed garlic cloves and lentils, stirring for a minute or two so the lentils get coated with oil.
Add the vegetable stock (you could use Kallo vegan wheat-free stock cubes) and bring to the boil. Place the lid on the pan and simmer for 20 minutes until the lentils are soft and fully cooked.
Now add the chestnut pieces, stir well and remove from the heat. Use a stick blender to purée the mixture; check seasoning, then place it in a bowl.

Pheasant pot roast with quince & chestnuts
Serves 2-3
150g (5¼oz) quince, puréed (see method)
200g (7oz) chestnuts
2 tbsp olive oil
30g (1oz) butter
1 medium red onion, finely sliced
80g (2¾oz) mushrooms, finely sliced
50g (1¾oz) chorizo or smoked bacon, finely sliced
1 pheasant, skinned and prepared
1 tbsp plain flour
300ml (10½fl oz) chicken stock
2 tbsp chopped fresh rosemary
2 tbsp chopped fresh sage
Salt and pepper
Stick blender
Heat the oil and butter in a large frying pan. Add the onion, mushrooms and chorizo. Rinse the pheasant through with cold running water and place on its side in the middle of the pan, surrounded by the other ingredients. Over a medium heat, lightly brown the pheasant on both sides, then remove from the pan and place into a preheated slow cooker on high. If you don’t have a slow cooker you can use a casserole dish – pre-heat the oven to 150°C (300°F / Gas Mark 2)
With the heat off, add the flour to the pan and stir into the ingredients, coating them evenly. Now add the stock, slowly stirring it into combine with the flour. Finally stir in the quince purée and transfer the mix to the slow cooker, surrounding the pheasant. Add the chestnuts and herbs and replace the lid.
Cook for 3-4 hours in the slow cooker, or 1-2 hours in the oven, until the meat is fully cooked and tender. Periodically turn the pheasant and baste with some of the sauce to keep the meat moist. Check seasoning.
Serve with potatoes and steamed greens for a warming autumnal feast!
For the puréed quince:
Peel, core and dice the quinces (roughly twice the weight of whole fruit of the final weight of purée required); place into a saucepan and cover with water. Bring to the boil and then simmer gently until the quinces are soft and drop off smoothly when you push a fork into them. Strain off excess water (you can leave in a little water for a finer purée) and blend with a stick blender until smooth.
Try this with other birds, such as wood pigeon or duck. The tartness of the quinces and the sweetness of the chestnuts complement their rich, earthy flavours.

Sweet chestnut pastry
Makes about 12 pastries or a 25cm (10") flan
100g (3½oz) sweet chestnut flour (see right)
110g (3¾oz) butter
50g (1¾oz) caster sugar
1 egg, beaten
100g (3½oz) plain white flour
A little milk (if needed)
Garnish:
Fresh chestnuts, halved
Preheat the oven to 180°C (350°F / Gas Mark 4)
Whisk together the butter and sugar until creamy. Gently whisk in the egg, then add the chestnut flour and sieve in the plain flour. Fold together with a spoon until it begins to bind, adding a splash of milk if necessary to keep it moist, then flour your hands and roll the mixture into a firm ball. Flatten to a disc and wrap in cling film, then put in the fridge for 10 minutes.
When the pastry has cooled and settled it will be ready to roll out on a floured surface and used for sweet pies, flans and tarts.
For the flour:
Whole dried sweet chestnuts (see page 40 for drying advice) are too large to put through a normal grain mill, so break them up into pieces. The best way to do this is put them into a cloth bag or sack and break them against a concrete floor with a hammer! The pieces, which can be a little larger than grains, will then go through most grain mills to produce chestnut flour. See Resources for suppliers of grain mills.
Try this with puréed medlars to make chestnut and medlar tartlets:
Roll out half the above quantity of pastry to 4mm (⅛”) thick. Using a small round pastry cutter, cut out circles of pastry and push them into a 12-cup cake tin.
Spoon in medlar purée to half-fill the pastry cases. Peel and halve fresh chestnuts to garnish, and brush the pastry crusts and chestnuts with honey water (1 tsp honey + ½ tsp hot water).
Bake for 25 minutes or until the crusts have browned.


Flowering quince / japonica (Chaenomeles japonica)
Flowering quinces are mainly treated as ornamentals in the UK, but are valuable fruiting plants, and japonica (C. japonica) is known as the northern lemon in the Baltic states, where it is grown commercially.
Japonica is the smallest of the Chaenomeles, growing around 1m (3') high and wide. Pink or reddish flowers in spring are followed by greenish-yellow fruits that ripen in autumn and hang well on the bushes.
The fruits and juice are acid and, for most people, need sweetening; they are very high in vitamin C and high in potassium.
Harvest the fruits in autumn. They are 3-6cm (1¼-2½") in diameter and contain a number of dark brown seeds. In common with apples and other members of the Rosaceae, these seeds are poisonous and should not be eaten.
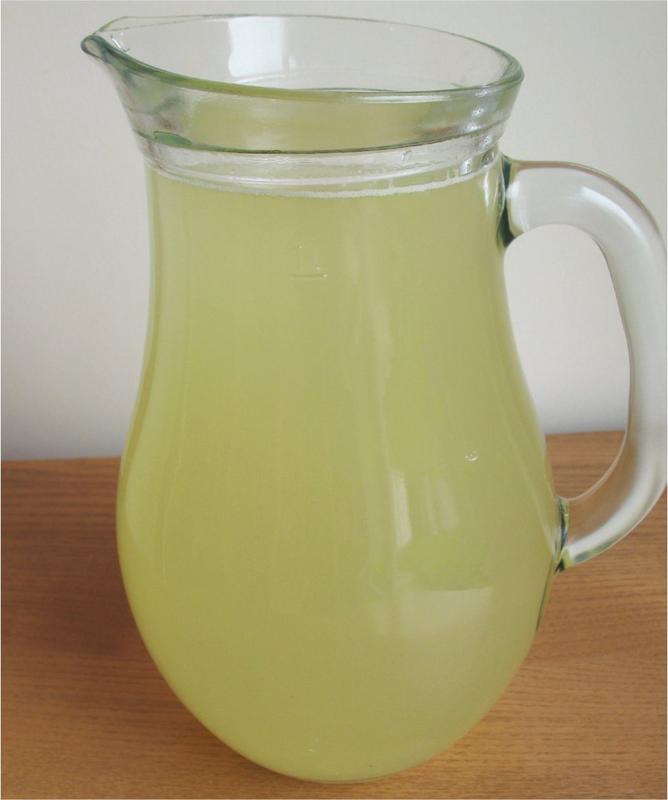
Quinceade
Makes 4.5l (8 pints / 160fl oz)
710g (1lb 9oz) japonica fruits
4l (7 pints / 140fl oz) water
300g (10½oz) sugar or equivalent sweetener (less or more to taste)
This is a superb soft drink. You can use fresh fruits but you can also use the previous year’s harvest that has been put straight in the freezer with no treatment.
Halve fruits and remove seeds, using the handle end of a teaspoon to scoop them out. Place the halves in a liquidiser with about 710ml (1¼ pints / 25fl oz) of water and liquidise for a few seconds. Pour into a sieve over a bowl and slowly pour on 2.5l (4½ pints / 90fl oz) more water, agitating the pulp so that you are extracting the maximum flavour from it.
Boil the remaining water and dissolve the sugar, then add to the juice. Bottle and use within a few days.
Other recipes using flowering quince: Baked American elderflower custard with flowering quince compote (page 110); Flowering quince & haw chutney (Part 1, page 23).

Hawthorns (Crataegus spp.)
There are numerous hawthorn species, many of which have excellent fruits for eating. Most form small trees with abundant ornamental flowers in spring. They are easy trees to grow in most situations.
The young leaves are also eaten in spring, mainly in salads. The fruits, usually red or orange, ripen in September/October. They hold well on the tree so it is worth waiting until most or all are ripe, then harvesting in one go. They can be made into haw jam and included in fruit leather mixes.
Haw fruits contain useful quantities of vitamins B and C, as well as many minerals.
To de-seed fruits like haws, with relatively small seeds, you can use a Moulinex sieve: fix a plate with appropriate-sized holes in the base, then put in the fruits or fruit pulp and turn the handle to force the pulp through the holes. Softer haws can be put straight into the sieve, though firmer ones may need simmering for a few minutes to soften them.
Roasted wild duck with haw and chestnut stuffing
Serves 2
1 tbsp haw jelly (see Part 1, page 20)
1 prepared wild duck (590-710g / 1lb 5oz-1lb 9oz)
Stuffing:
1 tsp haw jelly
50g (1¾oz) fresh chestnuts
40g (1½oz) stale bread
1 tsp dried sage
Half a small onion / 1 long welsh onion leaf, chopped
Vegetable oil
1 small egg, beaten
Salt and pepper
Garnish:
3 large sage leaves
Food processor
Preheat the oven to 150°C (300°F, Gas Mark 2)
Take the prepared duck and rinse thoroughly, outside and inside, with cold water. Pat it dry with kitchen paper and place in the centre of a roasting tin.
To make the stuffing, put the bread, chestnuts and sage into a food processor and blend to a chunky crumb consistency. Fry the onion gently in a little oil until translucent (you don’t need to fry welsh onion). Transfer the onion and crumb mix to a mixing bowl and add the teaspoon of haw jelly, egg, salt and pepper to taste. Stir together well until you can form a ball with the mixture, ensuring the egg and jelly have been well combined. If your bread was very dry you may wish to add the hot water to get the mixture to stick together, but if your ball is firm you won’t need it – the cooking juices of the duck will moisten the stuffing as it cooks.
Using a tablespoon, spoon the stuffing into the cavity of the duck. Prick the skin in a few places with a sharp knife to allow the fat to self-baste the duck while cooking. Put 1 tablespoon of haw jelly into a cup, add half a tablespoon of hot water and stir until the jelly has dissolved. Using a pastry brush, glaze the duck liberally with the haw jelly, then lay the sage leaves across the top as a garnish.
Put in the centre of the oven and roast for 50 minutes, or until the juices run clear and the skin is well browned. Remove after 20 minutes to re-glaze and add some parboiled potatoes to roast around the bird. Allow it to rest on a carving board for 10 minutes after cooking. While the duck rests you can drain any excess oil from the roasting tin to make gravy, then return your potatoes to the oven at 200°C (400°F / Gas Mark 6) to crisp up.
Try this with pheasant and replace the haw jelly with quince jam, and the sage with rosemary.

To make traditional gravy
If you are not roasting vegetables in the same tin, or if the vegetables are ready when the bird comes out of the oven, you can make gravy in the roasting tin. Otherwise, just drain off the oil and juices into a saucepan. Add 1 tbsp plain flour and stir into the oil with a wooden spoon or a hand whisk until fully blended. Turn on to a low heat and allow the flour and oil to cook gently for 2 minutes, stirring continuously. Now add the vegetable water (the trick is to remember to keep it when straining the veg!) a little at a time, making sure you have blended it well before adding more. You can add a stock cube to the water first for more flavour, and a drop of gravy browning or yeast extract for colour. Bring the gravy to the boil and simmer gently for 5 minutes. Serve in a preheated jug.
Haw & apple strudel
Serves 4-6
400g (14oz) haws
400g (14oz) eating apples, cored and diced
50g (1¾oz) sultanas
¼ tsp ground nutmeg
6 sheets filo pastry
50g (1¾oz) melted butter
2 tsp Demerara sugar
Preheat the oven to 190°C (375°F, Gas Mark 5)
Prepare your haws by gently cooking them whole over a low heat for around 15 minutes. If they are fairly hard, add 1cm (½") of water to the pan and cover to simmer gently. Remove from the heat and allow to cool. Once cooled, mash them with a potato masher or a pestle to release the pulp. Transfer to a large sieve and, using a pestle or a wooden spoon, push the pulp through the sieve into a bowl, a spoonful at a time, discarding the skin and seeds as you go (or use a Moulinex sieve as described on page 163). Put the pulped haws to one side.
Place the apples into a spacious saucepan. Eating apples do not need sugar or water adding. Place over a low heat and cover, stirring occasionally, for 5-10 minutes or until the apples have become soft. You can keep the apples fairly chunky for this recipe – just remove them from the heat before they break down completely. Add the haw pulp, sultanas and nutmeg to the apples and stir together well. The haw pulp binds the mixture and gives a pleasant rosy tint.
Put a sheet of baking parchment or kitchen foil on your work surface and lay out the first sheet of pastry. Brush the sheet with melted butter and carefully place the second sheet on top. Brush the second sheet and repeat until all sheets are on top of one another, stuck together with butter. Now place your fruit mixture in a thick line in the centre of the pastry. Fold the top edge over the fruit and brush with butter, then fold the bottom edge over and brush with butter, then fold in the side edges to close up the parcel. Using the paper or foil, gently roll the parcel upside down on to a greased baking tray to reveal what will be the top of your strudel. With a knife, cut slits widthways along the length of the parcel, brush with butter and sprinkle with the sugar.
Place the tray in the top of the oven and bake for 30 minutes, or until the top is golden and crispy. Serve warm with cream, ice cream or yogurt.
Try this with apple and medlar, apple and quince or apple and pear. Filo pastry is easy to find in most supermarkets, but if you have the time and the inclination, it is a good challenge to make it yourself. If you make a batch you can freeze it between layers of baking parchment in readiness for the tree fruit harvests.

Other recipes using hawthorn: Spring forest salad (page 70); Haw jelly (Part 1, page 20); Flowering quince and haw chutney (Part 1, page 23).
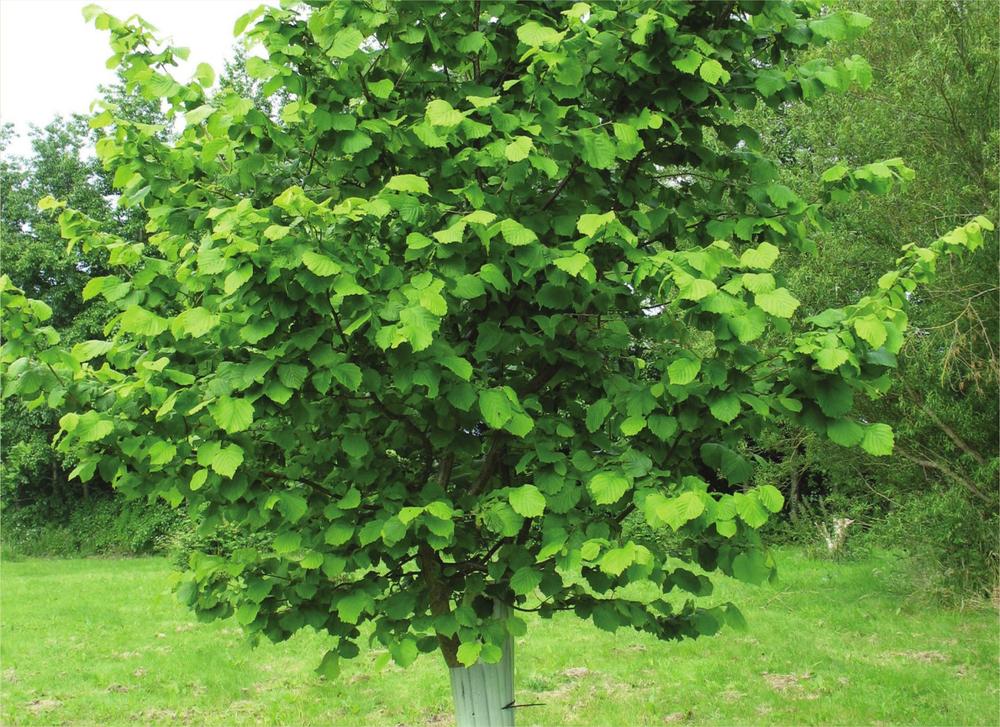
Hazels (Corylus spp.)
The only native nut to the UK, this is ironically probably the least used in cooking! Hazel trees are well known from hedgerows and woodlands, where they make large shrubs or small trees, and the crop of nuts is – if you can get it before critters like squirrels – extremely versatile. Hazelnuts are high in healthy fats (oils), protein, iron, calcium, vitamins C, E, etc. Commonly used in sweet recipes, they are particularly good with milk chocolate and used in desserts, but they are also very good in savoury dishes. When added to a casserole they become soft, like chestnuts.
The nuts ripen in September and are best shaken from the trees and collected from the ground using a Nut Wizard (see page 15), or shaken on to a tarp or sheet. They will need drying to store (in-shell is best), after which they will store for several years at room temperature.
Hazel trees are often biennial in their cropping nature, with a heavy crop year alternating with a light or no crop year. This goes for wild trees as well as the cultivated types you might deliberately have planted. Squirrel problems are always worse when wild trees are having a light year, whereas if a heavy crop year in wild trees coincides with a heavy crop year on your cultivated trees, the squirrels may leave yours alone. May. Or may not.
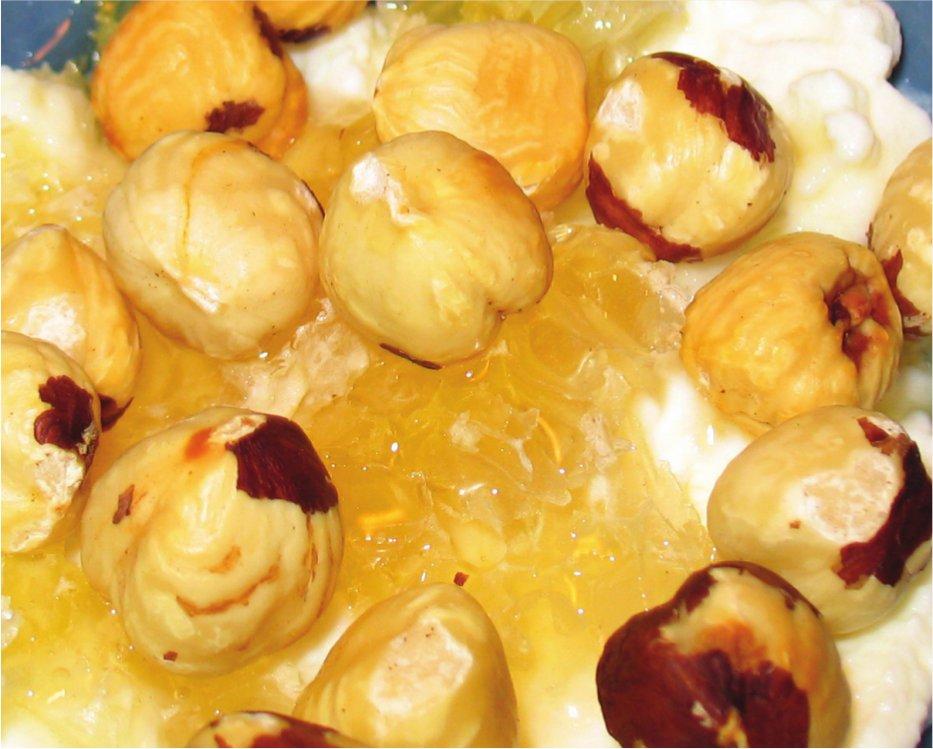
Ricotta, honeycomb, hazelnuts
This recipe by Hugh Fearnley-Whittingstall is a delicious way to eat hazelnuts. You probably won’t get honeycomb at your local supermarket, but good delis often stock it, and a small local honey producer will be able to sell to you direct; it’s also available online. It’s worth getting hold of some because it is such a treat: honey in its purest form, straight from the hive, untreated and pretty much as the bees intended it. The idea is to eat the whole thing, comb and all. The comb has a chewy, waxy texture and is perfectly edible, but you can discreetly discard the chewed comb once you’ve sucked all the honey from it, if you prefer.
Serves 4
100g (3½oz) hazelnuts (skin-on)
255g (9oz) ricotta
About 200g (7oz) honeycomb
Preheat the oven to 180°C (350°F / Gas Mark 4)
Spread the hazelnuts out on a baking sheet and toast them in the oven for about 5 minutes, until they are lightly coloured and their skins are starting to split. Tip them on to a clean tea towel, fold the towel over them and give them a vigorous rub. This will remove most of the skins – don’t worry if a few bits remain. Alternatively, you can remove the skins by tipping the hazelnuts into a sieve and rubbing the tea towel over them, so the bits of skin fall through the sieve.
Divide the ricotta between shallow serving bowls. Break or cut your honeycomb into four roughly equal pieces and place on the ricotta, trickling over any honey that has escaped from the comb too. Scatter over the hazelnuts. Admire the irresistible tripartite simplicity of what you have just compiled, and serve with a smile.
You can use a thick, rich natural yogurt instead of the ricotta, or plain fromage frais. And, of course, you can use a good runny honey without the comb.
Hazelnut & mulberry shortbread
Makes 20 biscuits
80g (2¾oz) hazelnuts
40g (1½oz) dried mulberries
130g (4½oz) butter, at room temperature
60g (2oz) golden caster sugar
120g (4¼oz) plain white flour
50g (1¾oz) sweet chestnut flour or rice flour
½ tsp allspice
Pinch of salt
Icing sugar
A 6cm (2½") pastry cutter
Food processor
Preheat the oven to 150°C (300°F, Gas Mark 2)
Toast the hazelnuts in the oven for 5 minutes on a baking tray. Remove from the oven and allow to cool. Once cooled you should be able to remove the skins easily by rubbing them between your fingers or as described opposite. Transfer the skinned nuts to a food processor and roughly chop so that you have varying sizes of hazelnut chunks.
Using a spoon or an electric whisk, cream the butter and sugar until soft and light. Sift in the plain flour, chestnut flour, allspice and salt. Using your fingertips work the ingredients together until they form a soft crumb texture. Add the hazelnuts and mulberries, and if the mixture seems too dry add a little more butter and mix into the dough. Keep the mixture loose and crumb-like until you feel you have the right consistency to form a cohesive, malleable ball. Take care not to overwork the mixture, and be as gentle and sparing as possible with your mixing to keep the dough light. When you are happy with the consistency, gently press the dough together into one ball.
Transfer to a flour-dusted surface and press the ball into a flat disc. Using a flour-dusted rolling pin, roll the dough out to about 1cm (⅜") thick. Cut out biscuits with the pastry cutter, then gather up the excess dough into a ball, roll it out and cut again. Line a flat baking tray with baking parchment and carefully transfer the biscuits to the tray using a palette knife.
Bake for 20 minutes in the centre of the oven. If your oven is hotter at the back, you may want to turn the tray halfway through to prevent those at the back from burning. Remove from the oven and allow to cool on the tray for a few minutes before transferring to a cooling rack. When cool, dust with icing sugar.

Squirrel with wild mushrooms & hazelnuts
As one of the biggest hindrances to a good hazelnut crop is the grey squirrel, it seems fitting to put them together in this hearty autumnal stew!
Serves 2
2 squirrels, prepared and jointed
80g (2¾oz) hazelnuts, toasted and skinned
50g (1¾oz) plain flour, seasoned
30g (1oz) butter
2 tbsp olive oil
1 medium onion, diced
300g (10½oz) mixed mushrooms (e.g. chanterelle, hedgehog, oyster, field, wood cep), sliced
2 garlic cloves, crushed
200ml (7fl oz) white wine
600ml (21fl oz) chicken or vegetable stock
2 sprigs of thyme, leaves stripped
1 tbsp fresh chopped sage
80ml (3fl oz) double cream
Salt and pepper
Place the seasoned flour in a shallow dish and roll the squirrel pieces in it until well covered.
Add the butter and oil to a spacious, heavy-based saucepan and place over a medium heat until the butter has melted. Add the onion and mushrooms and fry for about 2 minutes, until they begin to soften, then add the garlic and fry for 1 minute more. Add the squirrel pieces and brown lightly on all sides. Add a tablespoon of the remaining seasoned flour and stir in until it disappears. Gradually add the wine, stirring continuously, and simmer on a high heat for about 2 minutes. Add the stock, bring to the boil and reduce to a simmer. Add the herbs and hazelnuts and cover the pan.
Leave the pan to simmer on a low heat for 1 hour, and occasionally check that there is enough liquid to cover the meat and vegetables; add more stock if necessary. After 1 hour the meat should start to come off the bone. If it is still clinging to the bone continue cooking for up to 30 minutes, checking occasionally until the meat is really tender. When ready, remove the pan from the heat, stir in the cream and season to taste.
Serve with boiled or mashed potatoes and some seasonal greens.
Hazelnuts are more palatable cooked than raw – roasting lightly is one of the best ways. Like this they are also a fantastic snack food!

Other recipes using hazelnuts: Chicory, pear & hazelnut salad with blue cheese dressing (page 117); Siberian purslane salad (page 217).

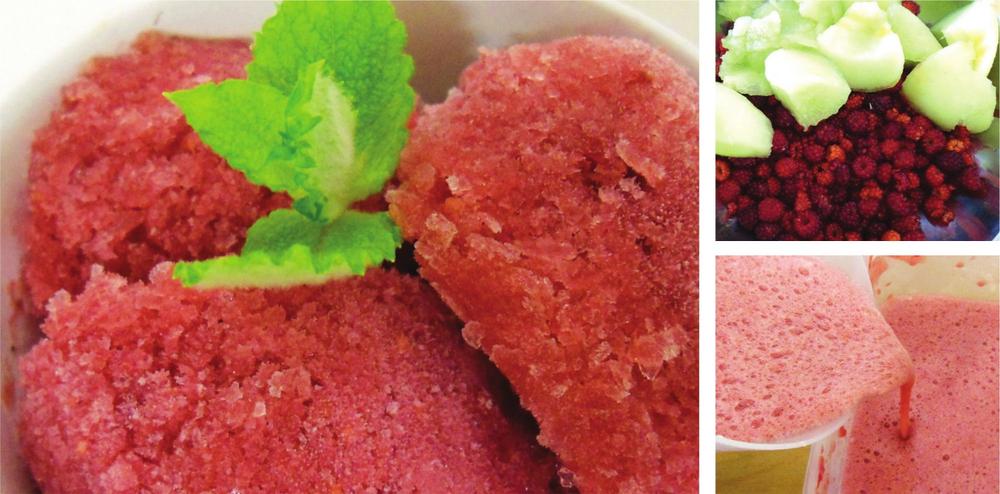
Japanese wineberry (Rubus phoenicolasius)
This less common member of the raspberry family grows as a spiny bush about 1.5m (5') high. Like raspberries, its stems are biennial – growing one year, fruiting the next and then dying back – but instead of suckering from the base, Japanese wineberry spreads by tip-layering, like blackberries.
The fruits are likely to be high in vitamins C, E and K, and many minerals, like most of the raspberry-type fruits.
After flowering in spring, the fruits ripen between late July and early September. Before ripening, the fruits are enclosed in papery calyxes, which protect them well against pests. The calyxes open to reveal bright orange-red raspberry-like fruits, which are slightly sticky to the touch. Pick the fruits as they are revealed.
Wineberry & apple mint sorbet
Serves 4-6
450g (1lb) wineberries
A small handful of fresh apple mint
170ml (6fl oz) boiling water
50g (1¾oz) sugar
1 egg white
Garnish:
Apple mint leaves
Tear the apple mint leaves, reserving a few for garnish, and put them into a measuring jug. Pour over the boiling water and allow to steep until cool.
Either mash or blend the wineberries in a liquidiser until puréed. Pour the purée through a sieve into a bowl and discard the seeds and pulp. Strain the mint leaves from the water and add the water and sugar to the wineberry juice. Stir together well and transfer to a plastic, freezer-safe storage container. Check the sorbet periodically and remove when it is semi-frozen – solid at the edges and slushy in the middle.
Whisk the egg white until it forms stiff peaks. When the sorbet is semi-frozen, remove it from the freezer and add it to the egg white. Whisk together briefly and return to the container, and then to the freezer.
The sorbet is ready to eat once it is completely frozen, but you may want to remove it from the freezer 10-20 minutes before eating so it is easier to scoop. Decorate with apple mint leaves and serve.
This basic sorbet recipe works well with any fruit or combination of fruits. You may need to alter the amount of sugar you use, depending on the tartness of the fruit you choose, and some fruits will benefit from being cooked so that you can make a smooth purée. Delicious combinations include blackcurrant and apple, wineberry and melon, and autumn olive and mulberry.
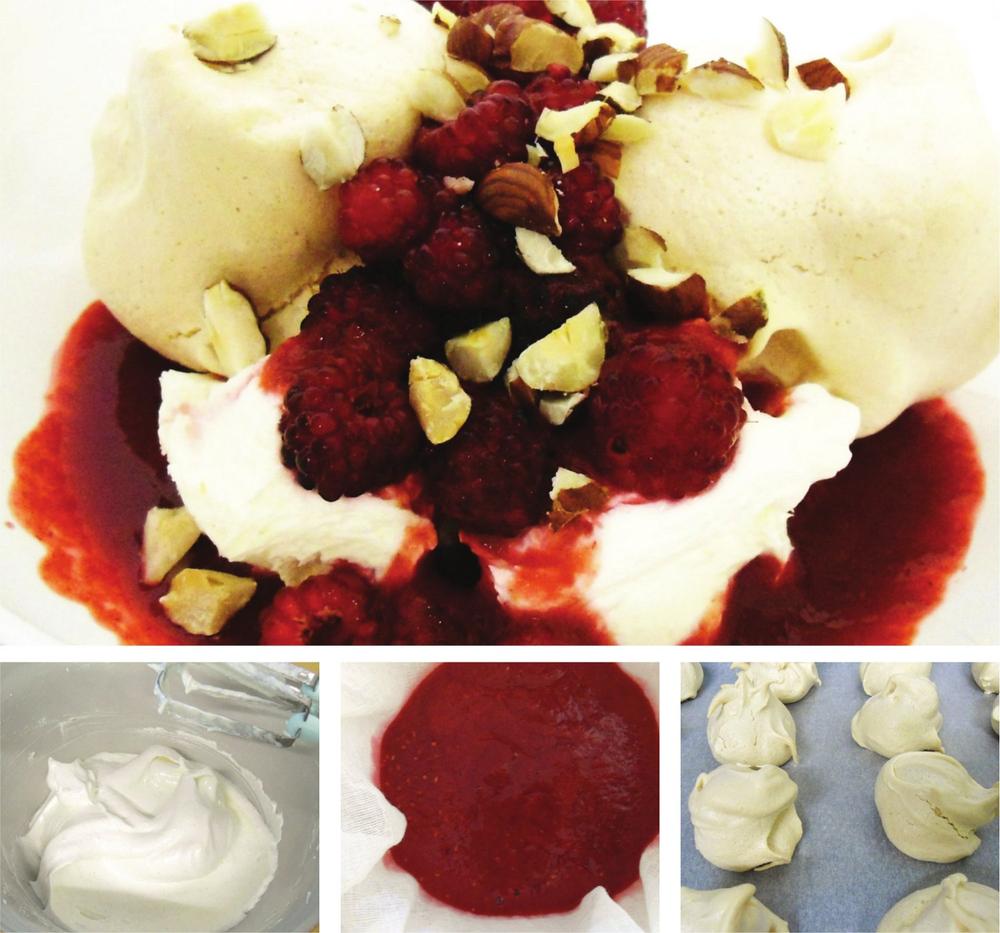
Wineberry meringues with hazelnuts
Serves 6-8
300g (10½oz) wineberries
2 egg whites
130g (4½oz) golden caster sugar
285ml (½ pint / 10fl oz) double cream, whipped
Garnish
30g (1oz) hazelnuts, toasted and chopped
Muslin
Preheat the oven to 140°C (275°F / Gas Mark 1)
Line a baking tray with baking parchment. In a spacious mixing bowl, whisk the egg whites until they form stiff peaks. Whisk in the caster sugar one tablespoon at a time, leaving one tablespoon aside for the fruit coulis. Whisk until thick and glossy, then place individual spoonfuls on to the baking parchment, making 16 little meringues.
Place the tray in the centre of the oven and bake for 1 hour. To test if the meringues are fully cooked, lift one and tap the base. It should be hard and sound hollow. Remove the meringues from the oven and place on a rack to cool.
Meanwhile, whip the cream and refrigerate until needed. Add the reserved tablespoon of sugar to half of the wineberries and either mash or use a liquidiser to blend them to a purée. Sieve into a bowl or strain through muslin to remove the seeds, then refrigerate until needed.
Assemble the dessert just before serving. Place a good spoonful of whipped cream into the bottom of each dessert bowl, then top with two or three meringues. Sprinkle over some whole wineberries, drizzle with coulis and top with hazelnuts.
Try this with other forest garden berries or a mix of several, including autumn olives, mulberries, blackcurrants or raspberries. You could use other nuts, too, and try blending these to a coarse powder and folding them into the meringue mix before cooking, for a different texture.
Medlar (Mespilus germanica)
Medlars make small, often twisted fruit trees. They flower in late May, after frosts have finished, so tend to be very reliable croppers. The fruits have a distinctive shape, like a sphere with an edge cut off flat, and can grow to 3-4cm (approx. 1-1½") diameter on good-fruiting varieties.
The texture of ripe fruits is like a purée, and the flavour is sweet with elements of date and apple. Some people enjoy them raw; they can also be used to make medlar jam and included in fruit leathers (they are good mixed with a juicier fruit). They are high in vitamin A, phosphorus and potassium.
Traditionally, the fruits are harvested still unripe with the first frosts in autumn; however, in warm summers in Devon they start ripening on the tree – a climate change effect. Conventional wisdom dictates that the fruits should be ‘bletted’ – a process that involves ripening them until they are semi-rotten – but not all would agree. When they ripen, the fruits soften and darken in colour. In cool Devon summers the fruit can still be harvested in late October, when the first frosts arrive; if they are placed indoors in a cool place, they will ripen 1-2 weeks later.
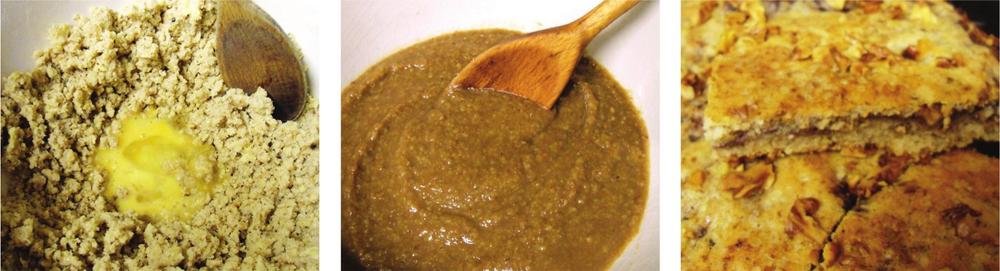
Medlar & walnut slices
200g (7oz) medlars
200ml (7fl oz) water
3 tsp brown sugar
130g (4½oz) butter, at room temperature
130g (4½oz) caster sugar
100g (3½oz) ground walnuts
¼ tsp cinnamon
200g (7oz) plain flour
1 egg, beaten
50g (1¾oz) chopped walnuts
1 tbsp brown sugar
Milk
Baking tin approx. 25 x 30cm (10 x 12") and at least 4cm (1½") deep.
Preheat the oven to 190°C (375°F / Gas Mark 5)
Place the medlars in a saucepan with the water and 3 teaspoons of brown sugar. Bring to the boil and simmer until they break up. Remove from the heat and strain off the water, then place a sieve over a bowl and push the pulp through with a wooden spoon, leaving the skin and seeds in the sieve to be discarded. Put the pulp to one side while you make your dough.
Slice the butter into a mixing bowl, add the caster sugar, ground walnuts and cinnamon and sieve in the flour. Rub the ingredients together to form a crumb, then make a space in the middle of the mixture and add the egg. Using a wooden spoon gradually mix the crumb into the egg to form a dough. Stir in milk a splash at a time until the dough reaches a thick ‘dropping’ consistency. Place half the dough into the centre of the greased baking tin. Level out the dough across the tin using a spatula. Now spoon the medlar pulp on top and spread over in an even layer.
Sprinkle half of the chopped walnuts over the medlar layer and cover with the second half of the dough mix. This forms a sandwich of two layers of dough with medlar and walnuts in the centre. Finish by sprinkling the top with the remaining chopped walnuts and the brown sugar.
Bake for 15-20 minutes. Remove and allow to cool, then slice into squares and store in a sandwich box for snacks and teatime treats.
Try this with haws instead of medlars. This version is based on a traditional recipe using mincemeat as the middle layer, but works well with tart, pulpy fruits such as medlars and haws, with a little spice such as cinnamon or nutmeg and some chopped nuts.
Toffee medlars
200g (7oz) medlars, bletted
60g (2oz) butter
80g (2¾oz) caster sugar
¼ tsp ground cinnamon
¼ tsp ground nutmeg
Preheat the oven to 200°C (400°F / Gas Mark 6)
Melt the butter in a large frying pan, add the medlars and fry on a medium heat for 5 minutes. Turn off the heat and add the sugar and spices. Stir together well, covering the medlars as much as possible. Transfer into a baking dish and put into the oven for 10-15 minutes, until the medlars are browned and the skin has begun to split. The sugar forms a toffee coating on the medlars, which will be very hot when they come out of the oven, so allow to cool a little and serve warm with ice cream.

Try this with chestnuts and walnuts. Peel or crack the nuts and add them raw to the sugar and butter mix, then bake as above. For a sweet snack with a lower glycaemic index, use honey instead of sugar as follows:
60g (2oz) butter
2 tbsp honey
¼ tsp ground cinnamon
¼ tsp ground nutmeg
Melt the butter in a saucepan, add the honey and spices and stir together until combined. Add your medlars and/or nuts and stir together, coating with the honey mixture. Transfer to a baking dish and bake at 180°C (350°F / Gas Mark 4) for 15 minutes.

Oaks(Quercus spp.)
Acorns of all oak species can be used for food, but most of them contain high levels of tannins, which are poisonous so must be removed before eating.
A number of cultures have depended on acorns as a staple in the past, and luckily there are still several well-documented ways of removing tannins. Cold-water leaching (described overleaf) is a good method and leads to minimal nutrient loss. You can also boil chopped acorn meal in water for faster removal, but you will lose more nutrients that way.
Acorns provide a complete vegetable protein and are high in carbohydrates. They contain 16 amino acids, appreciable amounts of vitamins A and C, and significant quantities of calcium, magnesium, phosphorus, potassium and sulphur.
As with most nuts, acorns are harvested from the ground. The first acorns to drop from a tree will usually have holes drilled in them and are being consumed within by nut weevils, so do not harvest these! Ideally clear them away before the good acorns start to fall. If you have poultry they will love to consume any weevil larvae emerging from the infested nuts.
Acorn preparation
After harvesting acorns, leave them in a cool, dry place for 1-2 weeks. This will encourage the kernels to shrink slightly, making shelling easier, and allow the tannin levels to reduce.
Shelling acorns can be done in a number of ways. For a fairly small number – as required in the recipes here – just cut each acorn in half lengthways with a sharp knife, and the two halves of the kernel will fall out freely. For larger quantities you can crush the acorns on a wooden board with a wooden mallet or piece of wood – this is messier and you have to separate out the bits of shell afterwards. If the acorns have been dried, you can put them through a nut-cracking machine (either hand-cranked or powered).
Removing the tannins from acorns is easy, and is no more trouble than (say) the sprouting of seeds.
Grind the acorn kernels into small pieces (2-6mm – less than ¼") in a coffee grinder or food blender. Half-fill a large jar with the acorn meal and fill to the top with fresh water. Place in a fridge. Then empty off the water from the top half of the jar and refill with fresh water twice a day for 3-4 days. Initially the water will be brown, as the tannins leach out of the acorns, but it becomes clearer day by day. After 3 or 4 days, the tannins have all gone, and the acorn meal can be drained off and then used.
You can leach tannins more quickly by repeatedly boiling the acorn meal and draining, but you are likely to lose many more nutrients this way, and the acorn meal also ends up a much darker-brown colour.
To make acorn flour, spread the acorn meal on a non-stick baking sheet to allow it to dry, and mill it into flour. Hawos (see Resources section) make fantastic small stone mills.
Starch extraction
Extracting the starch involves an adaption of the leaching method described above. As you pour off the tannin water from your soaked acorn grits, pay attention to a creamy, cloudy substance in the water – this is the starch. Stop pouring once this starts to flow, top up with fresh water and soak again for a few hours. To keep the starch, you have to leach the acorns for longer (as you are not pouring off as much at each change of water), ensuring that you do not pour any of the cloudy starch out in the process. After a few days, when the acorns are ripe, fill the container with water once more, stir well and allow to settle for 1 hour. Pour the clear water off and pour the cloudy water into a separate bowl, add fresh water to the acorns and allow to settle again, adding any cloudy water from this second round to the first.
Allow the starchy water to stand for 1 hour then separate, pouring off the clear water, and you should be left with an off-white, slightly sticky substance which can be dried in a very low oven or dehydrator to make acorn starch flour.
Acorn shortbread cookies
Makes 20 cookies
50g (1¾oz) acorn flour
150g (5¼oz) plain flour
60g (2oz) caster sugar
150g (5¼oz) margarine or butter
Preheat the oven to 180°C (350°F / Gas Mark 4).
Mix all the ingredients in a bowl, working the margarine or butter in with your fingertips.
Fashion small balls with your hands, place on to a greased baking tray and flatten gently (the mixture is too sticky to be able to spoon out effectively.)
Bake for 10-15 minutes until the cookies just start to brown. Remove and place on a cooling rack.
Acorn soup
This is a thick, rich and nutty soup which is filling and warming – perfect for a chilly autumn day.
Serves 4-6
200g (7oz) fresh acorns, leached
1 onion, finely chopped
1 small leek, finely chopped
2 tbsp olive oil
100g (3½oz) swede, diced
100g (3½oz) potatoes, diced
1.25l (2¼ pints / 44fl oz) vegetable stock
Small sprig of fresh rosemary, leaves stripped from the twig
2 fresh sage leaves
To serve:
Crème fraîche to serve
Stick blender
Place the onion and leek in a large saucepan with the olive oil and fry gently until soft. Add the swede, potatoes and acorns to the saucepan and fry for a further 3 minutes.
Add the vegetable stock and simmer on a low heat for 15 minutes. Add the rosemary and sage leaves and simmer for a further 5 minutes.
Remove from the heat and blend to a smooth consistency using a stick blender. Season to taste.
Serve with a little crème fraîche and a chunk of bread and butter. Goats’ cheese complements this soup very well.

Try this with chestnuts seasoned with tarragon and thyme for a rich, sweet alternative.
Acorn pâté
80g (2¾oz) acorns, leached
100g (3½oz) red split lentils
400ml (14fl oz) water
Half a small onion, finely chopped
80g (2¾oz) butter
2 garlic cloves, peeled
½ tsp dried thyme
½ tsp dried tarragon
30g (1oz) breadcrumbs, made from fresh or stale bread
Garnish:
Sprig of thyme
Food processor
Ramekins or small loaf tin
Put the lentils and water in a small saucepan and bring to the boil. Turn down to a simmer, cover and cook for 15 minutes or until completely soft (add more water if needed). Gently fry the onion in 10g (¼oz) butter until soft, then add the remaining butter and remove from the heat as soon as it has melted.
Put the acorns into the food processor and blend to a rough crumb consistency. Add the cooked lentils, butter and onions, garlic, herbs and breadcrumbs to the processor. Blend the ingredients together well until they form a smooth paste. You may need to add a little water to achieve the right consistency, which should be similar to fresh butter icing.
Spread the mixture into the ramekins or loaf tin while it is still warm, smooth over the top with a spatula and garnish with a sprig of thyme. Cover with cling film and place in the fridge to cool and set. Serve with bread or crackers.
Try this with other nuts instead of acorns. It works very well with chestnuts and walnuts, and you could liven it up with some dried redcurrants or berries, and your own combinations of herbs.

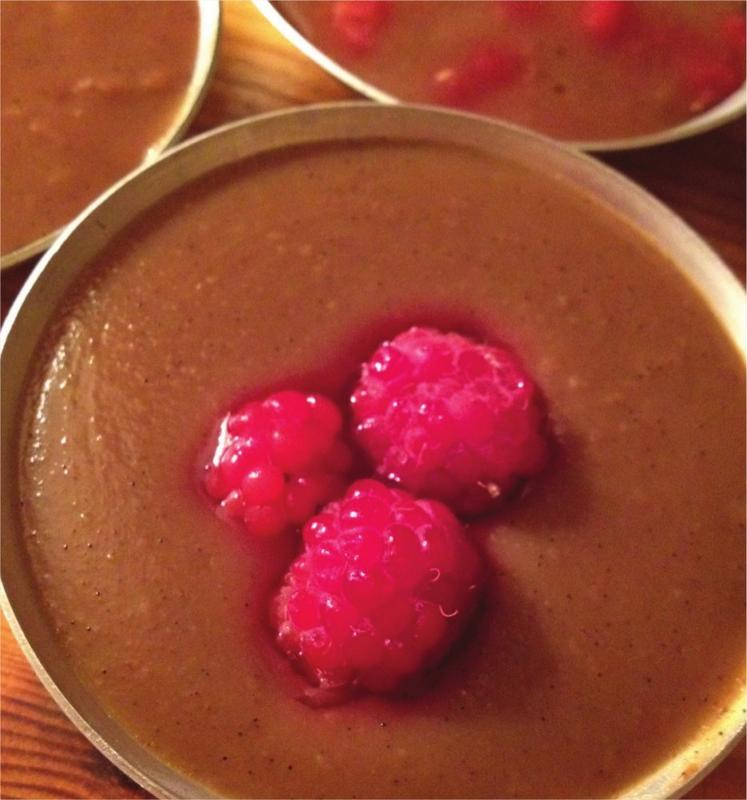
Acorn starch panna cotta
This and the following recipe, both from Toni Spencer’s Acornucopia project (see www.theferal kitchen.com), work well together. The first uses the starch of the acorn only. The second (overleaf) uses the acorn meal or the ‘leftovers’ from extracting the starch, without having to dry it.
This panna cotta recipe is inspired by the traditional Korean ‘Dotorimuk’ (dotori meaning ‘acorn’; muk meaning ‘jelly’), usually cooked unseasoned and served in a spicy savoury sauce. In Korean supermarkets it is sold ready-made as a block of jelly.
Serves 4-6
100ml (3½fl oz) acorn starch flour (see page 180)
600ml (21fl oz) water (a basic 1:6 ratio of flour to water)
2 tsp good-quality vanilla essence (or contents of one pod)
½ tsp cinnamon
Pinch of salt
1 tbsp cooking oil (sunflower or coconut)
1½ tbsp sugar
Handful of raspberries or blackberries, frozen or fresh
Optional:
1 tsp lemon zest
Ramekins or dessert glasses
Mix the flour and water in a bowl and leave for 10 minutes.
Whisk well and pour into a pan. Bring to a simmer and stir on a low heat for 20-30 minutes. It will thicken suddenly, so keep stirring! Pay attention to the bottom and sides of the pan when stirring, and use a metal spoon (you may need to whisk a little to begin with).
Near the end, add the flavourings, oil and sugar and cook for another few minutes. Stir well.
Fruit can be crushed or crumbled and mixed in at this point, or placed on top of the desserts while they set. Ladle carefully into ramekins or dessert glasses, and leave to set in the fridge for 6 hours or overnight.
This dish is delicious served with whipped cream, melted chocolate or wild fruit coulis.
Acorn burgers
This recipe, also from The Feral Kitchen (see previous page), is very flexible. You can substitute carrots or parsnips for the beetroot (beetroot gives a good pink/meat-like colour) and use any kind of bean. For example, you could use chickpeas and spices to create falafel. This recipe can take more or less acorn depending on availability and taste, and will work without egg.
Serves 6
300g (10½oz) fresh acorn meal or grits
2 medium red onions, finely chopped
1 celery stick
4 garlic cloves
Olive oil
Sprig of fresh sage and rosemary, finely chopped (or 2 tsp each dried)
2 tsp smoked paprika
1 medium or large beetroot
Sea salt & ground black pepper (or Szechuan pepper)
1 240g (8½ oz) tin cooked haricot or black turtle beans
2 tbsp tomato paste
1 large egg
200g (7oz) spelt flour (for coating)
Preheat the oven to 190°C (375°F / Gas Mark 5) if baking the burgers.
Slowly fry the onion, celery and garlic in olive oil until soft, adding the herbs and paprika midway. Grate the beetroot, strain off all the juice and put both aside.
Put aside 100g (3½oz) acorn meal. Put the rest into a pan with a pinch of salt, pepper, 1 tbsp oil and the beetroot juice and cook for approximately 20 minutes, stirring regularly and topping up with water if necessary to keep it moist.

In another bowl, blend the beans and tomato paste roughly with a potato masher. Once the acorn and beetroot mix has cooled down, mix everything (except the flour) in a large bowl with a good pinch of salt and pepper. Form into patties and coat each one lightly with flour.
Fry in olive oil on a medium heat for approximately 12 minutes each side, or bake in the oven for 25 minutes at 190°C (375°F / Gas Mark 5).
The burgers are delicious served with roast garlic tomatoes, sautéd wild greens and home-made chutney. This mix freezes well.

Quince (Cydonia oblonga)
This is the true quince (as opposed to the flowering quince fruits, Chaenomeles spp.), and is widely grown in many parts of the world. In warmer climes the fruits can fully ripen and become sweet, but in the UK this rarely happens and we use the fruits in autumn, while still hard, in cooked recipes.
Quince makes a small tree, with beautiful white flowers in spring followed by apple- or pear-shaped fruits that ripen in late September/October. In humid climates such as the UK they can suffer badly from quince leaf blight, a fungal disease which can cause leaves to blacken and can completely defoliate the tree. There are some resistant varieties, so it is important to choose these if you are thinking of planting a tree.
Allow the fruits to remain on the tree for as long as possible before harvesting, then harvest carefully and store the fruits in a cool place – they should store for a few weeks.
Quinces are high in vitamin C, iron, potassium and copper. The fruits are hard when raw, but when cooked they have a soft, grainy texture (like some pears) and a beautiful delicate flavour with citrus and floral tones.
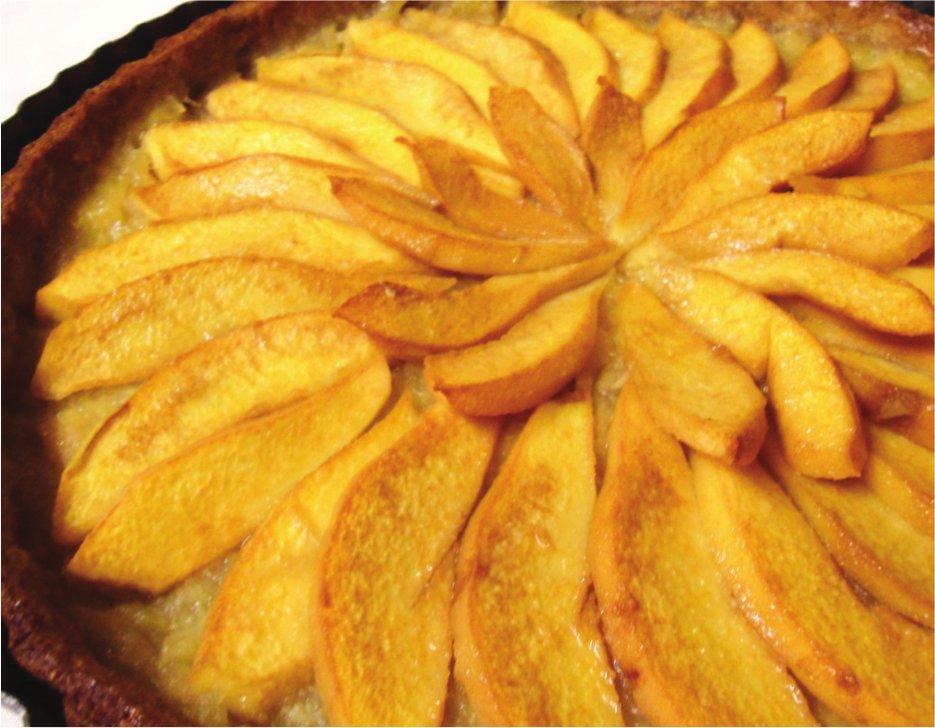
Quince & apple tart
Serves 4
6 medium quinces, peeled
2 medium cooking apples, peeled
About 2 tbsp Demerara sugar (to taste)
Lemon juice
Pastry:
115g (4oz) unsalted butter, at room temperature
50g (1¾oz) sugar
1 egg
200g (7oz) plain flour
Pinch of salt
Baking beans (dried beans or lentils)
A 25cm (10") flan dish
Preheat the oven to 180°C (350°F / Gas Mark 4)
Beat the butter and sugar with an electric whisk until smooth and creamy, then gently beat in the egg.
Sieve in the flour and salt to cover the mixture, then use your fingers to fold it in gently to form a doughy ball. It is important not to over-knead the pastry. Press it into a disc shape and put it in the fridge.
Roughly slice the apples and two of the quinces into a saucepan, discarding the cores, cover with water and sprinkle with the sugar. Put over a very low heat and cover with a lid. Simmer gently until the apples have become pulpy and the quince is soft. Cut the remaining quinces into quarters and core. Slice them lengthways to get long slices 3-5mm (up to ⅛") thick. Put in a bowl, cover with water and a little lemon juice and put to one side.
Grease the flan dish with a little butter and dust with flour. Take the pastry from the fridge and roll out on to a flour-dusted surface. Roll the pastry into a 30cm (12") circle. Pick the pastry up by rolling it on to your rolling pin, lay it over the flan dish and press it gently into the sides of the dish. Slice off the excess with a knife. Place a layer of foil or baking parchment over the pastry and fill with baking beans to weight it. Prick the base with a fork to prevent air bubbles forming. Bake for 20 minutes.
Remove from the oven, remove the foil or parchment, and allow to cool. When the quinces and apples are soft, remove from the heat and strain off excess water. Mash into a rough purée and spread into the bottom of the flan dish. Now arrange your raw quince slices into two circles, as pictured above, slightly overlapping. Brush the top of the fruit and the pastry crust with some melted butter and bake for a further 20 minutes at 190°C (375°F / Gas Mark 5).
Slice and serve hot or cold with cream or yogurt.
Try this with pear and haws: the same quantity of pears as quinces in this recipe, and around 300g (10½oz) raw haws. Prepare the haws as for Haw & apple strudel (page 166) and add to stewed pears to spread on to the bottom of the pastry crust, then layer sliced pears on top.
Poached quinces with chestnuts & toffee medlars
Serves 4
4 large quinces
150ml (5¼fl oz) apple juice
70g (2½oz) caster sugar
¼ tsp ground cinnamon
¼ tsp ground nutmeg
4 cloves
200ml (7fl oz) water
2 tsp cornflour
100g (3½oz) toasted chestnuts, peeled and halved
8 toffee medlars (see recipe on page 178)
This recipe can be made with a slow cooker or on the hob in a large heavy-based saucepan. It will take around 1 hour 30 minutes in a slow cooker; 30 minutes on the hob. Preheat your slow cooker to ‘Low’.
Put the apple juice, sugar, spices and half the water into a small saucepan and bring to the boil, stirring occasionally. Peel the quinces and cut into halves, removing the core with a teaspoon to leave a small oval cavity. When the syrup has come to the boil, turn it down to a low simmer. Stir the cornflour into the remaining water to form a smooth paste and slowly add to the syrup, stirring constantly until it thickens. Pour the syrup into the slow cooker or large saucepan and add the quinces and chestnuts, roll and cover them with the syrup, and put on the lid.
Quinces are hard fruits and stay firm when cooked. Push in a fork, lift the quince from the pan and if it slides off it’s done. If it sticks at all it needs longer.
With a slow cooker, check after 1 hour, taking care as a lot of steam may come out as you lift the lid. They shouldn’t take longer than 1 hour 30 minutes. On the hob, check after 20 minutes and make sure they are simmering gently. They shouldn’t take longer than 40 minutes. When checking, you can spoon a little syrup over the tops of the fruits.
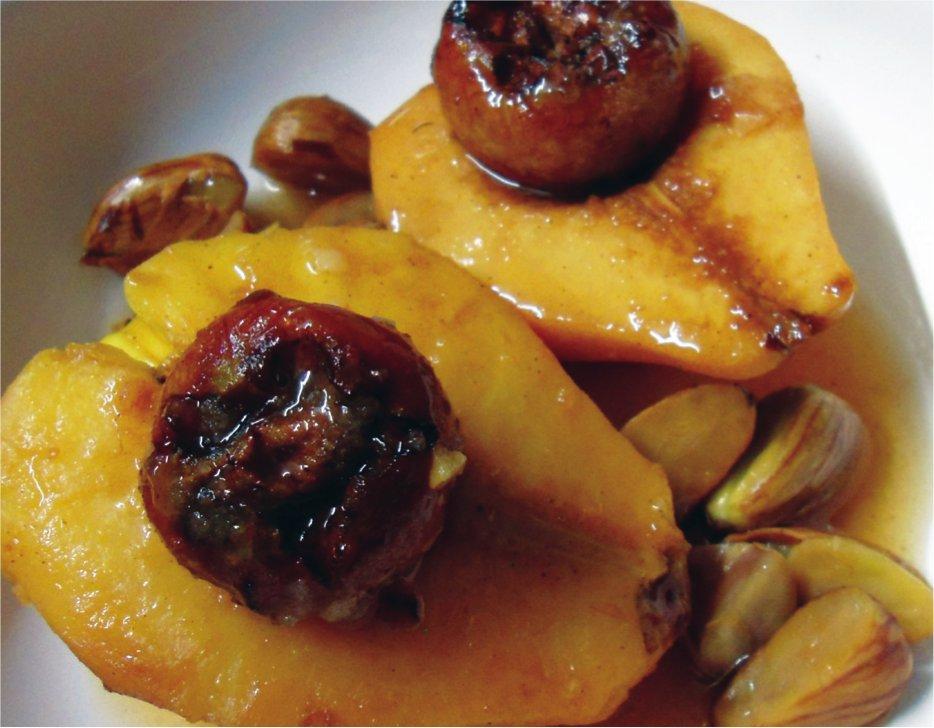
When the quinces are cooked, take them out of the syrup and place 2 halves on to each of 4 dessert plates. Place a medlar into each cavity and surround with chestnuts. Finish by spooning some of the spiced syrup over the fruits, and serve warm with cream or yogurt.
Try this with pears and walnuts using the same cooking times. You could also use wine or sherry instead of apple juice, as follows. Just bring the ingredients to the boil in a small pan, stirring continuously:
150ml (5¼fl oz) red wine or sherry
200ml (7fl oz) water
50g (1¾oz) brown sugar
Other recipes using quince: Baked American elderflower custard with flowering quince compote (page 110); Quince cheese (Part 1, page 22).

Sweet cicely (Myrrhis odorata)
Sweet cicely is a perennial herb growing about 60cm-1m (2-3') high. All parts of the plant are edible and have an excellent sweet anise flavour. The leaves can be used chopped in salads or, more traditionally, cooked with acid fruits such as apples or rhubarb, as they have a strong sweetening effect.
When green, sweet cicely seeds are quite sensational. Their flavour is incredibly sweet and similar to aniseed or liquorice, while their texture is crisp and succulent. This combination makes them irresistible to nibble on as a snack and they are so good on their own that they don’t need anything else. However, if any do manage to make it through the kitchen door, they can really lift the flavour of salads, stir-fries and desserts.
The plant has a taproot that looks like a parsnip but, again, with an anise flavour. It can be used raw or cooked.
Sweet cicely contains useful amounts of vitamins A and C, calcium, iron, potassium and phosphorus.
Sweet cicely fruit salad
Serves 4
3 tbsp sweet cicely seeds
2 eating apples, cored and diced
200g (7oz) strawberries, hulled and halved
200g (7oz) blueberries
200g (7oz) fresh apricots, halved and pitted
300ml (10½fl oz) apple juice
2 tsp lemon juice
4 tbsp yogurt or cream
Place all of the fruit into a bowl along with the sweet cicely seeds. Pour over the apple and lemon juice and gently stir the ingredients together.
Serve with either yogurt or cream.

Other recipes using sweet cicely: Bamboo shoot yum (page 64); Stir-fried Good King Henry (page 78); Ice plant with peanuts and coconut (page 86); Orpine & tomato salad (page 90); Spiced rhubarb fool (page 99); Plantain & sweet cicely soup (page 134); Warm Turkish rocket & lentil salad (page 144).

Szechuan pepper (Zanthoxylum schinifolium)
All members of this genus can be used as spices, but this one is particularly good. It forms a large rounded shrub, and is one of several Zanthoxylum species that have the name ‘Szechuan pepper’ attached to them. The leaves and fruits of this species have a wonderful citrus fragrance to them.
The leaves are used for flavouring, especially when young. The main crop, though, is the fruits – or, to be specific, the dried fruit ‘shells’ surrounding the black seeds. When the fruits ripen in September, the ‘shells’ turn red and split, revealing the seed within. The whole lot is then harvested, and the seeds optionally separated (they are tasteless). They need a little drying in our climate to store well. The spicy red shells are peppery and aromatic, like the leaves, and can be used directly in cooking, or ground as a spice.
The peppers are rich in essential oils (notably terpenes, which give the citrus flavours), and like black peppers they aid digestion. Note that most pepper mills do not grind the thin papery shells very efficiently; they can sometimes need shaking between grinding, or you can use a pestle and mortar.
Szechuan pepper is often used in China in the form of flavoured salt: toast or dry-fry equal amounts of coarse salt and peppercorns until the mixture just starts to smoke. When the mix is cool, grind to reduce to a coarse powder and use instead of salt and pepper. This is excellent on almost everything and Mark Diacono particularly recommends it on chips!
Chinese five-spice powder is frequently used in Szechuan cooking, especially with chicken, duck, pork and goose. It is a mixture of star anise, fennel, cinnamon, Szechuan peppercorns and cloves, toasted for a few minutes then ground to a powder. It is usually used either as a spice rub on the meat or is added to the breading for fried foods.
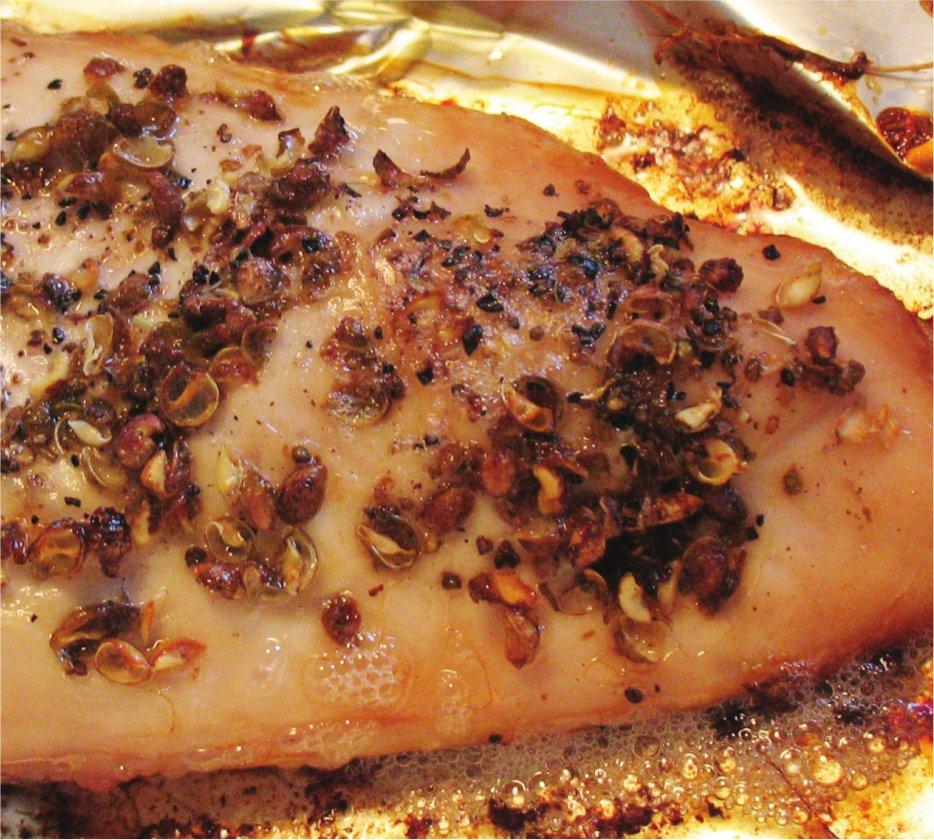
Szechuan chicken
One traditional use of this spice in China is to rub it on to meat (usually chicken or pork) before roasting.
225g (8 oz) chicken breast
1 tsp Szechuan peppercorns
Preheat the oven to 180°C (350°F / Gas Mark 4)
Roughly grind the peppercorns in a pestle and mortar (or use the end of rolling pin in a bowl). Place the chicken breasts on a foil-lined baking tray and rub the ground pepper thickly on to the upper surface. Wrap the foil around the chicken and place in the oven. After 30 minutes unwrap the foil from the top surface of the chicken and return to the oven for 15 minutes. Serve.
Other recipes using Szechuan pepper: Chinese artichoke stir-fry (page 199); Szechuan-infused rice vinegar (Part 1, page 26).
Szechuan & shiitake stir-fry
This Chinese-style dish comprises shiitake and oyster mushrooms in a simple aromatic marinade made with fresh Szechuan peppercorns, stir-fried with seasonal greens and walnuts.
Serves 4
2 tbsp fresh Szechuan peppercorns
150ml (5¼fl oz) boiling water
3 tsp honey
3 dsp soy sauce or tamari
10 fresh lemon balm leaves
150g (5¼oz) shiitake mushrooms, sliced
150g (5¼oz) oyster mushrooms, sliced lengthways
2 heaped tbsp welsh or spring onions, finely chopped
300g (10½oz) seasonal greens, shredded
100g (3½oz) walnut halves
2 tbsp vegetable oil
Place the Szechuan peppercorns into a bowl and gently bruise them with the back of a wooden spoon. You will hear them crack as you do so, and shiny black seeds will emerge from the red fleshy casing, releasing a lovely aroma. Add the boiling water, honey and soy sauce. Tear the lemon balm leaves and add them too, stirring all the ingredients together until the honey has dissolved. Cover the dish with a tea cloth and leave to stand for at least 20 minutes.
Next, strain the marinade through a sieve into a large bowl. Add the mushrooms to the marinade, turning them in until completely covered. The mushrooms will absorb the flavours and release them when cooked. Cover with a tea cloth and leave to marinate for 20 minutes.
Add the onions, greens and walnuts to the marinade. Put a wok on to a high heat and pour in the vegetable oil. When the oil is hot, add your mixed ingredients and stir. Stir-fry on a high heat for about 8 minutes, or until the vegetables are at your preferred softness. Ideally the greens should not wilt too much, but just soften to an emerald green colour. Stir continuously, ensuring the sauce has covered all of the ingredients.
Serve straight from the wok on to rice or noodles.
Try this with chicken or tofu. Cut two chicken breasts or a 255g (9oz) block of fresh tofu into long strips. Marinate in the Szechuan marinade with 150g (5¼oz) mushrooms for at least 1 hour, or preferably all day in the fridge. Heat the oil in a wok, remove the chicken or tofu from the marinade and stir-fry on a high heat for 3 minutes before adding the other vegetables.


Walnut (Juglans regia)
Walnut trees usually get very large with age; however, good varieties start producing nuts about 4-5 years from planting.
In the UK climate, fresh walnuts still contain a fair amount of water when ripe, and should be used within about 1 week, otherwise moulds will start to form on the outside on the nuts. To store properly they need drying, and usually (because this is in mid- or late October) artificial heat of some sort is needed to achieve proper dryness.
Walnuts are high in healthy fats (oils), protein, calcium, iron and numerous other minerals and vitamins. There are many recent medicinal studies showing the health benefits, particularly cardiovascular, of eating walnuts.
The nuts are borne within green husks that split on ripening to drop clean nuts to the ground. Cracking walnuts is fine by hand if you only have a few to do, but more than that and it becomes a chore. Some people build powered nut-cracking machines, but you can also buy a great hand-operated nut-cracking machine made in the USA (see Resources section).
Forest garden nut roast
Serves 4
200g (7oz) walnuts and chestnuts, shelled, toasted and chopped
170g (6oz) red lentils
485ml (17fl oz) veg stock
1 tbsp olive oil
100g (3½oz) onion, finely chopped
100g (3½oz) shiitake mushrooms, finely chopped
3 tsp ramsons pesto (see recipe on page 96)
2 eggs, beaten
150g (5¼oz) leftover cooked grain, e.g. brown rice or couscous
Freshly chopped thyme to taste
Salt and pepper
Garnish:
Walnut halves
A 1.5l (2¾ pint / 55fl oz) loaf tin
Preheat the oven to 190°C (375°F, Gas Mark 5)
Rinse the red lentils and cook in the vegetable stock in a covered saucepan for 15 minutes until all the stock is absorbed. Put the olive oil into a frying pan and fry the onions and mushrooms until they are soft, then stir in the pesto and cook for 1 minute.
Add the fried onions, mushrooms, eggs, cooked grain, thyme and chopped nuts to the lentils and stir together well. Add salt and pepper to taste. Oil the loaf tin and transfer your mixture to it, pushing it into the corners and levelling the top. Run a fork across the top to give some texture, brush with a little olive oil and garnish with walnut halves.
Cover the tin with foil and bake for 30 minutes, then remove the foil and bake for another 20 minutes. Remove from the oven and allow to rest for 5 minutes before cutting thick slices from the tin to serve with vegetables and gravy.
Walnuts are, of course, a fantastic food just eaten raw – try adding them to muesli for breakfast.

Other recipes using walnuts: Rhubarb & beetroot salad (page 96); Medlar & walnut slices (page 177); Crunchy yacon salad (page 223).