Starting a Fish Farm
Raising your own fish ensures that they are healthy and safe to eat and you can sell or trade your fresh fish to neighbors for other things that you need. You can also use your fish to stock your local pond or lake, increasing the fish population in your area.
Before starting your fish farm, check your state and local laws—some states require a license to run a fish farm. Also, pick the particular fish you want to raise and research everything about it; you will need to know the species’ specific life cycle, habitat, and dietary needs in order to properly care for your fish.
You’ll need a pond to raise your fish in. If you do not have one naturally, you will have to build one. Dig a hole in the ground to the desired width and depth. Check the dirt at the bottom; if it is too porous the water will seep into the ground. If this is the case use tamped down clay or thick plastic to cover the bottom. If you want your pond to be specifically for fish farming, put topsoil at the bottom of the pond for plants. If you are going to release fingerlings, place some tree stumps or dead bushes in the water for the smaller fish to hide in.
Be sure to choose freshwater fish that are adapted to life in non-flowing waters. It is preferable to raise vegetarian fish, as they will eat any plant matter, while carnivorous fish require expensive protein-rich fish food.
Make sure that you keep records of everything; how many fish/fingerlings you put in the pond, how many fish you take out, and the basic conditions the pond is in on a consistent basis. This will help you decide when it is time to restock or go fishing!
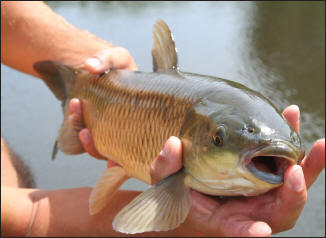
Carp—Carp is a very popular fish farming choice. They are hardy, and a lot of fish can be got for little effort. They will eat any sort of rotting vegetation in the water, and you can supplement their diet with oatmeal, barley, or vegetable waste. Keep the carp in your larger pond—they will breed naturally. Choose the grown ones you would like to eat or sell and isolate them in a smaller, shallow “stew pond.” Keep in mind the stew ponds need to be deep enough to stay ice-free in the winter.
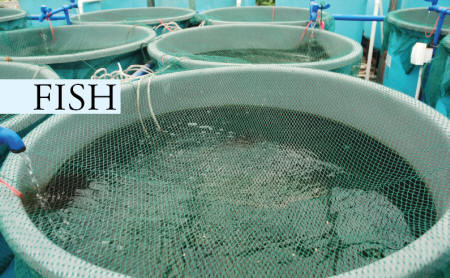
Tilapia—Since Tilapia are a tropical fish, they will require a heated tank kept at around 80 degrees Fahrenheit. They do not require running water, although it is important to keep an eye on the tank’s filters and air pumps. They are a very hardy species, and do not often get sick. They can produce tilapia fry almost every week year round. This combination of continuous production and high survival rate allows the tilapia farmer to have a constant supply of fingerlings to replace those that get big enough to eat.
One way to get started is to purchase a “hen mother” and several other tilapia. Alternatively, you could buy some fingerlings from a hatchery. Keep a few “breeding fish” in a separate tank.
Tilapia eat algae or any vegetation you put in the water. Tilapia fry, however, need some protein so live zooplankton, brine shrimp, or protein flakes are necessary until they grow. You can move the fingerlings to the main tank when they are about one inch long.
Aquaponics
Aquaponics is a sustainable food production structure that incorporates traditional aquaculture, like raising aquatic animals such as fish, prawns, or crayfish in tanks, with hydroponics, the method of cultivating plants in water. The fish and plants have a cooperative relationship and live in a harmonious, symbiotic environment.
Fish produce waste and effluents that accumulate in the water, and since too much waste can be toxic, the hydroponic system filters it out and utilizes it as vital nutrients for the plants. After this is done, the cleansed water re-circulates and returns to the animals.
Regardless of the size of an aquaponic system, the technology used is the same, and it is usually relegated into several subsystems. There is a rearing tank used for raising and feeding fish, and there is a unit that removes the solids: uneaten food, detached biofilms, fine particles, etc. In addition, there is a biofilter, an area where nitrification bacteria can grow and convert the ammonia into nitrates that plants can use. Nitrification is one of the most important processes because high concentrations of ammonia can kill the fish and aren’t easily absorbed by plants. The biofilter contains Nitrosomonas, bacteria that convert ammonia into nitrites, and then Nitrobacter, bacteria convert the nitrites into nitrates.
The hydroponics subsystem is the portion where plants are grown by absorbing the excess nutrients; their roots are immersed in the nutrient-rich, effluent water. This may be done in various ways: Styrofoam rafts floating in an aquaculture basin in troughs, closed loop aquaponics (utilizing solid media like gravel or clay beads held in a container that is then flooded by water from the aquaculture), flood-anddrain aquaponics (solid media in a container that is alternately flooded and drained utilizing different types of siphon drains), towers that trickle the water from the top, nutrient film technique channels, etc. Finally, there is also the sump which is the lowest point in the system and where the water flows to and from once it is cleaned.
An aquaponics system relies on the relationship between the plants and animals; a stable aquatic environment must be maintained with minimal fluctuations in the nutrient and oxygen levels. Occasionally, water must be added when water is lost, whether because the absorption and transpiration lead to water loss or evaporation of the surface water.
The three main components of the system are water, food given to aquatic animals, and the electricity that pumps water between the aquaculture and the hydroponics. With those three things, you can run a successful aquaponic system that can help you have an even more successful fish farm.
Set Up an Aquaponics System
Thanks to aquaponics master Marek Broadstock for the use of these directions for setting up your own aquaponics system!
For a very basic system on a small scale, you’ll need:
250 L pond bin
150 L grow tub
1000 L/ph pond pump capable of pushing water to a height of 1 meter
Double outlet air pump, 10 m extension cable
Large garden hose—bird wire
Plant choice (for example, tomato plants from seed packets)
Grow medium (for example, 50 kg of fine gravel)
Digital timer/surge protector; this is used to run the pump and to circulate the water to the plants
fFsh (for example, 6 Comet goldfish)
Bricks and roof tiles
Directions
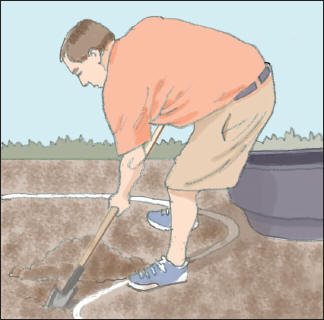
Dig a hole in which the fish tub will go. Ensure that the tub has some shade to avoid evaporation and is also below ground level to maintain a good, steady water temperature.
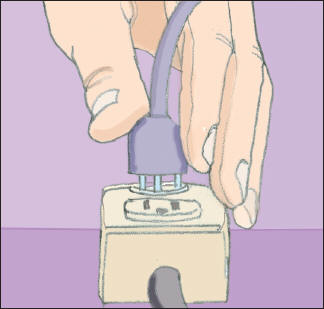
Run a 10-meter long outdoor/waterproof extension cable from a power outlet (whether in a shed, garage, house, etc.) to the fish area, and connect the pump and the air pump to the power outlet. Place all leads and sensitive electrical parts in a waterproofed box. Bury it in a small, easily accessible hole.
Drill or make some holes in the bottom of the grow tub so that the water can drain out and back into the fish tub. Next, set up a place for the grow tub to sit, preferably as close as possible to the fish tub so the pump won’t have to work as hard to get the water into the grow tub from the fish tub. For example, you can set your grow tub on a higher level than the fish tub, letting gravity control the water flow back into the fish tub with the help of a basic roof tile.
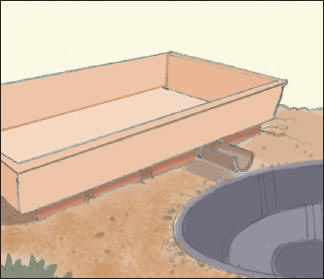
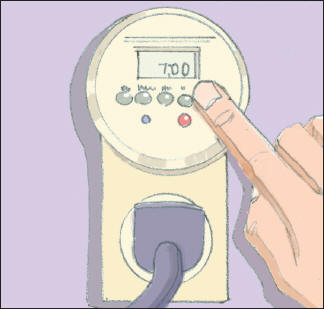
Connect a hose from the 1000 L pond pump to the grow tub, and set it up with the digital timer to control when you want the pond pump to turn on and off.
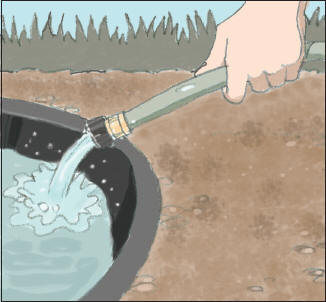
Fill the fish tub with non chlorinated water and fish. Have a few trial runs to see if the water flows from the fish tub to the grow tub and back out correctly. Monitor how fast the water escapes as this will slow down after you add your grow medium (for example, fine gravel).
Wash your grow medium and add it to the grow tub (make sure that you’re happy with the location because it gets extremely heavy and impossible to move). From here, you can simply drop seeds into the grow tub and cover lightly with the medium and wait for germination to occur. When you first put the seeds in, you will have doubts that the plants will even come up, but be patient. You will see plenty of little seedlings start to spring up. Otherwise, you can always add plants transplanted from a soil garden. Germination is always faster in hotter weather.
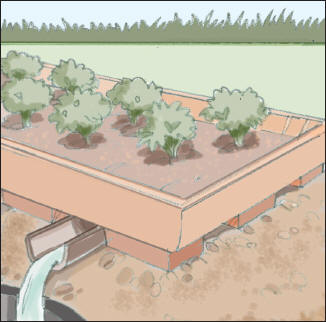
Maintenance
Fish feed: Some try to keep their systems totally organic by feeding the fish organic feed such as duckweed and worms. This method is perfectly fine and, in fact, truer to the idea of aquaponics, but you may not be able to breed worms, grow duckweed, or buy expensive feed. Cheap feed from supermarkets will work just as well as the organic kinds.
Pump cycle: This is determined by how fast your grow tub fills with water. Ideally, you want the water to fill up to about 3-5 cm. below the surface of the grow medium. Play around with the time setting, until you find a nice spot.
Plant selection and care: Most plants will work very well in an aquaponics type system, especially ones like tomatoes, spinach, and most green vegetables. The choice of plants to grow depends on the size of your system and how much experimentation you’re willing to try as to which plants/vegetables will grow best. Like any plants, even aquaponically grown plants can show deficiencies in some vitamins and minerals. It’s wise to add an organic, fish-friendly fertilizer, like a seaweed fertilizer, to your system every 2 weeks or so as you would a dirt garden to fix any signs of deficiencies.
If you’d like to increase the size of your aquaponics system, it’s actually an easy process. Abide to the general rule: For a 100 L fish tub, you can have a 200 L grow tub worth of plants.
