
Clay is the basic ingredient for making pottery. Clay is decomposed rock containing water (both in liquid and chemical forms). Water in its liquid form can be separated from the clay by heating the mass to a boiling point— a process that restores the clay to its original condition once dried. The water in the clay that is found in chemical forms can also be removed by ignition—a process commonly referred to as “firing.” After being fired, clay cannot be restored to any state of plasticity—this is what we term “pottery.” Some clay requires greater heat in order to be fired, and these are known as “hard clays.” These types of clay must be subjected to a “hard-firing” process. However, in the making of simple pottery, soft clay is generally used and is fired in an over-glaze (soft glaze) kiln.
Pottery clays can either be made by hand (by finding clay in certain soils) or bought from craft stores. If you have clay soil available on your property, the process of separating the clay from the other soil materials is simple. Put the earthen clay into a large bucket of water to wash the soil away. Any rocks or other heavy matter will sink to the bottom of the bucket. The milky fluid that remains—which is essentially water mixed with clay—may then be drawn off and allowed to settle in a separate container, the clear water eventually collecting on the top. Remove the excess water by using a siphon. A repetition of this process will refine the clay and make it ready for use.
You can also purchase clay at your local craft store. Usually, clay sold in these stores will be in a dry form (a grayish or yellowish powder), so you will need to prepare it in order to use it in your pottery. To prepare it for use, you must mix the powder with water. If there are directions on your clay packet, then follow those closely to make your clay. In general, though, you can make your clay by mixing equal parts of clay powder and water in a bowl and allowing the mixture to soak for 10 to 12 hours. After it has soaked, you must knead the mixture thoroughly to disperse the water evenly throughout the clay and pop any air bubbles. Air bubbles, if left in the clay, could be detrimental to your pottery once kilned, as the bubbles would generate steam and possibly crack your creation. However, be careful not to knead your clay mixture too much, or you may increase the chance of air bubbles becoming trapped in the mixture.
If, after kneading, you find that the clay is too wet to work with (test the wetness of the clay on your hands and if it tends to slip around your palm very easily, it is probably too wet), the excess water can be removed by squeezing or blotting out with a dry towel or dry-board.
The main tools needed for making pottery are simply your fingers. There are wooden tools that can be used for adding finer detail or decoration, but typically, all you really need are your own two hands. A loop tool (a piece of fine, curved wire) may also be used for scraping off excess clay where it is too thick. Another tool has ragged edges and this can be used to help regulate the contour of the pottery. Remember that homemade pottery will not always be symmetrical, and that is what makes it so special.
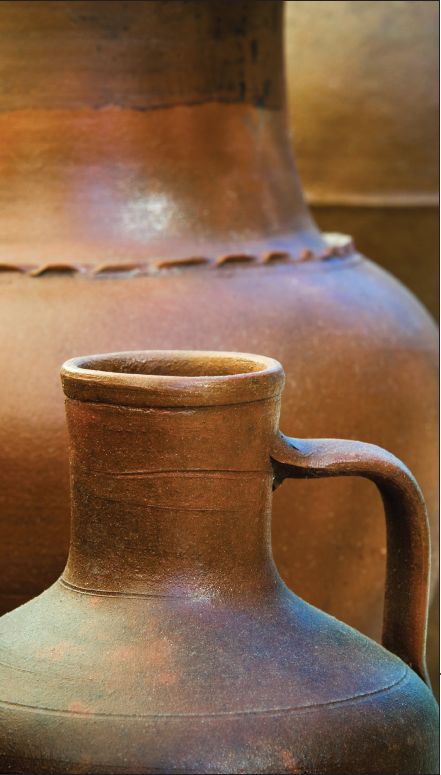
Basic Vase or Urn
Try making this simple vase or urn to get used to working with clay.
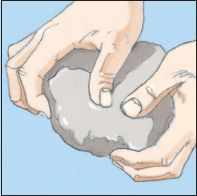
1. Take a lump of clay. The clay should be about the size of a small orange and should be rather elastic feeling. Then, begin to mold the base of your object—let’s say it is either a bowl or a vase.
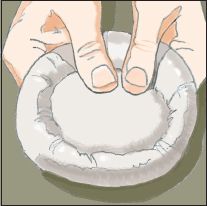
2. Continue molding your base. By now, you’ll have a rather heavy and thick model, hollowed to look a little like a bird’s nest. Now, using this base as support, start adding pieces of clay in a spiral shape. Press the clay together firmly with your fingers. Make sure that your model has a uniform thickness all around.
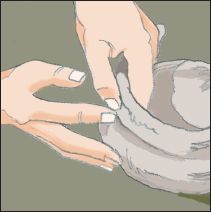
3. Continue molding your clay and making it grow. As you work with the clay, your hands will become more accustomed to its texture and the way it molds, and you will have less difficulty making it do what you want. As you start to elongate and lengthen the model, remember to keep the walls of the piece substantial and not too thin— it is easier to remove extra thickness than it is to add it.
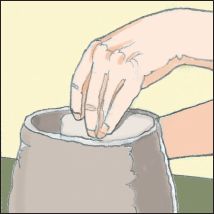
4. Don’t become frustrated if your first model fails. Even if you are being extra careful to make your bowl or vase sturdy, there is always the instance when a nearly complete vase will fall over. This usually happens when one side of the structure becomes too thin or the clay is too wet. To keep this from happening, it is sometimes helpful to keep one hand inside the structure and the other outside. If you are building a vase, you can extract one finger at a time as you reach closer and closer to the top of the model.
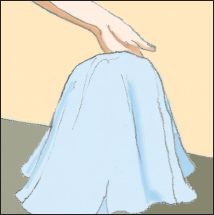
5. Make sure the clay is moist throughout the entire molding process. If you need to stop molding for an extended period of time, cover the item with a moist cloth to keep it from drying out.
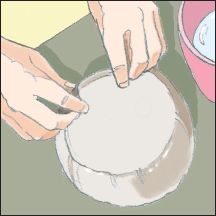
6. When your model has reached the size you want, you may turn it upside down and smooth and refine the contours of the object. You can also make the base much more detailed and shaped to a more pleasing design.
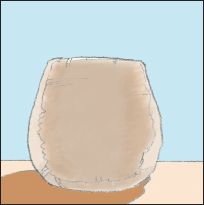
7. Allow your model to air dry.
Embellishing Your Clay Models
You may eventually want to make something that requires a handle or a spout, such as a cup or teapot. Adding handles and spouts can be tricky, but not if you remember some simple rules. Spouts can be modeled around a straw or any other material that is stiff enough to support the clay and light enough to burn out in the firing. Keep spouts and handles solid and thick. Also, keeping them closer to the body of your model is more practical, as handles and spouts that are elongated are harder to keep firm and can easily break off.
The simplest way to decorate your pottery is by making line incisions. Line incision designs are best made with wooden, finger-shaped tools. It is completely up to you as to how deep the lines are and into what pattern they are made.
Wheel-working and Firing Pottery
If you want to take your pottery-making one step further, you can experiment with using a potters’ wheel and also glazing and firing your model to create beautiful pottery. Look online or at your local craft store for potters’ wheels. Firing can leave your pottery looking two different ways, depending on whether you decide to leave the clay natural (so it maintains a dull and porous look) or to give it a color glaze.
Colored glazes come in the form of powder and are generally metallic oxides, such as iron oxides, cobalt oxide, chromium oxide, copper oxide, and copper carbonate. The colors these compounds become will vary depending on the atmosphere and temperature of the kiln. Glazes often come in the form of powder and need to be combined with water in order to be applied to the clay. Only apply glaze to dried pottery, as it won’t adhere well to wet clay. Use a brush, sponge, or putty knife to apply the glaze. Your pottery is then ready to be fired.
There are various different kinds of kilns in which to fire your pottery. An over-glaze kiln is sufficient for all processes discussed here, and you can probably find a kiln in your surrounding area (check online and in your telephone book for places that have kilns open to the public). Schools that have pottery classes may have over-glaze kilns. It is important, whenever you are using a kiln, that you are with a skilled pottery maker who knows how to properly operate a kiln.
After the pottery has been colored and fired, a simple design may be made on the pottery by scraping off the surface color so as to expose the original or creamy-white tint of the clay.
Unglazed pottery may be worked with after firing by rubbing floor wax on the outer surface. This fills up the pores and gives a more uniform quality to the whole piece.
Pottery offers so many opportunities for personal experimentation and enjoyment; there are no set rules as to how to make a piece of pottery. Keep a journal about the different things you try while making pottery, so you can remember what works best and what should be avoided in the future. Note the kind of clay you used and its consistency, the types of colors that have worked well, and the temperature and positioning within the kiln, if you use firing. Above all, enjoy making unique pieces of pottery!
Making Jars, Candlesticks, Bowls, and Vases
Making pottery at home is simple and easy, and is a great way for you to make personalized, unique gifts for family and friends. Clay can be purchased at local arts and crafts stores. Clay must always be kneaded before you model with it, because it contains air that, if left in the clay, would form air bubbles in your pottery and spoil it. Work out this air by kneading it the same way that you knead bread. Also guard against making the clay too moist, because that causes the pottery to sag, and sagging, of course, spoils the shape.
In order to make your own pottery, you need modeling clay, a board on which you can work, a pie tin on which to build, a knife, a short stick (one side should be pointed), and a ruler.
Jars
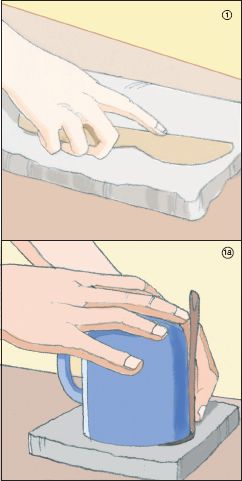
1. To start a jar, put a handful of clay on the board, pat it out with your hand until it is an inch thick, and smooth off the surface. Then, take a coffee cup, invert it upon the base, and, with your stick, trim the clay outside the rim.
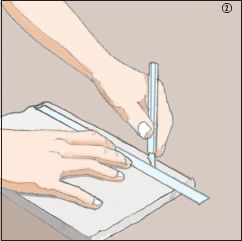
2. To build up the walls, put a handful of clay on the board and use a knife to smooth it out into a long piece, ¼ inch thick. With the knife and a ruler, trim off one edge of the piece and cut a number of strips ¾ inch wide.
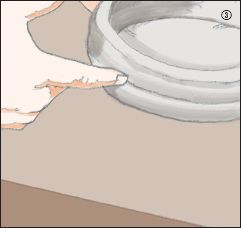
3. Take one strip, stand it on top of the base, and rub its edge into the base on both sides of the strip; then, take another strip and add it to the top of the first one, and continue building in this way, placing one strip on another, joining each to the one beneath it, and smoothing over the joints as you build. Keep doing this until the walls are as high as you want them to be.
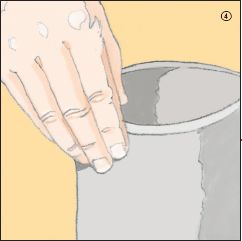
4. Remember to keep one hand inside the jar while you build, for extra support.
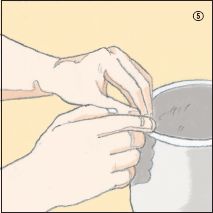
5. Fill uneven places with bits of clay and smooth out rough spots with your fingers, having moistened your fingers with water first.
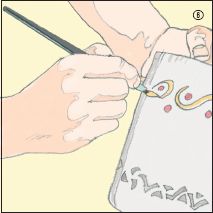
6. When you are finished, add decoration or ornaments to your jar, if desired.
Candlestick
Making a pottery candlestick requires a round base ½ inch thick and 4 inches in diameter. After preparing the base, put a lump of clay in the center, work it into the base, place another lump on top, work it into the piece, and continue in this way until the candlestick has been built as high as you want it. Then, force a candle into the moist clay, twisting it around until it has made a socket deep enough to place a candle into.
A cardboard “templet,” with one edge trimmed to the proper shape, will help make it easy to make the walls of the candlestick symmetrical and the projecting cap on the top equal on all sides. Run the edge of the templet around the walls as you work, and it will show you exactly where and how much to fill out, trim, and straighten the clay.
If you want to make a candlestick with a handle, make a base just as stated above. Then cut strips of clay and build up the wall as if building a jar, leaving a center hole just large enough to hold a candle. When the desired height for the wall has been reached, cut a strip of clay ½ inch wide and ½ inch thick, and lay it around the top of the wall with a projection of ¼ inch over the wall. Smooth this piece on top, inside, and outside with your modeling stick and fingers. For the handle, prepare a strip 1 inch wide and ⅜ inch thick, and join one end to the top band and the other end to the base. Use a small lump of clay for filling around where you join the piece, and smooth off the piece on all sides.
When the candlestick is finished, run a round stick the same size as the candle down into the hole, and let it stay put until the clay is dry, to keep the candlestick straight.
Bowls
Bowls are simple to make. Starting with a base, lay strips of clay around the base, building upon each strip as you did when making a jar. Once the bowl is at the desired height and width, allow it to dry.
Vases
Vases can be made as you’d make a jar, only bringing the walls up higher, like a candlestick. Experiment with different shapes and sizes and always remember to keep one hand inside the vase to keep everything even and to prevent your vase from caving in on itself.
Decorating Your Pottery
Pottery may be ornamented by scratching a design upon it with the end of your modeling stick. You can do a simple, straight-line design by using a ruler to guide the stick in drawing the lines. Ornamentation on vases and candlesticks can be done by hand-modeling details and applying them to your item.
Glazing and Firing
Pottery that you buy is generally glazed and then fired in a pottery kiln, but firing is not necessary to make beautiful, sturdy pottery. The clay will dry hard enough, naturally, to keep its shape, and the only thing you must provide for is waterproofing (if the pottery will be holding liquids). To do this, you can take bathtub enamel and apply it to the inside (and outside, if desired) of the pottery to seal off any cracks and to keep the item from leaking.
If you do want to try glazing and firing your own pottery, you will need a kiln. Below are instructions for making your own.
Sawdust Kiln
This small, homemade kiln can be used to bake and fire most small pottery projects. It will only get up to about 1200ºF, which is not hot enough to fire porcelain or stonewear. However, it will suffice for clay pinch pots and other decorative pieces.
You will need:
• 20 to 30 red or orange bricks
• Chicken wire
• Sawdust
• Newspaper and kindling
• Sheet metal
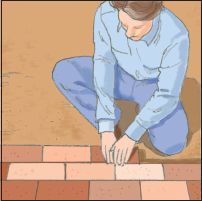
1. Choose a spot outdoors that is protected from strong winds. Clear away any dried branches or other flammables from the immediate area. A concrete patio or paved area makes an ideal base, but you can also place bricks or stones on the ground.
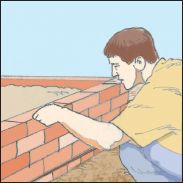
2. Stack bricks in a square shape, building each wall up at least four bricks high. Fill the kiln with sawdust.
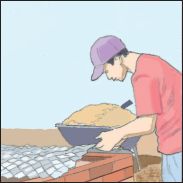
3. Place the chicken wire on top of the bricks and add another layer or two of bricks. Carefully place your pottery in the center of the mesh, spacing the pieces at least ½ inch apart. Cover the pottery with sawdust.
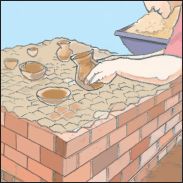
4. Add another piece of chicken wire, add bricks and pottery, and cover with sawdust. Repeat until your kiln is the desired height.
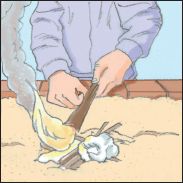
5. Light the top layer of sawdust on fire, using kindling and newspaper if needed. Cover with the sheet metal, using another layer of bricks to hold it in place.
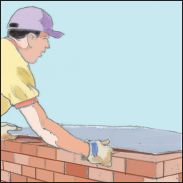
6. Once the kiln stops smoking, leave it alone until it completely cools down. Then carefully remove the sheet metal lid.
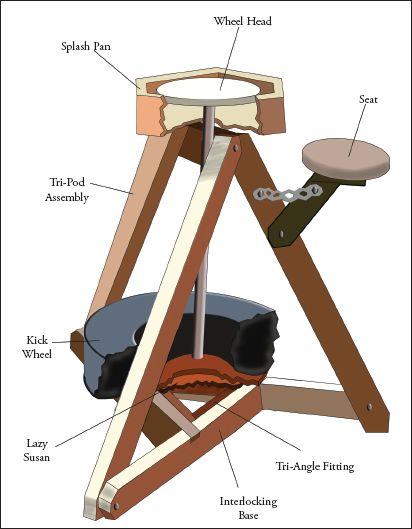
You can make your own pottery wheel using wood, an old lazy susan, and a tire. Place bags of sand inside the tire to give your wheel a sturdier base.