Basic Hand Stitching
Supplies:
Several different sizes of needle
Straight pins
Sewing scissors
Thread in several different colors
A needle threader (not required, but useful)
Threading a Needle
Estimate the amount of thread a sewing job will need. Cut the end of the thread at a 45 degree angle. Hold up the needle so the eye of the needle is open toward you. Slip the thread into the needle. Knot one end of the thread, leaving one end loose to sew with one thread or knot them together to sew with two threads. Use one strand of thread for places that you do not want the stitching to show, such as hems, and use two strands for extra strength jobs like sewing on buttons. Straighten the threads and begin sewing.
You can also use a needle threader to help you get the end of the thread through the eye of the needle. A needle threader is basically a tool that creates a much larger eye of the needle and makes it easier to thread. Slip the wire loop on the needle threader through the eye of the needle you want threaded. Slip the thread through the metal loop on the threader. Pull the needle up and off the threader loop, taking the thread with it. The needle should now be correctly threaded. Tie a knot at one end of the thread.
Tying a Knot
Place the end of the thread on your pointer finger, holding it in place with your thumb. Loop the thread around the pointer finger and then slide the knot off your finger. Using the end of your pointer finger and thumb, gently slide the knot to the end of the thread.
Pinning a Seam
Correctly pinning a seam is essential in order to have your sewing come out right. To pin a seam take the two pieces of fabric you are going to sew together and lay them on a flat surface. Make sure the front side of the fabric pieces (with the pattern) are on the inside, against one another and the back of the fabric is on the outside, facing you. Brush all of the wrinkles out of the fabric and line up the pieces so their edges match. Look to see where your seam is going to be and pin the fabric near there to keep the two pieces together.
Straight Stitch
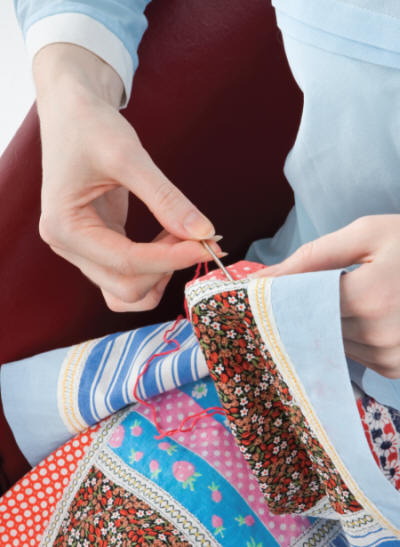
This type of stitch is used for very simple hems, sewing two pieces of fabric together, or gathering fabric. Prepare your fabric, if needed, by ironing it flat or by pinning together two pieces. Knot your thread to the fabric, and then simply weave the needle in and out of the fabric in a straight line. Try to keep the stitching as straight as possible. The length of your stitches can be short or long, depending on what you are working on but they should always be a consistent length. If you are gathering your fabric together, you might want to run a second straight stitch next to the first for stability.
Slip Stitch
Insert the needle in a seam allowance or hem edge to anchor the knot on the inside of the garment. Use the tip of the needle to pick up a few threads of the body of the garment, directly under where the thread knot was anchored. Pull the needle through the fabric toward the hem edge. Move the needle over and insert the needle into the hem edge. Repeat the stitch, picking up the threads of the garment fabric in the same direction on each stitch, keeping the stitch spacing as even as possible.
Back Stitch
A back stitch can be used when the stitches will not be seen on the outside of a garment or project. A back stitch is a strong stitch to join two pieces of fabric. Thread a needle a piece of thread that is no longer than a yard long. Longer pieces of thread tend to get knotted. Knot the ends of the threads. Anchor the knot in the inside fabric (usually a seam allowance) near where you need to start sewing. Push the needle into the fabric where you want to start the seam or joining two pieces of fabric. Bring the needle back through both layers of fabric just in front of the previous stitch for the strongest back stitch. Stitching in this fashion will resemble a machine sewn stitch. The length of the stitch sewn can be adjusted for the look or effect you want. Push the needle back into the fabric in between where the needle came in and out of the fabric to create the first stitch. Bring the needle up through the fabric the same distance you came forward in creating the first stitch. Continue on until you have finished the seam.
Overcast Stitch
This stitch is used to keep a fabric edge from fraying. Use a single knotted thread, and work from right to left. Insert the needle from the underside of your work. Pull the thread through to the knot, and insert the needle from the underside again, one eighth to one quarter inch to the left of the knot. Pull the thread through, but not too tightly or the fabric will curl. The more your fabric frays, the closer the stitches should be. Keep the depth of the stitches uniform, and make them as shallow as possible without pulling the fabric apart.
Sewing on a Button
Thread and knot your needle. Place the needle into the fabric so that the knot will end up on the back of the fabric (out of sight). Make a couple of stitches in the fabric where the button is to be located to anchor the thread. Lay the button on the place you will be attaching it. Bring the needle up through the button. Lay the straight pin, needle or toothpick on top of the button. Take the thread over top of the straight pin, needle or toothpick and bring your needle and thread back down through the button. Repeat to make about six stitches over the straight pin, needle or tooth picks to anchor your button. For a button with four holes, repeat the above steps for the other two holes. Bring the needle and thread to the back of the fabric and knot the thread in the threads that have sewn the button to the garment. Cut the thread. Remove the straight pin, needle or tooth pick and snug the button to the loops of thread by gently tugging the button.

